


语言杂谈
Rust

Rust社区最近一直很火热,本人也赶着时髦,浅浅的学了一下Rust。不得不说语言的设计很新颖,解决了很多痛点,但同样也有不少问题,老C++人感觉最明显的就是写Rust需要考虑各种规则,编译器时刻提醒我是傻x让我很难受,不过我还是很看好Rust的,以后会是我的主力语言之一,希望这门语言能够越来越好(加入Rust邪教,重写一切吧)。
Python
在很久以前,我一直对Python保持偏见,老C++人坚持手写一切,没使用Python之前,一听说调包就能完成各种功能,我对此十分鄙夷,这叫写代码?不知道底层,只要调包,这也太虚无了(语言没有高低之分,只有领域不同,原谅我年轻时的短见与无知)。等后面真的开始使用了,真香!太香了!人生苦短,我用Python!如果世界上只需要一门语言,那一定就是Python!从开始用Python之后,Lua、Perl、Bat、Shell这些脚本我就慢慢的不怎么用了,也算是另一种NTR了。
正片教程
Rust和Python一样有着丰富的包,Python的很多包底层都是C/C++编写的,而Rust天生就兼容C,那么可不可以用Rust为Python编写软件包,实现Python调用Rust?与原始的Python代码比起来,使用Rust代码具有更好的性能和速度。
显然我们能想到的,大佬们早早就想到了,PyO3就可以实现这个目标。PyO3 不仅仅提供了rust binding,也提供了创建Python包的开箱即用的脚手架工具maturin,使用maturin我们可以很方便地创建一个基于Rust开发的Python扩展模块。
实验环境
Python3.10Windos 11Rust 1.61
安装maturin&&创建项目
pip3 install maturin
maturin new rust_mod #项目名称默认会是Python的包名
选择pyo3,完成创建

编写&&编译Rust模块
接下来就是的工作就是写编写Rust代码,打开lib.rs文件,默认会有一个模板,我们修改模板就行了。
#[pyfunction]宏是定义生成的Python包里的函数。
#[pymodule]宏是创建Python的包实现,在包里添加各种包内成员。
除了以上的这些还有几种别的宏,用于添加类,方法等等,详细参考PyO3文档,我们演示就用最简单的,创建几个函数,功能是都是实现二维码生成,但保存格式不同。
- 在Crates.io中查找
qrcode包,在Cargo.toml中导入相关包。
[dependencies]
pyo3 = { version = "0.17.1", features = ["extension-module"] } //PyO3依赖,默认创建就有
qrcode = "0.12.0"
image = "0.23.14"
- 编写代码,可直接参考
qrcode的crates.io中的示例代码。
use image::Luma;
use pyo3::prelude::*;
use qrcode::render::unicode;

/// 二维码图片生成函数
#[pyfunction]
fn qrcode_img(data: String, save_path: String) {
    // Encode some data into bits.
    let code = QrCode::new(data.as_bytes()).unwrap();
    // Render the bits into an image.
    let image = code.render::<Luma<u8>>().build();
    // Save the image.
    image.save(save_path).unwrap();
}

/// 二维码字符生成函数
#[pyfunction]
fn qrcode_str(data: String) {
    let code = QrCode::new(data.as_bytes()).unwrap();
    let string = code
        .render::<char>()
        .quiet_zone(false)
        .module_dimensions(2, 1)
        .build();
    println!("{}", string);
}

/// 二维码unicode生成函数
#[pyfunction]
fn qrcode_unicode(data: String) {
    let code = QrCode::new(data.as_bytes()).unwrap();
    let image = code
        .render::<unicode::Dense1x2>()
        .dark_color(unicode::Dense1x2::Light)
        .light_color(unicode::Dense1x2::Dark)
        .build();
    println!("{}", image);
}

/// A Python module implemented in Rust.
#[pymodule]
fn rust_mod(_py: Python, m: &PyModule) -> PyResult<()> {
    m.add_function(wrap_pyfunction!(qrcode_img, m)?)?;
    m.add_function(wrap_pyfunction!(qrcode_str, m)?)?;
    m.add_function(wrap_pyfunction!(qrcode_unicode, m)?)?;
    Ok(())
}
- 编译生成软件包。
cd rust_mod
maturin build -f -r
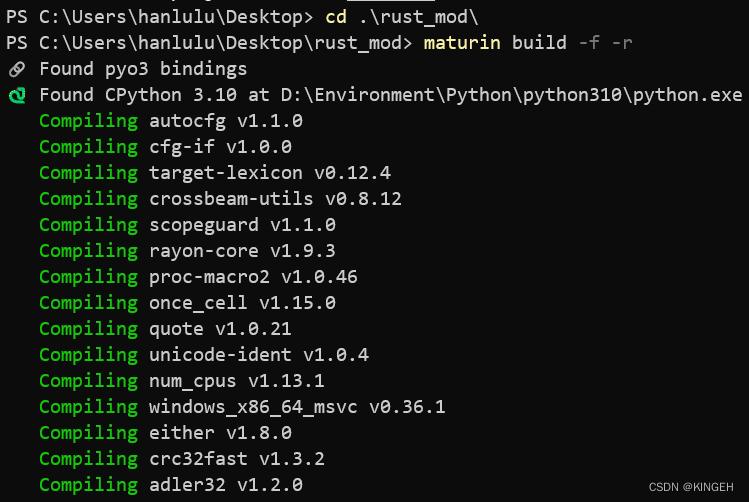
完成编译生成whl文件:

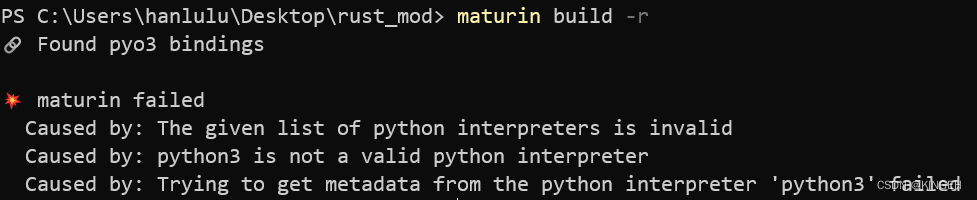
注意:这里编译过程,-f不要去掉了,在windows平台测试,没有-f会报错,提示解释器路径无效,我反复测试了,应该是个Bug,不过好像并没有修复,有人在github上问过,但是没有解答
错误提示:
安装包&&Python调用
- 使用
pip安装包。
cd .\target\wheels\
pip3 install .\rust_mod-0.1.0-cp310-none-win_amd64.whl

2. Python调用代码。
import rust_mod

if __name__ == '__main__':
    # 生成二维码图片保存
    rust_mod.qrcode_img("hello","./qrcode.png")
    # 生成二维码字符串
    rust_mod.qrcode_str("hello")
    print("\n")
    # 生成二维码unicode
    rust_mod.qrcode_unicode("hello")
运行结果:

在文件夹中也生成了相应的qrcode.png。
性能对比
使用python的第三方库qrcode,进行性能对比。
- 安装
qrcode。
pip install qrcode
Python性能测试代码。
import rust_mod
import qrcode
import time


if __name__ == '__main__':
    t0 = time.time()
    # rust包调用
    rust_mod.qrcode_img("hello", "./qrcode1.png")
    t1 = time.time()
    # python包调用
    img = qrcode.make("hello")
    img.save("./qrcode2.png")
    t2 = time.time()

    print("Rust time: %fs" % (t1-t0))
    print("Python time: %fs" % (t2-t1))
运行结果:

这个性能差距还是挺大的,差了一个量级,不过这样对比不太公平,毕竟底层细节我们也不知道,没法控制变量,但是有一点可以知道,大多数时候Rust编写的包性能还是够的。


 666
666


 被折叠的 条评论
为什么被折叠?
被折叠的 条评论
为什么被折叠?
 到【灌水乐园】发言


