


官方文档里给出了详细步骤:
Building Qt Sources
Building Qt 5 from Git (Wiki)
注:本文基于windows11+vs2019x64+qt5.15.9,不编译Qt WebEngine
归纳总结如下:
准备阶段
-
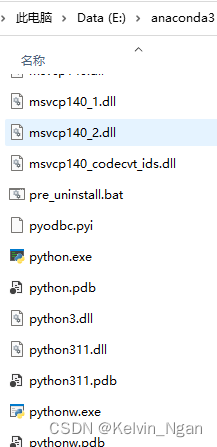
安装python,我这里用的是
anaconda python 3.11,要求2.7以上,你也可以直接去官网下载:https://www.python.org/downloads/ -
安装perl,我这里安装的是
strawberry-perl-5.32.1.1-64bit.msi,要求5.12以上,下载地址:https://strawberryperl.com/releases.html -
安装ruby(可选),ruby是为了编译WebKit,如果不编译该模块应该就不需要了(我没有测试)。我这里安装的是
rubyinstaller-3.2.2-1-x64.exe,下载地址:https://rubyinstaller.org/2023/04/01/rubyinstaller-3.2.2-1-3.1.4-1-3.0.6-1-and-2.7.8-1-released.html -
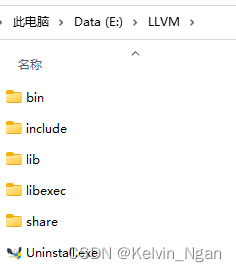
安装clang(可选),编译qtdoc时需要,影响Qt Assistant里的参考文档,如果编译了就可以在qt designer的帮助里查看参考文档。我这里安装的是LLVM-11.0.0-win64.exe,其实qt官网有给出vs2019的版本
libclang-release_140-based-windows-vs2019_64,下载地址:https://download.qt.io/development_releases/prebuilt/libclang/ -
安装openssl(可选),编译Qt Network时需要,为了支持 Secure Sockets Layer (SSL) 。我这里是下载源码自己编译(教程),
openssl-1.1.1w.tar.gz,下载地址:https://www.openssl.org/source/ -
安装ICU(可选),也是编译WebKit时需要,为了UNICODE和Localization ,因为我没有用到,就没有研究它了
-
安装jom(可选),qt提供的一个工具,可以实现并行编译,提高编译速度。我这里安装的是
jom_1_1_4.zip,官网经常打不开,可以到镜像源去下载https://mirrors.tuna.tsinghua.edu.cn/qt/official_releases/jom/ -
下载Qt源码,官网经常打不开,可以到镜像源去下载 qt-everywhere-opensource-src-5.15.9.zip
把上述东西都安装在英文路径下,注意目录名称尽量简短且不能带有空格,检查系统环境PATH,确保环境都设置好了,我的设置如下:
E:\qt-everywhere-src-5.15.9\gnuwin32\bin
E:\qt-everywhere-src-5.15.9\qtbase\bin
E:\anaconda3
C:\Strawberry\c\bin
C:\Strawberry\perl\site\bin
C:\Strawberry\perl\bin
E:\Ruby\bin
E:\jom
其中,
E:\qt-everywhere-src-5.15.9是qt源码目录
E:\anaconda3是python目录,
编译阶段
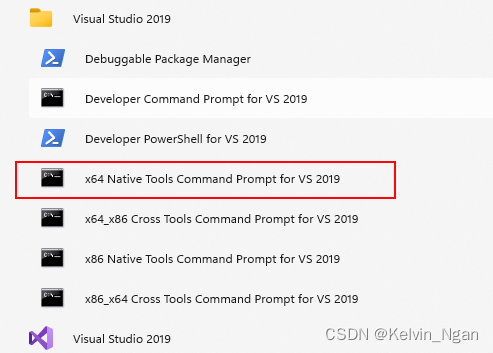
1、在开始里找到x64 Native Tools Command Prompt for VS 2019,以管理员权限运行
2、转到Qt源码目录
E:
cd E:\qt-everywhere-src-5.15.9
3、配置
注:每次configure要基于干净的源码目录,如果此前configure过,要先执行jom distclean(或nmake distclean),实测非常耗时,还不如直接删掉源码目录重新解压
set LLVM_INSTALL_DIR=E:\LLVM
configure -prefix "E:\Qt\5.15.9\msvc2019_64" -shared -debug-and-release -verbose -nomake tests -skip qtwebengine -opensource -confirm-license -opengl dynamic -openssl-runtime OPENSSL_INCDIR="D:\openssl\vc16_x64\include"
其中,
set LLVM_INSTALL_DIR=E:\LLVM是设置LLVM的环境,如果没有指定将无法编译qtdoc模块,只有要编译qtdoc才需要这句
configure -help可以查看configure的参数说明,此处仅给出上面用到的参数
-prefix "E:\Qt\5.15.9\msvc2019_64"   安装路径,执行install后将会输出到该路径
-shared 生成动态链接库,相应地,-static就是静态库,如果都不指定,默认是-shared
-debug-and-release 生成debug和release两个版本的库,也可以单独指定其中一种,-debug或-release,如果都不指定,默认是-release
-verbose 在configure过程中打印详细信息,方便排查问题
-nomake tests 默认生成以下几部分(part):libs、examples、tools、tests,这里就是告诉编译器不要生成tests这个part
-skip qtwebengine 跳过某个模块,这里不编译qtwebengine,它将非常耗时
-opensource 代表我们编译的是开源版本,相应地,-commercial代表商业许可的版本
-confirm-license 自动确认许可
-opengl dynamic 动态加载图形驱动,官方推荐采用该方式,具体看"Qt for Windows - Requirements"的"Graphics Drivers"一节
-openssl-runtime OPENSSL_INCDIR="D:\openssl\vc16_x64\include" 设置openssl,也可以不填该参数,我这里是动态链接的方式,一共有动态链接显示加载、动态链接隐式加载、静态库3种方式,具体见"Qt for Windows - Requirements"的"Libraries"一节
configure完成后,它会打印每个模块的情况,也可以到源码目录下的config.summary文件中查看
Build type: win32-msvc (x86_64, CPU features: sse sse2)
Compiler: msvc 192930152
Configuration: sse2 aesni sse3 ssse3 sse4_1 sse4_2 avx avx2 avx512f avx512bw avx512cd avx512dq avx512er avx512ifma avx512pf avx512vbmi avx512vl compile_examples f16c largefile precompile_header rdrnd rdseed shani x86SimdAlways shared shared debug_and_release release debug build_all c++11 c++14 c++17 c++1z concurrent dbus no-pkg-config release_tools stl
Build options:
  Mode ................................... debug and release; default link: debug; optimized tools
  Optimize release build for size ........ no
  Building shared libraries .............. yes
  Using C standard ....................... C89
  Using C++ standard ..................... C++17
  Relocatable ............................ yes
  Using precompiled headers .............. yes
  Using LTCG ............................. no
  Target compiler supports:
    SSE .................................. SSE2 SSE3 SSSE3 SSE4.1 SSE4.2
    AVX .................................. AVX AVX2
    AVX512 ............................... F ER CD PF DQ BW VL IFMA VBMI
    Other x86 ............................ AES F16C RDRAND SHA
  Build parts ............................ libs examples tools
  App store compliance ................... no
Qt modules and options:
  Qt Concurrent .......................... yes
  Qt D-Bus ............................... yes
  Qt D-Bus directly linked to libdbus .... no
  Qt Gui ................................. yes
  Qt Network ............................. yes
  Qt Sql ................................. yes
  Qt Testlib ............................. yes
  Qt Widgets ............................. yes
  Qt Xml ................................. yes
  ...
4、编译
jom -j20
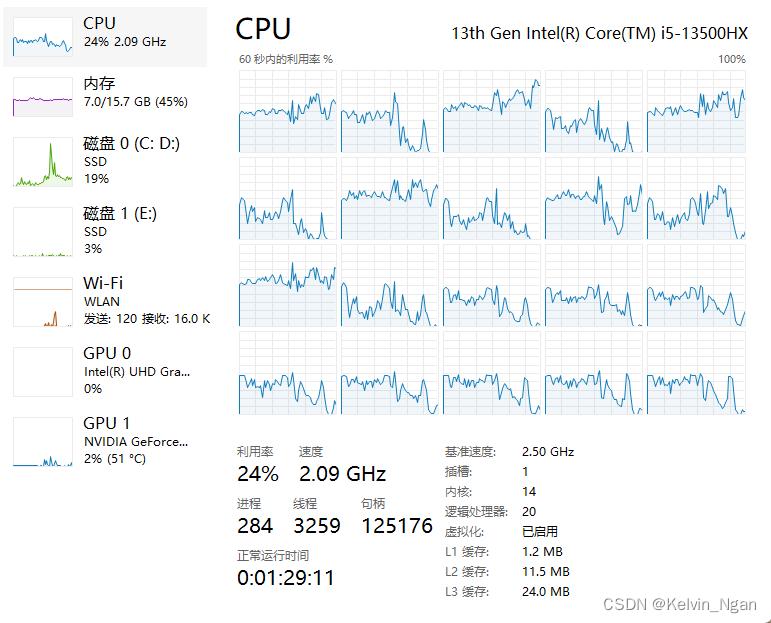
后面的-j20代表线程数,因为我的CPU是i5-13500HX,14核20线程
开始编译前记得关闭杀毒软件,否则会报错
ERROR: GetThreadContext failed: 31
LINK : fatal error LNK1000: 在 00007FF712958AFD 出现未知错误;请参考文档中的技术支持选项
当然也可以使用nmake指令。不管是用jom还是nmake,后续指令也要统一用对应的才行,否则会报错
编译过程的CPU占用率:
编译成功后是这样的
在我的机器(i5-13500HX + SSD PCIE4.0 7000MB/s)上的耗时 70分钟
5、安装
jom -j20 install
如果刚才是用nmake编译,这里要用nmake install
它会将编译好的文件拷贝至configure中-prefix指定的目录下
在我的机器耗时60分钟
6、编译参考文档
jom docs
如果刚才是用nmake编译,这里要用nmake docs
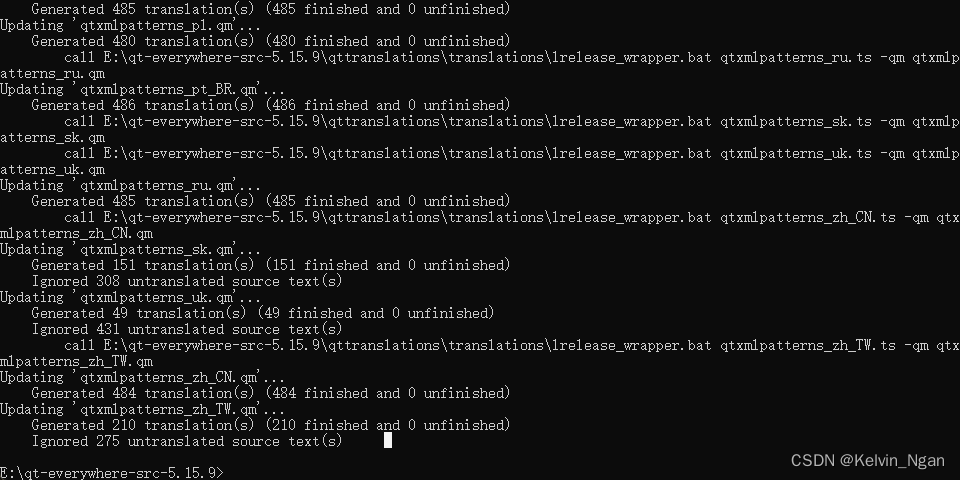
7、安装参考文档
jom install_docs
如果刚才是用nmake编译,这里要用nmake install_docs
实测中间卡在sqldriver的地方很久,ctrl+c跳过
安装成功后运行designer,打开“Qt设计师帮助”就可以看到参考文档,如果第3步中打印了如下信息,第6、7部都不会成功,“Qt设计师帮助”里的内容为空
Qt Tools:
  QDoc ................................... no

  WARNING: QDOC will not be compiled, probably because libclang could not be located. This means theat you cannot build the Qt ducomentation.
...
On Windows, you must set LLVN_INSTALL_DIR to the installation path.
...
编译静态库过程中报错
jom -j10
LINK : fatal error LNK1104: 无法打开文件“E:\qt-everywhere-src-5.15.9-static\qtimageformats\plugins\imageformats\qtiffd.lib”
jom: E:\qt-everywhere-src-5.15.9-static\qtserialport\examples\serialport\blockingmaster\Makefile.Debug [debug\blockingmaster.exe] Error 1104
LINK : fatal error LNK1104: 无法打开文件“E:\qt-everywhere-src-5.15.9-static\qtimageformats\plugins\imageformats\qwebpd.lib”
jom: E:\qt-everywhere-src-5.15.9-static\qtserialport\examples\serialport\blockingslave\Makefile.Debug [debug\blockingslave.exe] Error 1104
jom: E:\qt-everywhere-src-5.15.9-static\qtserialport\examples\serialport\blockingslave\Makefile [debug] Error 2
jom: E:\qt-everywhere-src-5.15.9-static\qtserialport\examples\serialport\Makefile [sub-blockingslave-make_first] Error 2
LINK : fatal error LNK1104: 无法打开文件“E:\qt-everywhere-src-5.15.9-static\qtimageformats\plugins\imageformats\qwebpd.lib”
jom: E:\qt-everywhere-src-5.15.9-static\qtserialport\examples\serialport\terminal\Makefile.Debug [debug\terminal.exe] Error 1104
jom: E:\qt-everywhere-src-5.15.9-static\qtserialport\examples\serialport\terminal\Makefile [debug] Error 2
jom: E:\qt-everywhere-src-5.15.9-static\qtserialport\examples\serialport\Makefile [sub-terminal-make_first] Error 2
jom: E:\qt-everywhere-src-5.15.9-static\qtserialport\examples\Makefile [sub-serialport-make_first] Error 2
jom: E:\qt-everywhere-src-5.15.9-static\qtserialport\Makefile [sub-examples-make_first] Error 2
LINK : fatal error LNK1104: 无法打开文件“E:\qt-everywhere-src-5.15.9-static\qtimageformats\plugins\imageformats\qwebpd.lib”
jom: E:\qt-everywhere-src-5.15.9-static\qtnetworkauth\examples\oauth\redditclient\Makefile [debug] Error 2
LINK : fatal error LNK1104: 无法打开文件“E:\qt-everywhere-src-5.15.9-static\qtimageformats\plugins\imageformats\qwebpd.lib”
jom: E:\qt-everywhere-src-5.15.9-static\qtnetworkauth\examples\oauth\twittertimeline\Makefile.Debug [debug\twittertimeline.exe] Error 1104
jom: E:\qt-everywhere-src-5.15.9-static\qtnetworkauth\examples\oauth\twittertimeline\Makefile [debug] Error 2
jom: E:\qt-everywhere-src-5.15.9-static\qtnetworkauth\examples\oauth\Makefile [sub-twittertimeline-make_first] Error 2
jom: E:\qt-everywhere-src-5.15.9-static\qtnetworkauth\examples\oauth\Makefile [sub-redditclient-make_first] Error 2
jom: E:\qt-everywhere-src-5.15.9-static\qtnetworkauth\examples\Makefile [sub-oauth-make_first] Error 2
jom: E:\qt-everywhere-src-5.15.9-static\qtnetworkauth\Makefile [sub-examples-make_first] Error 2
jom: E:\qt-everywhere-src-5.15.9-static\Makefile [module-qtnetworkauth-make_first] Error 2
然后停在这里
jom: E:\qt-everywhere-src-5.15.9-static\qtsvg\examples\svg\Makefile [sub-embedded-make_first] Error 2
jom: E:\qt-everywhere-src-5.15.9-static\qtsvg\examples\Makefile [sub-svg-make_first] Error 2
jom: E:\qt-everywhere-src-5.15.9-static\qtsvg\Makefile [sub-examples-make_first] Error 2
jom: E:\qt-everywhere-src-5.15.9-static\Makefile [module-qtsvg-make_first] Error 2
jom: E:\qt-everywhere-src-5.15.9-static\Makefile [module-qtserialport-make_first] Error 2
此时输入jom -xx可以继续编译。据说是多线程编译下,有的模块还没编译好(线程1),而依赖这些模块的别的模块无法继续编译(线程2),单线程编译就不会出现该问题(我没有验证单线程是不是就可以避免该问题,如果是这个原因,那动态库编译时应该也会出现)
我试了几次删掉源码目录,重新解压源码包,重新configure,重新开始编译,都是停在上面的地方
还没完,第二次停在这里
jom: E:\qt-everywhere-src-5.15.9-static\Makefile [module-qtsensors-make_first] Error 2
第三次停在这里
正在创建库 debug\qmloscilloscope.lib 和对象 debug\qmloscilloscope.exp
最后还是不行
jom -j10 instal1
Error: Target instal1 doesn't exist.
不用多线程,改用nmake编译就可以了。完整的命令行指令如下
set LLVM_INSTALL_DIR=E:\LLVM
configure -prefix "E:\Qt\5.15.9\msvc2019_64_satic" -static -debug-and-release -verbose -nomake tests -skip qtwebengine -opensource -confirm-license -opengl dynamic -openssl-runtime OPENSSL_INCDIR="D:\openssl\vc16_x64\include"
nmake
nmake install
编译qt doc失败,原因不明


 2万+
2万+


 被折叠的 条评论
为什么被折叠?
被折叠的 条评论
为什么被折叠?
 到【灌水乐园】发言


