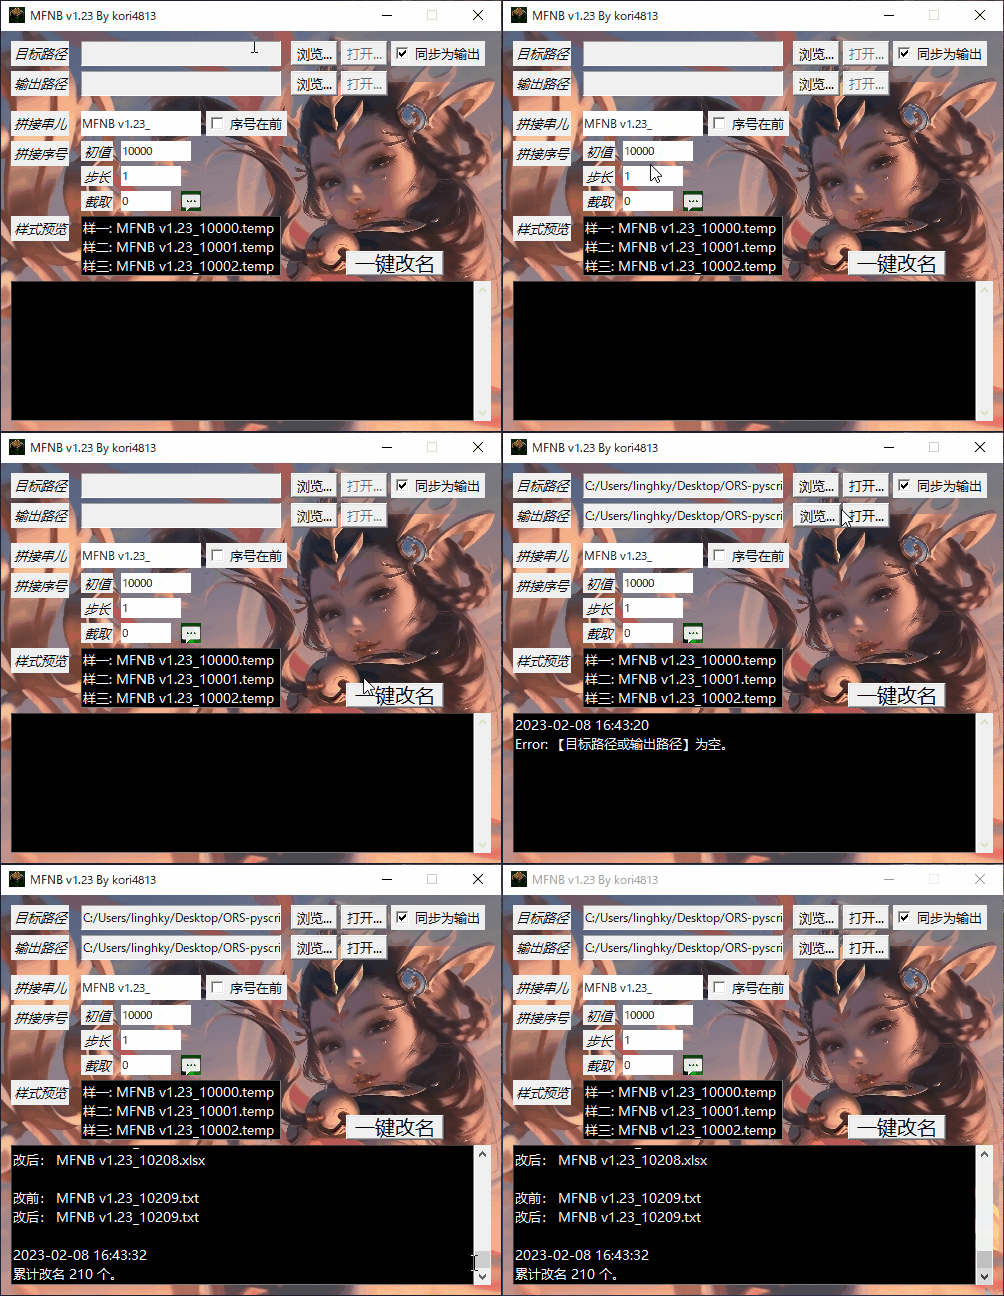
Tkinter快速入手简单案例
mfbn_deskapp
mfnb_deskapp/windows_app.py为std-python/py3.6up/modify_file_names_in_batches.py的衍生学习模块(学习方向tkinter)
学习参考案例:https://github.com/Xizo-114514/DiskIconChangerByXizo
Tkinter
Tkinter是为 Python 设置的 GUI(图形用户界面)小部件。
官方文档: https://tkdocs.com/shipman/
Python标准库之Tk图形用户界面(GUI): https://docs.python.org/zh-cn/3.9/library/tkinter.html#module-tkinter
极客笔记tkinter: https://deepinout.com/python-tkinter-tutorial/python_tkinter_tutorial.html
腾讯云开发社区tkinter: https://cloud.tencent.com/developer/section/1372347
博客专栏tkinter: https://blog.csdn.net/weixin_42272768/category_9315268.html
windows_app.py案例
演示

下载成果物体验
MFNB v1.23 2023.2.10 By kori4813
导包
import tkinter
窗口框架
app_window = tkinter.Tk()  # 通常习惯将这个变量名设置为root或者window
# 布局内容
app_window.mainloop()  # 进入消息循环 必需组件
窗口样式
app_window.title('MFNB v1.23 By kori4813')
pc_screenwidth = app_window.winfo_screenwidth()  # 分辨率
pc_screenheight = app_window.winfo_screenheight()
app_width = 500
app_height = 400
x = int((pc_screenwidth - app_width) / 2)
y = int((pc_screenheight - app_height) / 2)
app_window.geometry(f"{app_width}x{app_height}+{x}+{y}")  # 指定主框体大小与位置
app_window.resizable(False, False)  # 框体大小可调性
框体大小可调性: https://vimsky.com/examples/usage/resizable-method-in-tkinter-python.html
图标与背景
app_window.iconphoto(True, tkinter.PhotoImage(file="png/icon.png"))  # 第一个参数为True 则图标图像将应用于后面创建的窗口
background = tkinter.PhotoImage(file="png/yyh.png")  # 直接放入image参数里会没效果
tkinter.Label(app_window, image=background).pack()
pack布局: https://blog.csdn.net/weixin_42272768/article/details/100191059
grid布局: https://blog.csdn.net/weixin_42272768/article/details/100513564
place布局: https://blog.csdn.net/weixin_42272768/article/details/100516379
Button Checkbutton lambda传参
tkinter.Button(app_window, text="浏览...", command=lambda: func_get_input_output_path('input'), font=("微软雅黑", 10)).place(x=290, y=10, height=25)
tkinter.Button(app_window, text="浏览...", command=lambda: func_get_input_output_path('output'), font=("微软雅黑", 10)).place(x=290, y=40, height=25)
input_open_btn = tkinter.Button(app_window, text="打开...", command=lambda: func_open_path('input'), state="disabled", font=font_roman)
input_open_btn.place(x=340, y=10, height=25)
output_open_btn = tkinter.Button(app_window, text="打开...", command=lambda: func_open_path('output'), state="disabled", font=font_roman)
output_open_btn.place(x=340, y=40, height=25)
tkinter.Checkbutton(app_window, text="序号在前", font=font_roman, command=func_sample_view, variable=after_btn).place(x=205, y=80, height=25)
# 路径设置
def func_get_input_output_path(inout):
    # 打开窗口给用户选择想要指定的文件夹
    # 导包 from tkinter import filedialog
    input_output_dir = filedialog.askdirectory()
    if inout == "input":
        input_path.set(input_output_dir)  # tkinter.Entry(app_window, state="readonly", textvariable=input_path)
        if len(input_output_dir) != 0:
            input_open_btn.config(state="normal")  # 正常选择路径后 开放【打开...】按钮
        else:
            input_open_btn.config(state="disabled")  # 非正常路径 禁止【打开...】按钮
    if inout == "output" or sync_btn.get() == 1:
        output_path.set(input_output_dir)
        if len(input_output_dir) != 0:
            output_open_btn.config(state="normal")
        else:
            output_open_btn.config(state="disabled")
# 打开文件夹
def func_open_path(inout):
    if inout == "input":
        # 导包 import os
        os.startfile(input_path.get())
    elif inout == "output":
        os.startfile(output_path.get())
# 显示样式预览信息
def func_sample_view():
    pass  # 详细看源码
日志文本框 Frame Scrollbar Text
log_frame = tkinter.Frame(app_window)
log_frame.place(x=10, y=250, width=480, height=140)
right_scrollbar = tkinter.Scrollbar(log_frame, orient='vertical')  # HORIZONTAL 设置水平方向的滚动条,默认是竖直
right_scrollbar.pack(side="right", fill='y')  # side 停留在父组件的right一边 | fill 填充y方向上的空间
log_text = tkinter.Text(log_frame, font=font_roman, state="disabled", background="black", foreground='white', yscrollcommand=right_scrollbar.set, wrap='char')  # wrap 设置不自动换行为none
log_text.pack()
right_scrollbar.config(command=log_text.yview)   # log_text 随着滚动条移动被控制移动
日志文本框: https://www.shuzhiduo.com/A/kvJ3QGB7dg/
事件的应用: 图标info(鼠标放上去显示提示文本信息)
tip = tkinter.PhotoImage(file="png/tip.png")
info_label = tkinter.Label(app_window, image=tip)
info_label.place(x=180, y=160, width=20, height=20)
info_label.bind("<Enter>", lambda event: func_show_tips(event, "enter"))  # 使用lambda定义匿名分部函数 处理程序将传递一个Event描述发生的事情的对象
info_label.bind("<Leave>", lambda event: func_show_tips(event, "leave"))
info_text = tkinter.Text(app_window, font=font_tip, background="black", foreground='white', wrap='char')
info_text.place(x=205, y=110, width=0, height=0)
info_text.insert(tkinter.INSERT, "命名规则:第一个值为初值; 第i个值为(第i-1个值的累计初值+步长); 截取后再拼接串儿作为文件名。\n")
info_text.insert(tkinter.INSERT, "截取:值小于0, 取(初值+步长)最后i位数; 值为0, 全取; 值大于零, 则从第i+1位取到最后。")
info_text.config(state="disabled")
# 显示提示信息
def func_show_tips(event, enter_or_leave):
    if enter_or_leave == "enter":
        info_text.place(x=205, y=110, width=280, height=70)
    elif enter_or_leave == "leave":
        info_text.place(x=205, y=110, width=0, height=0)  # 通过设置控件的width和height来达到隐匿效果
事件: https://tkdocs.com/shipman/events.html
事件类型: https://tkdocs.com/shipman/event-types.html
处理程序将传递一个Event描述发生的事情的对象: https://tkdocs.com/shipman/event-handlers.html


 1185
1185


 被折叠的 条评论
为什么被折叠?


