


 本文详细介绍了如何在CentOS 8系统上通过YUM安装Docker,包括移除旧版本、配置国内镜像源、设置阿里云镜像加速,以及后续的启动、验证和镜像管理等步骤。适合刚入门Docker的Linux用户参考。
docker —yyds!

环境准备
1、linux 命令基础
2、centos8
3、虚拟机
环境变量
[admin@localhost ~]$ cat /etc/os-release
NAME="CentOS Linux"
VERSION="8"
ID="centos"
ID_LIKE="rhel fedora"
VERSION_ID="8"
PLATFORM_ID="platform:el8"
PRETTY_NAME="CentOS Linux 8"
ANSI_COLOR="0;31"
CPE_NAME="cpe:/o:centos:centos:8"
HOME_URL="https://centos.org/"
BUG_REPORT_URL="https://bugs.centos.org/"
CENTOS_MANTISBT_PROJECT="CentOS-8"
CENTOS_MANTISBT_PROJECT_VERSION="8"
安装步骤
1、移除旧版本的docker
yum remove docker \
                  docker-client \
                  docker-client-latest \
                  docker-common \
                  docker-latest \
                  docker-latest-logrotate \
                  docker-logrotate \
                  docker-engine
在此过程中可能需要root权限,可以先获取root权限再执行上述代码:
获取方式如下:
sudo root
输入密码
在这特别注意,可能会提示 “用户名 不在 sudoers文件中,此事将被报告。”,这个问题也卡住我好久,现在已经解决,如果您遇到无法解决,可以留言!!!
2、 安装所需的环境配置
[root@localhost admin]# yum install -y yum-utils
Repository extras is listed more than once in the configuration
CentOS-8 - Base - mirrors.aliyun.com             32 kB/s | 3.9 kB     00:00
CentOS-8 - Base - mirrors.aliyun.com            4.2 MB/s | 7.5 MB     00:01
CentOS-8 - Extras - mirrors.aliyun.com           13 kB/s | 1.5 kB     00:00
CentOS-8 - Extras - mirrors.aliyun.com           44 kB/s |  10 kB     00:00
CentOS-8 - AppStream - mirrors.aliyun.com        40 kB/s | 4.3 kB     00:00
CentOS-8 - AppStream - mirrors.aliyun.com       5.5 MB/s | 9.3 MB     00:01
CentOS Linux 8 - AppStream                      9.5 kB/s | 4.3 kB     00:00
CentOS Linux 8 - AppStream                      3.9 MB/s | 9.3 MB     00:02
CentOS Linux 8 - BaseOS                         6.0 kB/s | 3.9 kB     00:00
CentOS Linux 8 - BaseOS                         2.7 MB/s | 7.5 MB     00:02
Docker CE Stable - x86_64                       6.5 kB/s | 3.5 kB     00:00
Docker CE Stable - x86_64                        18 kB/s |  16 kB     00:00
Extra Packages for Enterprise Linux Modular 8 - 9.4 kB/s | 9.3 kB     00:00
Extra Packages for Enterprise Linux Modular 8 - 684 kB/s | 955 kB     00:01
Extra Packages for Enterprise Linux 8 - x86_64  5.1 kB/s | 5.5 kB     00:01
Extra Packages for Enterprise Linux 8 - x86_64  3.5 MB/s |  10 MB     00:02
软件包 yum-utils-4.0.18-4.el8.noarch 已安装。
依赖关系解决。
无需任何处理。
完毕!
3、设置镜像仓库
仓库地址默认为国外,设置国内镜像
[root@localhost admin]#  yum-config-manager \
										 --add-repo \
 										http://mirrors.aliyun.com/docker-ce/linux/centos/docker-ce.repo
Repository extras is listed more than once in the configuration
添加仓库aliyun:http://mirrors.aliyun.com/docker-ce/linux/centos/docker-ce.repo
4、更新yum软件包索引
centos7:[root@localhost admin]# yum makecache fast
centos8:[root@localhost admin]# yum makecache
5、 安装docker
最新版:[root@localhost admin]# yum install docker-ce docker-ce-cli containerd.io
指定版本:yum install docker-ce-<VERSION_STRING> docker-ce-cli-<VERSION_STRING> containerd.io
6、启动docker
[root@localhost admin]# systemctl start docker
[root@localhost admin]# docker version
Client: Docker Engine - Community
 Version:           20.10.9
 API version:       1.41
 Go version:        go1.16.8
 Git commit:        c2ea9bc
 Built:             Mon Oct  4 16:08:25 2021
 OS/Arch:           linux/amd64
 Context:           default
 Experimental:      true

Server: Docker Engine - Community
 Engine:
  Version:          20.10.9
  API version:      1.41 (minimum version 1.12)
  Go version:       go1.16.8
  Git commit:       79ea9d3
  Built:            Mon Oct  4 16:06:48 2021
  OS/Arch:          linux/amd64
  Experimental:     false
 containerd:
  Version:          1.4.11
  GitCommit:        5b46e404f6b9f661a205e28d59c982d3634148f8
 runc:
  Version:          1.0.2
  GitCommit:        v1.0.2-0-g52b36a2
 docker-init:
  Version:          0.19.0
  GitCommit:        de40ad0
7、 测试hello world
docker run hello-world

Hello from Docker!
This message shows that your installation appears to be working correctly.

To generate this message, Docker took the following steps:
 1. The Docker client contacted the Docker daemon.
 2. The Docker daemon pulled the "hello-world" image from the Docker Hub.
    (amd64)
 3. The Docker daemon created a new container from that image which runs the
    executable that produces the output you are currently reading.
 4. The Docker daemon streamed that output to the Docker client, which sent it
    to your terminal.

To try something more ambitious, you can run an Ubuntu container with:
 $ docker run -it ubuntu bash

Share images, automate workflows, and more with a free Docker ID:
 https://hub.docker.com/

For more examples and ideas, visit:
 https://docs.docker.com/get-started/
8、查看docker 镜像
[root@localhost admin]# docker images
REPOSITORY               TAG       IMAGE ID       CREATED        SIZE
busybox                  latest    42b97d3c2ae9   7 weeks ago    1.24MB
continuumio/miniconda3   latest    67414e5844b6   2 months ago   391MB
hello-world              latest    d1165f221234   7 months ago   13.3kB
docker 卸载
1、卸载docker
yum remove docker-ce docker-ce-cli containerd.io

2、 删除资源
rm -rf /var/lib/docker
rm -rf /var/lib/containerd
docker 配置阿里云镜像加速
1、登录阿里云官网
阿里云官方网址:https://www.aliyun.com/

进入后的网页界面;

网页的最低端,开通个人容器镜像加速:
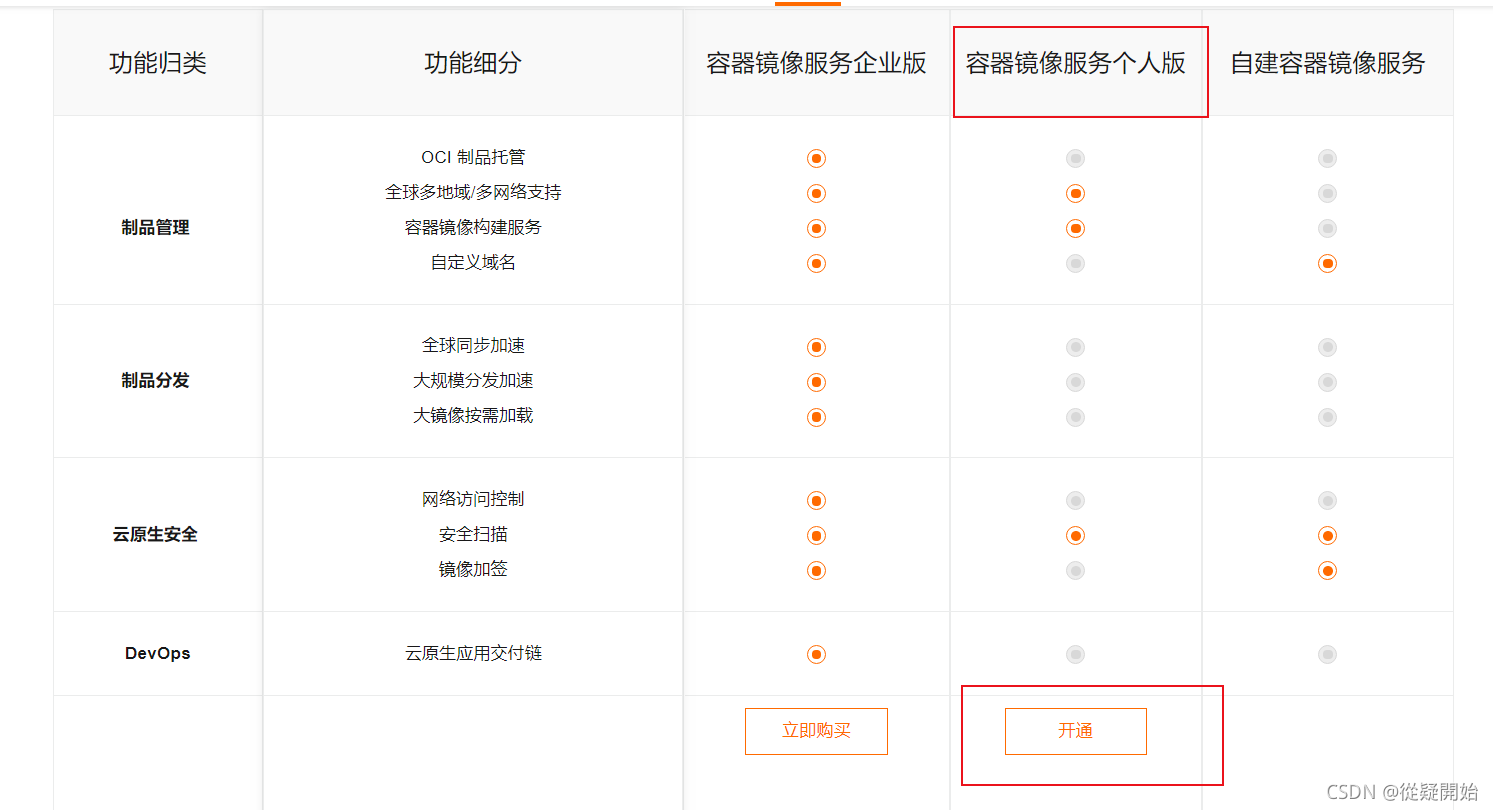
开通后的界面为:
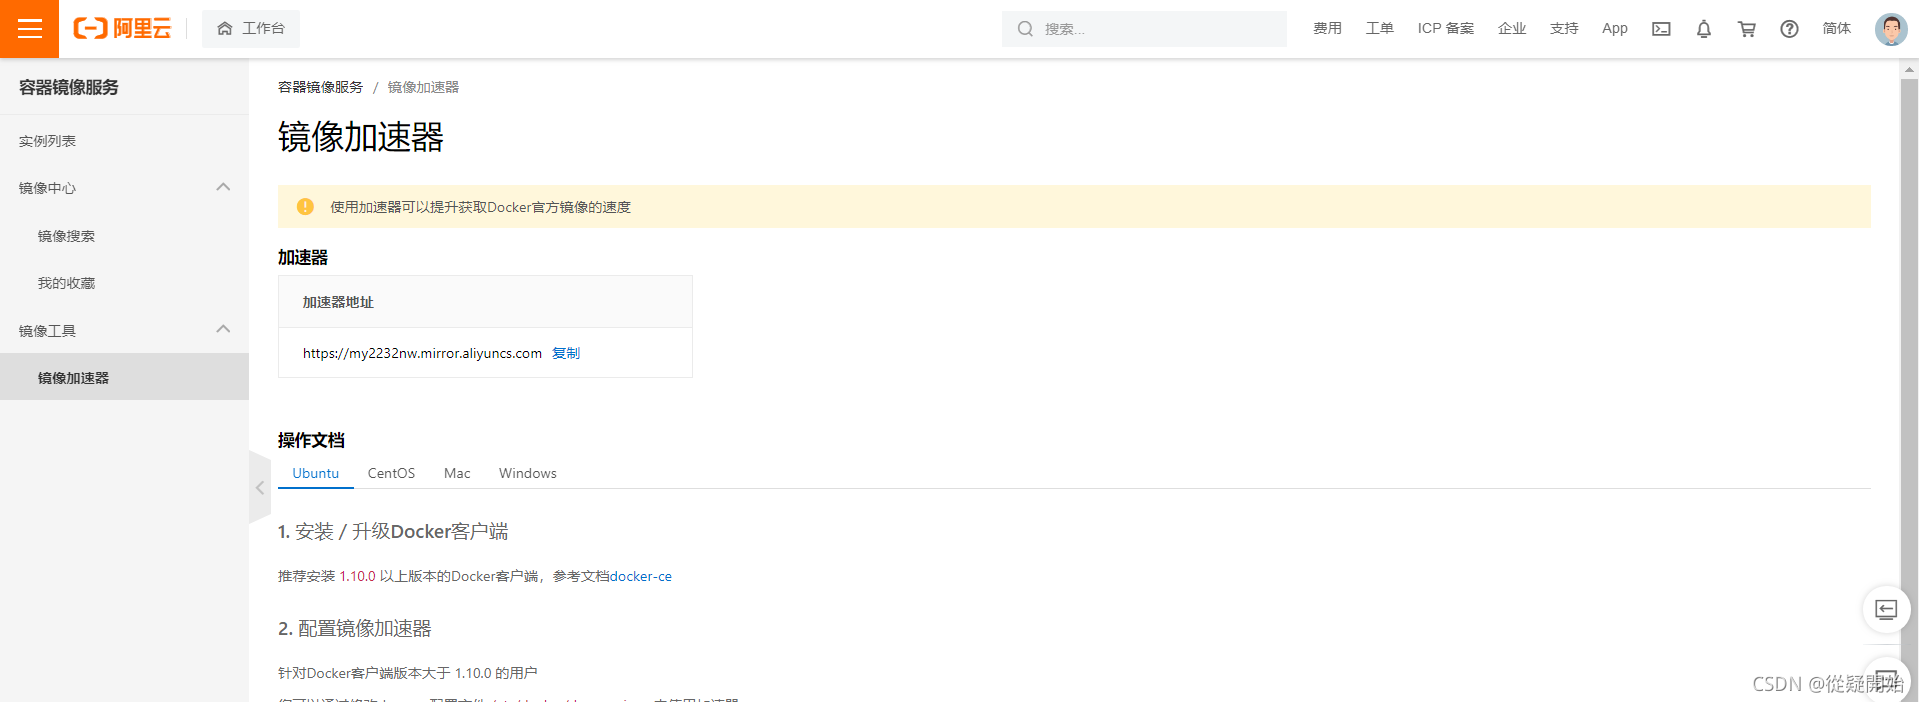
2、找到镜像加速地址
开通为免费的,尽量大家使用自己的镜像加速地址!!!
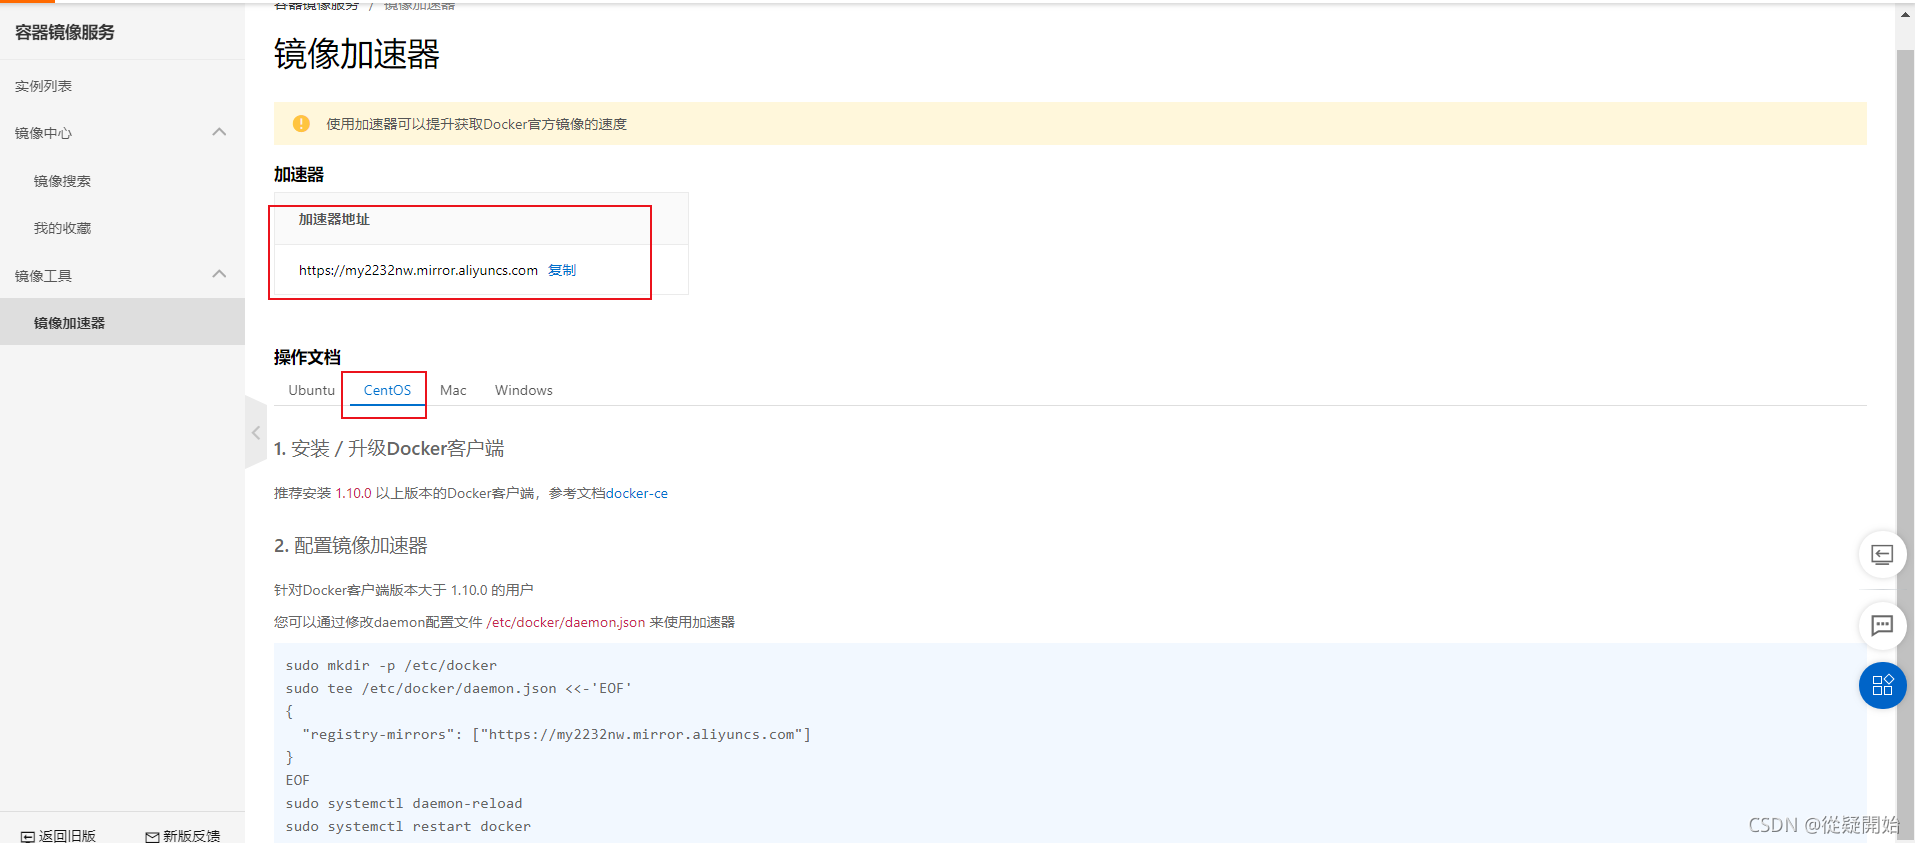
3、配置使用
sudo mkdir -p /etc/docker
sudo tee /etc/docker/daemon.json <<-'EOF'
{
  "registry-mirrors": ["https://my2232nw.mirror.aliyuncs.com"]
}
EOF
sudo systemctl daemon-reload
sudo systemctl restart docker
配置过程:
[root@localhost admin]# sudo mkdir -p /etc/docker
[root@localhost admin]# sudo tee /etc/docker/daemon.json <<-'EOF'
> {
>   "registry-mirrors": ["https://my2232nw.mirror.aliyuncs.com"]
> }
> EOF
{
  "registry-mirrors": ["https://my2232nw.mirror.aliyuncs.com"]
}
[root@localhost admin]# sudo systemctl daemon-reload
[root@localhost admin]# sudo systemctl restart docker


 7826
7826

 被折叠的 条评论
为什么被折叠?
被折叠的 条评论
为什么被折叠?
 到【灌水乐园】发言


