


文章目录
前言
Canvas是HTML5中的一个标签,用于在网页上动态生成图像和图形。
一、Canvas是什么?
Canvas是一种HTML元素,用于动态生成图形、动画和其他视觉效果。Canvas提供了一组API,使开发者可以使用JavaScript绘制各种图形,如矩形、圆形、线条和图片等,同时还可以进行动画、交互和数据可视化等操作。
Canvas的工作原理是在HTML页面中创建一个空白的画布,然后使用JavaScript代码将图形和其他元素绘制到画布上。
Canvas具有高度的灵活性和可扩展性,可以用于创建游戏、图表、数据可视化和各种交互式应用程序等。
二、使用方法:
1.先得到画布对象
	var can = document.querySelector("#can");
	var ctx = can.getContext('2d');
2.画图流程
1.绘画路线
	开始绘画 ctx.beginPath()
	确定要绘制的起点 ctx.moveTo(x,y)
	确定经过点... ctx.lineTo(x,y);
	确定要绘制的终点 ctx.lineTo(x,y);
	路径绘制结束 ctx.closePath(); (关闭路径,将终点与起点链接起来)
2.设置画笔
确定画笔的样式,使用设置好的画笔描边或者填色
ctx.fillStyle = "red" //确定填充的颜色,默认值是黑色
ctx.fill(); //开始填充

ctx.lineWidth = 8;//确定描边宽度
ctx.strokeStyle = 'blue';//描边颜色
ctx.stroke();//开始描边
三、快速绘制常见图形
1.快速绘制矩形:
ctx.rect(x,y,w,h) // 确定路径 x,y 起始坐标 w,h 宽高
ctx.strokeRect(x,y,w,h); // 确定路径并描出来
ctx.fillRect(x,y,w,h); // 确定路径并填充出来
2.快速绘制圆形:
ctx.arc(x,y,r,sa,ea,true/false):
x、y为圆心坐标,r为半径,
sa、ea分别为起始角度和结束角度,
true是逆时针画圆,false是顺时针画圆;
角度计算公式:
360度角即2PI弧度;
1度就是2PI/360=PI/180弧度;
90度就是2PI/360*90=PI/2弧度(其他的角度自行计算)
3.贝塞尔曲线
开始点通过moveTo去做
二次贝塞尔曲线
	ctx.quadraticCurveTo (cx,cy,ex,ey)
	cx,cy 控制点坐标
	ex,ey 结束点坐标
示例:
<style>
    #can{
         background-color: rgb(235, 239, 243);
     }
</style>
<body>
    <canvas id="can" width="200" height="200"></canvas>
</body>
<script>
    var can=document.querySelector('#can')
    var ctx=can.getContext('2d')
    ctx.beginPath();//开始绘图
    ctx.moveTo(10,10);//开始点
    ctx.quadraticCurveTo (100,150,150,10);//控制点和结束点
    ctx.stroke();//把路线描绘出来
</script>
成品:

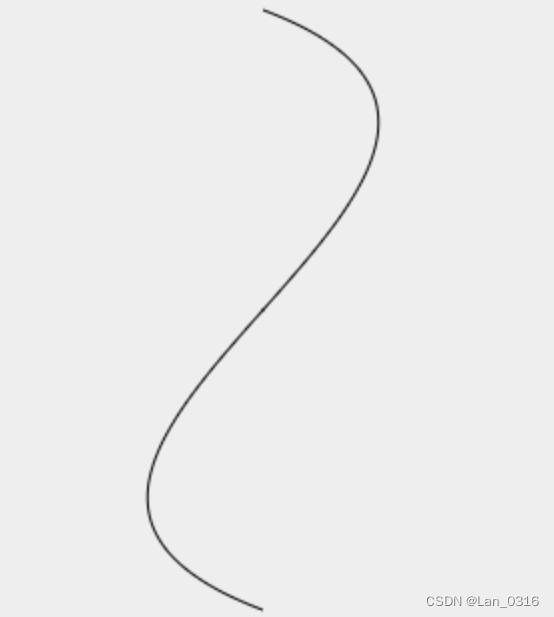
三次贝塞尔曲线
bezierCurveTo (cx1,cy1,cx2,cy2,ex,ey);
示例:
<style>
	#can{
		background-color: #eee;
	}
</style>
<body>
	<canvas width="500" height="400" id="can"></canvas>
</body>
<script>
	var can = document.querySelector('#can')
	var ctx = can.getContext('2d');
	ctx.beginPath();//开始绘图
	ctx.moveTo(250,50);//开始点
	ctx.bezierCurveTo(450,125,50,275,250,350);//控制点和结束点
	ctx.stroke();//把路线描绘出来
</script>
成品:
四、在画布绘制文字
1. 填充绘制
	fillText(text,x,y,maxWidth):
	text表示文字      x、y为坐标
	maxWidth可选,为文字最大宽度,防止文字溢出
2. 描边绘制
	strokeText(text,x,y,maxWidth):
	text表示文字      x、y为坐标
	maxWidth可选,为文字最大宽度,防止文字溢出;
3. 字体样式设置
	ctx.font = "bold 40px Arial" ;//文字粗细、大小、字体样式
	ctx.textAlign = "left | center | right";//居中方式
	对齐方式:
	ctx.textBaseline = "top | middle | bottom"
	top: 四线格的最顶部线对齐起始点!
	middle: 四线格的中间位置对齐起始点
	bottom: 四线格的底部对齐起始点
五、图形组合
ctx.globalCompositeOperation = "某一种方式"
	source-over:默认值,表示新图覆盖在旧图之上
	source-atop:只绘制旧图和重叠的部分,其他透明
	source-in:只绘制新图的重叠部分,其他透明
	source-out:只绘制新图,重叠部分和旧图透明
	destination-over:表示旧图覆盖在新图之上
	destination-atop:只绘制新图和重叠的部分,其他透明
	destination-in:只绘制旧图的重叠部分,其他透明
	destination-out:只绘制旧图,重叠部分和新图透明
	lighter:旧图与新图都绘制,重叠部分混色处理
	xor:旧图和新图重叠处做透明处理
	copy:只绘制新图形,不绘制旧图形
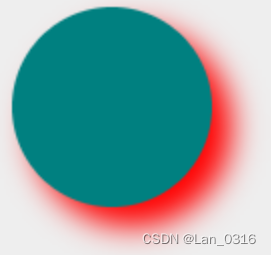
六、图形阴影
ctx.shadowColor = "red";//阴影颜色
ctx.shadowBlur = 10;//阴影模糊度
ctx.shadowOffsetX = 10;//阴影X轴距离
ctx.shadowOffsetY = 10;//阴影Y轴距离
示例:
<style>
	#can{
		background-color: #eee;
	}
</style>
<body>
	<canvas width="900" height="600" id="can"></canvas>
</body>
<script>
	var can = document.querySelector('#can')
	var ctx = can.getContext("2d");

	ctx.beginPath();
	ctx.arc(100,100,50,0,2*Math.PI,false);
	ctx.fillStyle="teal"

	ctx.shadowColor = "red";//阴影颜色
	ctx.shadowBlur = 15;//阴影模糊度
	ctx.shadowOffsetX = 10;//阴影X轴距离
	ctx.shadowOffsetY = 10;//阴影Y轴距离

	ctx.fill();
</script>
效果:
七、图形的绘制
- ctx.drawImage(imgage对象,x,y)
- ctx.drawImage(imgage对象,x,y,w,h)
w,h 以压缩方式设置图形的宽高 - ctx.drawImage(imgage对象,x,y,w,h,rx,ry,rw,rh)
x,y 图片上的坐标
w,h 要裁剪的宽高
rx,ry 画布上的坐标
rw,rh 要显示的图片的宽高
示例代码:
<style>
	#can{
		background-color: #eee;
	}
</style>
<body>
	<canvas width="300" height="300" id="can"></canvas>
</body>
<script>
	var can = document.querySelector('#can')
	var ctx = can.getContext("2d");

	ctx.beginPath();
	// 先把图片对象创建出来
	var image = new Image();
	image.src = '../img/6.jpg';

	image.onload = function(){
		ctx.drawImage(image,150,180,100,100,50,50,100,100);
	}
</script>
效果:
八、图片平铺
ctx.createPattern(图片对象,“平铺方式”);
平铺方式: repeat 完全平铺、 repeat-x/y 、 no-repeat;
示例代码:
<style>
	#can{
		background-color: #eee;
	}
</style>
<body>
	<canvas width="300" height="300" id="can"></canvas>
</body>
<script>
	var can = document.querySelector('#can')
	var ctx = can.getContext("2d");
	ctx.beginPath();
	// 先把图片对象创建出来
	var image = new Image();
	image.src = '../img/3.png';

	image.onload = function(){
		var pat = ctx.createPattern(image,"repeat-x");
		ctx.fillStyle = pat;
		ctx.fillRect(50,50,200,100);
	}
</script>
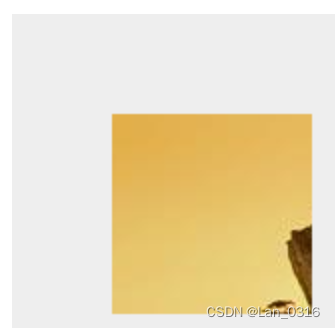
九、画布裁剪
ctx.drawImage(图片对象,x,y);//x,y图片开始裁剪位置坐标
示例代码:
<style>
	#can{
		background-color: #eee;
	}
</style>
</head>
<body>
	<canvas width="900" height="600" id="can"></canvas>
</body>
<script>
	var can = document.querySelector('#can')
	var ctx = can.getContext("2d");

	ctx.beginPath();
	ctx.rect(100,100,200,200);
	ctx.clip();
	// 先把图片对象创建出来
	var image = new Image();
	image.src = '../img/1.jpg';

	image.onload = function(){
		ctx.drawImage(image,0,0)
	}
</script>
十、画布变形
- scale(w,h) 画布缩放
w宽度上的缩放 h高度上的缩放 - rotate(度数) 画布旋转
1度就是 Math.PI/180
旋转的中心点事画布的左上角,正度数是顺时针旋转 - translate(x,y) 画布中心点偏移(原来的中心点:0 0)
x y 新的中心点坐标
十一、画布存档
- save() 保存当前的画布状态
- restore() 回退到上一次保存的状态
十二、清除画布
-
ctx.clearRect(x,y,w,h);
-
清除整个画布:
ctx.clearRect(0,0,标签.width,标签.height);


 5万+
5万+

 被折叠的 条评论
为什么被折叠?
被折叠的 条评论
为什么被折叠?
 到【灌水乐园】发言


