


摘要:在MATLAB2019b环境下训练深度学习目标检测模型。利用MATLABcoder和GPUcoder生成c++代码和CUDA代码,并部署在NVIDIA Jetson TX2开发板上运行。1.利用NVIDIA SDK manager对TX2进行刷机,配置CUDA、cuDNN环境,并安装各种支持包;2.在主机上配置MATLAB环境,包括C++编译器、CUDA、cuDNN、TensorRT和openCV等;3.利用主机MATLAB中codegen函数,在TX2中生成CUDA和c++代码以及可执行文件。
本文视频来源:Deploy YOLOv2 to an NVIDIA Jetson
代码连接:下载
目录
1.TX2刷机和环境配置
- 在NVIDIA Jetson上安装Jetpack:
利用Jetpack给NVIDIA Jetson刷机,安装操作系统、必要的深度学习库,包括TensorRT, cuDNN, CUDA Toolkit, OpenCV等。需要有Linux系统或Linux虚拟机的Windows系统的主机,如果选用虚拟机,分配足够的存储空间(30G+)。网上给TX2刷机的文章很多,主要分为两类:直接下载Jetpack进行刷机和使用SDK manager刷机助手。相比而言推荐后者,更加简便。
这里直接附上两个链接以供参考:
https://blog.csdn.net/u012254599/article/details/100009909
https://blog.csdn.net/weixin_39951217/article/details/101071917
后续会专门写一篇博客介绍我刷机过程中遇到的坑和解决方法。总结起来三个要点(其他博客未提及的要点):1.SDK manager装机全程无需网线将主机和TX2连接(而另一种直接下载Jetpack刷机的方式是需要网线和路由器将主机和TX2连接到同一个局域网的);2.进入主机Linux环境(我用的虚拟机)下打开终端输入
-s xrandr 1680x1050 //调节屏幕显示尺寸,如果太小SDK manager在启动时会提示报错3.不要Automatic setup,直接选Manual setup,然后一通recover模式操作复原系统。复原后先在板子上设置登录名称、密码,然后在主机中点下一步,开始刷机;4.刷机完成后,其他支持包的安装过程经常会中途失败,重新再来几遍,如果老报错(比如我在安装OpenCV时每次卡到95%后就崩溃)尝试在TX2中输入以下指令:
sudo apt update
sudo apt --fix-broken install
sudo aot upgrade
对TX2部分文件更新升级,修复破损文件。之后再尝试安装其他支持包。5.如果4中方法不好用,直接从头来过,从STEP1开始再来一遍,想想会很心累,但我OpenCV的安装失败问题就是这样解决的。
- 安装Simple DirectMedia Layer (SDL v1.2)库
刷机完成后,在TX2终端输入以下两行指令以安装SDL库
 $ sudo apt-get install libsdl1.2debian
$ sudo apt-get install libsdl1.2-dev- 设置TX2环境变量
输入
sudo gedit $HOME/.bashrc 打开$HOME/.bashrc文件,在文件最开始加入这两句话:
export PATH=/usr/local/cuda/bin:$PATH
export LD_LIBRARY_PATH=/usr/local/cuda/lib64:$LD_LIBRARY_PATH
点击保存后退出,命令行中会提示警告,没影响,忽视掉就行。
至此,TX2的刷机和环境配置工作就完成了。
2.主机MATLAB2019b支持包和安装环境配置
这部分内容顶部的代码连接中都有具体的讲解,在此不做赘述了。(文中不方便细讲,有问题可以留言私信)
3.主机MATLAB连接TX2并生成配套代码和可执行文件
用TX2自带的数据线将主机和TX2相连,MATLAB中输入指令:
ipaddress = '192.168.137.209'; % This is specific to your jetson, use ifconfig to find the ipaddress or set a static ip for the jetson
username = 'nvidia';
password = 'nvidia';
hwobj = jetson(ipaddress, username, password);
输入TX2的IP、用户名和密码,并用jetson函数在MATLAB上连接TX2。之后设置GPU环境:
gpuEnvObj = coder.gpuEnvConfig('jetson');
gpuEnvObj.BasicCodegen = 1;
gpuEnvObj.BasicCodeexec = 1;
gpuEnvObj.DeepLibTarget = 'cudnn'; % either tensorrt or cudnn
gpuEnvObj.DeepCodeexec = 1;
gpuEnvObj.DeepCodegen = 1;
gpuEnvObj.HardwareObject = hwobj;
results = coder.checkGpuInstall(gpuEnvObj);
如果返回的所有结果都是PASSED则环境没问题。再往后就是我自己做的一个例子了,其实就是把MATLAB中车辆检测的一个yolov2resNet50模型部署在TX2上:
首先在MATLAB中获取yolov2ResNet50VehicleExample.mat模型,该模型。输入以下指令以打开CodeGenForObjectDetectionUsingYOLOV2Example:
openExample('deeplearning_shared/CodeGenForObjectDetectionUsingYOLOV2Example')运行文件里面的这句话
%% Get Pretrained DAGNetwork
net = getYOLOv2();
以获得预训练过得yolov2模型。该模型用于车辆检测(预训练的效果并不好,在此只作为一个例子展示)。下载得到的模型:

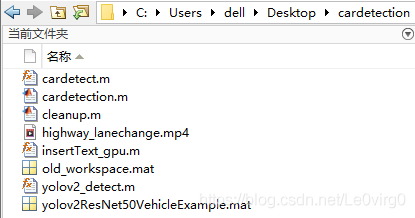
在桌面新建一个文件夹cardetection,将yolov2ResNet50VehicleExample.mat模型和highway_lanechange.mp4视频复制到文件夹下
之后我的cardetect.m主函数(也是用于后面生成GPU Code的函数),以及主函数中调用的yolov2_detect函数分别如下:
function cardetect() %#codegen

%   Copyright 2019 The MathWorks, Inc.

coder.gpu.kernelfun;
hwobj = jetson();
width = 640;
height = 480;%视频中的长宽分别为640*480,可以根据自己的视频分辨率修改
videoFileName = 'highway_lanechange.mp4';%视频名称也可以修改
vobj = VideoReader(hwobj,videoFileName,'Width',width,'Height',height);
dispObj = imageDisplay(hwobj);

while vobj.hasFrame
    input = vobj.readFrame;

    % run cardetection on the frame
    outImg =  yolov2_detect(input);

    % display the output
    image(dispObj,outImg);
end

end
function outImg = yolov2_detect(input)

%   Copyright 2018-2019 The MathWorks, Inc.

persistent yolov2Obj;

if isempty(yolov2Obj)
    yolov2Obj = coder.loadDeepLearningNetwork('yolov2ResNet50VehicleExample.mat');%这里加载的预训练过得yolov2ResNet50VehicleExample.mat,效果并不理想,可以加载别的模型或者自己用数据训练一遍
end

% pass in input
[bboxes,~,labels] = yolov2Obj.detect(input,'Threshold',0.5);

% convert categorical labels to cell array of charactor vectors for MATLAB
% execution
if coder.target('MATLAB')
    labels = cellstr(labels);
end

% Annotate detections in the image.
outImg = insertObjectAnnotation(input,'rectangle',bboxes,labels);
以上两个函数写好后,利用MATLAB GPU Coder将其转换成TX2上生成可执行的CUDA Code。先配置参数:
% To generate a CUDA executable that can be deployed  on to a NVIDIA
% target, create a GPU code configuration object for generating an executable.
cfg = coder.gpuConfig('exe');

% Use the <matlab:doc('coder.hardware') coder.hardware> function to create
% a configuration object for the Jetson platform and assign it to
% the |Hardware| property of the code configuration object |cfg|.
cfg.Hardware = coder.hardware('NVIDIA Jetson');

% Use the |BuildDir| property to specify the directory for performing remote
% build process on the target. If the specified build directory does not
% exist on the target then the software creates a directory with the
% given name. If no value is assigned to |cfg.Hardware.BuildDir|, the remote
% build process happens in the last specified build directory. If
% there is no stored build directory value, the build process takes place
% in the home directory.
cfg.Hardware.BuildDir = '~/remoteBuildDir';

% Set the |GenerateExampleMain| property to generate an example CUDA C++ main
% function and compile it. This example does not require modifications to
% the generated main files.
cfg.GenerateExampleMain = 'GenerateCodeAndCompile';
之后利用codegen生成代码:
%%
% To generate CUDA code, use the <matlab:doc('codegen') codegen> function
% and pass the GPU code configuration along with
% |fog_rectification| entry-point function. After the  code generation takes place on
% the host, the generated files are copied over and built on the target.
codegen('-config ',cfg,'cardetect','-report');
这需要一段时间。运行成功后会得到

这两个文件。同时,在NVIDIA TX2中也生成了对应文件,在Home\remoteBuildDir路径下可以查看到。之后继续在MATLAB命令行运行:
%% Copy Video File on the Target
% Move the video file to the target.
hwobj.putFile('highway_lanechange.mp4', hwobj.workspaceDir);
将待检测视频也放入TX2中生成代码的同路径下。
最后一步:MATLAB命令行运行
pid = runApplication(hwobj,'cardetection');这一句是运行TX2中的cardetection.elf可执行文件,运行后稍等一会儿,在TX2中可以看到如下的运行结果:

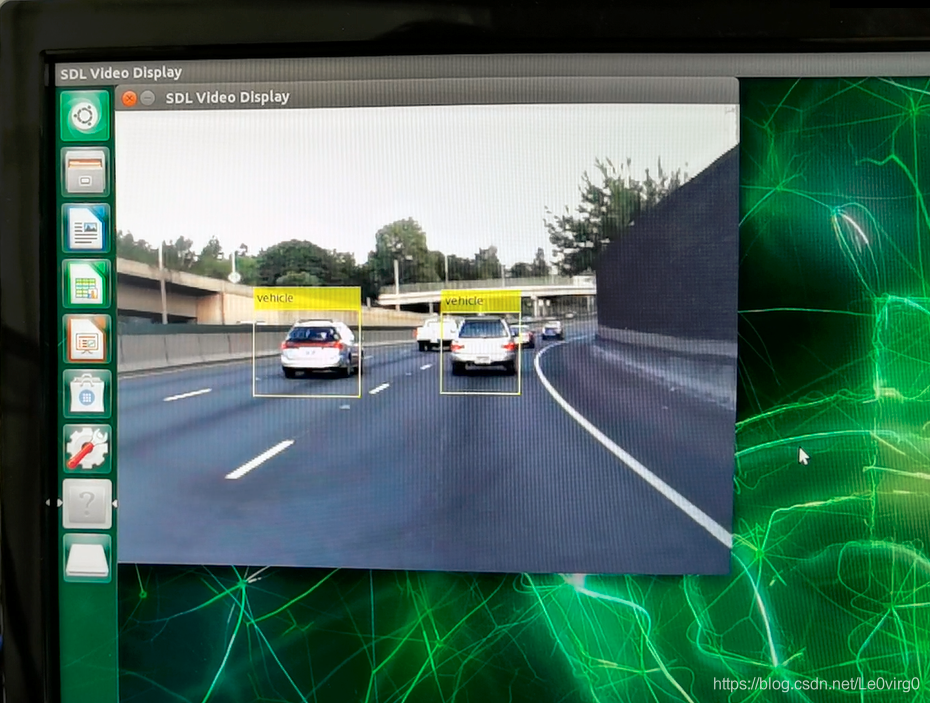
挑了效果相对好一点的两帧展示了出来,至此完成了MATLAB下训练的深度学习目标检测模型在NVIDIA Jetson TX2中的部署。花了整整一周的时间完成刷机,CUDA代码生成、嵌入式部署以及验证。中间踩了一些坑,同时在TX2安装USB摄像头实现实时检测的思路还没调通(TX2显示相机分辨率不匹配,尚未解决,希望大神点播)。
总体写的比较仓促,很多细节还未完善,后续继续补充,如果中间碰到了问题或者是我没写清楚的地方欢迎私信留言一同探讨!


 1414
1414


 被折叠的 条评论
为什么被折叠?
被折叠的 条评论
为什么被折叠?
 到【灌水乐园】发言


