


1. 环境(这个地方根据业务和硬件资源而定)
- Windows10上安装VMWare WorkStation Pro15
- VMWare WorkStation Pro15安装CentOS8
- CentOS8通过KVM创建一个嵌套虚拟化的CentOS8
2. 安装虚拟化的CentOS8
qemu-img create -f qcow2 /vm/zabbixserver-disk0.qcow2 30G

virt-install \
--name=zabbixserver \
--vcpus=2 \
--ram=1024 \
--cdrom=/iso/CentOS-Stream-8-x86_64-latest-dvd1.iso \
--disk path=/vm/zabbixserver-disk0.qcow2,size=30,format=qcow2 \
--network network=default \
--graphics vnc,listen=0.0.0.0 \
--os-type=linux \
--os-variant=rhl8.0
3. 配置虚拟机(语言:英语)

4. 关闭防火墙和Selinux、修改主机名
#关闭防火墙和 selinux 并重启
sed -i 's/SELINUX=enforcing/SELINUX=disabled/' /etc/selinux/config
systemctl disable --now firewalld

#查看firewall服务状态
systemctl status firewalld

#修改主机名,方面后面操作
hostnamectl set-hostname zabbix_server
5. 部署底层环境LAMP
注意: zabbix 6.0 需要 安装10.6.5以上的Mariadb,而系统自带的为10.5,所以需要安装额外源
cat <<EOF > /etc/yum.repos.d/mariadb.repo
# MariaDB 10.6 CentOS repository list - created 2022-01-16 15:10 UTC
# https://mariadb.org/download/
[mariadb]
name = MariaDB
baseurl = https://mirrors.cloud.tencent.com/mariadb/yum/10.6/centos8-amd64
module_hotfixes=1
gpgkey=https://mirrors.cloud.tencent.com/mariadb/yum/RPM-GPG-KEY-MariaDB
gpgcheck=1
EOF
开始安装 底层环境
dnf install mariadb mariadb-server httpd httpd-tools php php-cli php-json php-gd php-mbstring php-pdo php-xml php-mysqlnd php-pecl-zip wget -y6. 添加zabbix源并修改为清华源
rpm -Uvh https://repo.zabbix.com/zabbix/6.0/rhel/8/x86_64/zabbix-release-6.0-1.el8.noarch.rpm

[zabbix]
name=Zabbix Official Repository - $basearch
baseurl=https://mirrors.tuna.tsinghua.edu.cn/zabbix/zabbix/6.0/rhel/8/$basearch/
enabled=1
gpgcheck=1
gpgkey=file:///etc/pki/rpm-gpg/RPM-GPG-KEY-ZABBIX-A14FE591

[zabbix-non-supported]
name=Zabbix Official Repository non-supported - $basearch
baseurl=https://mirrors.tuna.tsinghua.edu.cn/zabbix/zabbix/6.0/rhel/8/$basearch/
enabled=1
gpgkey=file:///etc/pki/rpm-gpg/RPM-GPG-KEY-ZABBIX
gpgcheck=1
7. 安装zabbix
dnf install zabbix-server-mysql zabbix-web-mysql zabbix-apache-conf zabbix-sql-scripts zabbix-selinux-policy zabbix-agent2 -y
上面安装zabbix的时候可能会告知没有fping,这时候需要我们安装一下epel再执行安装语句就可以了!

yum install gcc -y
wget -O /etc/yum.repos.d/CentOS-Base.repo https://mirrors.aliyun.com/repo/Centos-vault-8.5.2111.repo

yum clean all
yum makecache

yum install epel-release
8. 配置MySQL
systemctl start mariadb && systemctl enable mariadb

设置 数据库名: zabbix
用户名:zabbix
密码: 123456

让用户zabbix,能够通过本地访问数据库zabbix,使用123456作为密码

MariaDB [(none)]> create database zabbix character set utf8 collate utf8_bin;
Query OK, 1 row affected (0.001 sec)

MariaDB [(none)]> grant all on zabbix.* to zabbix@'localhost' identified by '123456';
Query OK, 0 rows affected (0.001 sec)

MariaDB [(none)]> flush privileges;
Query OK, 0 rows affected (0.001 sec)

MariaDB [(none)]> quit
Bye
9. 导入初始架构和数据
zcat /usr/share/doc/zabbix-sql-scripts/mysql/server.sql.gz | mysql -uzabbix -p zabbix

输入密码:123456
10. 为zabbix-server配置数据库
vim /etc/zabbix/zabbix_server.conf
DBPassword=123456

grep DBPassword /etc/zabbix/zabbix_server.conf |grep -v ^#
DBPassword=123456
11. 为Zabbix前端配置PHP文件里的时区
#为Zabbix前端配置PHP文件里的时区
vim /etc/php-fpm.d/zabbix.conf

#增加内容
php_value[date.timezone] = Asia/Shanghai
12. 启动zabbix-server和zabbix-agent2进程并开机自启动
systemctl restart zabbix-server zabbix-agent2 httpd php-fpm
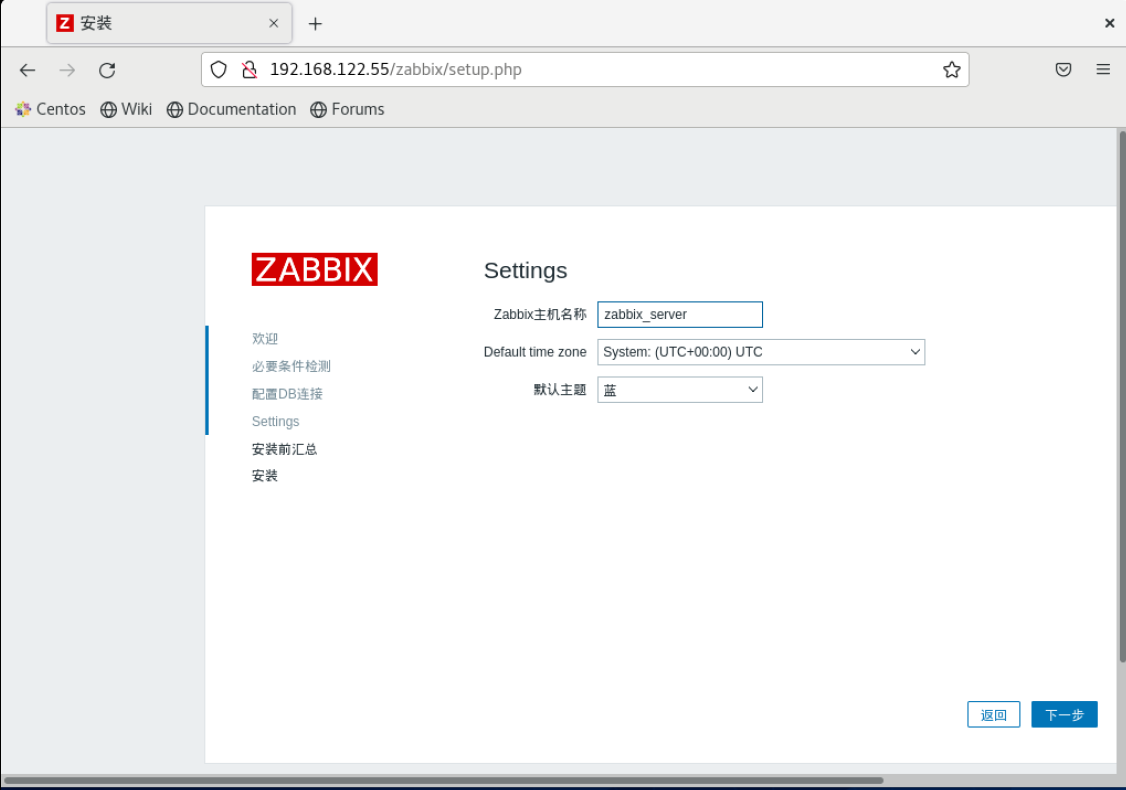
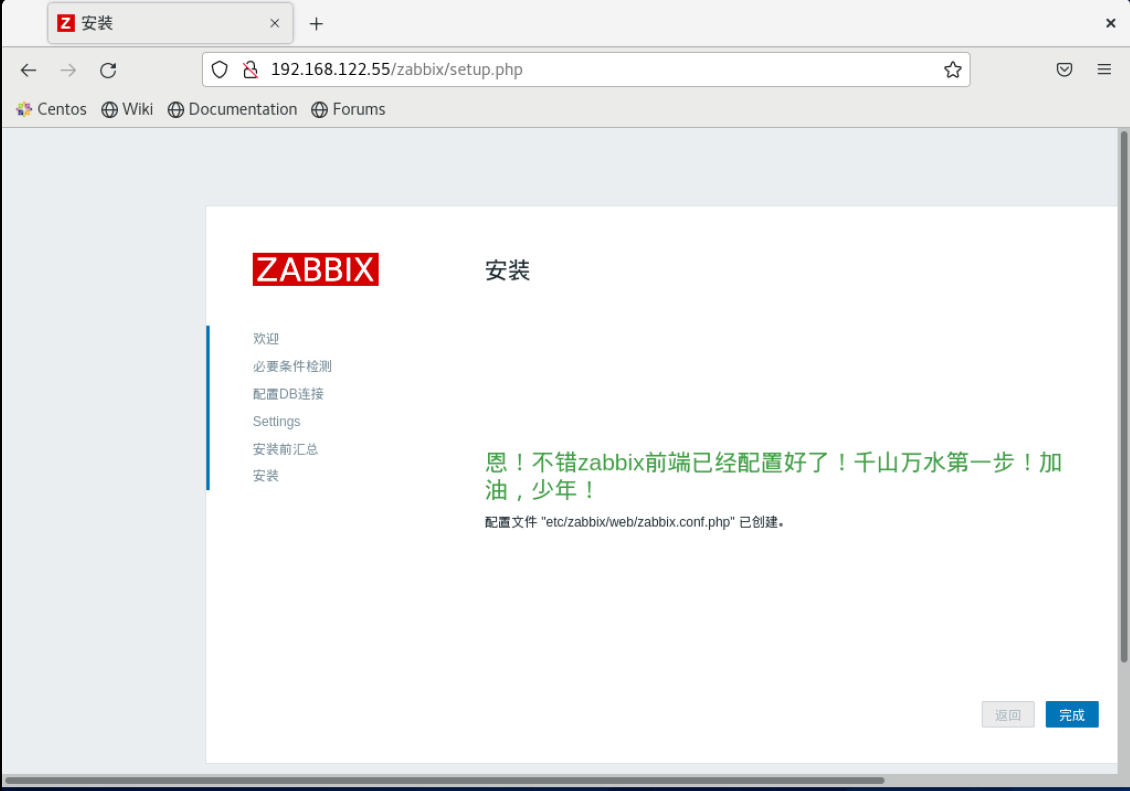
systemctl enable zabbix-server zabbix-agent2 httpd php-fpm13. 使用ip/zabbix访问前端页面进行配置


 613
613


 被折叠的 条评论
为什么被折叠?
被折叠的 条评论
为什么被折叠?
 到【灌水乐园】发言


