three.js入门基础三维模型案例,VUE使用超详细解析

简易三维模型

本案例使用开发环境:node.js开发运行环境,npm包管理,vue前端框架,webpack打包工具

一、先将以上项目所需环境安装

二、新建一个vue项目,或者在已有项目使用

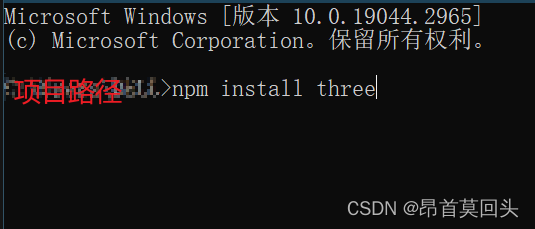
三、在项目内打开命令行安装three.js,输入:npm install three

须知:

        1,如果想要改变整个画布的大小需要使相机和渲染器的 尺寸保持一致

然后通过在CSS样式中去更改尺寸

const camera = new THREE.PerspectiveCamera(75, canvas.clientWidth / canvas.clientHeight, 0.1, 1000)

renderer.setSize(canvas.clientWidth, canvas.clientHeight)

        2,canvas的display默认为 inline ,然而行内元素的末尾会有空格

所以要设置它的displayblock

#c {
    width: 900px;
    height: 600px;
    display: block;
}

 HTML部分

<template>
    <canvas id="c"></canvas>
</template>

JS部分 

<script type="module">
// 把type="module"放到script标签中很重要。这可以让我们使用import关键字加载three.js
import * as THREE from 'three'
export default {
    name: 'IndexView',
    data() {
        return {

        }
    },
    mounted() {
        this.huabu()
    },
    methods: {
        // renderer:渲染器,scene:场景,camera:相机
        // Material:材质,Geometry:几何体,Mesh:网格
        // Light:光源,Group:群组,Object3D:三维物体,Texture:纹理
        huabu() {
            // 获取画布:canvas
            // Three.js需要使用这个canvas标签来绘制,所以我们要先获取它然后传给three.js
            const canvas = document.querySelector('#c');
            // 创建场景:Scene,three.js绘制的东西都需要加入到scene中
            const scene = new THREE.Scene()
            {
                // 设置光源:light(光的颜色、亮度),three.js中有很多种类型的灯光
                const light = new THREE.DirectionalLight(0xFFFFFF, 1);
                // 调整光的位置,默认是(0,0,0)
                light.position.set(-1, 2, 4);
                // 添加光源light到场景scene
                scene.add(light);
            }
            // 添加相机:camera
            // 透视摄像机:PerspectiveCamera,作为其他对象的子对象,会继承它父对象的位置和朝向
            // 参数解释(视野角度,长宽比,近截面,远截面)
            // 近平面和远平面的高度由视野范围决定,宽度由视野范围和宽高比决定。
            // 视椎体内部的物体将被绘制,视椎体外的东西将不会被绘制
            const camera = new THREE.PerspectiveCamera(75, window.innerWidth / window.innerHeight, 0.1, 1000)
            // 摄像机默认指向Z轴负方向,上方向朝向Y轴正方向。我们将会把立方体放置在坐标原点,所以我们需要往后移一下摄像机才能显示出物体
            camera.position.z = 5
            // 添加渲染器
            const renderer = new THREE.WebGLRenderer({ antialias: true, canvas })
            // 设置渲染器尺寸
            renderer.setSize(window.innerWidth, window.innerHeight)
            // 添加几何体:Geometry
            // Three.js内置了许多基本几何体 ,也可以创建自定义几何体或从文件中加载几何体
            // 组成三维物体的顶点信息(宽、高、深度)
            const geometry = new THREE.BoxGeometry(1, 1, 1);
            // 函数中带三个参数(几何体、颜色、x轴偏移量)
            function makeInstance(geometry, color, x) {
                // 添加材质:Material
                // 材质可以绘制几何体的表面属性,比如如何绘制物体,光滑还是平整,什么颜色,什么贴图等等
                // 改成会受灯光影响的材质,不然很难看出是三维的:MeshBasicMaterial
                const material = new THREE.MeshPhongMaterial({ color });
                // 添加网格:Mesh,(参数:几何体geometry,材质material)
                // 用一种特定的材质来绘制的一个特定的几何体同时材质和几何体可以被多个网格对象使用只需改变网格轴位置即可
                const cube = new THREE.Mesh(geometry, material);
                // 将网格cube添加到场景中
                scene.add(cube);
                // 将x赋值给x轴偏移量
                cube.position.x = x;
                // 修改各参数后返回最终的cube
                return cube;
            }
            // 定义常量cubes,每个makeInstance都是一个网格
            // 同时材质和几何体可以被多个网格对象使用
            // 生成的网格存在一个数组中,三个网格会调用三次函数makeInstance
            const cubes = [
                makeInstance(geometry, 0x8844aa, -2),
                makeInstance(geometry, 0x44aa88, 0),
                makeInstance(geometry, 0xaa8844, 2),
            ];
            // 渲染循环函数
            function render(time) {
                time *= 0.001;  // 将默认毫秒转换为秒
                // 给每个网格设置循环,并且每个立方体设置了稍微不同的旋转角度
                cubes.forEach((cube, ndx) => {
                    const speed = 1 + ndx * .1;
                    const rot = time * speed;
                    cube.rotation.x = rot;
                    cube.rotation.y = rot;
                });
                // 将场景和摄像机传递给渲染器来渲染出整个场景
                renderer.render(scene, camera);
                // requestAnimationFrame函数会告诉浏览器你需要显示动画
                // 传入render作为回调函数
                requestAnimationFrame(render);
            }
            // 回调函数之外在主进程中再调用一次requestAnimationFrame来开始整个渲染循环
            requestAnimationFrame(render);
        }
    }
}
</script>

  • 1
    点赞
  • 1
    收藏
    觉得还不错? 一键收藏
  • 打赏
    打赏
  • 1
    评论
Vue2中使用Three.js生成一个大型模型需要以下步骤: 1. 安装Three.js 可以通过npm安装Three.js ``` npm install three ``` 2. 在Vue组件中引入Three.jsVue组件中引入Three.js ```javascript import * as THREE from 'three' ``` 3. 创建一个Three.js场景 ```javascript mounted() { // 创建场景 this.scene = new THREE.Scene(); // 创建相机 this.camera = new THREE.PerspectiveCamera(75, window.innerWidth / window.innerHeight, 0.1, 1000); // 创建渲染器 this.renderer = new THREE.WebGLRenderer(); this.renderer.setSize(window.innerWidth, window.innerHeight); document.body.appendChild(this.renderer.domElement); } ``` 4. 创建一个大型模型 ```javascript mounted() { // 创建场景 this.scene = new THREE.Scene(); // 创建相机 this.camera = new THREE.PerspectiveCamera(75, window.innerWidth / window.innerHeight, 0.1, 1000); // 创建渲染器 this.renderer = new THREE.WebGLRenderer(); this.renderer.setSize(window.innerWidth, window.innerHeight); document.body.appendChild(this.renderer.domElement); // 创建几何体 const geometry = new THREE.BoxGeometry(1, 1, 1); // 创建材质 const material = new THREE.MeshBasicMaterial({ color: 0x00ff00 }); // 创建网格 this.cube = new THREE.Mesh(geometry, material); // 将网格添加到场景中 this.scene.add(this.cube); // 设置相机位置 this.camera.position.z = 5; } ``` 5. 渲染场景 ```javascript mounted() { // 创建场景 this.scene = new THREE.Scene(); // 创建相机 this.camera = new THREE.PerspectiveCamera(75, window.innerWidth / window.innerHeight, 0.1, 1000); // 创建渲染器 this.renderer = new THREE.WebGLRenderer(); this.renderer.setSize(window.innerWidth, window.innerHeight); document.body.appendChild(this.renderer.domElement); // 创建几何体 const geometry = new THREE.BoxGeometry(1, 1, 1); // 创建材质 const material = new THREE.MeshBasicMaterial({ color: 0x00ff00 }); // 创建网格 this.cube = new THREE.Mesh(geometry, material); // 将网格添加到场景中 this.scene.add(this.cube); // 设置相机位置 this.camera.position.z = 5; // 渲染场景 const animate = () => { requestAnimationFrame(animate); this.cube.rotation.x += 0.01; this.cube.rotation.y += 0.01; this.renderer.render(this.scene, this.camera); }; animate(); } ``` 以上就是在Vue2中使用Three.js生成一个大型模型的步骤。具体的实现可以根据需求进行调整。
评论 1
添加红包

请填写红包祝福语或标题

红包个数最小为10个

红包金额最低5元

当前余额3.43前往充值 >
需支付:10.00
成就一亿技术人!
领取后你会自动成为博主和红包主的粉丝 规则
hope_wisdom
发出的红包

打赏作者

昂首莫回头

你的鼓励将是我创作的最大动力

¥1 ¥2 ¥4 ¥6 ¥10 ¥20
扫码支付:¥1
获取中
扫码支付

您的余额不足,请更换扫码支付或充值

打赏作者

实付
使用余额支付
点击重新获取
扫码支付
钱包余额 0

抵扣说明:

1.余额是钱包充值的虚拟货币,按照1:1的比例进行支付金额的抵扣。
2.余额无法直接购买下载,可以购买VIP、付费专栏及课程。

余额充值