


一、maven的安装与配置
1、从官网下载Maven https://maven.apache.org/download.cgi直接解压到D盘,有时候解压到C盘会报错;
解压至D:\Program Files (x86)\eclipse-jee-neon-2-win32-x86_64\apache-maven-3.3.9-bin\apache-maven-3.3.9
2、添加属性变量MAVEN_HOME,属性值为Maven的安装目录D:\Program Files (x86)\eclipse-jee-neon-2-win32-x86_64\apache-maven-3.3.9-bin\apache-maven-3.3.9
在将%MAVEN_HOME%\bin;用户变量Path后
3、打开命令行输入mvn -version
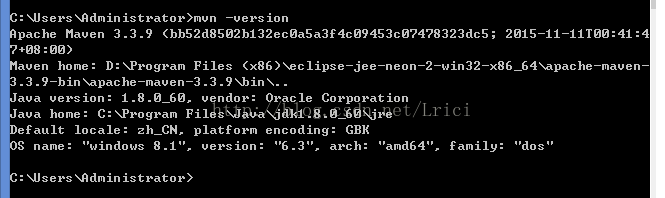
安装成功
二、在Eclipse中配置maven
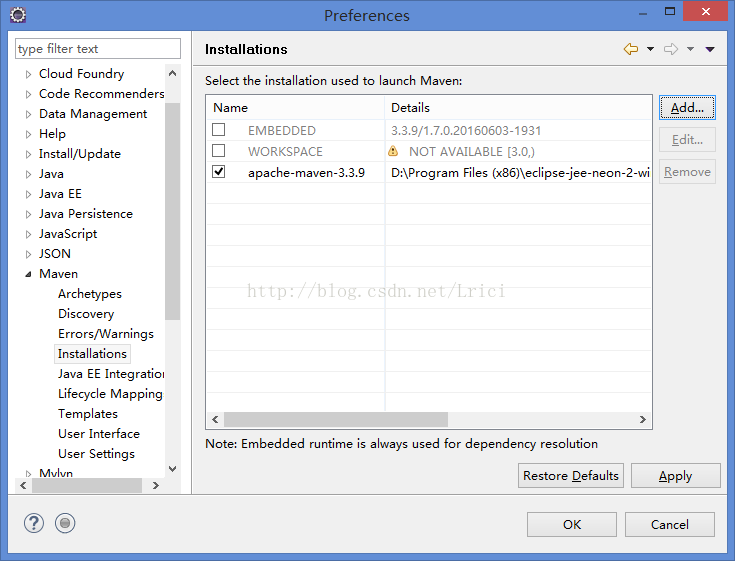
1、windows->preferences->maven->Installations 添加maven的安装目录
2、windows->preferences->maven->User Setting 添加conf目录下的settings.xml文件

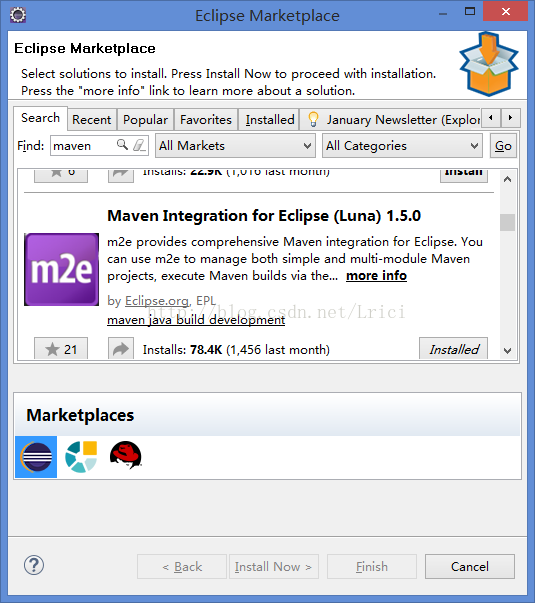
3、点击help->Eclipse Marketplace 在find处查找maven, 安装 Maven Integrationg for Eclipse(luna)1.5.0
三、新建Maven项目
1、 File->New->other->maven project 点击Next 选择maven-archetype-webapp选择next
填写Group Id和Artifact Id点击Finish
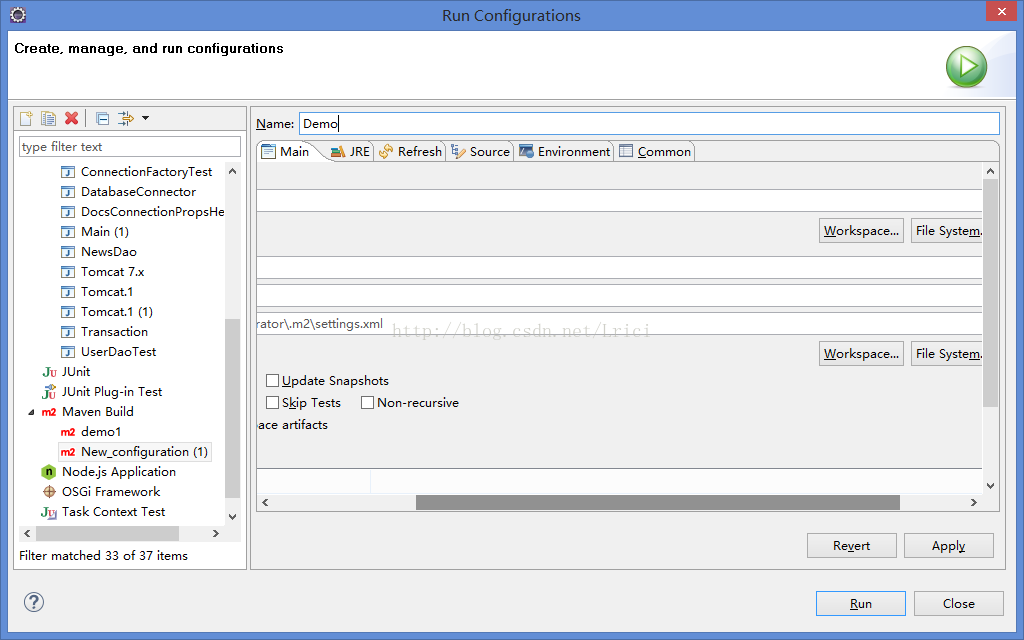
2、构建maven项目
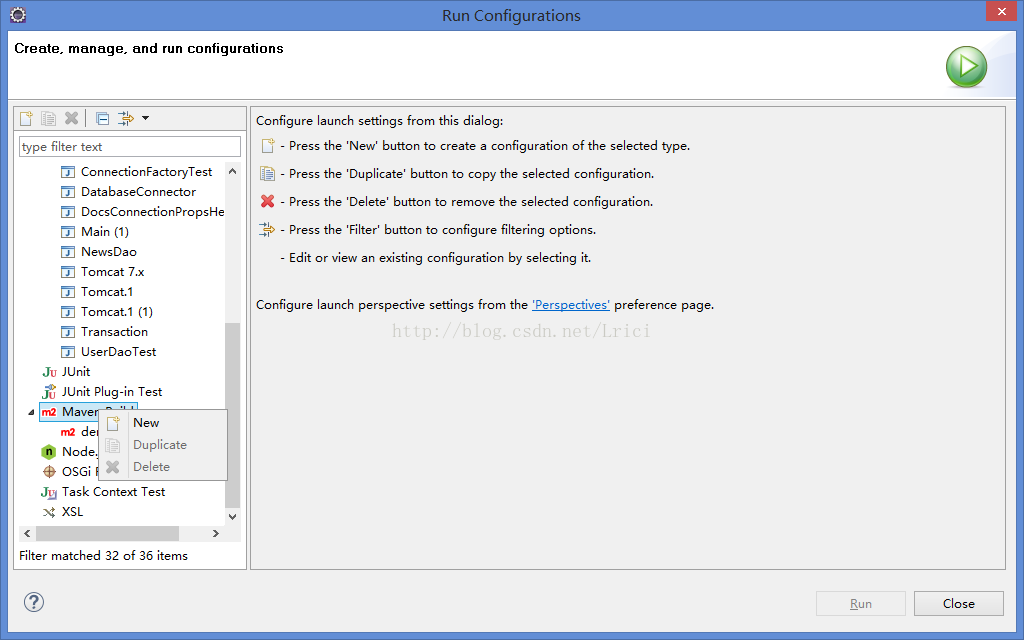
Run->Run configurations->Maven鼠标右键new 在Name位置填写Demo, Base directory处点击workspace选择项目的工作目录,点击apply->run
错误解决:
src/main/webapp/WEB-INF下的index.jsp文件报错The superclass "javax.servlet.http.HttpServlet" was not found on the Java Build Path
在工程目录鼠标右键选择 build path->configure build path->Java Build Path->Libraries->Add library选择Server Runtime
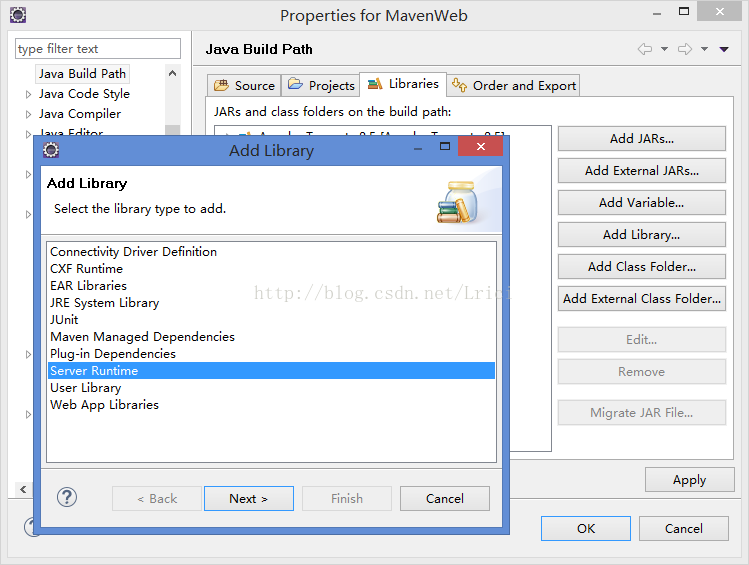
在项目的工作目录右键 选择Maven->Update Project 即可解决错误
四、运行项目Run->Run As->Run on Server
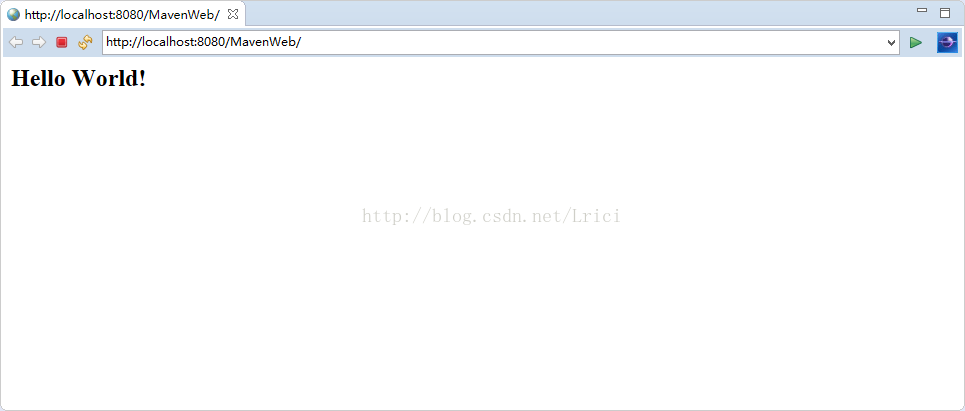
运行成功


 346
346

 被折叠的 条评论
为什么被折叠?
被折叠的 条评论
为什么被折叠?
 到【灌水乐园】发言


