


 本文详细介绍了如何在Linux服务器上创建新用户,配置git,安装和定制zsh及oh-my-zsh,安装tmux和oh-my-tmux,以及优化vim。此外,还提供了常用命令和解决`serverversionistoooldforclient`的问题。
文章目录
新用户创建
创建用户需要首先登陆一个有 root 权限的账户,然后执行下面的命令。
# 将下方 xxx 替换为新用户名
# e.g. export USERNAME=wlt
export USERNAME=xxx

# 新增用户,需要根据提示输入密码等信息
sudo adduser ${USERNAME}

# (可选)修改家目录位置,其中 /mnt/data1 可以替换为服务器上的其他位置
export USERHOME=/mnt/data1/${USERNAME}
sudo usermod -d ${USERHOME} -m ${USERNAME}

# (可选)将用户加入组
# sudo usermod -aG docker ${USERNAME}
sudo usermod -aG ${GROUPNAME} ${USERNAME}

# 进入新用户,需要输入密码
su ${USERNAME}
cd
执行完 su 命令以后就进入新用户了。注意我们其实是通过 root 账户进入新用户的,所以如果在 su 命令之后执行 exit,不会直接断开远程连接,而是会返回 root 账户。这时再执行 exit 才会断开远程连接。下次再连接服务器时,不需要先登入 root 账户再使用 su 命令切换用户,可以直接等入新用户。
git 初始化
在执行 git init 初始化代码仓库之前,需要设置好用户名和邮箱。
# 将下方 xxx 替换为 git 中的用户名,和刚刚创建的系统用户名不必保持一致
# e.g. git config --global user.name "LutingWang"
git config --global user.name "xxx"

# 将下方 example@domain.com 替换为邮箱, github 会使用邮箱来匹配用户
# e.g. git config --global user.email "2457348692@qq.com"
git config --global user.email "example@domain.com"

git config --global pull.rebase true

git config --global core.editor "vim"

# 对于 MacOS ,使用下方注释的命令
# git config --global credential.helper osxkeychain
git config --global credential.helper store
上述命令会在新用户的家目录下创建一个 .gitconfig 文件,内容就是 git 用户的用户名和邮箱。
[user]
	name = LutingWang
	email = 2457348692@qq.com
[pull]
	rebase = true
[core]
    editor = vim
[credential]
    helper = store
为了和 github 通信,我们有时需要生成密钥。参考使用 SSH 连接到 GitHub,我们使用下面的命令生成密钥。
# e.g. ssh-keygen -t ed25519 -C "2457348692@qq.com"
ssh-keygen -t ed25519 -C "example@domain.com"
根据提示依次输入密钥地址和密码。默认情况下,密钥地址在家目录的 .ssh 文件夹下,密码为空。
Generating public/private ed25519 key pair.
Enter file in which to save the key (/mnt/data1/wlt/.ssh/id_ed25519):
Enter passphrase (empty for no passphrase):
Enter same passphrase again:
Your identification has been saved in /mnt/data1/wlt/.ssh/id_ed25519.
Your public key has been saved in /mnt/data1/wlt/.ssh/id_ed25519.pub.
可以看到,公钥 id_ed25519.pub 和私钥 id_ed25519 都放在了 .ssh 目录下。私钥是用做身份验证的,不能随意泄露。我们需要参考使用 SSH 连接到 GitHub,把公钥注册到 GitHub 上,然后就可以使用 ssh 连接 GitHub 了,对应的远程仓库格式为 git@github.com:USERNAME/REPOSITORY.git。
zsh / oh-my-zsh
zsh 在大多数类 UNIX 系统中都预装了。如果没有安装,可以运行下面的命令安装
sudo apt install zsh
切换默认 shell
在配置 oh-my-zsh 前,我们需要将 zsh 设置为默认 shell。
chsh -s /bin/zsh
修改会在下次登陆时生效。正常情况下,登陆后会进入 zsh 的配置界面
This is the Z Shell configuration function for new users,
zsh-newuser-install.
You are seeing this message because you have no zsh startup files
(the files .zshenv, .zprofile, .zshrc, .zlogin in the directory
~).  This function can help you with a few settings that should
make your use of the shell easier.

You can:

(q)  Quit and do nothing.  The function will be run again next time.

(0)  Exit, creating the file ~/.zshrc containing just a comment.
     That will prevent this function being run again.

(1)  Continue to the main menu.

(2)  Populate your ~/.zshrc with the configuration recommended
     by the system administrator and exit (you will need to edit
     the file by hand, if so desired).

--- Type one of the keys in parentheses ---
皇家翻译:我们会看到这条信息是因为我们的家目录下没有 zsh 启动文件。我们现在有以下几个选项
- 输入
q会退出当前的引导程序,下次登陆时还会看到上述提示信息。 - 输入
0会退出当前的引导程序,同时创建一个空的~/.zshrc,以后不会再看到上述提示信息。 - 输入
1会转到主菜单,里面有更多设置选项。 - 输入
2会退出当前的引导程序,创建一个推荐的~/.zshrc,以后不会再看到上述提示信息。
我们选择 2 就可以直接进入 zsh 了。
安装 oh-my-zsh
大家可以根据自己的网络情况选择 github 或 gitee 的安装脚本,不过二者都需要克隆 github 仓库。
# refer to https://github.com/ohmyzsh/ohmyzsh
sh -c "$(wget -O- https://raw.githubusercontent.com/ohmyzsh/ohmyzsh/master/tools/install.sh)"

# 无法连接 githubusercontent 的同学可以尝试 gitee 镜像,不过最终还是需要克隆 github 仓库
sh -c "$(wget -O- https://gitee.com/mirrors/oh-my-zsh/raw/master/tools/install.sh)"
配置 oh-my-zsh
oh-my-zsh 使得配置 zsh 变得十分轻松,只需要修改 ~/.zshrc 即可。例如我们可以修改 ZSH_THEME 变量,从而使用 agnoster 主题。
# ZSH_THEME="robbyrussell"
ZSH_THEME="agnoster"
需要注意,使用 agnoster 主题可能会导致乱码,这是因为终端没有安装 Powerline 字体导致的,与服务器配置无关。终端安装字体的方法可以参考 Powerline 字体安装 for Windows / Mac / Ubuntu。
我们还可以将 ~/.bashrc 中的配置迁移到 ~/.zshrc 中,例如取消 LANG 变量定义的注释
export LANG="en_US.UTF-8"
或者定义环境变量
export PIPENV_PYPI_MIRROR=https://pypi.tuna.tsinghua.edu.cn/simple
alias pip=pip3
alias python=python3
执行 source ~/.zshrc 可以使上述配置生效。
安装插件
oh-my-zsh 的优势之一就是可以方便地安装插件。这里我们安装一个基于历史命令进行提示的插件 zsh-autosuggestions,首先将插件克隆到 ${ZSH_CUSTOM}/plugins 路径下。
git clone git@github.com:zsh-users/zsh-autosuggestions ${ZSH_CUSTOM}/plugins/zsh-autosuggestions
git clone git@github.com:zsh-users/zsh-syntax-highlighting ${ZSH_CUSTOM}/plugins/zsh-syntax-highlighting
然后我们需要在 ~/.zshrc 中注册插件,找到 plugins 变量,将其替换为如下。
# plugins=(git)
plugins=(git zsh-autosuggestions zsh-syntax-highlighting)
同上,要使插件生效,需要手动执行 source ~/.zshrc。
tmux / oh-my-tmux
oh-my-tmux 依赖于 tmux>=2.4。tmux 版本可以通过 tmux -V 命令查看。如果 tmux 版本过低,需要先进行升级,参考
https://blog.csdn.net/LutingWang/article/details/146121322
安装 oh-my-tmux
cd
git clone git@github.com:gpakosz/.tmux.git
ln -s -f .tmux/.tmux.conf
cp .tmux/.tmux.conf.local .
配置 oh-my-tmux
我们可以修改 ~/.tmux.conf.local 来自定义 oh-my-tmux。例如修改状态条的分割线样式
。
# status left/right sections separators
#tmux_conf_theme_left_separator_main=""
#tmux_conf_theme_left_separator_sub="|"
#tmux_conf_theme_right_separator_main=""
#tmux_conf_theme_right_separator_sub="|"
tmux_conf_theme_left_separator_main='\uE0B0'  # /!\ you don't need to install Powerline
tmux_conf_theme_left_separator_sub='\uE0B1'   #   you only need fonts patched with
tmux_conf_theme_right_separator_main='\uE0B2' #   Powerline symbols or the standalone
tmux_conf_theme_right_separator_sub='\uE0B3'  #   PowerlineSymbols.otf font, see README.md
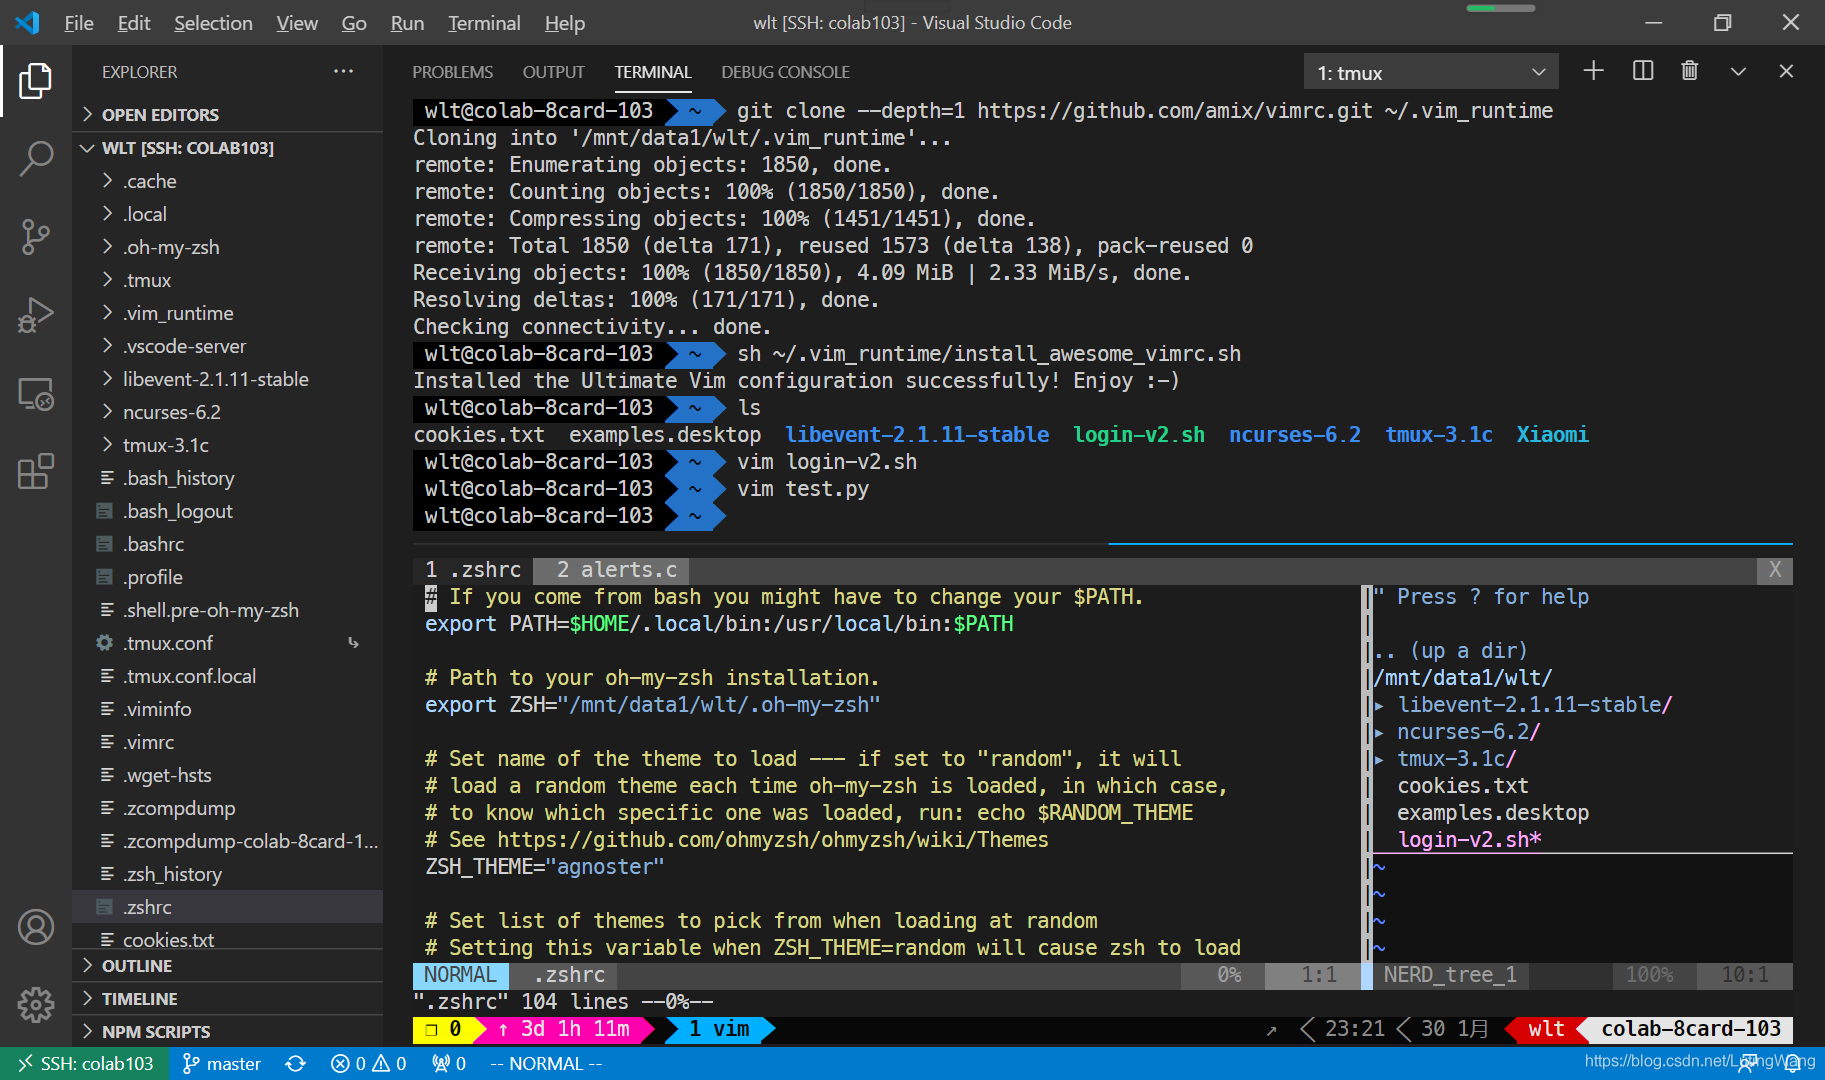
vim / awesome-vimrc
awesome-vimrc 可以使 vim 变得更加强大,安装方法非常简单。
git clone --depth=1 git@github.com:amix/vimrc.git ~/.vim_runtime
sh ~/.vim_runtime/install_awesome_vimrc.sh
效果图

常用命令
$ fortune | lolcat -f | boxes -d parchment
 ___________________________
/\                          \
\_| I represent a sardine!! |
  |                         |
  |   ______________________|_
   \_/________________________/
$ figlet -f lean Todd

_/_/_/_/_/                _/        _/
   _/      _/_/      _/_/_/    _/_/_/
  _/    _/    _/  _/    _/  _/    _/
 _/    _/    _/  _/    _/  _/    _/
_/      _/_/      _/_/_/    _/_/_/


 1198
1198

 被折叠的 条评论
为什么被折叠?
被折叠的 条评论
为什么被折叠?
 到【灌水乐园】发言


