


文章目录
一、Zabbix概述
1、Zabbix简介
Zabbix是基于WEB界面,提供分布式系统监视及网络监视功能的企业级开源解决方案。监视各种网络参数,保证服务器系统安全运行,并提供灵活的通知机制,让系统管理员快速定位并解决问题。
2、Zabbix功能及特点
数据采集
灵活的阈值定义
高度可配置化的告警
实时图形
web监控功能
可视化选项繁多
配置简单
3、Zabbix架构

二、Zabbix安装部署
| 主机 | IP地址 |
|---|---|
| server | 192.168.88.10 |
| client | 192.168.88.20 |
1、安装Nginx(192.168.88.10)
#修改主机名,关闭防火墙及系统安全机制
[root@localhost ~]# hostnamectl set-hostname server
[root@localhost ~]# su -
上一次登录:五 10月  8 15:07:22 CST 2021从 192.168.88.1pts/2 上
[root@server ~]# systemctl stop firewalld.service
[root@server ~]# systemctl disable firewalld.service
Removed symlink /etc/systemd/system/multi-user.target.wants/firewalld.service.
Removed symlink /etc/systemd/system/dbus-org.fedoraproject.FirewallD1.service.
[root@server ~]# setenforce 0

#配置nginx源,用于下载nginx
[root@server ~]# vim /etc/yum.repos.d/nginx.repo
[root@server ~]# cat /etc/yum.repos.d/nginx.repo
[nginx]
name=nginx repo
baseurl=http://nginx.org/packages/centos/7/$basearch/
gpgcheck=0
enabled=1
#清除元数据缓存
yum clean all
#加载元数据列表
yum list
#安装nginx服务,开启服务,开机自启,查看端口占用
yum -y install nginx
systemctl start nginx
systemctl enable nginx
netstat -natp | grep nginx
2、安装mariadb
#安装mariadb,开启服务,开机自启,查看端口占用(与mysql相同)
yum -y install mariadb*
systemctl start mariadb.service
systemctl enable mariadb.service
netstat -natp | grep 3306
#mysql安全配置向导
mysql_secure_installation
回车
y
123456
123456
n
n
n
y
3、安装php
#安装epel扩展源
yum -y install epel-release.noarch
#创建yum仓库源
rpm -Uvh https://mirror.webtatic.com/yum/el7/webtatic-release.rpm
#安装php,语言开发包,处理动态请求,支持图像化处理,处理多文本字符串,支持php语言的驱动
yum -y install php72w php72w-devel php72w-fpm php72w-gd php72w-mbstring php72w-mysql
#查看php版本
php -v
#修改php-fpm配置文件
vim /etc/php-fpm.d/www.conf
#把用户和组改为nginx(8和10行)
user = nginx
group = nginx
#编辑主配置文件
vim /etc/nginx/conf.d/default.conf
//9 增加首页文件 index.php
//29-35 取消注释并做修改
#修改首页根目录,站点变量(站点根目录)
fastcgi_param  SCRIPT_FILENAME  $document_root$fastcgi_script_name;


vim /etc/php.ini
#支持php短标签
//202 short_open_tag = On
#隐藏php版本
//359 expose_php = Off
#修改执行时间
//368 max_execution_time = 300
#修改接受数据等待时间
//378 max_input_time = 300
#post数据大小
//656 post_max_size = 16M
//799 upload_max_filesize = 2M
#原始数据直接处理
//800 always_populate_raw_post_data = -1
#修改时区
//878 date.timezone = Asia/Shanghai
#开启php,开机自启,查看端口
systemctl start php-fpm
systemctl enable php-fpm
netstat -natp | grep 9000
4、测试连接数据库
#首页根目录下编写首页文件
vim /usr/share/nginx/html/info.php

<?php
phpinfo();
?>

#重启服务
systemctl restart php-fpm.service
systemctl restart nginx

#真机访问
http://192.168.88.10/info.php

#测试连接数据库
vim /usr/share/nginx/html/info.php
<?php
$link=mysqli_connect('127.0.0.1','root','123456');
if ($link) echo '连接成功';
else echo '连接失败';
?>

#真机访问
http://192.168.88.10/info.php

#进入数据库
mysql -uroot -p123456
#创建zabbix库,设置字符集utf8
create database zabbix character set utf8 collate utf8_bin;
#授权zabbix用户
grant all privileges on *.* to 'zabbix'@'%' identified by 'admin123';
#刷新授权表
flush privileges;
exit
#测试能否使用zabbix用户连接数据库
vim /usr/share/nginx/html/info.php
<?php
$link=mysqli_connect('127.0.0.1','zabbix','admin123');
if ($link) echo 'zabbix成功';
else echo 'zabbix失败';
?>

#真机访问
http://192.168.88.10/info.php

#用户冲突导致连接失败。删除相关用户
mysql -uroot -p123456
select user,host from mysql.user;
drop user ''@'localhost';
drop user ''@'server';
flush privileges;


5、部署zabbix server
#安装zabbix源
rpm -i https://repo.zabbix.com/zabbix/4.0/rhel/7/x86_64/zabbix-release-4.0-1.el7.noarch.rpm

#安装server端和代理端的web界面,并兼容mysql数据组件
yum -y install zabbix-server-mysql zabbix-web-mysql zabbix-agent
cd /usr/share/doc/zabbix-server-mysql-4.0.34/(压缩包里包含zabbix必要的数据表)
#把文件内容注入zabbix数据库
zcat create.sql.gz | mysql -uzabbix -p zabbix
#进入数据库
mysql -uzabbix -padmin123
use zabbix;
show tables;

#编辑zabbix服务端配置文件
vim /etc/zabbix/zabbix_server.conf

#定义日志文件位置和名称
//38 LogFile=/var/log/zabbix/zabbix_server.log

#定义日志文件大小,0表示不限制大小
//49 LogFileSize=0

#进程文件位置
//72 PidFile=/var/run/zabbix/zabbix_server.pid

#通信sock文件
//82 SocketDir=/var/run/zabbix

#数据库所在服务器,本地
//91 DBHost=localhost

#数据库名称
//100 DBName=zabbix

#数据库用户
//116 DBUser=zabbix

#数据库密码
//124 DBPassword=admin123

#snmp协议日志位置
//356 SNMPTrapperFile=/var/log/snmptrap/snmptrap.log

#定义超时时间
//473 Timeout=4

#告警的脚本存放位置
//516 AlertScriptsPath=/usr/lib/zabbix/alertscripts

#扩展性脚本存放位置
//527 ExternalScripts=/usr/lib/zabbix/externalscripts

#定义慢查询时间
//563 LogSlowQueries=3000

#把zabbix内容复制到nginx首页目录下
cp -r /usr/share/zabbix/ /usr/share/nginx/html
#修改zabbix相关目录用户和组
chown -R zabbix.zabbix /etc/zabbix
chown -R zabbix.zabbix /usr/share/nginx
chown -R zabbix.zabbix /usr/lib/zabbix
#给zabbix web页面目录和php动态会话目录赋权
chmod -R 755 /etc/zabbix/web
chmod -R 777 /var/lib/php/session

#开启服务,开机自启,查看端口
systemctl start zabbix-server.service
systemctl enable zabbix-server.service
netstat -napl | grep 10051

#真机访问
http://192.168.88.10/zabbix


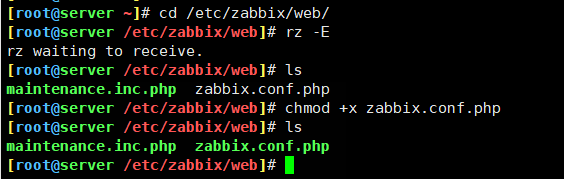
cd /etc/zabbix/web
chmod +x zabbix.conf.php

#开启代理服务,查看端口
systemctl start zabbix-agent
systemctl enable zabbix-agent
netstat -natp | grep 10050

6、配置代理端zabbix(192.168.88.20)
#关闭防火墙及系统安全机制
systemctl stop firewalld.service
systemctl disable firewalld.service
setenforce 0

#安装zabbix源
rpm -i https://repo.zabbix.com/zabbix/4.0/rhel/7/x86_64/zabbix-release-4.0-1.el7.noarch.rpm
#安装代理服务
yum -y install zabbix-agent
#编辑代理服务配置文件
vim /etc/zabbix/zabbix_agentd.conf
#98行和139行指向监控端
Server=192.168.88.10
ServerActive=192.168.88.10
#150行修改名称
Hostname=test
#开启服务,查看端口
systemctl start zabbix-agent
systemctl enable zabbix-agent
netstat -natp | grep 10050


 914
914


 被折叠的 条评论
为什么被折叠?
被折叠的 条评论
为什么被折叠?
 到【灌水乐园】发言


