


前言
本系列文章主要讲解NXOpen UF API(简称ufun函数)的使用,之前看教学视频大都建议用ufun进行开发,这里西门子官方还专门给了一套系列文章来讲,说明官方也是特别推崇ufun。
本人从事二开也有一段时间了,我的二开启蒙师父就特别喜欢用NXOpen API,用他的话来说“年少不知nxopen好,错把ufun当成宝”,其实就我个人而言,还是喜欢NXOPEN+ufun联合开发。
一、小节概要
本实例实现了通过ufun函数连接关联曲线,主要知识点如下:
1、theUfSession的初始化
2、通过StreamWriter记录日志
3、创建直线相关ufun方法
4、创建圆弧相关ufun方法
5、创建连接关联曲线的ufun方法
二、需求分析
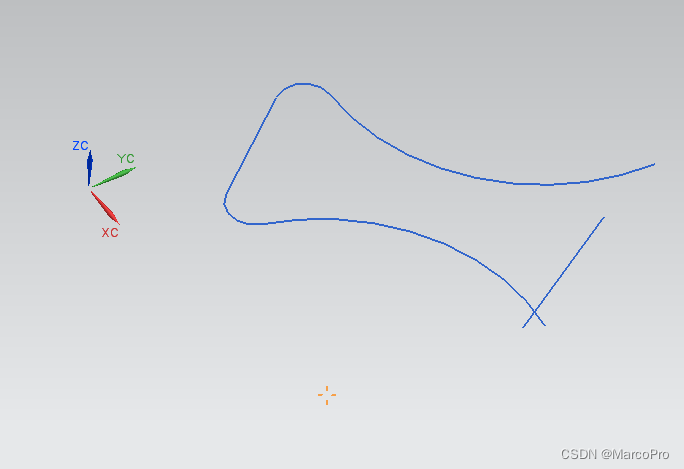
1、效果图
2、需求分解
这里需要创建连接曲线,分以下几步实现:
1)先新建prt文件
2)有了文件,画曲线、直线
3)创建连接曲线
3)保存文件
三、程序分析
1、源码所在目录
UGOPEN\SampleNXOpenApplications\.NET\NXOpenExamples\EX_Curve_CreateFillet.cs
2、主要功能分析
1、创建直线
UFCurve.Line line_coords1 = new UFCurve.Line();
line_coords1.start_point = new double[3];
line_coords1.start_point[0] = 1.2;
line_coords1.start_point[1] = 0.2;
line_coords1.start_point[2] = 0.0;
line_coords1.end_point = new double[3];
line_coords1.end_point[0] = -0.5;
line_coords1.end_point[1] = 2.5;
line_coords1.end_point[2] = 0.0;
theUfSession.Curve.CreateLine(ref line_coords1, out line1);
有起始端点的坐标就可以创建一条直线
2、创建圆弧
UFCurve.Arc arc_coords1 = new UFCurve.Arc();
arc_coords1.matrix_tag = Tag.Null;
arc_coords1.start_angle =238*DEGRA ;
arc_coords1.end_angle = 357*DEGRA;
arc_coords1.arc_center=new double[3];
arc_coords1.arc_center[0] = 0.22;
arc_coords1.arc_center[1] = 4.3;
arc_coords1.arc_center[2] = 0.0;
arc_coords1.radius = 2.0;
theUfSession.Csys.AskWcs(out wcs_tag);
theUfSession.Csys.AskMatrixOfObject(wcs_tag, out matrix_tag);
arc_coords1.matrix_tag=matrix_tag;
theUfSession.Curve.CreateArc(ref arc_coords1, out arc1);
创建圆弧的关键在于初始化 arc_coords
1、matrix_tag 圆弧所在的CSYS矩阵
2、start_angle 开始弧度
3、end_angle 结束弧度
4、arc_center 圆弧中心坐标
5、radius 圆弧半径
3、连接关联曲线
/*create fillet between "arc1" and "line1"*/
curve_objs[0] = arc1;
curve_objs[1] = line1;
center[0] = 0.0;
center[1] = 2.1;
center[2] = 0.0;
radius = .25;
trim_opts[0] = 1; /*trim first UFCurve*/
trim_opts[1] = 1; /*trim second UFCurve*/
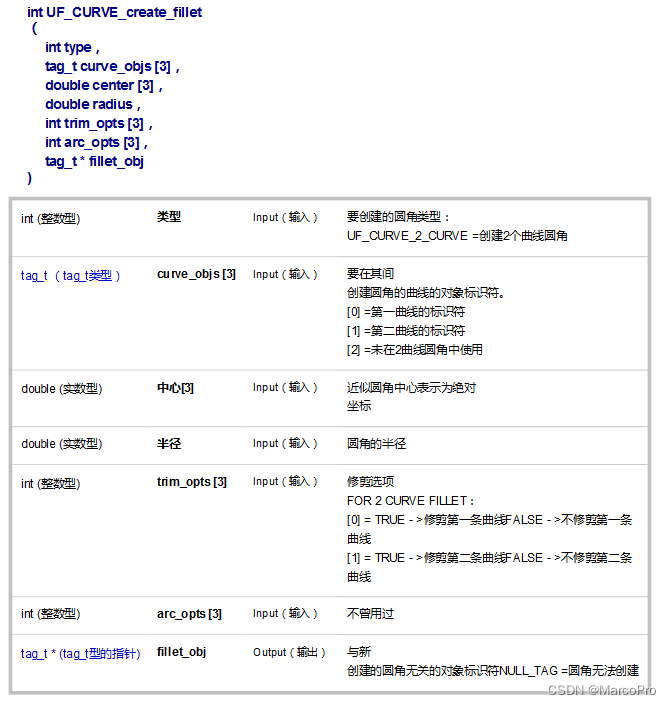
theUfSession.Curve.CreateFillet(UF_CURVE_2_CURVE,curve_objs, center, radius, trim_opts,arc_opts, out fillet_obj1);4、附上连接关联曲线的官方函数截图


 615
615


 被折叠的 条评论
为什么被折叠?
被折叠的 条评论
为什么被折叠?
 到【灌水乐园】发言


