


在实际开发过程中,我们会碰到许多这种界面
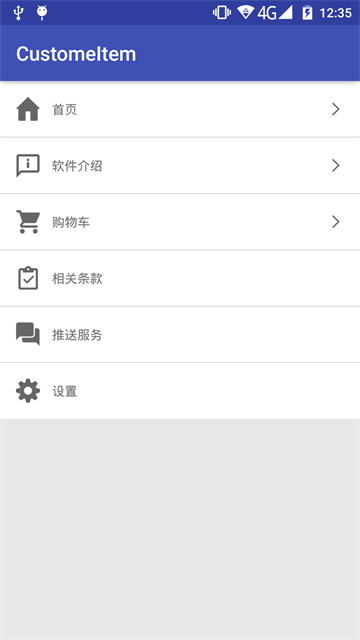
下面来介绍怎样封装成为一个通用的控件
1.首先新建一个类,在这里继承自FrameLayout,实现对应的构造方法
  public class ItemGroup extends FrameLayout{


        public ItemGroup(Context context) {
            super(context);
        }

        public ItemGroup(Context context, AttributeSet attrs) {
            super(context, attrs);
        }

        public ItemGroup(Context context, AttributeSet attrs, int defStyleAttr) {
            super(context, attrs, defStyleAttr);
        }
    }
2.属性的定义,在完成类的创建后,来自定义相关属性
首先需要在values目录下面新建一个attrs.xml文件 , 自定义相关属性,在这里定义了一个标题文字,文字左右的图片,最右边的图片,分割线,分割线颜色这几个属性。
<declare-styleable name="ItemGroup">

     <attr name="title" format="string"/>
     <attr name="drawable_left" format="reference"/>
     <attr name="drawable_right" format="reference"/>
     <attr name="line_color" format="color"/>
     <attr name="line_height" format="integer"/>

</declare-styleable>
其定义格式如下:
<declare-styleable name="自定义属性名称">
    <attr name="属性名称" format="属性类型"/>
</declare-styleable>
属性类型主要包括:
reference 引用
color 颜色
boolean 布尔值
dimension 尺寸值
float 浮点值
integer 整型值
string 字符串
enum 枚举值
3 属性的引入,在定义完属性后,接下来将定义的属性值引入到类中
/**
 * 初始化,引入相关属性
 * @param context
 * @param attrs
 */
private void initAttrs(Context context,AttributeSet attrs){
    TypedArray typedArray = context.obtainStyledAttributes(attrs, R.styleable.ItemGroup);
    strTitle = typedArray.getString(R.styleable.ItemGroup_title);
    drawableLeft = typedArray.getDrawable(R.styleable.ItemGroup_drawable_left);
    drawableright = typedArray.getDrawable(R.styleable.ItemGroup_drawable_right);
    lineHeight    = typedArray.getInt(R.styleable.ItemGroup_line_height,1);
    lineColor     = typedArray.getColor(R.styleable.ItemGroup_line_color,0xff999999);
    typedArray.recyc
最低0.47元/天 解锁文章


 2782
2782

 被折叠的 条评论
为什么被折叠?
被折叠的 条评论
为什么被折叠?
 到【灌水乐园】发言


