


特此声明:本文参考自 [1] Pajankar A . Python Unit Test Automation[M]. Apress, 2017.
1. pytest
nose 是一个比起过时的、基础的 unittest 更好的、高级的 Python 测试框架,
然而,nose 已经没有处于活跃的开发中,nose 用户无法得到软件功能的相应提升,维护以及支持,不应该作为 Python 开发活动的首选测试框架。
作为过时的、基础的 unittest 测试运行器,nose2 也没有处于活跃的开发中,同样已经过时了。
作为一个 Python 程序开发者,势必需要一个比起 unittest更好的 Python 测试框架,以及处于活跃的开发状态中的 Python 测试框架。
本文介绍 python 测试框架 pytest,其具有技术流行的、开发活跃的、性能高级的优点。
1.1. 安装步骤
- 命令提示符键入以下命令:
pip install pytest
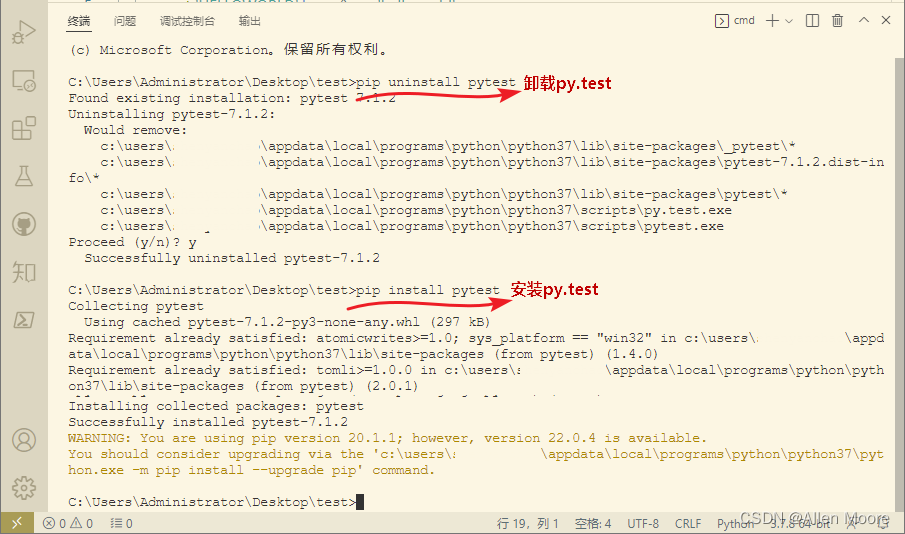
图1.1.1. 卸载与安装py.test
2. 通过以下命令可以查看安装结果
py.test --version
1.2. 简易测试
def test_case01():
    assert "helloworld".upper() == "HELLOWORLD"
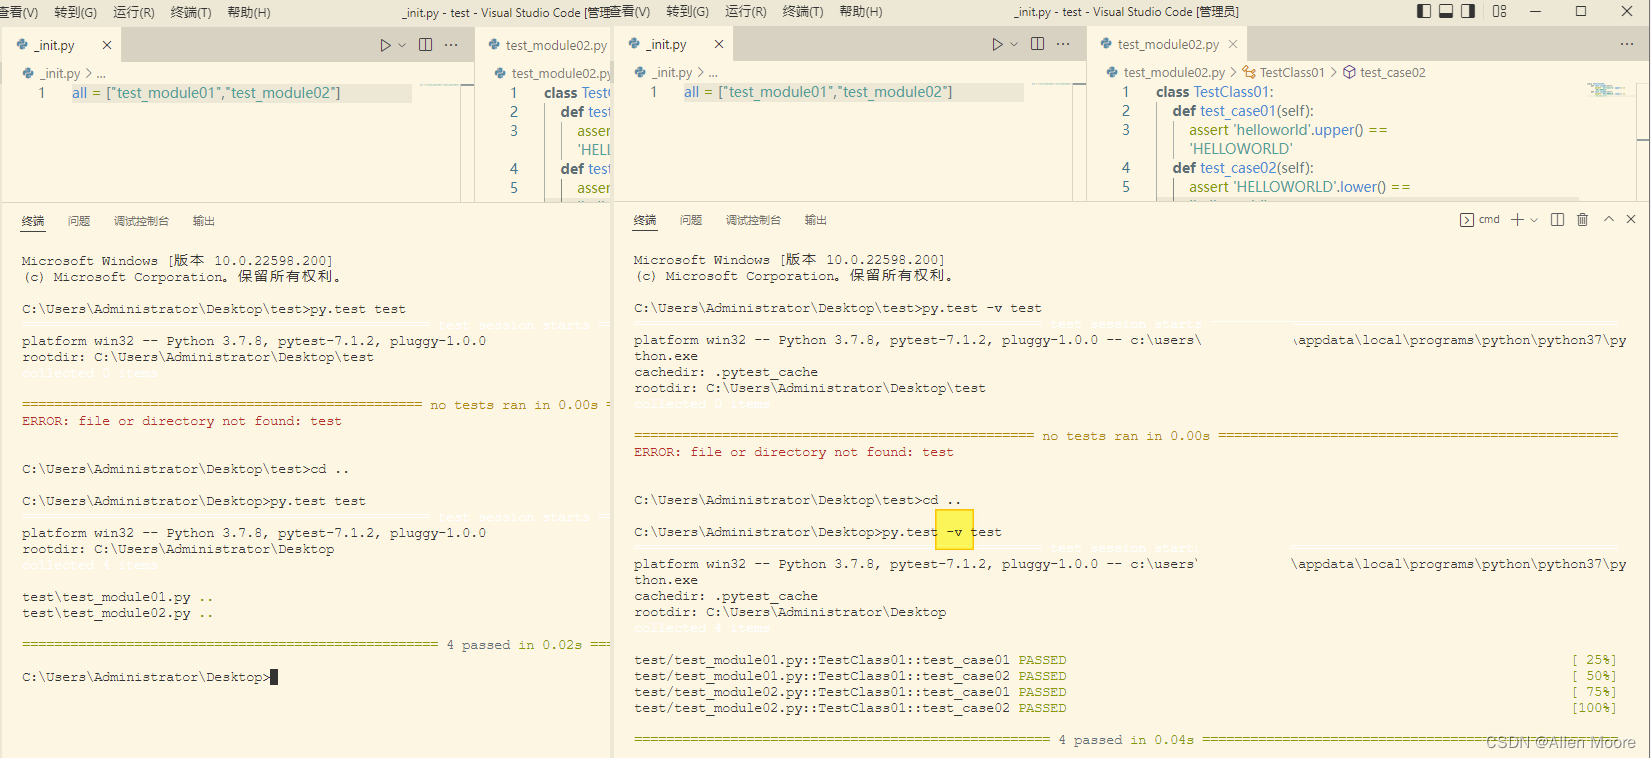
- 键入以下CMD命令行输出精简信息
python -m pytest test_model01.py
py.test test_module01.py
- 键入以下CMD命令行输出冗余信息
python -m pytest -v  test_model01.py
py.test test_module01.py -v

图 1.2.1. 左边与右边命令行分别输出精简信息以及冗余信息
注意: pytest 输出测试内容自身是彩色的。
1.3. 类与方法的测试
- 第1步,创建测试类
class TestClass01:
    def test_case01(self):
        assert 'helloworld'.upper() == 'HELLOWORLD'
    def test_case02(self):
        assert 'HELLOWORLD'.lower() == 'helloworld'
- 第2步, 创建_init.py 文件,将所要测试的文件包含在内;本文中即为 test_module01 以及 test_module02
all = ["test_module01", "test_module02"]
- 第3步,在测试文件夹的父文件夹内,使用 pytest 相关命令执行测试功能,测试的范围可调,范围由大到小依次是:包(文件夹),测试模块,测试类,测试类中的方法,测试函数
py.test test
py.test -v test
py.test -v test/test_module01.py
py.test -v test/test_module02.py::TestClass01
py.test -v test/test_module02.py::TestClass01::test_case01
py.test -v test/test_module01.py::test_case01
另外,类似常规的unittest、nose测试工具,pytest 能够发现和自动运行测试。
- 第3步*,也可以在测试文件夹中,运行以下命令也可以执行包(文件夹)测试功能
py.test
py.test -v
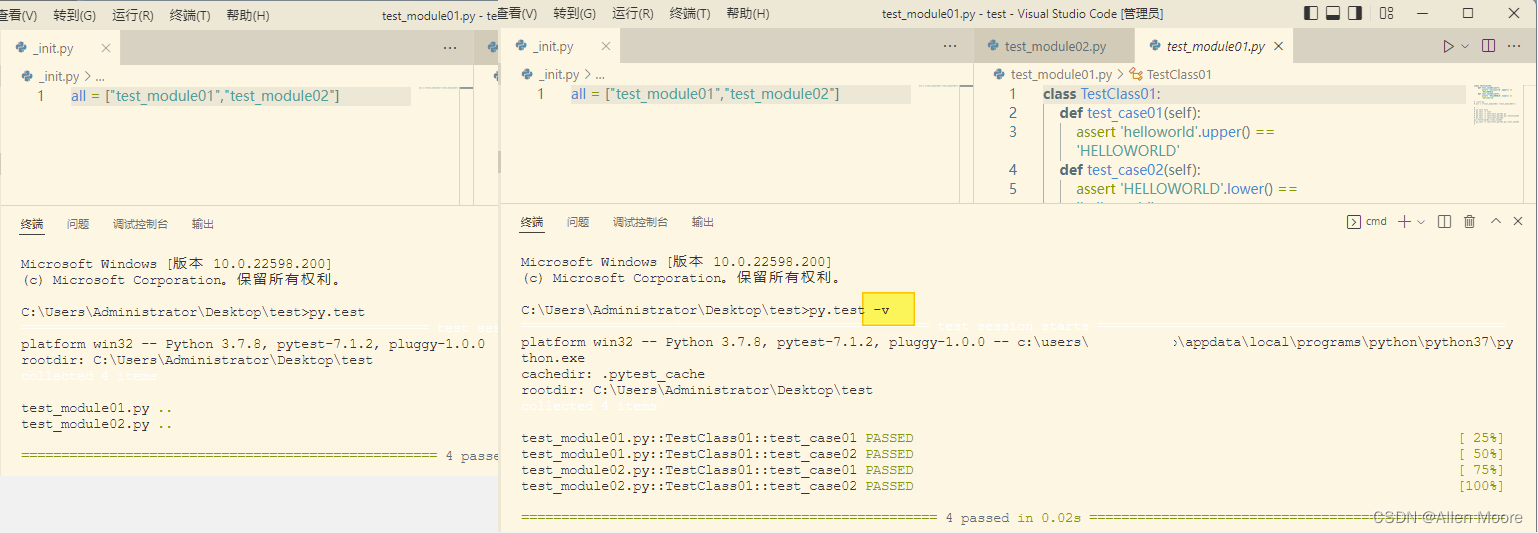
图 1.3.2. 命令行输出精简信息 & 冗余信息
1.3. xUnit-Style 测试夹具
1.3.1. xUnit-Style 测试夹具作用域
| 名称 | 层级 | 调用时间 |
|---|---|---|
| setup_module() & teardown_module() | 模块 | 在模块中的任何其他行为之前和之后都会调用。 |
| setup_class() & teardown_class() | 类 | 在类中的任何其他行为之前和之后都会调用,需要使用@classmethod()修饰符标志。 |
| setup_method() &t eardown_method() | 方法 | 在每种测试方法测试方法之前和之后运行。 |
| setup_function() & teardown_function() | 函数 | 在系统中的每个测试函数的之前和之后运行。 |
- 运行以下命令查看上述测试夹具运行细节的日志
py.test -vs test_module03.py
py.test -v test_module03.py
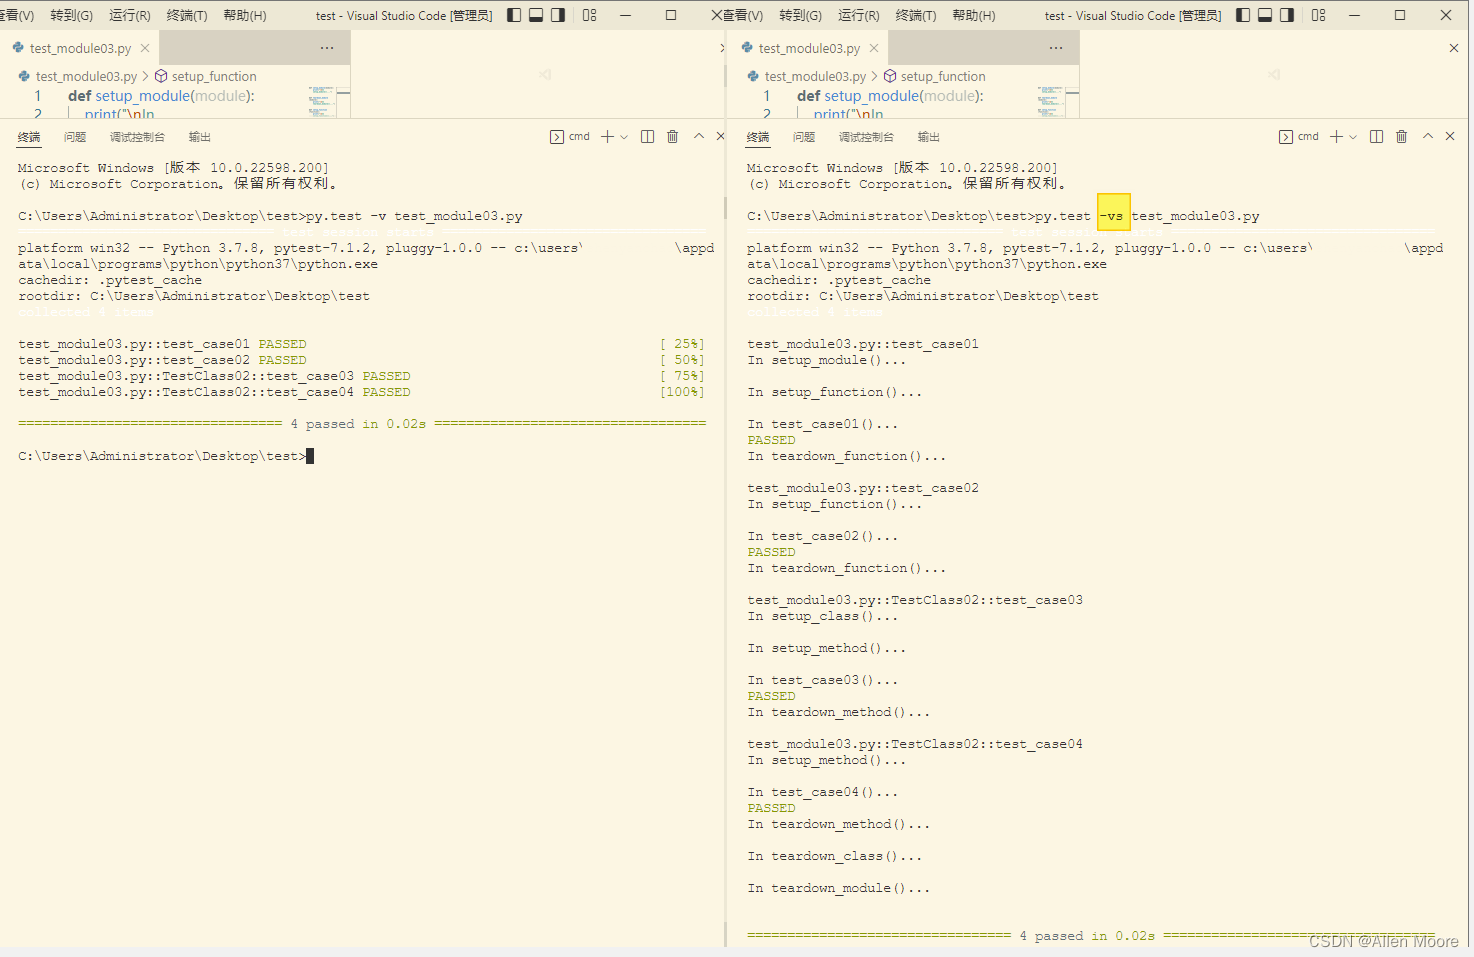
py.test 支持 unittest编写的xUnit-Style (x单元测试风格)测试夹具以及nose编写的大多数测试夹具,此外,py.test 还提供自定义的测试夹具。
1.4. py.test 自定义测试夹具
- 输入以下命令建立针对函数的自定义测试夹具
import pytest


@pytest.fixture()
def fixture01():
    print("\nIn fixture01()...")


def test_case01(fixture01):
    print("\nIn test_case01()...")
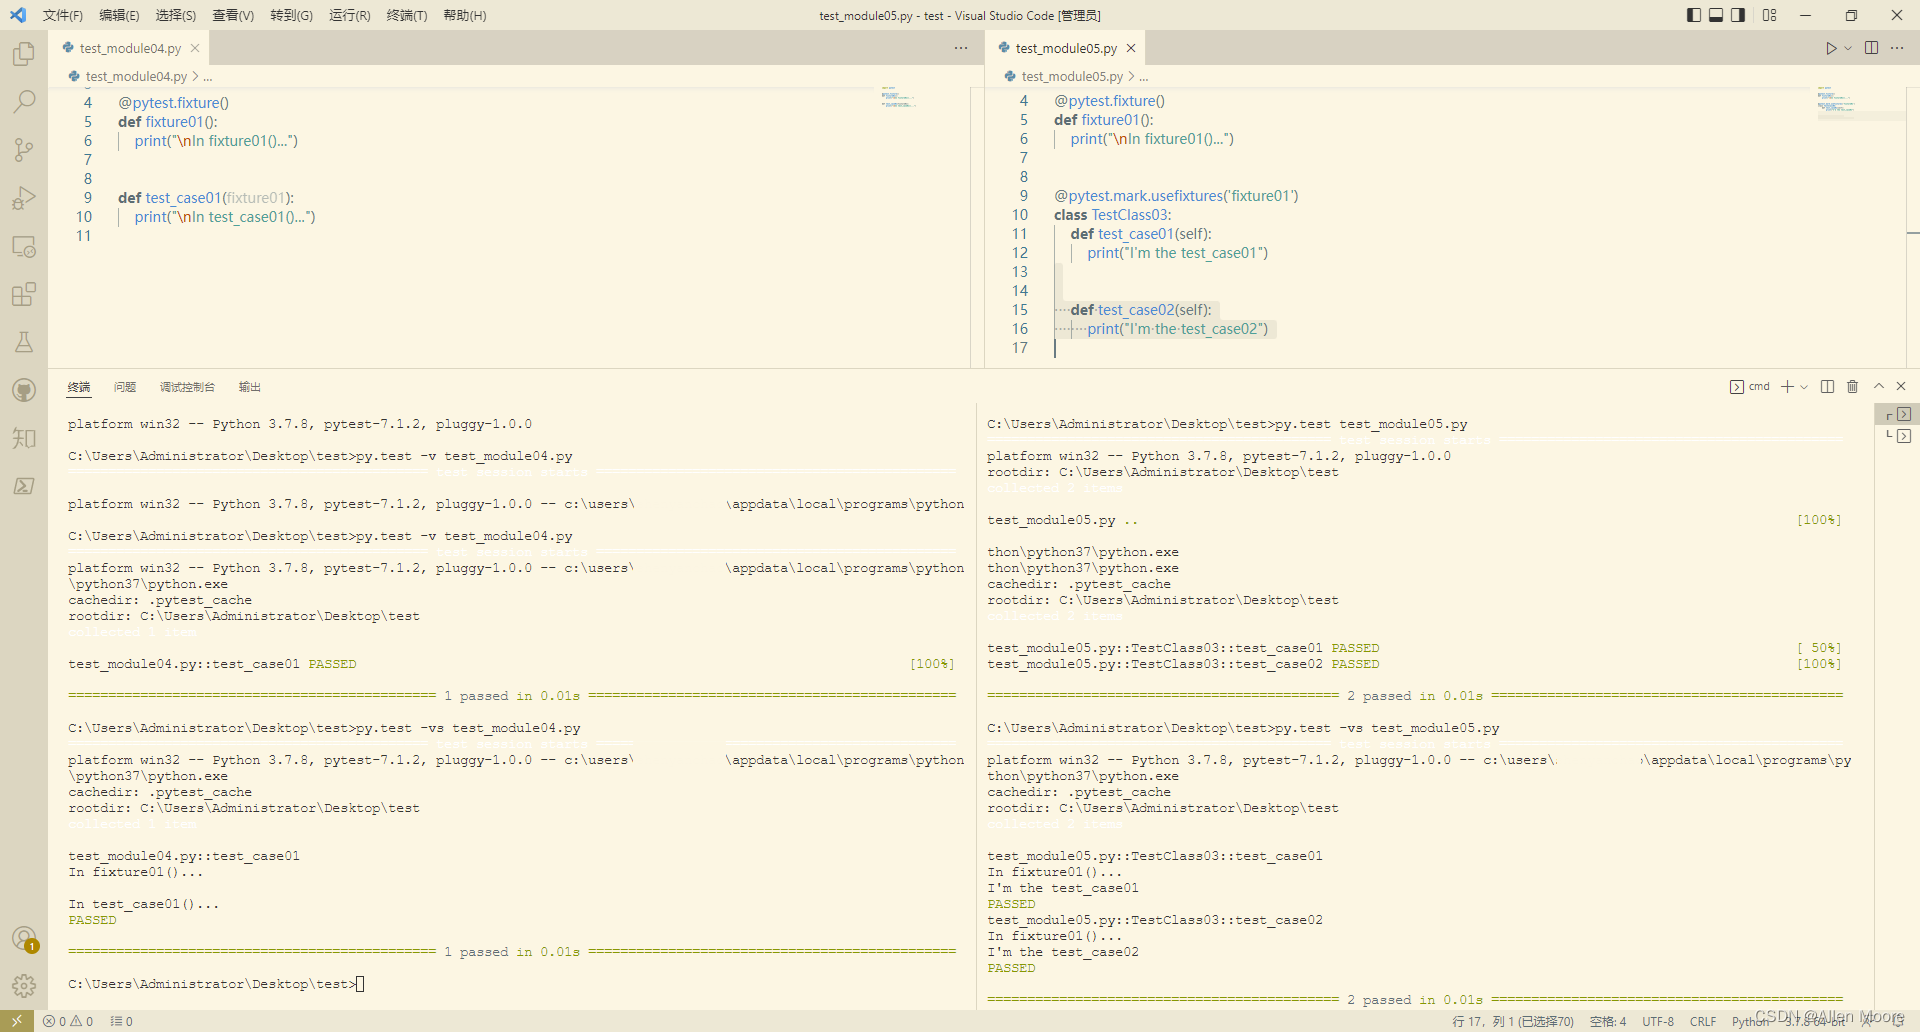
- 输入以下命令建立针对测试类的自定义测试夹具
import pytest


@pytest.fixture()
def fixture01():
    print("\nIn fixture01()...")


@pytest.mark.usefixtures('fixture01')
class TestClass03:
    def test_case01(self):
        print("I'm the test_case01")


    def test_case02(self):
        print("I'm the test_case02")
3. 输入以下命令建立针对测试类的自定义测试夹具
import pytest


@pytest.fixture()
def fixture01():
    print("\nIn fixture01()...")


@pytest.mark.usefixtures('fixture01')
class TestClass03:
    def test_case01(self):
        print("I'm the test_case01")

    def test_case02(self):
        print("I'm the test_case02")
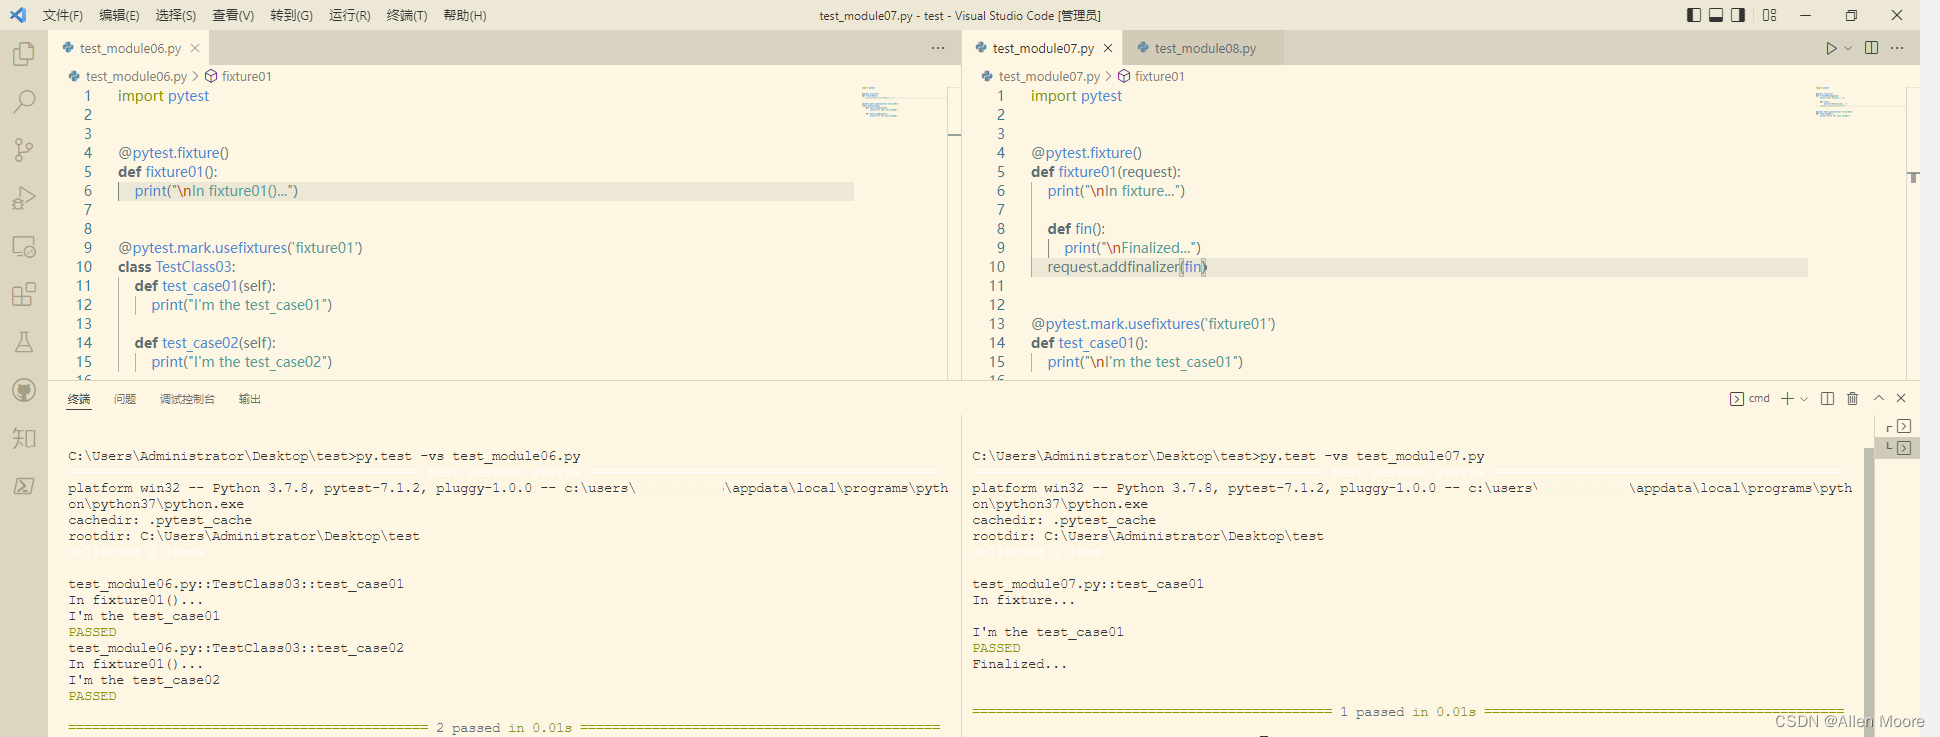
- 输入以下命令添加具有终结器的、基于函数的自定义测试夹具
import pytest


@pytest.fixture()
def fixture01(request):
    print("\nIn fixture...")

    def fin():
        print("\nFinalized...")
    request.addfinalizer(fin)


@pytest.mark.usefixtures('fixture01')
def test_case01():
    print("\nI'm the test_case01")
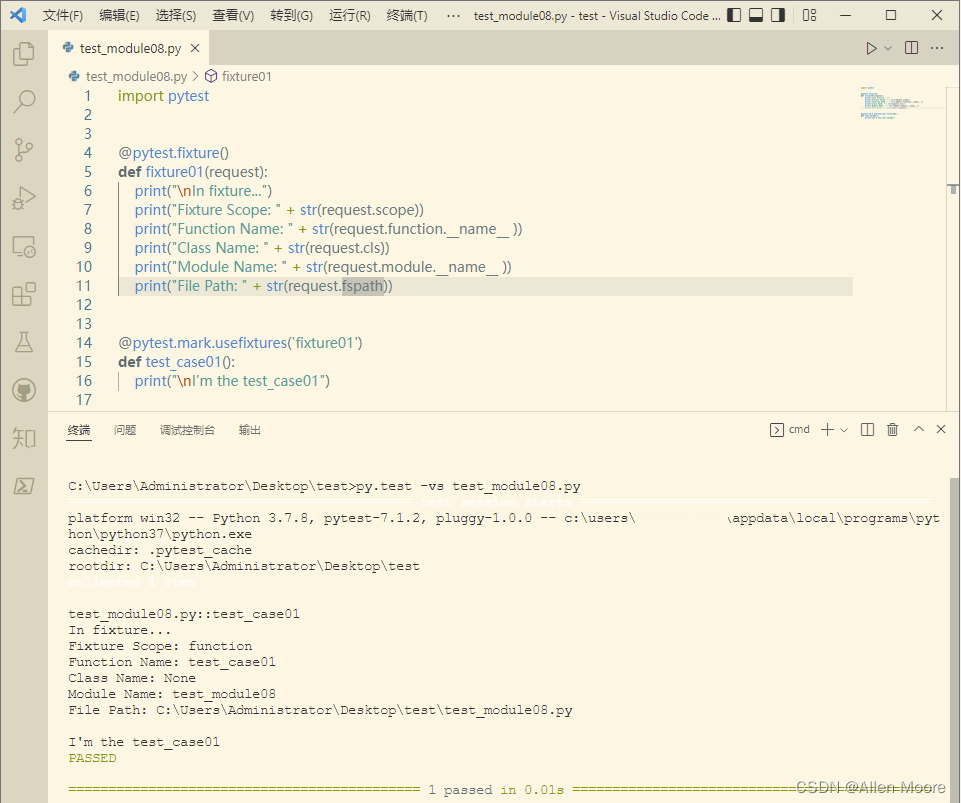
1.4.1. 自定义夹具作用域
类似 xUnit-Style 夹具,py.test 的作用域可以通过 @pytest.fixture(scope=“class”)中scope的值进行指定。默认情况下,scope的值为function,函数测试夹具将分配给所有测试。
| scope 值 | 作用域 |
|---|---|
| function | 每个测试运行一次 |
| class | 每个测试类运行一次 |
| module | 每个模块运行一次 |
| session | 每个会话运行一次 |
下面示例将展示默认情况下测试夹具的作用域。
进一步阅读
通过在命令行提示符键入下方命令可以获得关于py.test的进一步帮助。
py.test -h
py.test --help


 831
831


 被折叠的 条评论
为什么被折叠?
被折叠的 条评论
为什么被折叠?
 到【灌水乐园】发言


