


Spring Cloud整合Hystrix
首先还是从Spring Cloud服务管理框架Eureka简单示例(三)这篇博客的底部拿到我们的Eureka简单集群代码,改写eureka-consumer项目,在com.init.springCloud包下添加PersonService类,这个类其实就是原本ConsumerController控制器里面请求方法的抽取:
package com.init.springCloud;

import org.springframework.beans.factory.annotation.Autowired;
import org.springframework.stereotype.Service;
import org.springframework.web.client.RestTemplate;

@Service
public class PersonService {

	@Autowired
	private RestTemplate restTemplate;

	public Person getPersonById(Integer id){
		return restTemplate.getForObject("http://eureka-provider/search/{id}", Person.class, id);
	};

}
方法中需要返回Person实体类,从eureka-provider项目中拷贝过来(lombok需要自己添加依赖,也从eureka-provider项目的pom.xml文件中拷贝);还需要需用RestTemplate,我们在这个实体类作为Spring组件注册到Spring中,所以在eureka-consumer项目的ConsumerApp中添加这个bean组件:
@Bean
@LoadBalanced
public RestTemplate getRestTemplate(){
	return new RestTemplate();
}
之后改写ConsumerController控制器,引入PersonService:
package com.init.springCloud;

import org.springframework.beans.factory.annotation.Autowired;
import org.springframework.http.MediaType;
import org.springframework.web.bind.annotation.PathVariable;
import org.springframework.web.bind.annotation.RequestMapping;
import org.springframework.web.bind.annotation.RequestMethod;
import org.springframework.web.bind.annotation.RestController;

@RestController
public class ConsumerController {

	@Autowired
	private PersonService personService;

	@RequestMapping(value = "/router/{id}", method = RequestMethod.GET,
			produces = MediaType.APPLICATION_JSON_VALUE)
	public Person router(@PathVariable Integer id){
		return personService.getPersonById(id);
	}

}
之后依次运行三个项目的**App类里面的main方法,启动三个项目。访问:http://localhost:8081/router/1,测试我们改写的方法是否能够正常运行:

到这里,我们完成了在Spring Cloud中使用Hystrix的准备工作。
接下来,先在eureka-consumer项目中添加Spring Cloud整合的Hystrix依赖:
<dependency>
	<groupId>org.springframework.cloud</groupId>
    <artifactId>spring-cloud-starter-hystrix</artifactId>
</dependency>
之后在ConsumerApp启动类中使用@EnableCircuitBreaker注解开启对Hystrix的开关:
package com.init.springCloud;

import org.springframework.boot.SpringApplication;
import org.springframework.boot.autoconfigure.SpringBootApplication;
import org.springframework.cloud.client.circuitbreaker.EnableCircuitBreaker;
import org.springframework.cloud.client.loadbalancer.LoadBalanced;
import org.springframework.cloud.netflix.eureka.EnableEurekaClient;
import org.springframework.context.annotation.Bean;
import org.springframework.web.client.RestTemplate;

@SpringBootApplication
@EnableEurekaClient
@EnableCircuitBreaker
public class ConsumerApp {

	@Bean
	@LoadBalanced
	public RestTemplate getRestTemplate(){
		return new RestTemplate();
	}

	public static void main(String[] args) {
		SpringApplication.run(ConsumerApp.class, args);
	}

}
之后在PersonService类的getPersonById()方法上添加@HystrixCommand注解,并且为Hystrix添加一个回退方法:
package com.init.springCloud;

import org.springframework.beans.factory.annotation.Autowired;
import org.springframework.stereotype.Service;
import org.springframework.web.client.RestTemplate;

import com.netflix.hystrix.contrib.javanica.annotation.HystrixCommand;

@Service
public class PersonService {

	@Autowired
	private RestTemplate restTemplate;

	@HystrixCommand(fallbackMethod = "getPersonFallback")
	public Person getPersonById(Integer id){
		return restTemplate.getForObject("http://eureka-provider/search/{id}", Person.class, id);
	};

	public Person getPersonFallback(Integer id){
		Person person = new Person();
		person.setId(id);
		person.setName("angels");
		return person;
	}

}
这个时候,我们停止eureka-provider项目的服务,再次访问:http://localhost:8081/router/1,可以看到请求未成功,走了回退逻辑:

Spring Cloud整合Hystrix就是如此的简单!
Spring Cloud中Hystrix的常用配置
Hystrix的配置可以用注解或yml的形式来做到。譬如我们常用到的groupKey、commandKey、commandProperties、threadPoolProperties等都可以在注解上面完成配置:
@HystrixCommand(fallbackMethod = "getPersonFallback", groupKey = "myGroupKey",
		commandKey = "myCommandKey",
		commandProperties = {
			@HystrixProperty(name = "execution.isolation.thread.timeoutInMilliseconds", value = "500")
		},
		threadPoolProperties = {
			@HystrixProperty(name = "coreSize", value = "5")
		})
注意,在@HystrixProperty属性里,前面三个对作用域进行限制的命令空间得去除。
上面的示例是在方法级上的注解,即使用@HystrixCommand来修饰方法,同样也可以把这个写到整个类上,这个时候使用在类上使用@DefaultProperties注解,就可以完成对整个类里面所有方法的修饰了。只不过不能再配置commandKey,以及使用默认回退(defaultFallback)来供类里面所有方法调用。
同样,我们可以在yml配置文件中配置这些属性,譬如超时等待时间:
hystrix:
  command:
    myCommandKey:
      execution:
        isolation:
          thread:
            timeoutInMilliseconds: 500
其中,“myCommandKey”对应的是我们单个方法的超时等待时间,改成“default”之后就是全局生效。
更多详细的配置还要参见Spring Cloud官网或者是Netflix在GitHub上托管的代码和文档
缓存
实际上,在上一篇博客里面我们已经做过缓存了,只不过那时是单独使用的Hystrix,我们在这里演示一下如何在Spring Cloud的Hystrix中使用缓存,先在eureka-consumer项目的com.init.springCloud下创建cache包,新建MyFilter类,实现Filter接口:
package com.init.springCloud.cache;
import java.io.IOException;
import javax.servlet.Filter;
import javax.servlet.FilterChain;
import javax.servlet.FilterConfig;
import javax.servlet.ServletException;
import javax.servlet.ServletRequest;
import javax.servlet.ServletResponse;
import javax.servlet.annotation.WebFilter;
import com.netflix.hystrix.strategy.concurrency.HystrixRequestContext;
@WebFilter(urlPatterns = "/*", filterName = "HystrixFilter")
public class MyFilter implements Filter {
@Override
public void destroy() {
}
@Override
public void doFilter(ServletRequest request, ServletResponse response,
FilterChain chain) throws IOException, ServletException {
HystrixRequestContext context = HystrixRequestContext.initializeContext();//开启一个上下文
try {
System.out.println("这里是过滤器");
chain.doFilter(request, response);
} catch (Exception e) {
e.printStackTrace();
} finally{
context.shutdown();
}
}
@Override
public void init(FilterConfig arg0) throws ServletException {
}
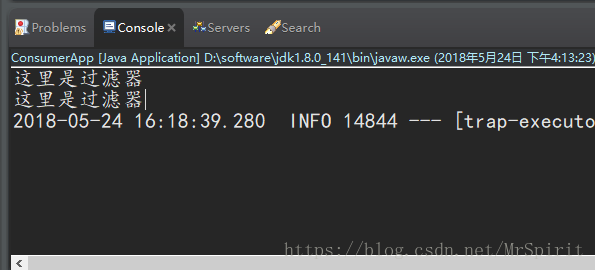
}之后在启动类ConsumerApp顶上添加@ServletComponentScan注解,让Spring可以扫描到Servlet提供的bean组件,重启eureka-consumer项目,访问:http://localhost:8081/router/1,看看我们的过滤器是否配置成功:
在cache包下新建CacheService类,和PersonService类类似,只不过我们这里不去调用具体的服务了,只打印一下是否请求了这个服务,要使用缓存,需要在方法上面添加@HystrixCommand和@CacheResult注解,两者联合在一起,才能使用缓存:
package com.init.springCloud.cache;

import org.springframework.beans.factory.annotation.Autowired;
import org.springframework.stereotype.Service;
import org.springframework.web.client.RestTemplate;

import com.init.springCloud.Person;
import com.netflix.hystrix.contrib.javanica.annotation.HystrixCommand;
import com.netflix.hystrix.contrib.javanica.cache.annotation.CacheResult;

@Service
public class CacheService {

	@Autowired
	private RestTemplate restTemplate;

	@CacheResult
	@HystrixCommand
	public Person getCachePerson(Integer id){
		System.out.println("这里是缓存服务");
		return null;
	};

}
再创建CacheController控制器,用于调用这个服务,我们在一次请求里,多次调用同一个方法(注意参数不能变化),查看是否在这一个请求上下文里使用了缓存(注意我们在MyFilter里面针对每次请求都给了一个请求上下文):
package com.init.springCloud.cache;

import org.springframework.beans.factory.annotation.Autowired;
import org.springframework.http.MediaType;
import org.springframework.web.bind.annotation.PathVariable;
import org.springframework.web.bind.annotation.RequestMapping;
import org.springframework.web.bind.annotation.RequestMethod;
import org.springframework.web.bind.annotation.RestController;

@RestController
public class CacheController {

	@Autowired CacheService cacheService;

	@RequestMapping(value = "/myCache/{id}", method = RequestMethod.GET,
			produces = MediaType.APPLICATION_JSON_VALUE)
	public String router(@PathVariable Integer id){
		for(int i=0; i < 4; i++){
			System.out.println("这是第"+(i+1)+"次调用");
			cacheService.getCachePerson(id);
		}
		return "success";
	}

}
重启eureka-consumer项目,访问:http://localhost:8081/myCache/1,查看控制台输出,针对单次请求中的相同服务调用,确实是使用了缓存的:

接下来测试删除缓存。在CacheService类中添加两个方法,一个用户返回缓存数据,另一个是清除缓存的,注意要使用同一个commandKey来联动:
@CacheResult
@HystrixCommand(commandKey = "myCacheKey")
public String getCache(Integer id){
	System.out.println("===>获取缓存数据");
	return null;
}

@CacheRemove(commandKey = "myCacheKey")
@HystrixCommand
public String clearCache(Integer id){
	System.out.println("===>清除缓存");
	return null;
}
在CacheController控制器中新增测试方法:
@RequestMapping(value = "/clearCache/{id}", method = RequestMethod.GET,
produces = MediaType.APPLICATION_JSON_VALUE)
public String clearCache(@PathVariable Integer id){
for(int i=0; i < 4; i++){
cacheService.getCache(id);
}
System.out.println("<<下面执行清除缓存>>");
cacheService.clearCache(id);
for(int i=0; i < 4; i++){
cacheService.getCache(id);
}
return "success";
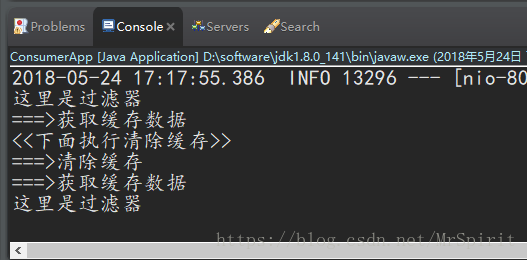
}重启项目,访问:http://localhost:8081/clearCache/1,查看控制台输出:
请求合并
如果对于同一个接口,在短时间内请求了数次,只是请求的参数略有不同,那我们可以考虑使用请求合并。譬如,同样是查询商品信息,在10ms内发生了30次请求,而每次的请求只是商品的ID不同而已,那么,我们在使用了请求合并以后,就可以把30次请求合并成一次请求,一次性返回结果,而这10ms的延迟影响,用户是不可感知的,但对于服务器来说,就节省了网络的开销,以及减缓了数据库压力。
在eureka-consumer项目的com.init.springCloud包下创建collapser包,新建CollapserService类,先编写一个getPerson()方法,返回一个Future对象,这个方法用于收集请求的参数,具体的处理需要再编写一个getPersons()方法,用于实际业务处理。然后需要再请求合并器上添加@HystrixCollapser注解,同时设置批处理的具体方法(这里还设置了合并10ms内的请求),批处理的具体方法用于执行命令,添加@HystrixCommand注解:
package com.init.springCloud.collapser;

import java.util.ArrayList;
import java.util.List;
import java.util.concurrent.Future;

import org.springframework.stereotype.Service;

import com.init.springCloud.Person;
import com.netflix.hystrix.contrib.javanica.annotation.HystrixCollapser;
import com.netflix.hystrix.contrib.javanica.annotation.HystrixCommand;
import com.netflix.hystrix.contrib.javanica.annotation.HystrixProperty;

@Service
public class CollapserService {

	@HystrixCollapser(batchMethod = "getPersons",
			collapserProperties = {
				@HystrixProperty(name = "timerDelayInMilliseconds", value = "10")
			})
	public Future<Person> getPerson(Integer id){
		System.out.println("进入请求收集方法");
		return null;
	}

	@HystrixCommand
	public List<Person> getPersons(List<Integer> ids){
		List<Person> persons = new ArrayList<Person>(ids.size());
		System.out.println("====>这是某一次的请求");
		for (Integer id : ids) {
			System.out.println("用户ID:"+id);
			Person person = new Person();
			person.setId(id);
			person.setName("spirit"+id);
			persons.add(person);
		}
		return persons;
	}

}
之后创建一个CollapserController控制器,多次请求我们编写的合并器:
package com.init.springCloud.collapser;

import java.util.concurrent.Future;

import org.springframework.beans.factory.annotation.Autowired;
import org.springframework.http.MediaType;
import org.springframework.web.bind.annotation.RequestMapping;
import org.springframework.web.bind.annotation.RequestMethod;
import org.springframework.web.bind.annotation.RestController;

import com.init.springCloud.Person;

@RestController
public class CollapserController {

	@Autowired
	private CollapserService collapserService;

	@RequestMapping(value = "/collapser", method = RequestMethod.GET,
			produces = MediaType.APPLICATION_JSON_VALUE)
	public String getPerson() throws Exception{
		Future<Person> f1 = collapserService.getPerson(1);
		Future<Person> f2 = collapserService.getPerson(2);
		Future<Person> f3 = collapserService.getPerson(3);

		Person p1 = f1.get();
		Person p2 = f2.get();
		Person p3 = f3.get();

		System.out.println(p1);
		System.out.println(p2);
		System.out.println(p3);
		return "success";
	}

}
重启eureka-consumer项目,访问:http://localhost:8081/collapser,查看控制台输出:
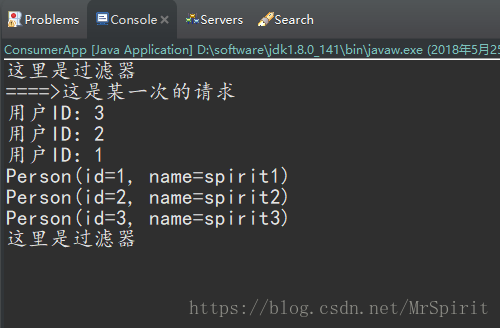
可以看到,我们虽然请求了同一个方法三次,但是最终是被合并成了一次请求进行处理的。
Spring Cloud中Hystrix和Feign整合使用
首先我们在eureka-consumer项目的pom.xml文件中引入Feign的依赖:
<dependency>
	<groupId>org.springframework.cloud</groupId>
    <artifactId>spring-cloud-starter-feign</artifactId>
</dependency>
之后在ConsumerApp启动类中使用@EnableFeignClients注解,打开Feign客户端的开关。
我们先创建一个Feign客户端的接口,已经对应的Controller控制器,先确保Feign是可以使用的(对于Feign的讲解以及如何在Spring Cloud中使用Feign,可以参考以前的博客,这里就不赘述了)。
在eureka-consumer项目的com.init.springCloud包下创建FeignHystrixSup包,新建PersonClient接口:
package com.init.springCloud.FeignHystrixSup;

import org.springframework.cloud.netflix.feign.FeignClient;
import org.springframework.web.bind.annotation.PathVariable;
import org.springframework.web.bind.annotation.RequestMapping;
import org.springframework.web.bind.annotation.RequestMethod;

import com.init.springCloud.Person;

@FeignClient("eureka-provider")
public interface PersonClient {

	@RequestMapping(value = "/search/{id}", method = RequestMethod.GET,
			consumes = "application/json")
	public Person getPersonById(@PathVariable("id") Integer id);

}
接着创建FeignController控制器,注入上面的接口并提供一个访问方法:
package com.init.springCloud.FeignHystrixSup;

import org.springframework.beans.factory.annotation.Autowired;
import org.springframework.http.MediaType;
import org.springframework.web.bind.annotation.PathVariable;
import org.springframework.web.bind.annotation.RequestMapping;
import org.springframework.web.bind.annotation.RequestMethod;
import org.springframework.web.bind.annotation.RestController;

import com.init.springCloud.Person;

@RestController
public class FeignController {

	@Autowired
	private PersonClient personClient;

	@RequestMapping(value = "/feign/{id}", method = RequestMethod.GET,
			produces = MediaType.APPLICATION_JSON_VALUE)
	public Person getPersonById(@PathVariable Integer id){
		return personClient.getPersonById(id);
	}

}
重启eureka-consumer项目,访问:http://localhost:8081/feign/1,浏览器返回了我们的数据,则Spring中Feign成功整合。
接下来就是需要将Hystrix整合到Feign中,先打开Feign对Hystrix的支持,因为默认是关闭的,在application.yml文件中打开这个开关:
feign:
  hystrix:
    enabled: true
如果PersonClient接口的方法能够正常使用,则不会有异常抛出,在使用了Hystrix之后,如果方法发生异常,就需要寻找一个回退的方法,我们编写一个PersonClientFallback类,去实现上面的PersonClient接口,PersonClientFallback实现类里面的实现方法对应的就是回退方法:
package com.init.springCloud.FeignHystrixSup;

import org.springframework.context.annotation.Configuration;

import com.init.springCloud.Person;

@Configuration
public class PersonClientFallback implements PersonClient {

	@Override
	public Person getPersonById(Integer id) {
		Person person = new Person();
		person.setId(id);
		person.setName("angels");
		return person;
	}

}
接着,在@FeignClient注解里面配置这个回退的类:
@FeignClient(name = "eureka-provider", fallback = PersonClientFallback.class)注意,PersonClientFallback需要放到Spring容器里面,Feign才能找到这个类。
之后,停止eureka-provider项目,再次访问:http://localhost:8081/feign/1,浏览器就返回了我们回退方法的JSON字符串:

Hystrix的监控功能
要使用Hystrix的监控功能,需要引入Spring Boot中的Actuator,我们在eureka-consumer项目的pom.xml中引入相关依赖,之后重启eureka-consumer项目:
<!-- Hystrix监控功能 -->
<dependency>
	<groupId>org.springframework.boot</groupId>
	<artifactId>spring-boot-starter-actuator</artifactId>
	<version>1.5.3.RELEASE</version>
</dependency>
由于我们监控的是eureka-consumer项目,所以是需要把Actuator的依赖项加入到这个项目中的。接下来创建一个简单java的maven新项目hystrix-dashboard,同样去引入Actuator的依赖,同时引入Hystrix的监控依赖,pom.xml的配置如下:
<project xmlns="http://maven.apache.org/POM/4.0.0" xmlns:xsi="http://www.w3.org/2001/XMLSchema-instance"
	xsi:schemaLocation="http://maven.apache.org/POM/4.0.0 http://maven.apache.org/xsd/maven-4.0.0.xsd">
	<modelVersion>4.0.0</modelVersion>
	<groupId>org.init.springcloud</groupId>
	<artifactId>hystrix-dashboard</artifactId>
	<version>0.0.1-SNAPSHOT</version>
	<build />

	<dependencyManagement>
	    <dependencies>
	        <dependency>
	            <groupId>org.springframework.cloud</groupId>
	            <artifactId>spring-cloud-dependencies</artifactId>
	            <version>Dalston.SR5</version>
	            <type>pom</type>
	            <scope>import</scope>
	        </dependency>
	    </dependencies>
	</dependencyManagement>
	<dependencies>
		<!-- Hystrix监控功能 -->
		<dependency>
			<groupId>org.springframework.boot</groupId>
			<artifactId>spring-boot-starter-actuator</artifactId>
			<version>1.5.9.RELEASE</version>
		</dependency>
		<dependency>
			<groupId>org.springframework.cloud</groupId>
			<artifactId>spring-cloud-starter-hystrix-dashboard</artifactId>
		</dependency>
	</dependencies>

</project>
创建com.init.springCloud包,新建DashboardApp启动类,开启Hystrix监控:
package com.init.springCloud;

import org.springframework.boot.SpringApplication;
import org.springframework.boot.autoconfigure.SpringBootApplication;
import org.springframework.cloud.netflix.hystrix.dashboard.EnableHystrixDashboard;

@SpringBootApplication
@EnableHystrixDashboard
public class DashboardApp {

	public static void main(String[] args) {
		SpringApplication.run(DashboardApp.class, args);
	}

}
启动hystrix-dashboard项目,我们测试一下Hystrix提供出来的其中一个Endpoints(端点):健康端点(/health),首先访问:http://localhost:8081/hystrix.stream,这是被监控客户端向监控端推送的stream流,浏览器会不停地打印推送信息:

我们接着访问:http://localhost:8082/hystrix,进入Hystrix控制台管理界面

在第一个url地址栏里填入我们上面那个推流地址:http://localhost:8081/hystrix.stream,“Delay”延迟时间可以用默认的2秒,“Title”监控的标题可以随便起一个,之后进入监控端页面:
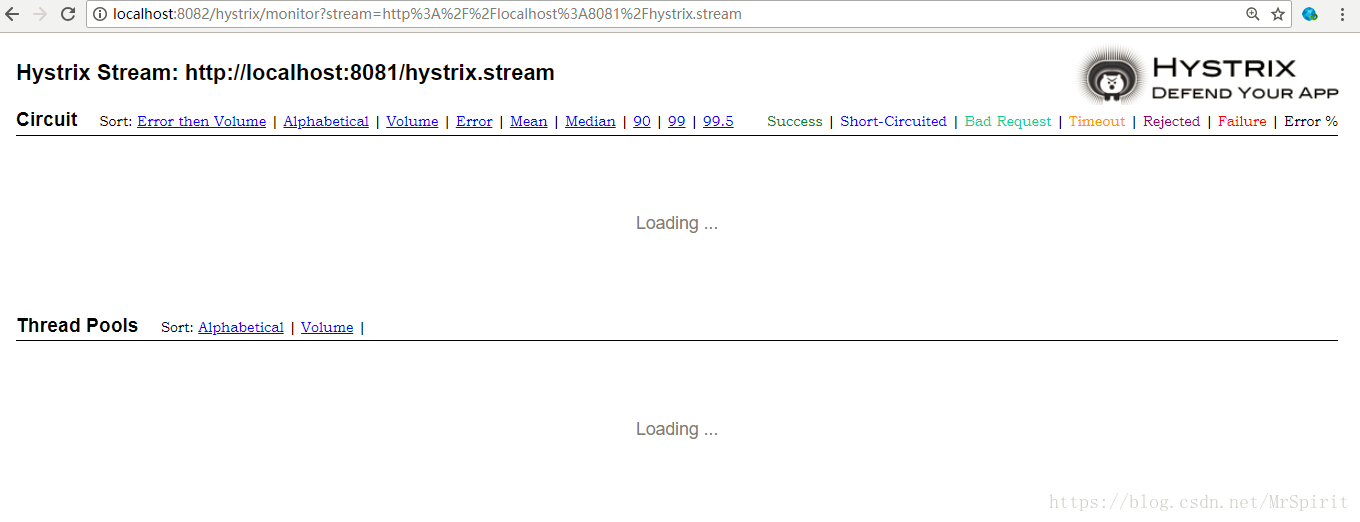
我们在被监控那端发起一个请求,譬如:http://localhost:8081/feign/1,那监控界面就会展示出这些信息:
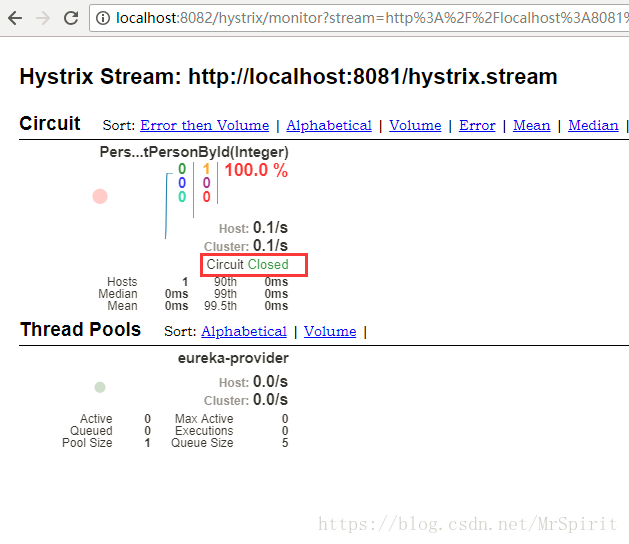
上图展示了我们请求的是哪一个方法,请求了几次,成功率是多少,断路器是否开启等等的信息。
Spring Cloud中使用Hystrix的知识就讲到这里了。
最后,大家有什么不懂的或者其他需要交流的内容,也可以进入我的QQ讨论群一起讨论:654331206
Spring Cloud系列:
Spring Cloud服务管理框架Eureka简单示例(三)


 1233
1233


 被折叠的 条评论
为什么被折叠?
被折叠的 条评论
为什么被折叠?
 到【灌水乐园】发言


