


文章目录
一、Tensorflow2.8 GPU环境配置
Tensorflow2.8 GPU的环境搭建,参考我上一篇的博文:
地址:https://blog.csdn.net/Nanicy_lin/article/details/123739689
二、下载 Object Detection API
Tensorflow官方下载地址:
地址:https://github.com/tensorflow/models
若github下载太慢,也可在gitee仓库下载:
地址:https://gitee.com/linanicy/object_detection_api
注意:由于官方models将随tensorflow版本进行升级,而gitee仓库是copy的github的models后,生成的个人仓库。故此连接下载的models,从版本上更为兼容,不会受到官方版本升级影响。
创建一个新的文件夹用于放API项目文件。进入新建文件夹,将models解压后,拷贝至该文件夹下。

三、下载 COCO API
github官方地址:
地址:https://github.com/cocodataset/cocoapi
gitee克隆仓库地址:
地址:https://gitee.com/linanicy/cocoapi
同理,由于github官方版本可能更新,在当前配置下,从gitee地址连接上下载,更为兼容。
注:
1.对于Tensorflow2.x, 需要安装COCO API,并且要在Tensorflow2.x Object Detection API安装之前安装,因为pycocotools 包是Object Detection API的依赖库,不安装可能出错。
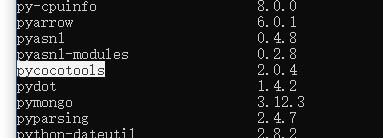
2.需要在Tensorflow环境下运行,其本质是为当前Tensorflow环境安装一个pycocotools包,如下图为已经安装完成的pycocotools包:

四、Protobuf的安装配置
Tensorflow Object Detection API使用Protobuf对模型和参数进行管理,在使用框架前必须下载编译Protobuf库,库文件都放在object_detection/protos文件夹下。建议使用3.0版本以上的Protobuf。
安装Protobuf,在Tensorflow2.8虚拟环境中运行命令
conda install -c anaconda protobuf
进入models/research/目录下,运行编译命令如下,将protos文件夹下.proto文件编译为.py文件
cd D:\python\workspace\Object_Detection_API\models\research  # 根据自己的路径改

protoc object_detection/protos/*.proto --python_out=.
运行结束后可查看protos文件内,是否新生成很多.py文件。如图:

五、配置环境变量,path路径
简要说一下为什么配置path的路径,配置该API的路径,代表python搜索的路径,把编写的python模块添加到path上,想要python解释器找到自己编写的模块,则该模块的路径必须添加到path上,具体做法如下

即将model、models\research、models\research\slim都加入系统变量中的path中,也可以自己新建一个变量名,名字随意。
六、添加path路径文件
由于models路径太深,在执行一些python命令时,python会报错无法找指定模块,
解决办法是在你的当前虚拟环境(Tensorflow2.8)的python安装路径下新建一个tensorflow_model.pth文件。
比如我的是:
D:\python\anaconda\envs\od_api\Lib\site-packages\tensorflow2.x_models.pth,文件名字随意
然后将该文件用记事本打开,把写到环境变量里的其中两个路径复制到该文件中,如图:

七、安装 COCO API
cd进入下载好的cocoapi/PythonAPI,cocoapi存放位置随意,在Tensorflow2.8虚拟环境下,执行
cd D:\python\workspace\Object_Detection_API\cocoapi\PythonAPI  # 路径根据自己的cocoapi路径改

pip install cython

python3 setup.py build_ext --inplace

python3 setup.py build_ext install

pip install pycocotools  # 系统提示需要安装的包,自行安装
八、验证 COCO API 是否安装成功
1.pip list,可以看到包pycocotools==2.0.4
2.进入python命令行,执行import pycocotools命令,不报错说明已经安装成功了

九、安装 Object Detection API
在Tensorflow2.8虚拟环境中,进入models/research/文件目录下,运行如下命令
cp object_detection/packages/tf2/setup.py .

python -m pip install --use-feature=2020-resolver .
十、验证 Object Detection API 是否安装成功
在Tensorflow2.8虚拟环境中,进入models/research/文件目录下,运行model_builder_tf2_test.py 验证代码
python object_detection/builders/model_builder_tf2_test.py
注:若提示缺少包,使用pip命令下载安装即可。需要特别注意的是,在提示缺少official包时,不要直接安装此包,会提示找不到,安装命令应该是:
pip install tf-models-official
若出现以下运行结果则表示Object detection api训练环境搭建成功
INFO:tensorflow:time(__main__.ModelBuilderTF2Test.test_create_ssd_models_from_config): 16.0s
I0326 02:35:58.660149  9780 test_util.py:2374] time(__main__.ModelBuilderTF2Test.test_create_ssd_models_from_config): 16.0s
[       OK ] ModelBuilderTF2Test.test_create_ssd_models_from_config
[ RUN      ] ModelBuilderTF2Test.test_invalid_faster_rcnn_batchnorm_update
INFO:tensorflow:time(__main__.ModelBuilderTF2Test.test_invalid_faster_rcnn_batchnorm_update): 0.0s
I0326 02:35:58.673595  9780 test_util.py:2374] time(__main__.ModelBuilderTF2Test.test_invalid_faster_rcnn_batchnorm_update): 0.0s
[       OK ] ModelBuilderTF2Test.test_invalid_faster_rcnn_batchnorm_update
[ RUN      ] ModelBuilderTF2Test.test_invalid_first_stage_nms_iou_threshold
INFO:tensorflow:time(__main__.ModelBuilderTF2Test.test_invalid_first_stage_nms_iou_threshold): 0.0s
I0326 02:35:58.678552  9780 test_util.py:2374] time(__main__.ModelBuilderTF2Test.test_invalid_first_stage_nms_iou_threshold): 0.0s
[       OK ] ModelBuilderTF2Test.test_invalid_first_stage_nms_iou_threshold
[ RUN      ] ModelBuilderTF2Test.test_invalid_model_config_proto
INFO:tensorflow:time(__main__.ModelBuilderTF2Test.test_invalid_model_config_proto): 0.0s
I0326 02:35:58.688573  9780 test_util.py:2374] time(__main__.ModelBuilderTF2Test.test_invalid_model_config_proto): 0.0s
[       OK ] ModelBuilderTF2Test.test_invalid_model_config_proto
[ RUN      ] ModelBuilderTF2Test.test_invalid_second_stage_batch_size
INFO:tensorflow:time(__main__.ModelBuilderTF2Test.test_invalid_second_stage_batch_size): 0.0s
I0326 02:35:58.692566  9780 test_util.py:2374] time(__main__.ModelBuilderTF2Test.test_invalid_second_stage_batch_size): 0.0s
[       OK ] ModelBuilderTF2Test.test_invalid_second_stage_batch_size
[ RUN      ] ModelBuilderTF2Test.test_session
[  SKIPPED ] ModelBuilderTF2Test.test_session
[ RUN      ] ModelBuilderTF2Test.test_unknown_faster_rcnn_feature_extractor
INFO:tensorflow:time(__main__.ModelBuilderTF2Test.test_unknown_faster_rcnn_feature_extractor): 0.0s
I0326 02:35:58.705710  9780 test_util.py:2374] time(__main__.ModelBuilderTF2Test.test_unknown_faster_rcnn_feature_extractor): 0.0s
[       OK ] ModelBuilderTF2Test.test_unknown_faster_rcnn_feature_extractor
[ RUN      ] ModelBuilderTF2Test.test_unknown_meta_architecture
INFO:tensorflow:time(__main__.ModelBuilderTF2Test.test_unknown_meta_architecture): 0.0s
I0326 02:35:58.707704  9780 test_util.py:2374] time(__main__.ModelBuilderTF2Test.test_unknown_meta_architecture): 0.0s
[       OK ] ModelBuilderTF2Test.test_unknown_meta_architecture
[ RUN      ] ModelBuilderTF2Test.test_unknown_ssd_feature_extractor
INFO:tensorflow:time(__main__.ModelBuilderTF2Test.test_unknown_ssd_feature_extractor): 0.0s
I0326 02:35:58.719965  9780 test_util.py:2374] time(__main__.ModelBuilderTF2Test.test_unknown_ssd_feature_extractor): 0.0s
[       OK ] ModelBuilderTF2Test.test_unknown_ssd_feature_extractor
----------------------------------------------------------------------
Ran 24 tests in 19.862s

OK (skipped=1)
十、配置完成
参考资料
https://blog.csdn.net/l13022736018/article/details/108737082
https://blog.csdn.net/mdjxy63/article/details/81146964
https://www.jianshu.com/p/9c9b908a2b73


 1114
1114


 被折叠的 条评论
为什么被折叠?
被折叠的 条评论
为什么被折叠?
 到【灌水乐园】发言


