


目录
使用 XML 配置实现 IoC
在 Spring 中,构成应用程序主干并由 Spring IoC 容器管理的对象称为bean。bean是一个由 Spring IoC 容器实例化、组装和管理的对象。
bean 标签
bean标签用于配置由 Spring 容器管理的对象,默认情况下调用类的无参构造方法,若没有无参构造方法则不能创建成功。- 有以下常用属性:
| 属性 | 作用 |
|---|---|
| id | 对象在容器中的唯一标识,用于获取对象 |
| class | 类的全限定类名,容器通过反射创建该对象,默认使用类的无参构造 |
scope | 指定对象的作用范围 |
| init-method | 指定类中的初始化方法名称,在对象创建成功之后调用 |
| destory-method | 指定类中的销毁方法名称,在对象销毁之前前调用 |
scope属性有以下取值:
| 取值 | 解释 |
|---|---|
| singleton | 默认值,单例对象 |
| prototype | 多例对象 |
| request | 将对象存入到 web 项目的 request 域中 |
| session | 将对象存入到 web 项目的 session 域中 |
| global session | 将对象存入到 web 项目集群的 session 域中,若不存在集群则相当于session |
Bean 的作用范围与生命周期
单例对象
scope = "singleton"
- 每个应用只有一个该对象的实例,它的生命周期如下:
- 对象出生:当容器创建时,对象就被创建了。
- 对象活着:只要容器没有关闭,那么对象一直存在。
- 对象死亡:当容器关闭时,对象就被销毁了。
多例对象
scope = "prototype"
- 每次访问对象时,都会重新创建该对象的实例。它的生命周期如下:
- 对象出生:当使用对象时,创建新的对象实例。
- 对象活着:只要对象在使用中,对象就一直存在。
- 对象死亡:当对象长时间未使用,被 Java 的垃圾回收器清理。
使用无参构造方法获取 bean
dao 层接口及实现类
public interface UserDao {
void saveUser();
}
public class UserDaoImpl implements UserDao {
@Override
public void saveUser() {
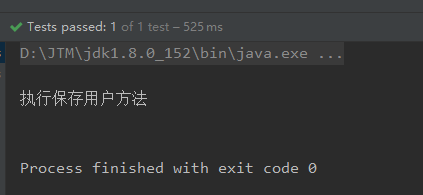
System.out.println("执行保存用户方法");
}
}
Spring 配置文件
<?xml version="1.0" encoding="UTF-8"?>
<beans xmlns="http://www.springframework.org/schema/beans"
       xmlns:xsi="http://www.w3.org/2001/XMLSchema-instance"
       xsi:schemaLocation="http://www.springframework.org/schema/beans
        http://www.springframework.org/schema/beans/spring-beans.xsd">

    <bean id="userDao" class="com.hn.dao.impl.UserDaoImpl"></bean>

</beans>
测试代码
    @org.junit.Test
    public void testUserService() {
        ApplicationContext ac = new ClassPathXmlApplicationContext("applicationContext.xml");
        UserDao userDao = (UserDao) ac.getBean("userDao");
        userDao.saveUser();
    }
运行结果
使用有参构造方法获取 bean
User.java
public class User {
    private String name;
    private int age;

    public User(String name, int age) {
        this.name = name;
        this.age = age;
    }

    @Override
    public String toString() {
        return "User{" +
                "name='" + name + '\'' +
                ", age=" + age +
                '}';
    }
}
Spring 配置文件
<?xml version="1.0" encoding="UTF-8"?>
<beans xmlns="http://www.springframework.org/schema/beans"
xmlns:xsi="http://www.w3.org/2001/XMLSchema-instance"
xsi:schemaLocation="http://www.springframework.org/schema/beans
http://www.springframework.org/schema/beans/spring-beans.xsd">
<bean id="user" class="com.hn.pojo.User">
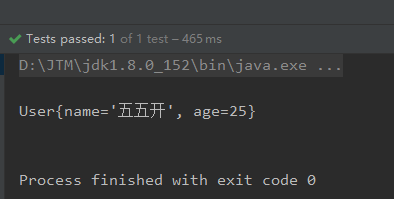
<constructor-arg name="name" value="五五开"></constructor-arg>
<constructor-arg name="age" value="25"></constructor-arg>
</bean>
</beans>
测试代码
    @org.junit.Test
    public void testUser() {
        ApplicationContext ac = new ClassPathXmlApplicationContext("applicationContext.xml");
        User user = (User) ac.getBean("user");
        System.out.println(user);
    }
运行结果
通过设值注入
设值注入指的是,通过类中的 set 方法给成员变量赋值
Student.java
public class Student {
    private String name;
    private String major;
    private Date time;

    public void setName(String name) {
        this.name = name;
    }

    public void setMajor(String major) {
        this.major = major;
    }

    public void setTime(Date time) {
        this.time = time;
    }

    @Override
    public String toString() {
        return "Student{" +
                "name='" + name + '\'' +
                ", major='" + major + '\'' +
                ", time=" + time +
                '}';
    }
}
Spring 配置文件
<?xml version="1.0" encoding="UTF-8"?>
<beans xmlns="http://www.springframework.org/schema/beans"
xmlns:xsi="http://www.w3.org/2001/XMLSchema-instance"
xsi:schemaLocation="http://www.springframework.org/schema/beans
http://www.springframework.org/schema/beans/spring-beans.xsd">
<bean id="time" class="java.util.Date"></bean>
<bean id="student" class="com.hn.pojo.Student">
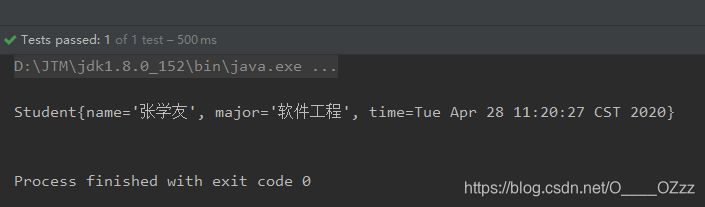
<property name="name" value="张学友"></property>
<property name="major" value="软件工程"></property>
<property name="time" ref="time"></property>
</bean>
</beans>
<property>标签用于 set 方法注入,常用属性如下
| 属性 | 作用 |
|---|---|
| name | 指定注入时所调用的 set 方法名称,去掉 set 并将剩余部分首字母小写得到的字符串 |
| value | 用于给基本类型和 String 类型数据赋值 |
| ref | 用于给其它 Bean 类型的字段赋值,ref 属性的值应为配置文件中配置的 Bean 的 id |
测试代码
    @org.junit.Test
    public void testStudent() {
        ApplicationContext ac = new ClassPathXmlApplicationContext("applicationContext.xml");
        Student student = (Student) ac.getBean("student");
        System.out.println(student);
    }
运行结果
基于 xml 的 IoC 案例
依赖
<dependencies>
        <dependency>
            <groupId>org.springframework</groupId>
            <artifactId>spring-context</artifactId>
            <version>5.2.5.RELEASE</version>
        </dependency>
        <dependency>
            <groupId>mysql</groupId>
            <artifactId>mysql-connector-java</artifactId>
            <version>5.1.6</version>
        </dependency>
        <dependency>
            <groupId>commons-dbutils</groupId>
            <artifactId>commons-dbutils</artifactId>
            <version>1.7</version>
        </dependency>
        <dependency>
            <groupId>c3p0</groupId>
            <artifactId>c3p0</artifactId>
            <version>0.9.1.2</version>
        </dependency>
        <dependency>
            <groupId>junit</groupId>
            <artifactId>junit</artifactId>
            <version>4.13</version>
            <scope>test</scope>
        </dependency>

    </dependencies>
实体类 Student
public class Student {
    private Integer id;
    private String name;
    private String sex;

    @Override
    public String toString() {
        return "Student{" +
                "id=" + id +
                ", name='" + name + '\'' +
                ", sex='" + sex + '\'' +
                '}';
    }
    ...
    //此处省略 getter and setter
}
持久层接口及实现
public interface StudentDao {
    List<Student> queryStudentAll();

    Student queryStudentById(Integer id);

    int insertStudent(Student student);

    int updateStudent(Student student);

    int deleteStudent(Integer id);
}

public class StudentDaoImpl implements StudentDao {
    private QueryRunner queryRunner;

    public void setQueryRunner(QueryRunner queryRunner) {
        this.queryRunner = queryRunner;
    }

    @Override
    public List<Student> queryStudentAll() {
        try {
            return queryRunner.query("select * from student", new BeanListHandler<Student>(Student.class));
        } catch (Exception e) {
            throw new RuntimeException(e);
        }
    }

    @Override
    public Student queryStudentById(Integer id) {
        try {
            return queryRunner.query("select * from student where id = ?", new BeanHandler<Student>(Student.class), id);
        } catch (Exception e) {
            throw new RuntimeException(e);
        }
    }

    @Override
    public int insertStudent(Student student) {
        try {
            return queryRunner.update("insert into student(name,sex) values(?,?) ", student.getName(), student.getSex());
        } catch (Exception e) {
            throw new RuntimeException(e);
        }
    }

    @Override
    public int updateStudent(Student student) {
        try {
            return queryRunner.update("update student set name = ?,sex = ? where id = ?", student.getName(), student.getSex(), student.getId());
        } catch (Exception e) {
            throw new RuntimeException(e);
        }
    }

    @Override
    public int deleteStudent(Integer id) {
        try {
            return queryRunner.update("delete from student where id = ?", id);
        } catch (Exception e) {
            throw new RuntimeException(e);
        }
    }
}
业务层接口及实现
public interface StudentService {
    List<Student> queryStudentAll();

    Student queryStudentById(Integer id);

    int insertStudent(Student student);

    int updateStudent(Student student);

    int deleteStudent(Integer id);
}

public class StudentServiceImpl implements StudentService {
    private StudentDao studentDao;

    public void setStudentDao(StudentDao studentDao) {
        this.studentDao = studentDao;
    }

    @Override
    public List<Student> queryStudentAll() {
        return studentDao.queryStudentAll();
    }

    @Override
    public Student queryStudentById(Integer id) {
        return studentDao.queryStudentById(id);
    }

    @Override
    public int insertStudent(Student student) {
        return studentDao.insertStudent(student);
    }

    @Override
    public int updateStudent(Student student) {
        return studentDao.updateStudent(student);
    }

    @Override
    public int deleteStudent(Integer id) {
        return studentDao.deleteStudent(id);
    }
}
配置文件 applicationContext.xml
<?xml version="1.0" encoding="UTF-8"?>
<beans xmlns="http://www.springframework.org/schema/beans"
       xmlns:xsi="http://www.w3.org/2001/XMLSchema-instance"
       xsi:schemaLocation="http://www.springframework.org/schema/beans
        http://www.springframework.org/schema/beans/spring-beans.xsd">
    <!-- 配置 service -->
    <bean id="studentService" class="com.hn.service.impl.StudentServiceImpl">
        <!-- 注入 dao -->
        <property name="studentDao" ref="studentDao"></property>
    </bean>
    <!-- 配置 dao -->
    <bean id="studentDao" class="com.hn.dao.impl.StudentDaoImpl">
        <!-- 注入QueryRunner -->
        <property name="queryRunner" ref="queryRunner"></property>
    </bean>
    <!-- 配置 QueryRunner -->
    <bean id="queryRunner" class="org.apache.commons.dbutils.QueryRunner" scope="prototype">
        <!-- 注入 DataSource -->
        <constructor-arg name="ds" ref="dataSource"></constructor-arg>
    </bean>
    <!-- 配置 DataSource -->
    <bean id="dataSource" class="com.mchange.v2.c3p0.ComboPooledDataSource">
        <!-- 连接数据库必备的信息 -->
        <property name="driverClass" value="com.mysql.jdbc.Driver"></property>
        <property name="jdbcUrl" value="jdbc:mysql://localhost:3306/spring"></property>
        <property name="user" value="root"></property>
        <property name="password" value="root"></property>
    </bean>
</beans>
单元测试
public class StudentServiceTest {
    private StudentService studentService;

    @Before
    public void init() {
        //获取容器
        ApplicationContext applicationContext = new ClassPathXmlApplicationContext("applicationContext.xml");
        //从容器里获取对象
        studentService = applicationContext.getBean("studentService", StudentService.class);
    }

    @Test
    //测试查询所有学生
    public void testQueryStudentAll() {
        List<Student> students = studentService.queryStudentAll();
        for (Student student : students) {
            System.out.println(student);
        }

    }

    @Test
    //测试根据 id 查询
    public void testQueryStudentById() {
        Student student = studentService.queryStudentById(2);
        System.out.println(student);
    }

    @Test
    //测试插入学生
    public void testInsertStudent() {
        Student student = new Student();
        student.setName("赵丽颖");
        student.setSex("男");
        int i = studentService.insertStudent(student);
        if (i > 0) {
            System.out.println("插入成功");
        } else {
            System.out.println("插入失败");
        }
    }

    @Test
    //测试更新学生
    public void testUpdateStudent() {
        Student student = studentService.queryStudentById(4);
        student.setSex("女");
        int i = studentService.updateStudent(student);
        if (i > 0) {
            System.out.println("更新成功");
        } else {
            System.out.println("更新失败");
        }
    }

    @Test
    //测试删除学生
    public void testDeleteStudent() {
        int i = studentService.deleteStudent(4);
        if (i > 0) {
            System.out.println("删除成功");
        } else {
            System.out.println("删除失败");
        }
    }

}
使用半注解方式实现 IoC
在半注解配置下,Spring 容器仍然需要从xml 文件中读取 IoC 配置,同时在 xml 文件中告知 Spring 创建容器时要扫描的包。
用于创建对象的注解
使用注解,首先需要在配置文件中新增 xml 命名空间与模式约束文件位置,并指定要扫描的包
<?xml version="1.0" encoding="UTF-8"?>
<beans xmlns="http://www.springframework.org/schema/beans"
       xmlns:xsi="http://www.w3.org/2001/XMLSchema-instance"
       xmlns:context="http://www.springframework.org/schema/context"
       xsi:schemaLocation="http://www.springframework.org/schema/beans
        http://www.springframework.org/schema/beans/spring-beans.xsd
        http://www.springframework.org/schema/context
        http://www.springframework.org/schema/context/spring-context.xsd">

    <!-- 告知 Spring 在创建容器时要扫描的包 -->
    <context:component-scan base-package="com.hn"></context:component-scan>
</beans>
修改 UserDao 的实现类
//添加注解,声明唯一标识,这里的 value 相当于 bean 标签 里的 id
@Component(value = "userDao")
public class UserDaoImpl implements UserDao {
    @Override
    public void saveUser() {
        System.out.println("执行保存用户方法");
    }
}
通过在类上添加一个
@Component注解,可以被 Spring 容器识别,,会自动把它转成容器管理的Bean;
除了@Component外,Spring 还提供了3个功能基本和它等效的注解,它们的作用是使三层架构的对象更加清晰
@Component | 用于将当前类对象存入 Spring 容器中 |
|---|---|
@Repository | 用于将持久层对象存入 Spring 容器中 |
@Service | 用于将业务层对象存入 Spring 容器中 |
@Constroller | 用于将控制层对象存入 Spring 容器中 |
用于注入数据的注解
-
@Autowired注解:
默认根据 byType 注入,使用注解注入时可省略 set 方法;
如果容器中有唯一 一个 Bean 的类型与之匹配,注入该对象;
如果容器中有唯多个 Bean 的类型与之匹配,则再根据 byName 进行查找,找到匹配的则注入,未找到则报错 -
@Qualifier注解:
*在默认 根据 byType 注入的基础之上,再根据 byName 注入;注入方法时可以独立使用,注入变量时必须和@Autowired一起使用。 -
@Resource注解:
默认根据 byName 进行注入,名称可以通过 name 属性进行指定,可以独立使用。
public class Test {
    //@Autowired
    //@Qualifier(value = "userDao")
    @Resource(name = "userDao")
    private UserDao userDao;
    @org.junit.Test
    public void testUserService(){
        ApplicationContext ac = new ClassPathXmlApplicationContext("applicationContext.xml");
        userDao = (UserDao) ac.getBean("userDao");
        userDao.saveUser();
    }
}
用于设置作用范围和生命周期的注解
@Scope注解
用于指定 bean 的作用范围,value 常用取值为 singleton(单例)、prototype(多例)
@PostConstruct:注解
用于指定初始化方法,相当于<bean>标签的init-method属性
@PreDestroy注解
用于指定销毁方法,相当于<bean>标签的destroy-metho属性
    @PostConstruct
    public void init() {
        System.out.println("初始化方法执行了");
    }
    @PreDestroy
    public void destroy() {
        System.out.println("销毁方法执行了");

    }
基于半注解的 IoC 案例
在基于 xml 的案例基础上进行修改
修改配置文件 applicationContext.xml
<?xml version="1.0" encoding="UTF-8"?>
<beans xmlns="http://www.springframework.org/schema/beans"
       xmlns:xsi="http://www.w3.org/2001/XMLSchema-instance"
       xmlns:context="http://www.springframework.org/schema/context"
       xsi:schemaLocation="http://www.springframework.org/schema/beans
        http://www.springframework.org/schema/beans/spring-beans.xsd
        http://www.springframework.org/schema/context
        http://www.springframework.org/schema/context/spring-context.xsd">
    <!-- 告知 Spring 在创建容器时要扫描的包 -->
    <context:component-scan base-package="com.hn"></context:component-scan>
    <!-- 配置 QueryRunner -->
    <bean id="queryRunner" class="org.apache.commons.dbutils.QueryRunner" scope="prototype">
        <!-- 注入 DataSource -->
        <constructor-arg name="ds" ref="dataSource"></constructor-arg>
    </bean>
    <!-- 配置 DataSource -->
    <bean id="dataSource" class="com.mchange.v2.c3p0.ComboPooledDataSource">
        <!-- 连接数据库必备的信息 -->
        <property name="driverClass" value="com.mysql.jdbc.Driver"></property>
        <property name="jdbcUrl" value="jdbc:mysql://localhost:3306/spring"></property>
        <property name="user" value="root"></property>
        <property name="password" value="root"></property>
    </bean>
</beans>
第三方类没有加
@Component注解,也不能保证第三方类的包路径可以被自动扫描,所以QueryRunner和ComboPooledDataSource第三方类还是需要配置文件配置。
修改持久层实现类
@Repository("studentDao")
public class StudentDaoImpl implements StudentDao {
    @Autowired
    private QueryRunner queryRunner;
    //使用注解可省略 setter
    ...
    //此处省略持久化方法
修改业务层实现类
@Service("studentService")
public class StudentServiceImpl implements StudentService {
    @Autowired
    private StudentDao studentDao;
    //使用注解可省略 setter
    ...
    //此处省略业务方法
使用纯注解方式实现 IoC
在纯注解配置下,创建Spring 容器时不再读取 xml 文件,但是需要创建一个配置类,以及用到一些新的注解。
纯注解方式需要用到的新注解
| 注解 | 作用 |
|---|---|
@Configuration | 写在类上,声明此类为配置类 |
@ComponentScan | 写在类上,指定 Spring 初始化容器时要扫描的包 |
@Bean | 写在方法上,将此方法作为 bean 对象存入容器中 |
@Import | 写在类上,用于导入其他的配置类 |
基于纯注解的 IoC 案例
在基于半注解的案例基础上进行修改
删除原有配置文件改为添加配置类
//声明此类为配置类
@Configuration
//指定 Spring 初始化容器时要扫描的包
@ComponentScan("com.hn")
public class SpringConfiguration {
    //将此方法作为 bean 对象存入容器中
    @Bean(name = "queryRunner")
    public QueryRunner getQueryRunner(DataSource dataSource) {
        return  new QueryRunner(dataSource);
    }
    @Bean(name = "dataSource")
    public DataSource getDataSource() {
        ComboPooledDataSource comboPooledDataSource = new ComboPooledDataSource();
        try {
            comboPooledDataSource.setDriverClass("com.mysql.jdbc.Driver");
            comboPooledDataSource.setJdbcUrl("jdbc:mysql://localhost:3306/spring");
            comboPooledDataSource.setUser("root");
            comboPooledDataSource.setPassword("root");
        } catch (PropertyVetoException e) {
            e.printStackTrace();
        }
        return comboPooledDataSource;
    }
}
修改测试方法,使用 AnnotationConfigApplicationContext 加载配置类
public class StudentServiceTest {
    private StudentService studentService;

    @Before
    public void init() {
        //获取容器
        ApplicationContext applicationContext = new AnnotationConfigApplicationContext(SpringConfiguration.class);
        //从容器里获取对象
        studentService = applicationContext.getBean("studentService", StudentService.class);
    }

    @Test
    //测试查询所有学生
    public void testQueryStudentAll() {
        List<Student> students = studentService.queryStudentAll();
        for (Student student : students) {
            System.out.println(student);
        }
    }
    ...
    //此处省略其他测试方法


 1004
1004

 被折叠的 条评论
为什么被折叠?
被折叠的 条评论
为什么被折叠?
 到【灌水乐园】发言


