


(完整代码在最下方)
一、实现:从嵌套的圈a到圈b(即环形)的所有像素颜色从颜色x渐变为颜色y。
二、应用:估测两条等高线之间每一处的具体高度。
三、简介:网上找了很多资料,但基本所有的渐变都是变化率固定的的线性变化,这样只适合规则图形。如果在不规则图形上,就会出现在a端颜色统一为x,b端却分化为颜色x和颜色z的情况。我希望做一个变化率不固定的方法出来,于是就有了以下代码:
四、过程:
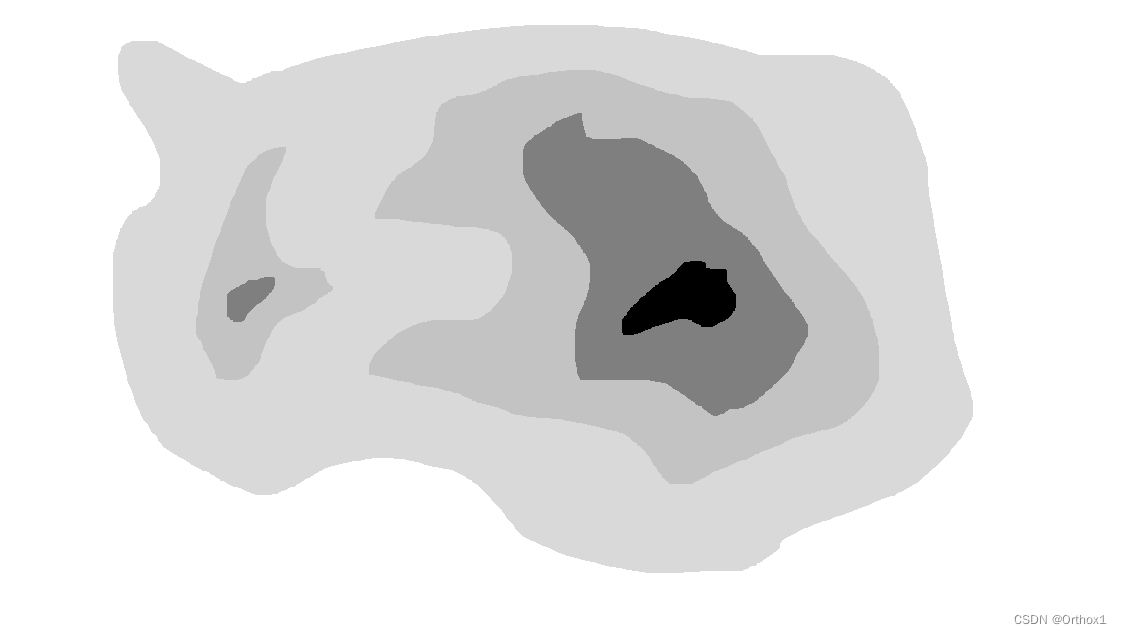
1.预先准备
pip install opencv-python、pip install numpy
import cv2 as cv
import numpy as np
待处理图片
2.采用OpenCV的边缘检测获取轮廓
# 【启动代码】
# 随意替换,只要能输入方法需要的参数即可
# 1.读取图像
path = '你的路径'
image = cv.imread(path)
# 2.识别颜色种类
color_values = np.unique(image)
color_values.sort()
# 3.随机挑选其中三个颜色a、b、c,画出a与b的交界线、b与c的交界线,将两个交界线作为后续步骤中进行操作的两个轮廓。
_, edge1 = cv.threshold(image, color_values[1], color_values[2], cv.THRESH_BINARY_INV)
edge1 = cv.Canny(edge1, 50, 150)
contour1, _ = cv.findContours(edge1, cv.RETR_EXTERNAL, cv.CHAIN_APPROX_SIMPLE)
_, edge2 = cv.threshold(image, color_values[2], color_values[3], cv.THRESH_BINARY_INV)
edge2 = cv.Canny(edge2, 50, 150)
contour2, _ = cv.findContours(edge2, cv.RETR_EXTERNAL, cv.CHAIN_APPROX_SIMPLE)
3.轮廓挑选
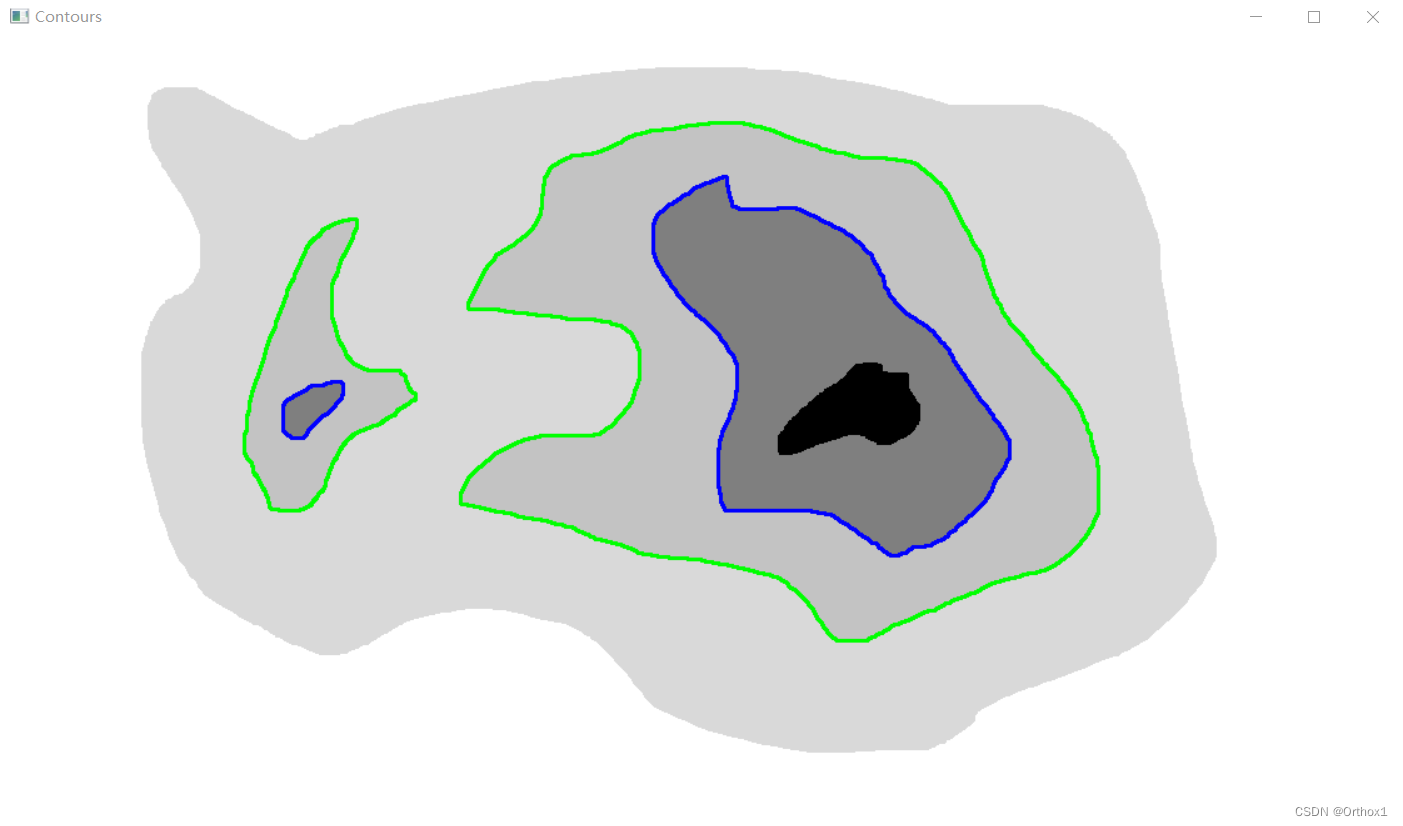
# 4.两个轮廓全部展示
contour_image = image.copy()
cv.drawContours(contours_image, contour1, -1, (255, 0, 0), 2)
cv.drawContours(contours_image, contour2, -1, (0, 255, 0), 2)
cv.imshow("Contours", contours_image)
cv.waitKey(0)
cv.destroyAllWindows()
绿线和蓝线之间就是我们要实现渐变的区域,可以看到有四个圈,现在我们只想对右边的两个圈进行渐变。
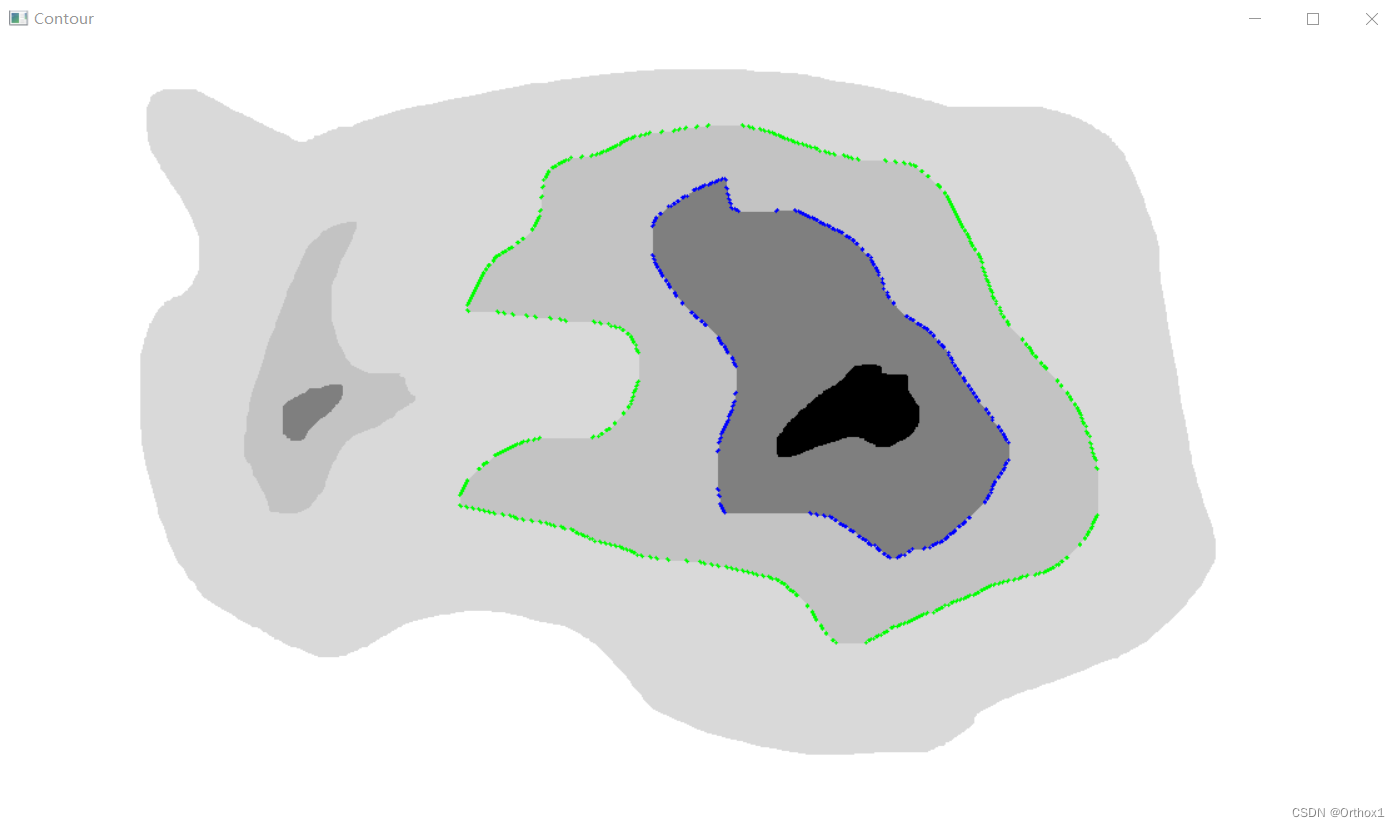
OpenCV里的轮廓是实际上是一堆轮廓的集合,这里都取[1],取到右边的两个圈
# 5.两个轮廓中都只取其中一个部分展示
contours_image = image.copy()
cv.drawContours(contours_image, contour1[1], -1, (255, 0, 0), 2)
cv.drawContours(contours_image, contour2[1], -1, (0, 255, 0), 2)
cv.imshow("Contour", contours_image)
cv.waitKey(0)
cv.destroyAllWindows()
这里轮廓线断断续续应该是显示问题,后续运作是正常的
4.调用方法,输入参数
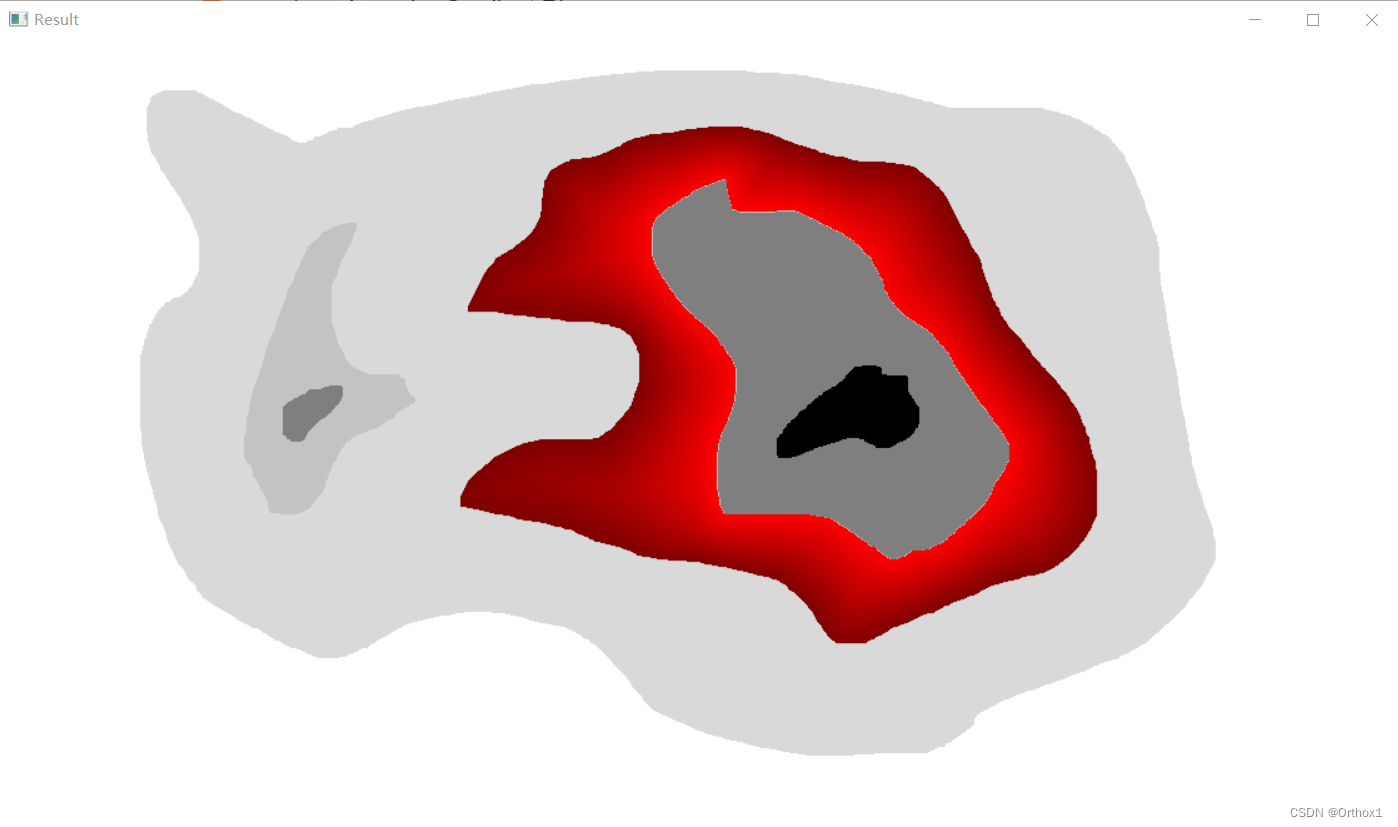
五个参数分别是待处理图片,内轮廓、外轮廓、内颜色、外颜色。
内颜色和外颜色我随便写了深红和正红。
等下要实现的是从内轮廓的内颜色渐变到外轮廓的外颜色
# 6.将轮廓与颜色输入函数
image = draw_gradient(image,contour1[1],contour2[1],(0,0,127),(0,0,255))
cv.imshow("Result", image)
cv.waitKey(0)
cv.destroyAllWindows()
5.方法运行,得到结果
# 【方法体】

def draw_gradient(image,inner_contour,outer_contour,inner_color,outer_color):
    # 1.计算颜色差值
    # 适用于RGB等三通道图像,也可以改成别的模式
    difference = [None] * 3
    for i in range(3):
        difference[i] = inner_color[i] - outer_color[i]
    height, width = image.shape[:2]

    # 2.遍历每行每列的像素
    for y in range(height):
        for x in range(width):
            # 3. 判断是否在大轮廓内
            distance_to_outer = cv.pointPolygonTest(outer_contour, (x,y), True)
            if distance_to_outer > 0:
                # 4. 判断是否在小轮廓外
                distance_to_inner = cv.pointPolygonTest(inner_contour, (x,y), True)
                if distance_to_inner < 0:
                    # 5.若符合以上两个条件,将该点改为介于inner_color和outer_color之间的渐变颜色
                    # 5.1计算颜色比例
                    ratio = - distance_to_inner / (distance_to_outer - distance_to_inner)
                    # 5.2替换颜色
                    for i in range(3):
                        image[y,x][i] = (ratio * difference[i] + outer_color[i])

    return image
最终结果如下:
可以看到,颜色并不是均匀变化的,而是由到内轮廓的距离与外轮廓的距离所决定。像素位置越接近内轮廓,其颜色就越接近内颜色,反之亦然。
五、 完整代码
import cv2 as cv
import numpy as np

# 【方法体】

def draw_gradient(image,inner_contour,outer_contour,inner_color,outer_color):
    # 1.计算颜色差值
    # 适用于RGB等三通道图像,也可以改成别的模式
    difference = [None] * 3
    for i in range(3):
        difference[i] = inner_color[i] - outer_color[i]
    height, width = image.shape[:2]

    # 2.遍历每行每列的像素
    for y in range(height):
        for x in range(width):
            # 3. 判断是否在大轮廓内
            distance_to_outer = cv.pointPolygonTest(outer_contour, (x,y), True)
            if distance_to_outer > 0:
                # 4. 判断是否在小轮廓外
                distance_to_inner = cv.pointPolygonTest(inner_contour, (x,y), True)
                if distance_to_inner < 0:
                    # 5.若符合以上两个条件,将该点改为介于inner_color和outer_color之间的渐变颜色
                    # 5.1计算颜色比例
                    ratio = - distance_to_inner / (distance_to_outer - distance_to_inner)
                    # 5.2替换颜色
                    for i in range(3):
                        image[y,x][i] = (ratio * difference[i] + outer_color[i])

    return image

# 【启动代码】
# 随意替换,只要能输入方法需要的参数即可

# 1.读取图像
path = '你的路径'
image = cv.imread(path)

# 2.识别颜色种类
color_values = np.unique(image)
color_values.sort()

# 3.随机挑选其中三个颜色a、b、c,画出a与b的交界线、b与c的交界线,将两个交界线作为后续步骤中进行操作的两个轮廓。
_, edge1 = cv.threshold(image, color_values[1], color_values[2], cv.THRESH_BINARY_INV)
edge1 = cv.Canny(edge1, 50, 150)
contour1, _ = cv.findContours(edge1, cv.RETR_EXTERNAL, cv.CHAIN_APPROX_SIMPLE)

_, edge2 = cv.threshold(image, color_values[2], color_values[3], cv.THRESH_BINARY_INV)
edge2 = cv.Canny(edge2, 50, 150)
contour2, _ = cv.findContours(edge2, cv.RETR_EXTERNAL, cv.CHAIN_APPROX_SIMPLE)

# 4.两个轮廓全部展示
contour_image = image.copy()
cv.drawContours(contours_image, contour1, -1, (255, 0, 0), 2)
cv.drawContours(contours_image, contour2, -1, (0, 255, 0), 2)
cv.imshow("Contours", contours_image)
cv.waitKey(0)
cv.destroyAllWindows()

# 5.两个轮廓中都只取其中一个部分展示
contours_image = image.copy()
cv.drawContours(contours_image, contour1[1], -1, (255, 0, 0), 2)
cv.drawContours(contours_image, contour2[1], -1, (0, 255, 0), 2)
cv.imshow("Contour", contours_image)
cv.waitKey(0)
cv.destroyAllWindows()

# 6.将轮廓与颜色输入函数
image = draw_gradient(image,contour1[1],contour2[1],(0,0,127),(0,0,255))
cv.imshow("Result", image)
cv.waitKey(0)
cv.destroyAllWindows()


 508
508


 被折叠的 条评论
为什么被折叠?
被折叠的 条评论
为什么被折叠?
 到【灌水乐园】发言


