


一 下载需搭建SpringMVC框架需要的jar包
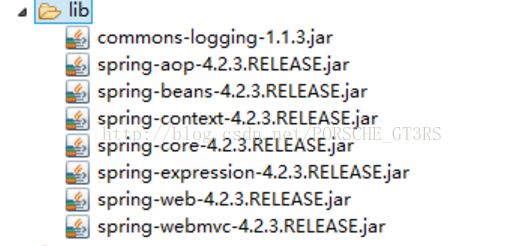
下面就是该项目中需要的jar包 :
二 编写SpringMVCDemo
2.1. 创建一个名为SpringMVCDemoJavaWeb工程
2.2. 创建一个SpringMVC控制类 Hello Contorller
package com.xuhao.controller;

import org.springframework.stereotype.Controller;
import org.springframework.ui.Model;
import org.springframework.web.bind.annotation.RequestMapping;
import org.springframework.web.bind.annotation.RequestMethod;

/**
 * HelloWorld控制器
 * @author XuHao
 *
 */
//   将类声明为Spring容器中的Bean,Spring调用时对该类实例化
@Controller
@RequestMapping("/HelloWorld")  // 声明Conntroller处理的请求是 /HelloWorld
public class HelloWorldController {

	@RequestMapping(method = RequestMethod.GET) //  声明请求方法为GET
	public String print(Model model){
		model.addAttribute("message", "我是陈二狗!!!");
		return "hello";   //  返回"hello"   交由ViewResolver解析
	}
}
/ * 在分层体系结构中 @Controller 用来对控制层的类进行注释,@Service用来声明应用服务层 @Repository用来声明持久层
使用Spring中引入的组件自动扫描机制可以在类路径下寻找标注了@Controller等注解的类,并将这些类纳入到Spring容器中
进行管理。使用@Controller注解的作用等同于在xml文件中使用<bean>标签进行配置
*/
2.3. 定义视图 创建一个名为hello.jsp的文件 在WEB_INF/jsp文件下
<%@ page language="java" import="java.util.*" pageEncoding="utf-8"%>
<%
String path = request.getContextPath();
String basePath = request.getScheme()+"://"+request.getServerName()+":"+request.getServerPort()+path+"/";
%>

<!DOCTYPE HTML PUBLIC "-//W3C//DTD HTML 4.01 Transitional//EN">
<html>
  <head>
  </head>
  <body>
    <h1>SpringMVCDemo:${message}</h1>
  </body>
</html>
<?xml version="1.0" encoding="UTF-8"?>
<beans xmlns="http://www.springframework.org/schema/beans"
    xmlns:xsi="http://www.w3.org/2001/XMLSchema-instance" xmlns:mvc="http://www.springframework.org/schema/mvc"
    xmlns:p="http://www.springframework.org/schema/p" xmlns:context="http://www.springframework.org/schema/context"
    xmlns:aop="http://www.springframework.org/schema/aop" xmlns:tx="http://www.springframework.org/schema/tx"
    xsi:schemaLocation="http://www.springframework.org/schema/beans
            http://www.springframework.org/schema/beans/spring-beans-4.0.xsd
            http://www.springframework.org/schema/context
            http://www.springframework.org/schema/context/spring-context-4.0.xsd
            http://www.springframework.org/schema/aop
            http://www.springframework.org/schema/aop/spring-aop-4.0.xsd
            http://www.springframework.org/schema/tx
            http://www.springframework.org/schema/tx/spring-tx-4.0.xsd
            http://www.springframework.org/schema/mvc
            http://www.springframework.org/schema/mvc/spring-mvc-4.0.xsd
            http://www.springframework.org/schema/context
            http://www.springframework.org/schema/context/spring-context-4.0.xsd">

   <mvc:annotation-driven/>
   <mvc:annotation-driven />
   <!-- 注入Bean时,Spring容器要查找的包  自动扫描包-->
   <context:component-scan base-package="com.xuhao.controller"/>

   <!-- 配置视图解析器 使用InternaResourceViewResolver 类作为视图解析器
            Conntroller回传的ModelandView DispactherServlet将其交给ViewResolver解析 -->
   <bean class="org.springframework.web.servlet.view.InternalResourceViewResolver">
   		<!-- 指定目录前缀 -->
   		<property name="prefix">
   			<value>/WEB-INF/jsp/</value>
   		</property>
   		<!-- 指定文件后缀 -->
   		<property name="suffix">
   			<value>.jsp</value>
   		</property>
   </bean>

</beans>
<?xml version="1.0" encoding="UTF-8"?>
<web-app xmlns:xsi="http://www.w3.org/2001/XMLSchema-instance" xmlns="http://java.sun.com/xml/ns/javaee" xsi:schemaLocation="http://java.sun.com/xml/ns/javaee http://java.sun.com/xml/ns/javaee/web-app_3_0.xsd" id="WebApp_ID" version="3.0">
  <!-- 定义前端控制器 -->
  <servlet>
  	<!-- 定义Servlet名字 -->
  	<servlet-name>springmvc</servlet-name>
  	<!-- 指定Servlet类 -->
  	<servlet-class>org.springframework.web.servlet.DispatcherServlet</servlet-class>
  	<!-- 指定启动顺序 为1表示该Servlet会随着Servlet容器一起启动 -->
  	<load-on-startup>1</load-on-startup>
  </servlet>
  <!-- 设置Servlet的访问方式 -->
  <servlet-mapping>
  	<servlet-name>springmvc</servlet-name>
  	<url-pattern>/</url-pattern>
  </servlet-mapping>
  <!-- 设置SpringMVC配置文件(Bean定义文件)的位置和名称 -->
  <context-param>
  	<param-name>contextConfigLocation</param-name>
  	<param-value>/WEB-INF/springmvc-servlet.xml</param-value>
  </context-param>
  <!-- 设置监听器 -->
  <listener>
  	<listener-class>org.springframework.web.context.ContextLoaderListener</listener-class>
  </listener>


  <welcome-file-list>
    <welcome-file>index.jsp</welcome-file>
  </welcome-file-list>
</web-app>
<param-value>/WEB-INF/springmvc-servlet.xml</param-value> 默认是这里 如果放在类路径下面的话 需要指明为:<param-value>Classpath:springmvc-servlet.xml</param-value>*/
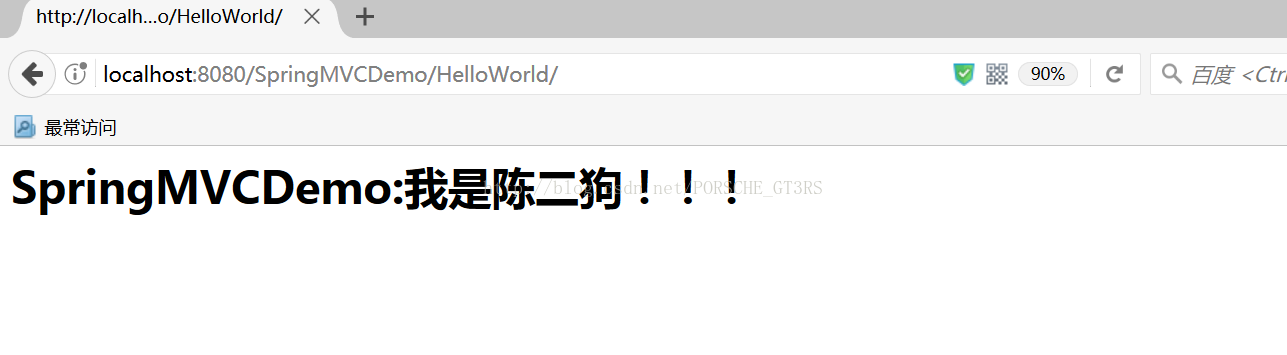
2.6. 在浏览器上运行: http:localhost:8080/SpringMVCDemo/HelloWorld 结果如下:


 319
319

 被折叠的 条评论
为什么被折叠?
被折叠的 条评论
为什么被折叠?
 到【灌水乐园】发言


