


创建RootViewController,在.m文件中操作
#import "RootViewController.h"
@interface RootViewController ()
{
NSArray *imageArray;// 装图片的数组
UIImageView *imageView;
NSInteger imageIndex;// 标记图片数组中的图片下标
CGFloat netRotation;// 视图旋转后的的角度
CGPoint netTranslation;// 平移坐标
}
@end
@implementation RootViewController
- (void)viewDidLoad {
[super viewDidLoad];
/*
iPhone中处理触摸屏的操作,在3.2之前是主要是使用由UIResponder而来的如下4种方式:
- (void)touchesBegan:(NSSet *)touches withEvent:(UIEvent *)event
- (void)touchesCancelled:(NSSet *)touches withEvent:(UIEvent *)event
- (void)touchesEnded:(NSSet *)touches withEvent:(UIEvent *)event
- (void)touchesMoved:(NSSet *)touches withEvent:(UIEvent *)event
这种方式甄别不同的手势操作非常麻烦,需要自己计算做出不同的手势分辨;后来苹果就给出了一个比较简便的方式:使用UIGestureRecognizer。
UIGestureRecognizer基类是一个抽象类,我们主要是使用它的子类:
UITapGestureRecognizer
UIPinchGestureRecognizer
UIRotationGestureRecognizer
UISwipeGestureRecognizer
UIPanGestureRecognizer
UILongPressGestureRecognizer
Tap(点击)、Pinch(捏合)、Rotation(旋转)、Swipe(划动手势,快速移动,用于监测滑动的方向的)、Pan(拖拽,慢速移动,用于监测偏移量、 LongPress(长按)
*/
// 设置根视图背景颜色
self.view.backgroundColor = [UIColor redColor];
// 创建一个子视图,用来测试各种手势
UIView *gestureView = [[UIView alloc]initWithFrame:CGRectMake(50, 50, self.view.frame.size.width - 100, self.view.frame.size.height - 300)];
gestureView.backgroundColor = [UIColor orangeColor];
gestureView.tag = 101;// 给测试视图添加tag值
[self.view addSubview:gestureView];
[gestureView release];
// 创建一个imageView,用来测试双击放大/缩小图片
imageView = [[UIImageView alloc]initWithImage:[UIImage imageNamed:@"image1.jpg"]];
imageView.frame = [UIScreen mainScreen].bounds;
imageView.userInteractionEnabled = YES;// 打开imageView的用户交互(系统默认是NO)
[self.view addSubview:imageView];
[imageView release];
// 1、轻拍手势
UITapGestureRecognizer *tapGesture1 = [[UITapGestureRecognizer alloc]initWithTarget:self action:@selector(tapGesture1Action:)];
tapGesture1.numberOfTapsRequired = 2;// 设置点击2次才有效
tapGesture1.numberOfTouchesRequired = 2;// 设置2根手指触摸才有效
// 将手势添加到gestureView上
[gestureView addGestureRecognizer:tapGesture1];
[tapGesture1 release];
// 1、轻拍手势 - 对图片进行双击放大/缩小
UITapGestureRecognizer *tapGesture2 = [[UITapGestureRecognizer alloc]initWithTarget:self action:@selector(tapGesture2Action:)];
tapGesture2.numberOfTapsRequired = 2;// 设置点击2次才有效
tapGesture2.numberOfTouchesRequired = 1;// 设置1根手指触摸才有效
// 将手势添加到gestureView上
[imageView addGestureRecognizer:tapGesture2];
[tapGesture2 release];
// 2、捏合手势
UIPinchGestureRecognizer *pinchGesture = [[UIPinchGestureRecognizer alloc]initWithTarget:self action:@selector(pinchGestureAction:)];
[gestureView addGestureRecognizer:pinchGesture];
[pinchGesture release];
// 3、旋转手势
UIRotationGestureRecognizer *rotationGesture = [[UIRotationGestureRecognizer alloc]initWithTarget:self action:@selector(rotationGestureAction:)];
[gestureView addGestureRecognizer:rotationGesture];
[rotationGesture release];
// 4、划动手势
// 右划
UISwipeGestureRecognizer *UpSwipeGesture = [[UISwipeGestureRecognizer alloc]initWithTarget:self action:@selector(swipeGestureAction:)];
[imageView addGestureRecognizer:UpSwipeGesture];
UpSwipeGesture.direction = UISwipeGestureRecognizerDirectionUp;// 系统默认是right
[UpSwipeGesture release];
UISwipeGestureRecognizer *DownSwipeGesture = [[UISwipeGestureRecognizer alloc]initWithTarget:self action:@selector(swipeGestureAction:)];
[imageView addGestureRecognizer:DownSwipeGesture];
DownSwipeGesture.direction = UISwipeGestureRecognizerDirectionDown;
[DownSwipeGesture release];
UISwipeGestureRecognizer *RightSwipeGesture = [[UISwipeGestureRecognizer alloc]initWithTarget:self action:@selector(swipeGestureAction:)];
[imageView addGestureRecognizer:RightSwipeGesture];
RightSwipeGesture.direction = UISwipeGestureRecognizerDirectionRight;
[RightSwipeGesture release];
UISwipeGestureRecognizer *LeftSwipeGesture = [[UISwipeGestureRecognizer alloc]initWithTarget:self action:@selector(swipeGestureAction:)];
[imageView addGestureRecognizer:LeftSwipeGesture];
LeftSwipeGesture.direction = UISwipeGestureRecognizerDirectionLeft;
[LeftSwipeGesture release];
UIImage *image1 = [UIImage imageNamed:@"image1.jpg"];
UIImage *image2 = [UIImage imageNamed:@"image2.jpg"];
UIImage *image3 = [UIImage imageNamed:@"image3.jpg"];
UIImage *image4 = [UIImage imageNamed:@"image4.jpg"];
imageArray = [[NSArray alloc]initWithObjects:image1, image2, image3, image4, nil];
imageIndex = 0;
// 5、拖拽手势
UIPanGestureRecognizer *panGesture = [[UIPanGestureRecognizer alloc]initWithTarget:self action:@selector(panGestureAction:)];
[imageView addGestureRecognizer:panGesture];
[panGesture release];
// 6、长按手势
UILongPressGestureRecognizer *longPressGesture = [[UILongPressGestureRecognizer alloc]initWithTarget:self action:@selector(longPressGestureAction:)];
// 设置长按触发时间为多少
longPressGesture.minimumPressDuration = 1;
// 按下的手指数量
longPressGesture.numberOfTouchesRequired = 1;
longPressGesture.allowableMovement = 10;// 系统默认是10
[imageView addGestureRecognizer:longPressGesture];
[longPressGesture release];
// 关联手势的处理方法
/*
在日常开发中,有些手势是关联的,例如:Tap 与 LongPress、Swipe与 Pan,或是 Tap 一次与Tap 兩次。
单击和双击并存时,如果不做处理,它就只能发送出单击的消息;拖拽手势和划动手势并存时,如果不做处理,它就只能发送出拖拽消息。
手势识别是具有互斥原则的,比如单击和双击,如果识别出一种手势,另一个手势将不被识别。所以对于关联手势,要做特殊处理以帮助程序甄别。
为了能够识别出双击手势,就需要做一个特殊处理逻辑,即先判断手势是否是双击,在双击失效的情况下作为单击手势处理。
使用[A requireGestureRecognizerToFail:B]方法,它可以指定当A手势发生时,即便A已经滿足条件了,也不会立刻触发,会等到指定的手势B确定失败之后才触发。
*/
// 左右划动手势失败才会响应拖拽手势,该方法间接实现了手势的优先级,即优先处理左右划动手势
[panGesture requireGestureRecognizerToFail:LeftSwipeGesture];
[panGesture requireGestureRecognizerToFail:RightSwipeGesture];
}
#pragma mark - tapGestureAction
- (void)tapGesture1Action:(UITapGestureRecognizer *)sender
{
NSLog(@"双手指 - 双击 - 手势");
// 随机改变视图颜色
sender.view.backgroundColor = [UIColor colorWithRed:arc4random()%256/255.0 green:arc4random()%256/255.0 blue:arc4random()%256/255.0 alpha:1.0];
}
- (void)tapGesture2Action:(UITapGestureRecognizer *)sender
{
NSLog(@"单手指 - 双击 - 手势");
//判断imageView的内容模式是否是UIViewContentModeScaleAspectFit,该模式是原比例,按照图片原始比例显示大小
if (sender.view.contentMode == UIViewContentModeScaleAspectFit) {
//把imageView模式改成UIViewContentModeCenter,按照图片原先的大小在imageView上显示其中心部分(中心部分放大后显示到原来的fram上)
sender.view.contentMode = UIViewContentModeCenter;
} else {
sender.view.contentMode = UIViewContentModeScaleAspectFit;
}
}
#pragma mark - pinchGestureAction
- (void)pinchGestureAction:(UIPinchGestureRecognizer *)sender
{
NSLog(@"捏合手势");
// 检测到捏合手势后,按比例改变试图大小(通过子视图的tag值找到测试视图gestureView)
[self.view viewWithTag:101].transform = CGAffineTransformScale([self.view viewWithTag:101].transform, sender.scale, sender.scale);
// 每次执行捏合的触动方法时,最后都要让前一次的捏合比例置为1;否侧捏合的比例会叠加,导致捏合时图片改变越来越快
sender.scale = 1;
}
#pragma mark - rotationGestureAction
- (void)rotationGestureAction:(UIRotationGestureRecognizer *)sender
{
NSLog(@"旋转手势");
//浮点类型,得到sender的旋转度数
CGFloat rotation = sender.rotation;
//旋转角度CGAffineTransformMakeRotation
CGAffineTransform transform = CGAffineTransformMakeRotation(netRotation + rotation);
//根据旋转角度改变图像角度
sender.view.transform = transform;
//状态结束,保存数据
if (sender.state == UIGestureRecognizerStateEnded) {
netRotation = netRotation + rotation;
}
}
#pragma mark - swipeGestureAction
- (void)swipeGestureAction:(UISwipeGestureRecognizer *)sender
{
// 划动的方向
UISwipeGestureRecognizerDirection direction = sender.direction;
// 根据不同划动方向做出对应的响应
switch (direction) {
case UISwipeGestureRecognizerDirectionUp:
NSLog(@"up");
break;
case UISwipeGestureRecognizerDirectionDown:
NSLog(@"down");
break;
case UISwipeGestureRecognizerDirectionLeft:
NSLog(@"left");
imageIndex++;
break;
case UISwipeGestureRecognizerDirectionRight:
NSLog(@"right");
imageIndex--;
break;
default:
break;
}
// 得到不越界的下标
imageIndex = (imageIndex < 0) ? ([imageArray count] - 1) : imageIndex%[imageArray count];
imageView.image = [imageArray objectAtIndex:imageIndex];
}
#pragma mark - panGestureAction
- (void)panGestureAction:(UIPanGestureRecognizer *)sender
{
// 得到拖拽过程中的x、y坐标
CGPoint translation = [sender translationInView:imageView];
// 平移图片
sender.view.transform = CGAffineTransformMakeTranslation(netTranslation.x + translation.x, netTranslation.y + translation.y);
// 状态结束,保存数据
if (sender.state == UIGestureRecognizerStateEnded) {
netTranslation.x = netTranslation.x + translation.x;
netTranslation.y = netTranslation.y + translation.y;
}
}
#pragma mark - longPressGestureAction
- (void)longPressGestureAction:(UILongPressGestureRecognizer *)sender
{
// 1、第一种情况,不加约束条件直接写longPressGestureAction的内部实现方法(警告栏会弹出两次)
// 创建警告
UIAlertView *alert = [[UIAlertView alloc]initWithTitle:@"警告" message:@"触发长按方法" delegate:self cancelButtonTitle:@"确定" otherButtonTitles:nil, nil];
// 展示警告
[alert show];
[alert release];
// 2、第二种情况,给longPressGestureAction的内部实现方法加上约束条件(警告栏只会弹出一次)
// 长按时间到达1秒时(设置的触发时间是1秒),longPressGestureAction会被执行一次,如果不给它内部的方法加上约束条件,手指在长按超过一秒后离开时,再次触发longPressGestureAction,还会执行一遍它内部的方法
//为了防止弹出两次警告,给它内部的方法加上一个约束条件:手势状态为开始状态时(长按刚好1秒)才会触发它内部的方法,其他情况不触发
// if (sender.state == UIGestureRecognizerStateBegan) {
// // 创建警告
// UIAlertView *alert = [[UIAlertView alloc]initWithTitle:@"警告" message:@"触发长按方法" delegate:self cancelButtonTitle:@"确定" otherButtonTitles:nil, nil];
// // 展示警告
// [alert show];
// [alert release];
// }
// 测试长按的过程
// if (sender.state == UIGestureRecognizerStateBegan) {
// NSLog(@"开始");// 长按到达1秒时触发该状态
// } else if (sender.state == UIGestureRecognizerStateChanged) {
// NSLog(@"改动");// sender的状态变为开始后 再移动手指会触发该状态
// } else if (sender.state == UIGestureRecognizerStateEnded) {
// NSLog(@"结束");// 手指离开,触发该状态
// } else if (sender.state == UIGestureRecognizerStateCancelled) {
// NSLog(@"取消");// 手指长按过程中,有突发事件发生(例如弹出警告框),触发该状态
// }
// 也就是说,如果在longPressGestureAction内写了一个事件,如果不给事件加上约束条件,那么该事件最少会被执行两次
}
- (void)dealloc
{
[imageArray release];
[imageView release];
[super dealloc];
}
/*
iphone操作手势的大概用途
1.点击(Tap)
点击作为最常用手势,用于按下或选择一个控件或条目(类似于普通的鼠标点击)
2.拖动(Drag)
拖动用于实现一些页面的滚动,以及对控件的移动功能。
3.滑动(Flick)
滑动用于实现页面的快速滚动和翻页的功能。
4.横扫(Swipe)
横扫手势用于激活列表项的快捷操作菜单
5.双击(Double Tap)
双击放大并居中显示图片,或恢复原大小(如果当前已经放大)。同时,双击能够激活针对文字编辑菜单。
6.放大(Pinch open)
放大手势可以实现以下功能:打开订阅源,打开文章的详情。在照片查看的时候,放大手势也可实现放大图片的功能。
7.缩小(Pinch close)
缩小手势,可以实现与放大手势相反且对应的功能的功能:关闭订阅源退出到首页,关闭文章退出至索引页。在照片查看的时候,缩小手势也可实现缩小图片的功能。
8.长按(Touch &Hold)
在我的订阅页,长按订阅源将自动进入编辑模式,同时选中手指当前按下的订阅源。这时可直接拖动订阅源移动位置。
针对文字长按,将出现放大镜辅助功能。松开后,则出现编辑菜单。
针对图片长按,将出现编辑菜单。
9.摇晃(Shake)
摇晃手势,将出现撤销与重做菜单。主要是针对用户文本输入的。
*/
// 本文参考博客地址http://blog.csdn.net/likendsl/article/details/7554150
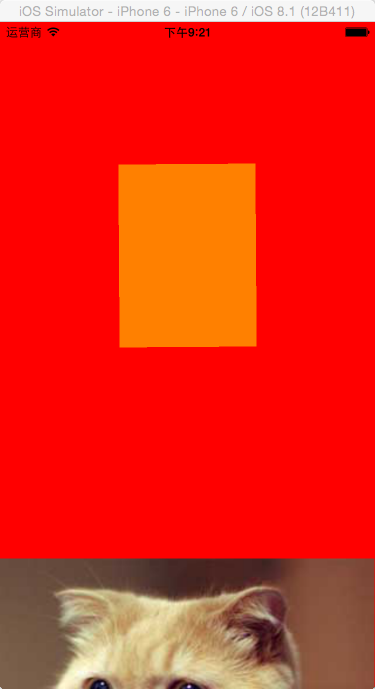
原始颜色

随机变化出来的颜色

捏合手势的缩小效果
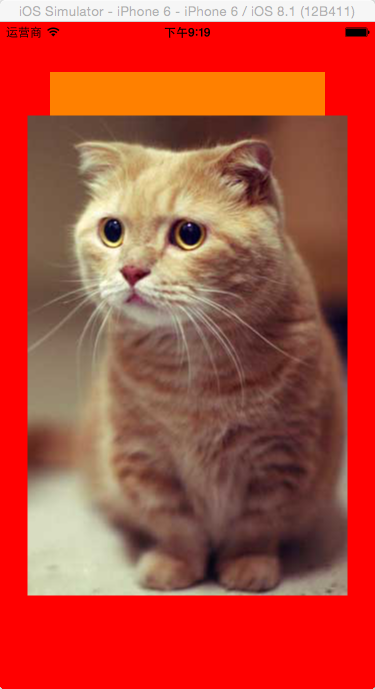
图片的原始形状
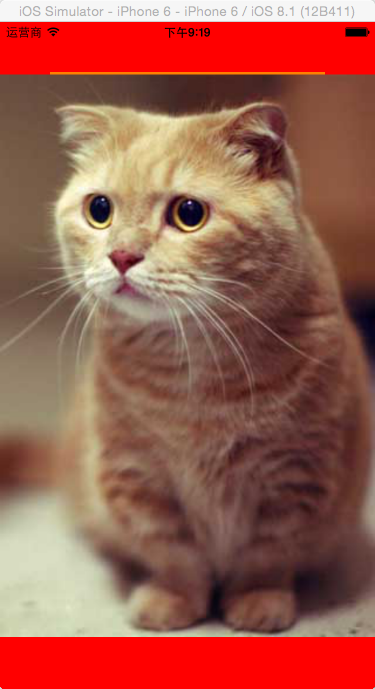
双击后图片的形状
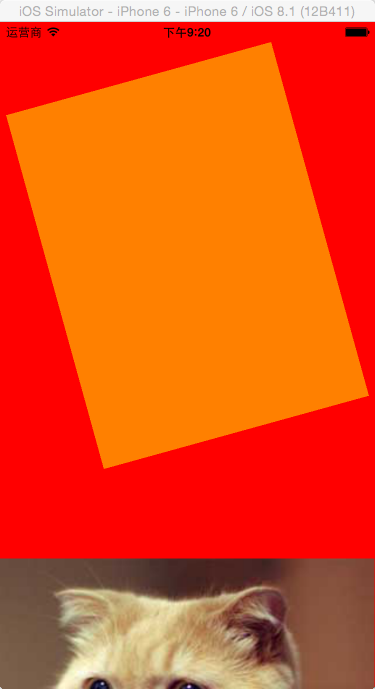
旋转效果
长按效果


 747
747


 被折叠的 条评论
为什么被折叠?
被折叠的 条评论
为什么被折叠?
 到【灌水乐园】发言


