


To build a twittmap, we need to utilize the twitter API. Here, I chose twitter4j, which is an unofficial Java library for the Twitter API. With Twitter4J, you can easily integrate your Java application with the Twitter service. There are some tutorials here: How to “Sign in with Twitter” using twitter4j.
Register twitter app
Click this linkand fill out the following form, it should be fine. Just remember to grant your app access for read and write.
Include twitter4j
For those who are not familiar with java, it would be a painful process to learn how use new tools at first(I like VS better, lol). Don’t worry, just follow the steps below.
1. Download twitter4j from here.
2. Unzip it.
3. After you create a java project, Right-click on your Java project and Select Properties.
4. Choose Java Build Path and select the third tab, Libraries.
5. Click add external library and add twitter4j-core-4.0.4.jar.
Begin programming
A lot of examples are available. Here is the sample code used in tutorial mentioned above (Using eclipse).
package com.example.test;

import twitter4j.Status;
import twitter4j.Twitter;
import twitter4j.TwitterException;
import twitter4j.TwitterFactory;
import twitter4j.auth.AccessToken;
import twitter4j.auth.RequestToken;
import twitter4j.conf.ConfigurationBuilder;
import twitter4j.conf.Configuration;

import java.io.BufferedReader;
import java.io.IOException;
import java.io.InputStreamReader;

public class FirstClass {

    public static void main(String[] args) {
        // TODO Auto-generated method stub
        String testStatus="Hello from twitter4j";

        ConfigurationBuilder cb = new ConfigurationBuilder();

        //the following is set without accesstoken- desktop client
        cb.setDebugEnabled(true)
            .setOAuthConsumerKey("CONSUMER-KEY")
            .setOAuthConsumerSecret("CONSUMER-SECRET");
        try{
            TwitterFactory tf = new TwitterFactory(cb.build());
            Twitter twitter = tf.getInstance();

            try{
                RequestToken requestToken = twitter.getOAuthRequestToken();
                System.out.println("Got request token.");
                System.out.println("Request token: " + requestToken.getToken());
                System.out.println("Request token secret: " + requestToken.getTokenSecret());
                AccessToken accessToken = null;

                BufferedReader br = new BufferedReader(new InputStreamReader(System.in));
                while(accessToken == null){
                    System.out.println("Open the following URL and grant access to your account:");
                    System.out.println(requestToken.getAuthorizationURL());
                    System.out.print("Enter the PIN(if available) and hit enter after you granted access.[PIN]:");
                    String pin = br.readLine();
                    try {
                        if (pin.length() > 0) {
                            accessToken = twitter.getOAuthAccessToken(requestToken, pin);
                        } else {
                            accessToken = twitter.getOAuthAccessToken(requestToken);
                        }
                    } catch (TwitterException te) {
                        if (401 == te.getStatusCode()) {
                            System.out.println("Unable to get the access token.");
                        } else {
                            te.printStackTrace();
                        }
                    }
                }
                System.out.println("Got access token.");
                System.out.println("Access token: " + accessToken.getToken());
                System.out.println("Access token secret: " + accessToken.getTokenSecret());
            } catch(IllegalStateException ie){
                if (!twitter.getAuthorization().isEnabled()) {
                    System.out.println("OAuth consumer key/secret is not set.");
                    System.exit(-1);
                }
            }
            Status status = twitter.updateStatus(testStatus);
            System.out.println("Successfully updated the status to [" + status.getText() + "].");
            System.exit(0);
        } catch (TwitterException te) {
            te.printStackTrace();
            System.out.println("Failed to get timeline: " + te.getMessage());
            System.exit(-1);
        } catch (IOException ioe) {
            ioe.printStackTrace();
            System.out.println("Failed to read the system input.");
            System.exit(-1);
        }
    }

}
This piece of code can post a twitter from your account, after running this u can see the following instructions.

Just click into the url it mentioned and grant access to your app, and then type in the PIN code that it gives u. After that, u can check ur twitter now.

Use streaming API
Here is the code.
package com.example.test;

import twitter4j.*;
import twitter4j.conf.ConfigurationBuilder;

public class PrintSampleStream {

    public static void main(String[] args) throws TwitterException{
         ConfigurationBuilder cb = new ConfigurationBuilder();

            //the following is set without accesstoken- desktop client
            cb.setDebugEnabled(true)
                .setOAuthConsumerKey("I won't tell u")
                .setOAuthConsumerSecret("what my key and secret is")
                .setOAuthAccessToken("LOL")
                .setOAuthAccessTokenSecret(":)");

        TwitterStream twitterStream = new TwitterStreamFactory(cb.build()).getInstance();
        StatusListener listener = new StatusListener() {
             public void onStatus(Status status) {
                 System.out.println(status.getUser().getName() + " : " + status.getText());
             }
             public void onDeletionNotice(StatusDeletionNotice statusDeletionNotice) {}
             public void onTrackLimitationNotice(int numberOfLimitedStatuses) {}
             public void onException(Exception ex){
                 ex.printStackTrace();
             }
            @Override
            public void onScrubGeo(long arg0, long arg1) {
                // TODO Auto-generated method stub
            }
            @Override
            public void onStallWarning(StallWarning arg0) {
                // TODO Auto-generated method stub
            }
         };
         twitterStream.addListener(listener);
         twitterStream.sample();

    }
}
This piece of sample code enables you to fetch tweets from twitter in real-time.
Fetch Filtered Stream
Sometimes, we would like to search information that we are interested in, so we may need to filter the stream so that we can get relevant twitters. The code is shown below.
package com.example.test;

import twitter4j.*;
import twitter4j.conf.ConfigurationBuilder;

import java.util.ArrayList;
import java.util.Arrays;

public class PrintFilteredStream {

    public static void main(String[] args) throws TwitterException {
        String[] keywordsArray = {"iphone", "samsung"};

        ConfigurationBuilder cb = new ConfigurationBuilder();

            //the following is set without accesstoken- desktop client
        cb.setDebugEnabled(true)
            .setOAuthConsumerKey("CONSUMER-KEY")
            .setOAuthConsumerSecret("CONSUMER-SECRET")
            .setOAuthAccessToken("ACCESS-TOKEN")
            .setOAuthAccessTokenSecret("ACCESS-TOKEN-SECRET");

        //  Implementing StatusListner
        StatusListener listener = new StatusListener() {
            @Override
            public void onStatus(Status status) {
                System.out.println(status.getUser().getName() + " : " + status.getText());
            }

            @Override
            public void onDeletionNotice(StatusDeletionNotice statusDeletionNotice) {
                System.out.println("Got a status deletion notice id:" + statusDeletionNotice.getStatusId());
            }

            @Override
            public void onTrackLimitationNotice(int numberOfLimitedStatuses) {
                System.out.println("Got track limitation notice:" + numberOfLimitedStatuses);
            }

            @Override
            public void onException(Exception ex){
                ex.printStackTrace();
            }

            @Override
            public void onScrubGeo(long userId, long upToStatusId) {
                System.out.println("Got scrub_geo event userId:" + userId + " upToStatusId:" + upToStatusId);
            }
            @Override
            public void onStallWarning(StallWarning warning) {
                System.out.println("Got stall warning:" + warning);
            }
        };

        TwitterStream twitterStream = new TwitterStreamFactory(cb.build()).getInstance();
        twitterStream.addListener(listener);
        ArrayList<Long> follow = new ArrayList<Long>();
        ArrayList<String> track = new ArrayList<String>();
        for(String arg : keywordsArray){
            if(isNumericalArgument(arg)){
                for(String id : arg.split(",")){
                    follow.add(Long.parseLong(id));
                }
            }else{
                track.addAll(Arrays.asList(arg.split(",")));
            }
        }
        long[] followArray = new long[follow.size()];
        for(int i = 0; i < follow.size(); i++){
            followArray[i] = follow.get(i);
        }
        String[] trackArray = track.toArray(new String[track.size()]);
        twitterStream.filter(new FilterQuery(0, followArray, trackArray));
    }

    private static boolean isNumericalArgument(String argument){
        String args[] = argument.split(",");
        boolean isNumericalArgument = true;
        for(String arg : args){
            try{
                Integer.parseInt(arg);
            } catch(NumberFormatException nfe){
                isNumericalArgument = false;
                break;
            }
        }
        return isNumericalArgument;
    }
}
Set up elasticsearch environment
- Go to AWS console and select elasticsearch service(you can also choose to use elasticsearch by downloading and unzipping it from here)
- Set access police to open access or any way you like, and then use curl to create index using index API.
$ curl -XPUT 'http://search-twitter-1-kf5qeriqw5iu6uasbyv6dmwfbq.us-west-2.es.amazonaws.com/user/' -d '{
    "settings" : {
        "index" : {
            "number_of_shards" : 3,
            "number_of_replicas" : 2
        }
    }
}'
this piece of code will create an index named “user” in your AWS domain.
3. Next, you are going to create mapping. Here, the mapping called “profile” is created, which has three properties: text, latitude and longitude.
curl -XPOST search-twitter-1-kf5qeriqw5iu6uasbyv6dmwfbq.us-west-2.es.amazonaws.com/user/_mapping/profile -d
'
{
    "profile" : {
        "properties" : {
        "text" : { "type" : "string"},
        "latitude" : { "type" : "string"},
        "longitude" : { "type" : "string"}
         }
    }
}
'
Upload data to elasticsearch
To upload data to elasticsearch, you can use the curl command in cygwin, since I am using a windows machine, or put this piece of code into the java program that are fetching twitter. From twitter stream, we can obtain a JSONObject, which could by utilize into uploading to elasticsearch.
String url = "http://search-twitter-1-kf5qeriqw5iu6uasbyv6dmwfbq.us-west-2.es.amazonaws.com/user/profile";
HttpClient client = HttpClientBuilder.create().build();
HttpPost put = new HttpPost(url);
put.setHeader("Content-type", "application/json");
StringEntity params =new StringEntity(json.toString());
put.setEntity(params);
HttpResponse response = client.execute(put);
System.out.println("Response Code:"+response.getStatusLine().getStatusCode());

BufferedReader rd = new BufferedReader(new InputStreamReader(response.getEntity().getContent()));
StringBuffer result = new StringBuffer();
String line = "";
while ((line = rd.readLine()) != null) {
    result.append(line);
}
                            System.out.println("result:"+result);
UI for our application
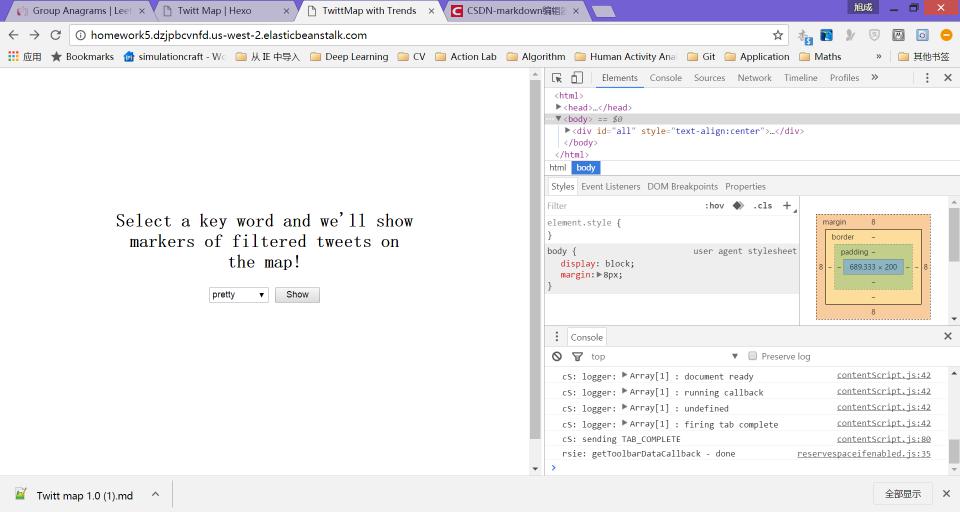
This is the entry point for our application, you can choose keyword for twitter.
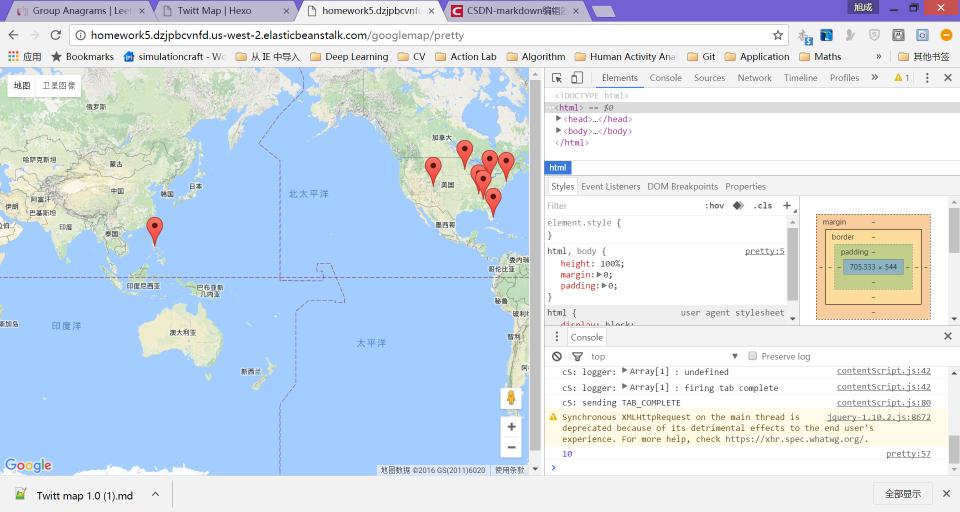
After you choose the keyword and click the “show” button, you can see the corresponding twitter location marked on the map.
Every 5 seconds, the front end will refresh and the counter, which can be seen in the second picture as 10, will gradually increase as our backend program continuously fetching data from twitter.


 1192
1192

 被折叠的 条评论
为什么被折叠?
被折叠的 条评论
为什么被折叠?
 到【灌水乐园】发言


