HAproxy搭建Web集群
一、基本环境
1. IP地址配置
| 主机 | IP地址 | 系统 |
|---|
| haproxy | 192.168.119.191/24 | CentOS 7.8 |
| web01 | 192.168.119.192/24 | CentOS 7.8 |
| web02 | 192.168.119.193/24 | CentOS 7.8 |
2. 主机名设置
$ hostnamectl set-hostname haproxy
$ hostnamectl set-hostname web01
$ hostnamectl set-hostname web02
3. 关闭Selinux
$ setenforce 0
$ sed -i 's/SELINUX=enforcing/SELINUX=disabled/g' /etc/selinux/config
二、Web服务器
1. 添加Nginx源
$ vim /etc/yum.repos.d/nginx.repo
[nginx-stable]
name=nginx stable repo
baseurl=http://nginx.org/packages/centos/$releasever/$basearch/
gpgcheck=1
enabled=1
gpgkey=https://nginx.org/keys/nginx_signing.key
module_hotfixes=true

[nginx-mainline]
name=nginx mainline repo
baseurl=http://nginx.org/packages/mainline/centos/$releasever/$basearch/
gpgcheck=1
enabled=0
gpgkey=https://nginx.org/keys/nginx_signing.key
module_hotfixes=true
2. 安装Nginx
$ yum install nginx -y
3. 添加Web页面
$ echo "<h1>This is web01 page!</h1>" > /usr/share/nginx/html/index.html
$ echo "<h1>This is web02 page!</h1>" > /usr/share/nginx/html/index.html
4. 启动服务
$ systemctl start nginx
$ systemctl enable nginx
5. 防火墙
$ firewall-cmd --add-service=http --permanent
$ firewall-cmd --reload
三、HAproxy
1. 安装haproxy
$ yum install haproxy -y
2. 配置rsyslog服务来接收haproxy的日志
$ vim /etc/rsyslog.conf
$ModLoad imtcp
$InputTCPServerRun 514
local2.* /var/log/haproxy.log
$ systemctl restart rsyslog
3. 配置haproxy
$ vim /etc/haproxy/haproxy.cfg
global
log 127.0.0.1:514 local2 info
chroot /var/lib/haproxy
pidfile /var/run/haproxy.pid
maxconn 4000
user haproxy
group haproxy
daemon
defaults
mode http
log global
option httplog
option dontlognull
timeout connect 10s
timeout client 1m
timeout server 1m
frontend http_front
bind 192.168.119.191:80
stats uri /haproxy?stats
default_backend http_back
backend http_back
balance roundrobin
server web01 192.168.119.192:80 check
server web02 192.168.119.193:80 check
$ systemctl restart haproxy
$ systemctl enable haproxy
4. 防火墙
$ firewall-cmd --add-port=80/tcp --permanent
$ firewall-cmd --reload
5. 测试
$ curl 192.168.119.191
<h1>This is web01 page!</h1>
$ curl 192.168.119.191
<h1>This is web02 page!</h1>
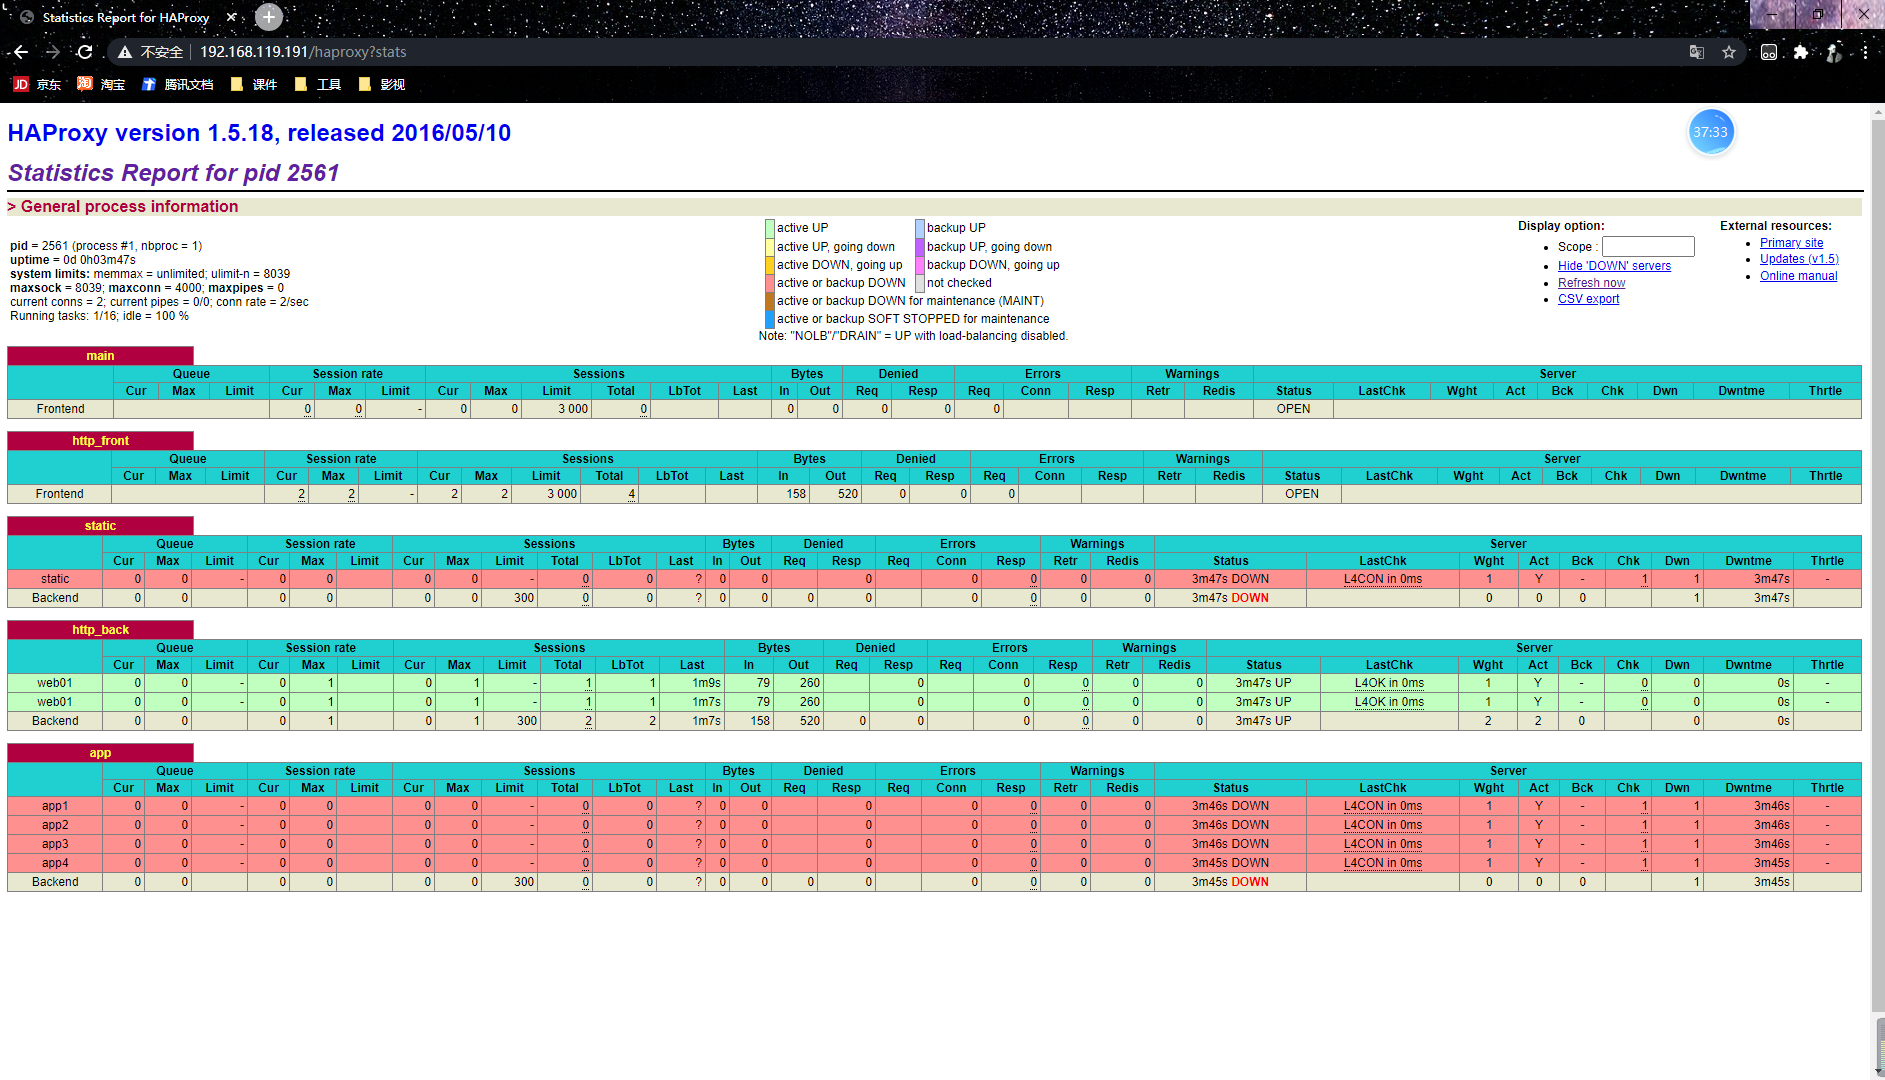
6. stats页面
四、基于域名的负载均衡
1. 配置haproxy
$ vim /etc/haproxy/haproxy.cfg
global
log 127.0.0.1:514 local2 info
chroot /var/lib/haproxy
pidfile /var/run/haproxy.pid
maxconn 4000
user haproxy
group haproxy
daemon
defaults
mode http
log global
option httplog
option dontlognull
timeout connect 10s
timeout client 1m
timeout server 1m
frontend http_front
bind 192.168.119.191:80
stats uri /haproxy?stats
stats hide-version
default_backend web01
acl is_web02 hdr_end(host) www.web02.com
use_backend web02 if is_web02
backend web01
balance roundrobin
option forwardfor header X-REAL-IP
option httpchk GET /index.html
server web01 192.168.119.192:80 check inter 2000 rise 3 fall 3 weight 1
backend web02
balance roundrobin
option forwardfor header X-REAL-IP
option httpchk GET /index.html
server web02 192.168.119.193:80 check inter 2000 rise 3 fall 3 weight 1
$ systemctl restart haproxy
2. 在Windows中添加域名解析
C:\Windows\System32\drivers\etc\hosts
192.168.119.191 www.web01.com
192.168.119.191 www.web02.com
3. 测试

五、调度算法采用IP哈希
1. 配置haproxy
$ vim /etc/haproxy/haproxy.cfg
backend web01
balance source
backend web02
balance source
$ systemctl restart haproxy
2. 测试
$ curl 192.168.119.191
<h1>This is web01 page!</h1>
$ curl 192.168.119.191
<h1>This is web01 page!</h1>
$ curl 192.168.119.191
<h1>This is web01 page!</h1>
$ curl 192.168.119.191
<h1>This is web01 page!</h1>
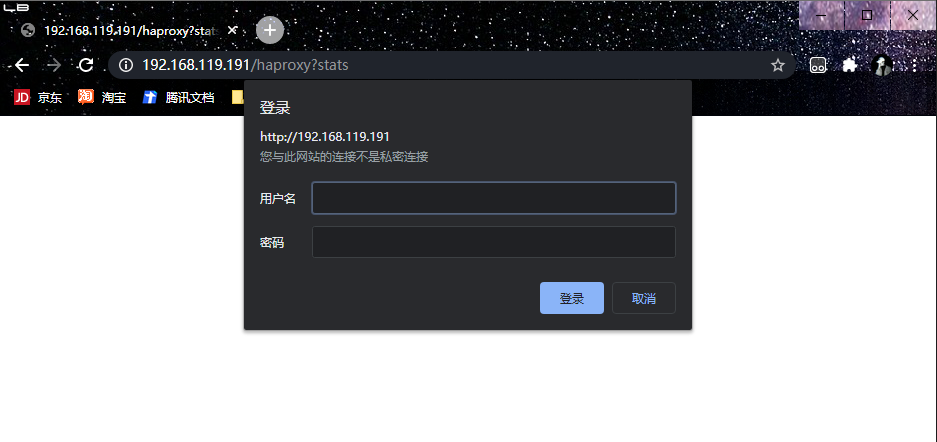
六、配置stats页面认证
1. 配置haproxy
$ vim /etc/haproxy/haproxy.cfg
frontend http_front
bind 192.168.119.191:80
stats uri /haproxy?stats
stats hide-version
stats realm "Welcome to the haproxy load balancer status page of Legolas"
stats auth admin:admin123
stats admin if TRUE
$ systemctl restart haproxy
2. 认证界面测试
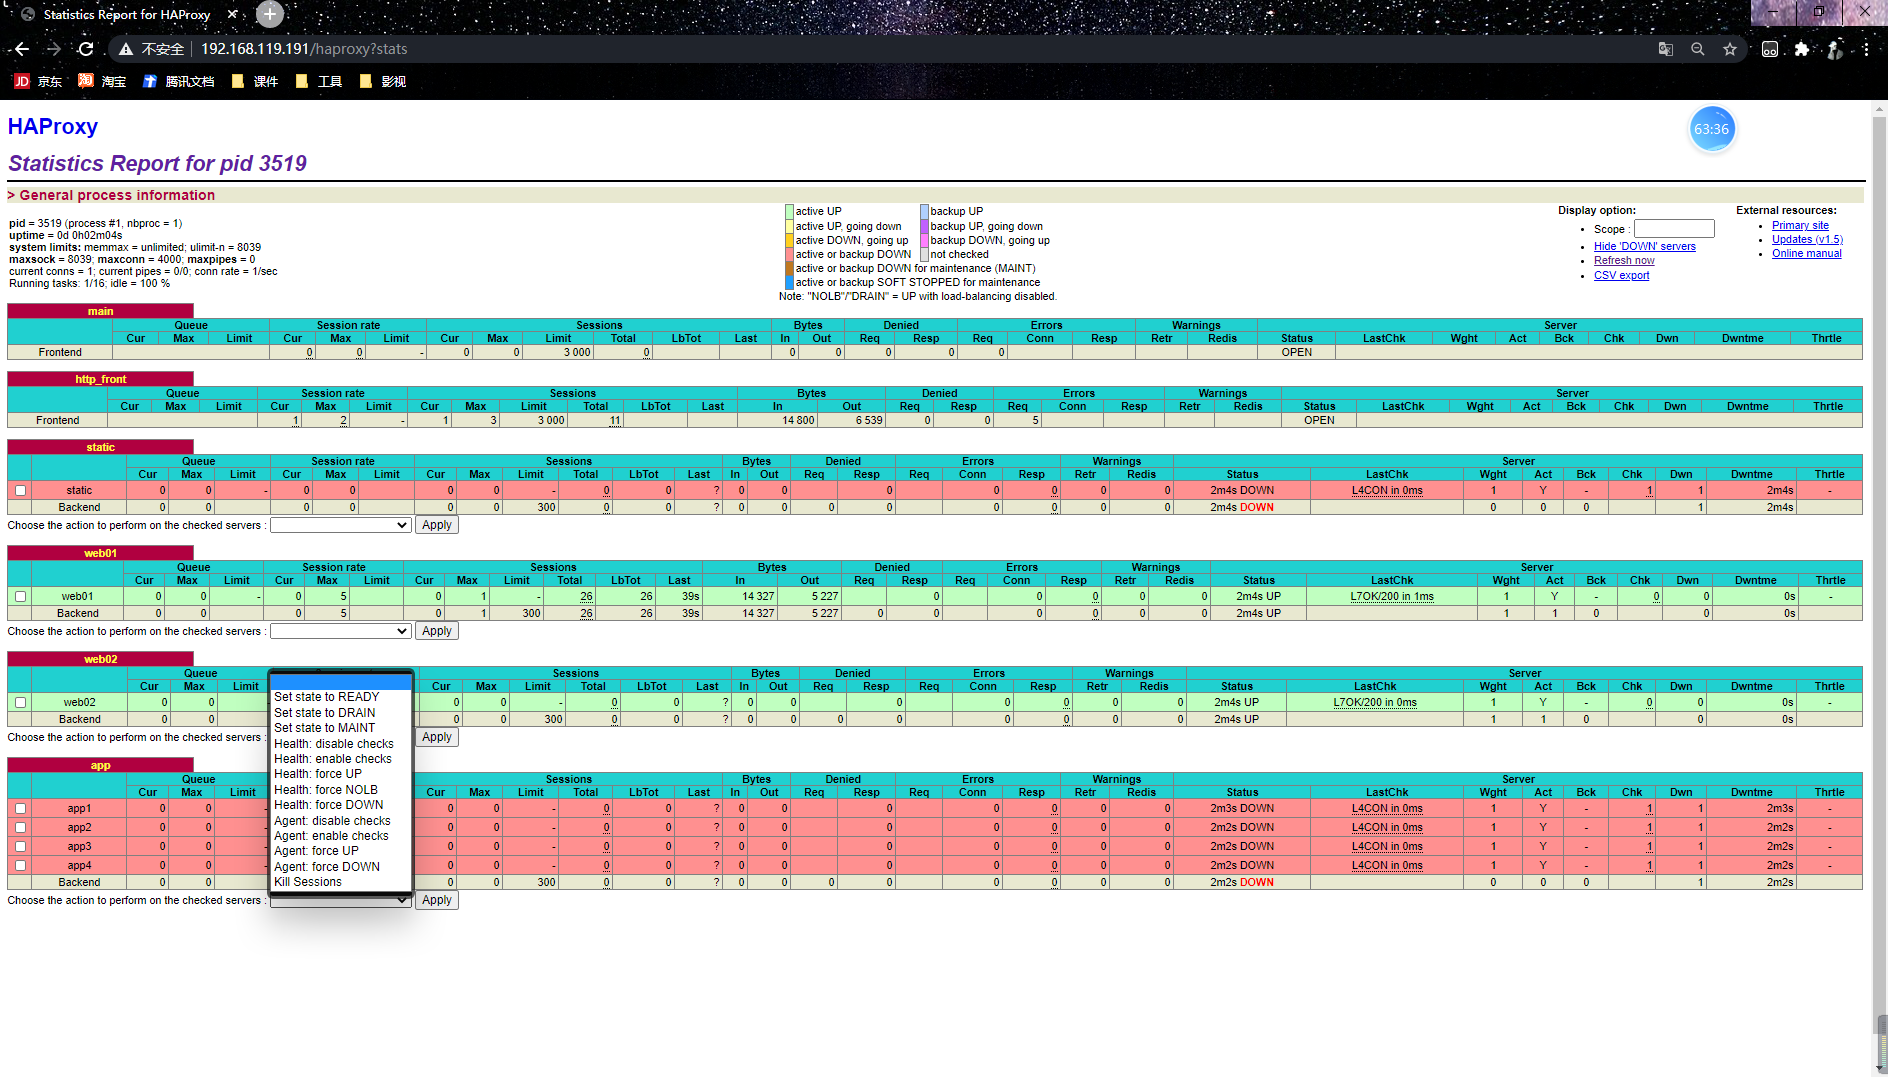
3. 状态监测界面测试


 196
196

 被折叠的 条评论
为什么被折叠?
被折叠的 条评论
为什么被折叠?
 到【灌水乐园】发言


