


深度学习目标检测框架yolo训练CS2数据集反恐精英2数据集 构建一个基于YOLOv8的FPS游戏CS2数据集检测系统
-FPS游戏CS2数据集反恐精英2数据集射击游戏数据集yolo txt标注10W
 构建一个基于YOLOv8的FPS游戏CS2数据集检测系统,特别是针对这个特定的数据集,涉及多个步骤,包括环境设置、数据准备、模型训练、评估和推理部署。
FPS游戏CS2数据集
图片: 10万+张,带txt标注
精标注的4.4万张,带txt标注
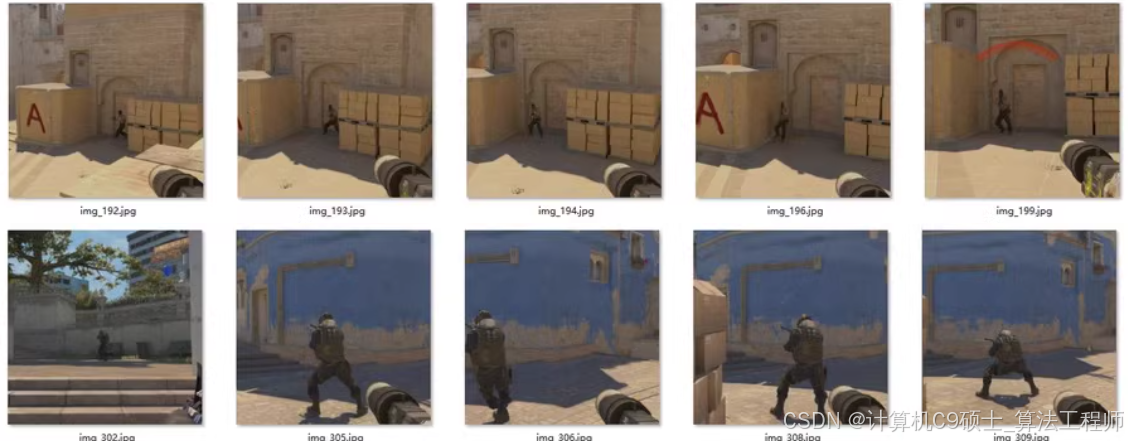
4.4W张是从10万张中精选出来,经过质检的,准确率高。
数据集已划分好训练集和验证集
训练集: 35371个
验证集: 8843个
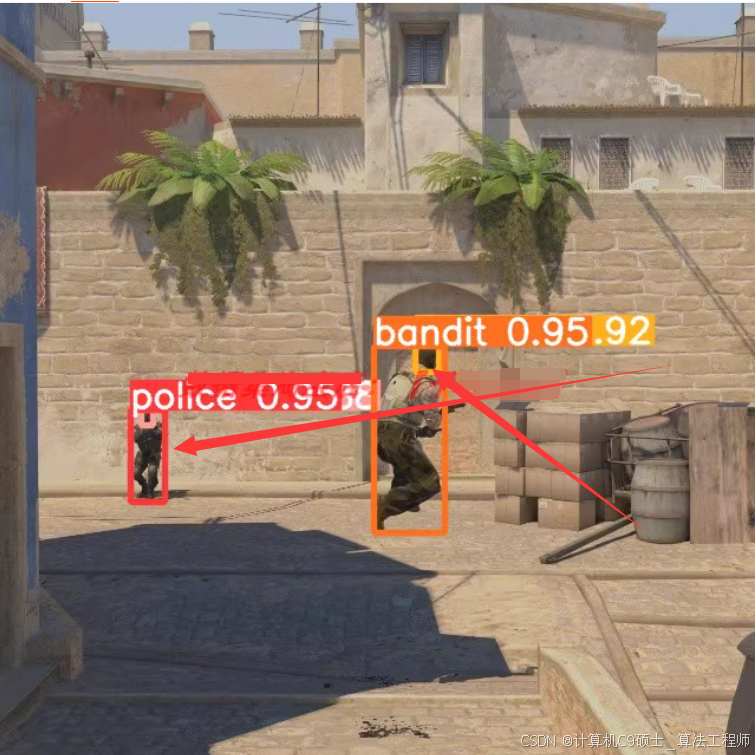
4个分类:
police警身
-P_ head警头
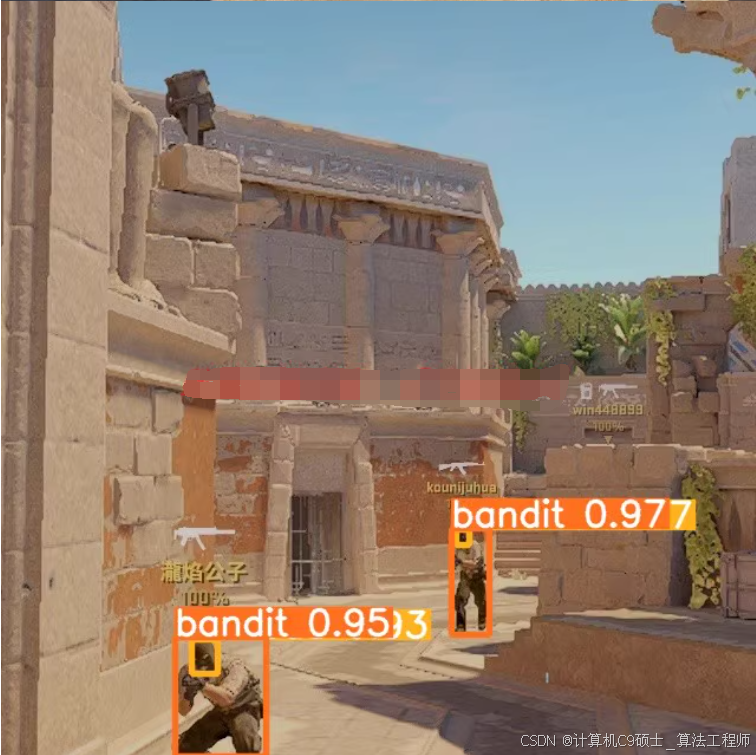
- bandit匪身
- B_ head匪头
可直接用于yolo各版本训练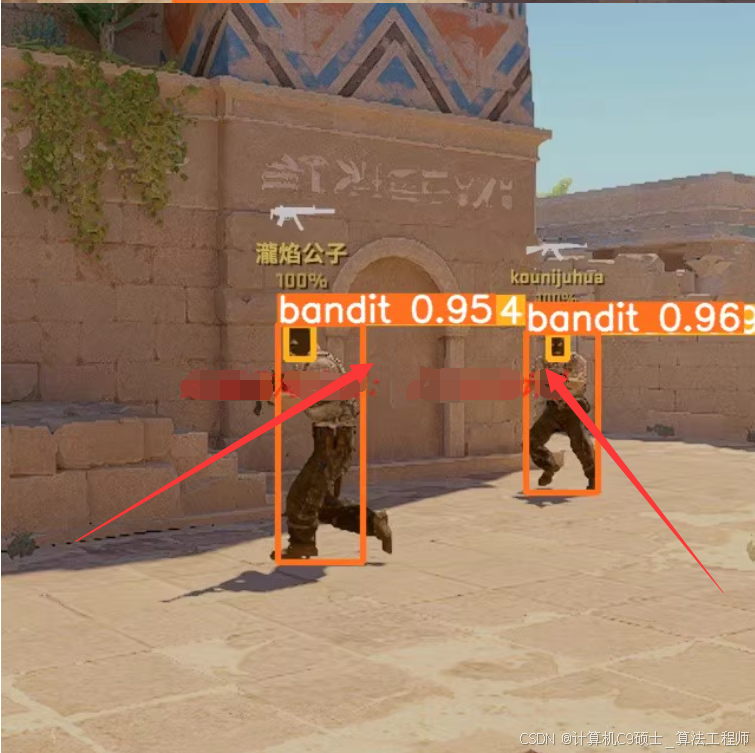
构建一个基于YOLOv8的FPS游戏CS2数据集检测系统,特别是针对这个特定的数据集,涉及多个步骤,包括环境设置、数据准备、模型训练、评估和推理部署。以下是详细的指南:
1. 环境设置
确保你的开发环境已经安装了必要的库和工具:
pip install torch torchvision ultralytics pyqt5 opencv-python pandas
2. 数据准备
2.1 数据集结构
根据你提供的信息,数据集已经划分好训练集和验证集,并且有精标注的4.4万张图片。确保数据集目录结构如下:
datasets/
└── cs2_detection/
    ├── images/
    │   ├── train/
    │   └── val/
    ├── labels_yolo/
    │   ├── train/
    │   └── val/
每个图像对应一个同名的.txt文件(YOLO格式),标签文件是CSV或XML格式的注释文件。
2.2 标签说明
你提到有四个分类:
police警身§P_ head警头(PH)bandit匪身(B)B_ head匪头(BH)
假设你已经有了正确的YOLO格式的标注文件,其中每个类别有一个对应的ID。例如:
- P: 0
- PH: 1
- B: 2
- BH: 3
3. 文件内容
3.1 Config.py
配置文件用于定义数据集路径、模型路径等。
# Config.py
DATASET_PATH = 'datasets/cs2_detection/'
MODEL_PATH = 'runs/detect/train/weights/best.pt'
IMG_SIZE = 640
BATCH_SIZE = 16
EPOCHS = 50
CONF_THRESHOLD = 0.5
3.2 train.py
训练YOLOv8模型的脚本。注意,这里我们有多个类别,因此 nc 应该设置为类别数量,并且 names 列表应该包含所有类别的名称。
from ultralytics import YOLO
import os

# Load a model
model = YOLO('yolov8n.pt')  # You can also use other versions like yolov8s.pt, yolov8m.pt, etc.

# Define dataset configuration
dataset_config = f"""
train: {os.path.join(os.getenv('DATASET_PATH', 'datasets/cs2_detection/'), 'images/train')}
val: {os.path.join(os.getenv('DATASET_PATH', 'datasets/cs2_detection/'), 'images/val')}
nc: 4
names: ['police', 'P_head', 'bandit', 'B_head']
"""

# Save dataset configuration to a YAML file
with open('cs2.yaml', 'w') as f:
    f.write(dataset_config)

# Train the model
results = model.train(data='cs2.yaml', epochs=int(os.getenv('EPOCHS', 50)), imgsz=int(os.getenv('IMG_SIZE', 640)), batch=int(os.getenv('BATCH_SIZE', 16)))
3.3 detect_tools.py
用于检测的工具函数。
from ultralytics import YOLO
import cv2
import numpy as np

def load_model(model_path):
    return YOLO(model_path)

def detect_objects(frame, model, conf_threshold=0.5):
    results = model(frame, conf=conf_threshold)
    detections = []
    for result in results:
        boxes = result.boxes.cpu().numpy()
        for box in boxes:
            r = box.xyxy[0].astype(int)
            cls = int(box.cls[0])
            conf = round(float(box.conf[0]), 2)
            label = f"{model.names[cls]} {conf}"
            detections.append((r, label))
    return detections

def draw_detections(frame, detections):
    for (r, label) in detections:
        cv2.rectangle(frame, (r[0], r[1]), (r[2], r[3]), (0, 255, 0), 2)
        cv2.putText(frame, label, (r[0], r[1] - 10), cv2.FONT_HERSHEY_SIMPLEX, 0.9, (0, 255, 0), 2)
    return frame
3.4 UIProgram/MainProgram.py
主程序,使用PyQt5构建图形界面。
import sys
import cv2
from PyQt5.QtWidgets import QApplication, QMainWindow, QLabel, QVBoxLayout, QWidget, QPushButton
from PyQt5.QtGui import QImage, QPixmap
from PyQt5.QtCore import Qt, QTimer
from detect_tools import load_model, detect_objects, draw_detections
import os

class VideoWindow(QMainWindow):
    def __init__(self):
        super().__init__()

        self.setWindowTitle("CS2 Detection")
        self.setGeometry(100, 100, 800, 600)

        self.central_widget = QWidget()
        self.setCentralWidget(self.central_widget)

        self.layout = QVBoxLayout()
        self.central_widget.setLayout(self.layout)

        self.label = QLabel()
        self.layout.addWidget(self.label)

        self.start_button = QPushButton("Start Detection")
        self.start_button.clicked.connect(self.start_detection)
        self.layout.addWidget(self.start_button)

        self.cap = None
        self.timer = QTimer()
        self.timer.timeout.connect(self.update_frame)

        self.model = load_model(os.getenv('MODEL_PATH', 'runs/detect/train/weights/best.pt'))

    def start_detection(self):
        if not self.cap:
            self.cap = cv2.VideoCapture(0)  # Use webcam
        self.timer.start(30)

    def update_frame(self):
        ret, frame = self.cap.read()
        if not ret:
            return

        detections = detect_objects(frame, self.model, conf_threshold=float(os.getenv('CONF_THRESHOLD', 0.5)))
        frame = draw_detections(frame, detections)

        rgb_image = cv2.cvtColor(frame, cv2.COLOR_BGR2RGB)
        h, w, ch = rgb_image.shape
        bytes_per_line = ch * w
        qt_image = QImage(rgb_image.data, w, h, bytes_per_line, QImage.Format_RGB888)
        pixmap = QPixmap.fromImage(qt_image)
        self.label.setPixmap(pixmap.scaled(800, 600, Qt.KeepAspectRatio))

if __name__ == "__main__":
    app = QApplication(sys.argv)
    window = VideoWindow()
    window.show()
    sys.exit(app.exec_())
3.5 requirements.txt
列出所有依赖项。
torch
torchvision
ultralytics
pyqt5
opencv-python
pandas
3.6 setup.py
用于安装项目的脚本。
from setuptools import setup, find_packages

setup(
    name='cs2_detection',
    version='0.1',
    packages=find_packages(),
    install_requires=[
        'torch',
        'torchvision',
        'ultralytics',
        'pyqt5',
        'opencv-python',
        'pandas'
    ],
    entry_points={
        'console_scripts': [
            'train=train:main',
            'detect=UIProgram.MainProgram:main'
        ]
    }
)
3.7 README.md
项目说明文档。
# CS2 Detection System

This project uses YOLOv8 and PyQt5 to create a real-time detection system for FPS game CS2. The system detects various objects such as police bodies, police heads, bandit bodies, and bandit heads.

## Installation

1. Clone the repository:
   ```bash
   git clone https://github.com/yourusername/cs2-detection.git
   cd cs2-detection
-
Install dependencies:
pip install -r requirements.txt -
Set up environment variables (optional):
export DATASET_PATH=./datasets/cs2_detection/
export MODEL_PATH=./runs/detect/train/weights/best.pt
export IMG_SIZE=640
export BATCH_SIZE=16
export EPOCHS=50
export CONF_THRESHOLD=0.5
Training
To train the YOLOv8 model:
python train.py
Running the GUI
To run the graphical user interface:
python UIProgram/MainProgram.py
Usage Tutorial
See 使用教程.xt for detailed usage instructions.
### 4. 运行步骤

- **确保数据集路径正确**:将你的数据集放在 `datasets/cs2_detection` 目录下。
- **安装必要的库**:确保已安装所有所需库。
- **运行代码**:
  - 首先运行训练代码来训练YOLOv8模型:
    ```bash
    python train.py
    ```
  - 然后运行GUI代码来启动检测系统:
    ```bash
    python UIProgram/MainProgram.py
    ```

### 5. 模型评估与优化

在训练完成后,你可以通过验证集评估模型性能,查看mAP(平均精度均值)和其他指标。根据评估结果,调整超参数如学习率、批次大小、图像尺寸等,以优化模型性能。

### 6. 结果分析与可视化

利用内置的方法或自定义脚本来分析结果和可视化预测边界框。这有助于理解模型的表现并识别可能的改进点。

### 7. 用户界面开发

为了构建用户界面,你可以使用Flask或FastAPI等框架创建RESTful服务,或者直接用Streamlit这样的快速原型开发工具。上述代码中已经包含了使用PyQt5创建的简单GUI示例。

### 注意事项

- **类别映射**:确保YOLO格式的标签文件中的类别ID与`train.py`中定义的类别名称一致。
- **数据增强**:考虑到游戏场景可能会有复杂背景和光照变化,可以考虑使用数据增强技术提高模型的泛化能力。
- **模型选择**:根据你的硬件条件和需求选择合适的YOLO版本(如YOLOv8n、YOLOv8s等)。
- **预处理**:对于特别大的数据集,建议在训练前对数据进行适当的预处理,比如缩放、裁剪等操作。

顺利构建基于YOLOv8的CS2射击游戏检测系统。


 被折叠的 条评论
为什么被折叠?
被折叠的 条评论
为什么被折叠?
 到【灌水乐园】发言


