


 本文详细介绍了如何配置SpringCloud Config实现配置的自动刷新。包括Config-Server的设置、Config Client的配置、Eureka Server作为服务注册中心的角色,以及通过手动POST请求或Git webhook自动刷新配置的方法。同时,提到了利用ngrok进行URL映射和解决GitHub post请求时的400错误问题。
准备:搭建一个服务注册中心,一个配置中心,和一个获取配置的客户端。
提前安装RabbitMQ官网下载 https://www.rabbitmq.com/install-windows.html
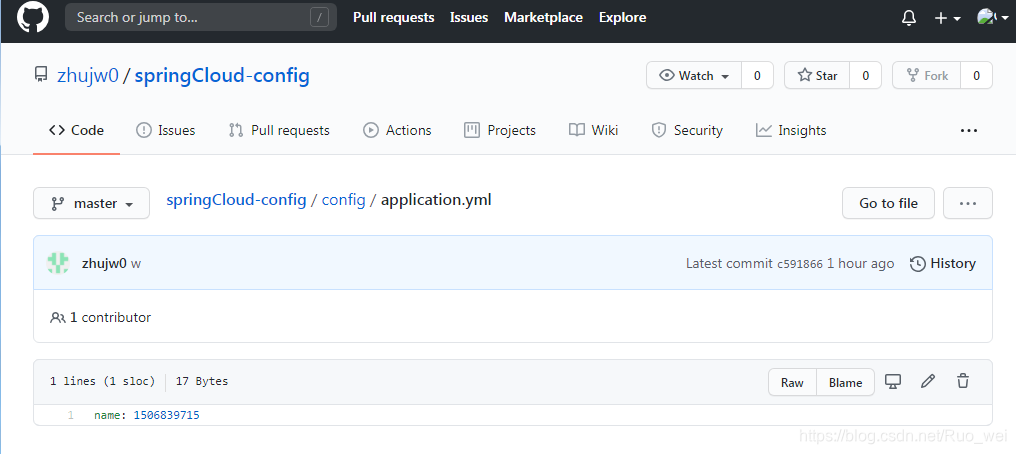
git上准备一个文件用做测试
一、Config-Server(配置中心)配置
1.添加依赖
    <dependency>
        <groupId>org.springframework.cloud</groupId>
        <artifactId>spring-cloud-config-server</artifactId>
    </dependency>

    <dependency>
        <groupId>org.springframework.cloud</groupId>
        <artifactId>spring-cloud-starter-bus-amqp</artifactId>
    </dependency>
2.修改配置文件application.yml文件
server:
  port: 8085
#  servlet:
#    context-path:   #访问项目前缀
spring:
  application:
    name: config-server   #服务注册中心的名称
  cloud:
    config:
      label: master
      server:
        git:
          uri: https://github.com/zhujw0/springCloud-config/
          search-paths: config
  rabbitmq:  #本地环境不需要配置mq,但是需要启动mq,Springboot会自动连接本地mq
    host: localhost
    port: 5672
    username: guest
    password: guest

eureka:
  client:
    service-url:
      defaultZone: http://www.eureka-server.com:1111/eureka/  #对应Eureka-server中的url
  instance:
    hostname: www.client.com
management:  #暴露/bus-refresh接口
  endpoints:
    web:
      exposure:
        include: "*"

# curl -X POST http://www.client.com:8085/actuator/bus-refresh         cmd窗口输入,模拟post请求
3.启动类添加注解 @EnableConfigServer
二、Config Client端配置(测试获取Config-Server服务端获取的git配置)
1.添加依赖
    <dependency>
        <groupId>org.springframework.cloud</groupId>
        <artifactId>spring-cloud-config-client</artifactId>
    </dependency>

    <dependency>
        <groupId>org.springframework.cloud</groupId>
        <artifactId>spring-cloud-starter-bus-amqp</artifactId>
    </dependency>

    <dependency>
        <groupId>org.springframework.boot</groupId>
        <artifactId>spring-boot-starter-actuator</artifactId>
    </dependency>
2.bootstra.yml文件
eureka:
  client:
    service-url:
      defaultZone: http://www.eureka-server.com:1111/eureka/  #对应Eureka-server中的url
  instance:
    hostname: www.client.com


spring:
  cloud:
    config:
#      profile: pro
      label: master
      discovery:
        enabled: true
        service-id: config-server #对应config-server中的spring.application.name
      uri: http://www.client.com:8085  #config-server的访问 hostname+port
      name: application #配置文件名称
    bus:
      trace:
        enabled: true  #开启信息跟踪
application.yml文件
server:
  port: 8081
  servlet:
    context-path: /client1  #访问项目前缀
#eureka:
#  client:
#    service-url:
#      defaultZone: http://www.eureka-server.com:1111/eureka/  #对应Eureka-server中的url
#  instance:
#    hostname: www.client.com

spring:
  application:
name: eureka-client1 #服务注册中心的名称3.编写controller类获取git上的属性(@RefreshScope添加在需要刷新的配置文件上)
package com.controller;
import org.springframework.beans.factory.annotation.Value;
import org.springframework.cloud.context.config.annotation.RefreshScope;
import org.springframework.web.bind.annotation.RequestMapping;
import org.springframework.web.bind.annotation.RestController;
@RestController
@RefreshScope
public class ConfigController {
@Value("${name}")
private String name;
@RequestMapping("/configtest")
public String configTest(){
return "获取git上的配置:"+name;
}
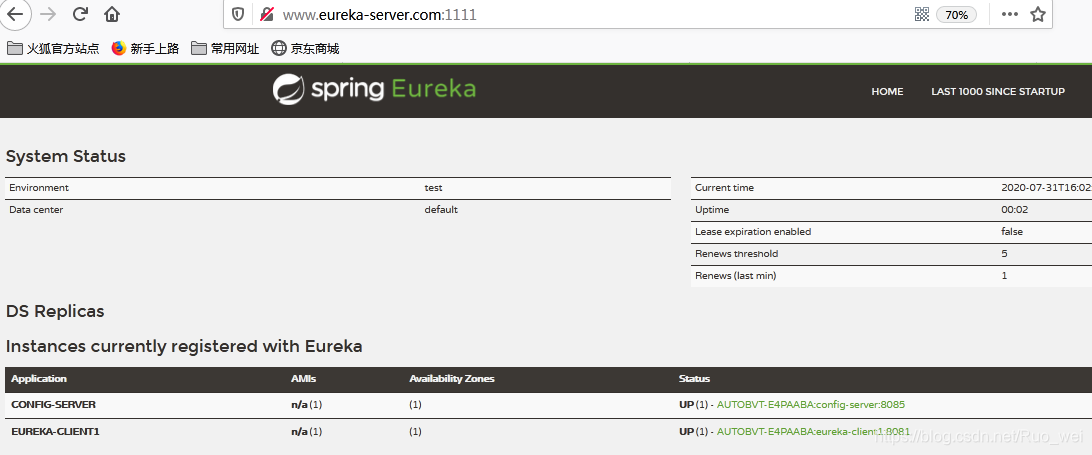
}三、启动Eureka Server服务注册中心,启动Config Server端和Config Client端,要实现配置自动刷新需要post方式请求/bus-refresh接口,游览器输入访问默认是git方式会出现405错误
Eureka Server:
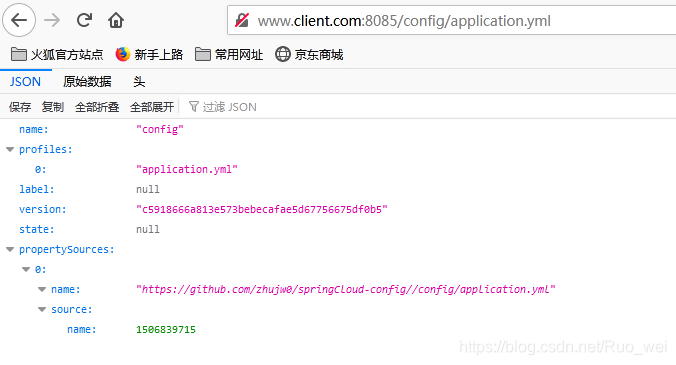
访问Config Server服务端获取git配置
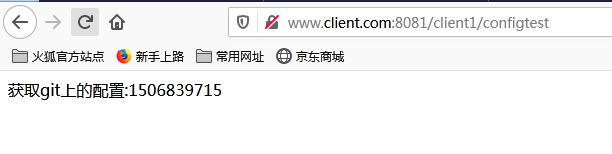
Config Client端测试:
1.》修改git文件中的name属性,刷新发现Config Server服务端配置发生改变,Config Client端还没修改
方式一:(手动调用(post请求):http://www.client.com:8085/actuator/bus-refresh)
方式二:配置git的webhook ,当git端配置发生改变,自动调用/bus-refresh接口
安装curl模拟post请求 、下载地址:curl - Download
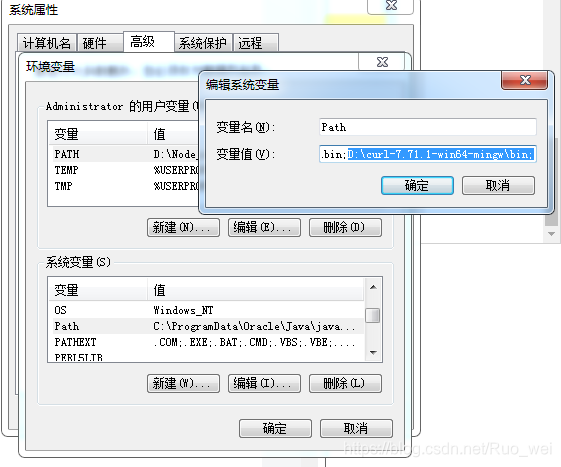
2》下载解压后设置环境变量
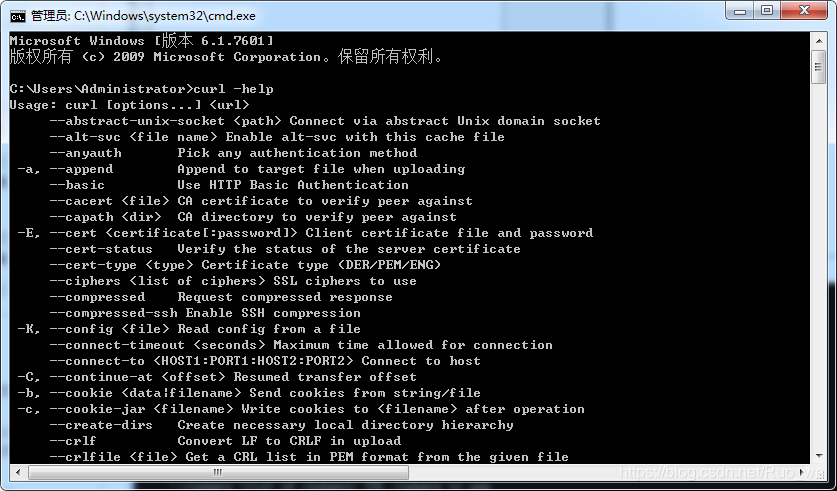
3》打开cmd窗口输入:curl -help 出现如下界面就安装成功了
修改git的信息后,在cmd窗口输入
curl -X POST http://www.client.com:8085/actuator/bus-refresh 发送post请求刷新配置
2:配置git的webhook自动调用/bus-refresh接口刷新配置
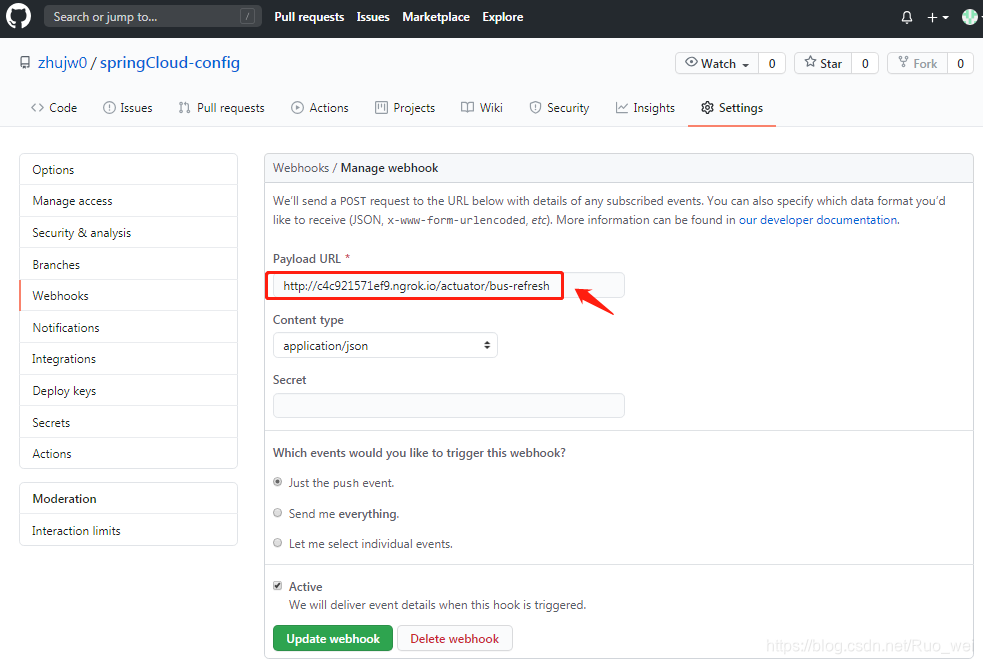
1.不能直接使用localhost 需要做映射,我这里使用的是 ngrok
下载地址:https://ngrok.com/download
下载解压后启动 ngrok.exe 输入: ngrok http 8085
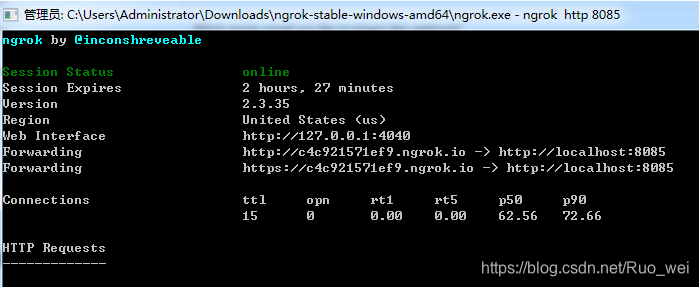
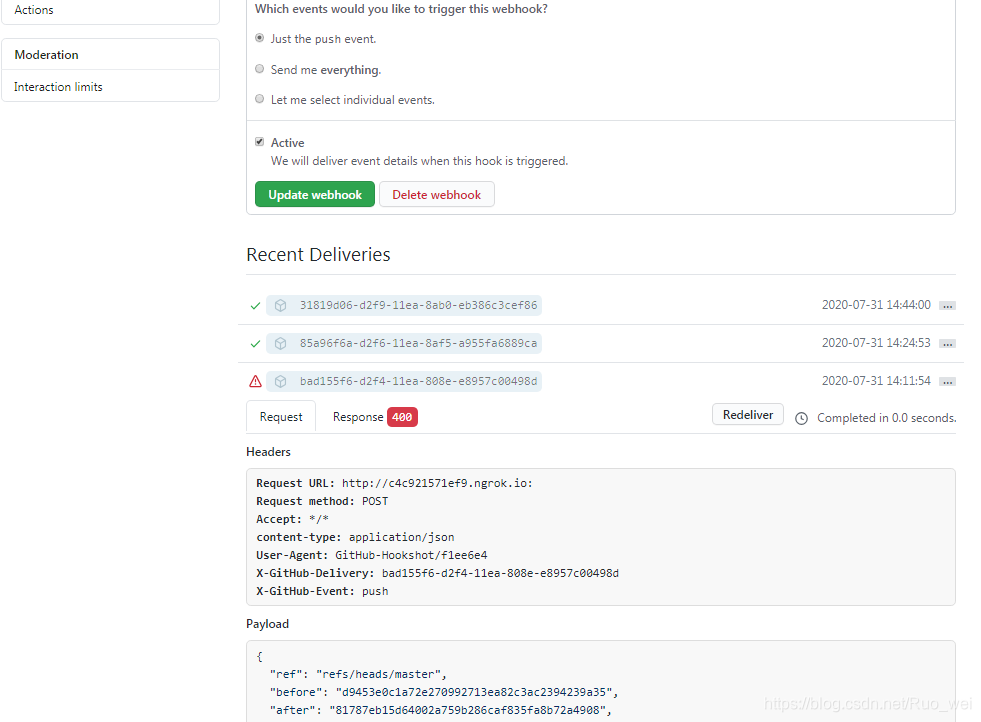
2. git中Payload URL有效负载地址 http://c4c921571ef9.ngrok.io/actuator/bus-refresh
此时本地修改git中的文件提交后,会出现如下400错误(GitHub在进行post请求的同时默认会在body加上一串载荷(payload))
3.在Config-Server配置中心 添加过滤器
package com.filter;

import javax.servlet.*;
import javax.servlet.annotation.WebFilter;
import javax.servlet.http.HttpServletRequest;
import javax.servlet.http.HttpServletRequestWrapper;
import java.io.IOException;

@WebFilter(urlPatterns = "/actuator/bus-refresh")
public class WebHookFilter implements Filter {

    @Override
    public void init(FilterConfig filterConfig) {
    }

    @Override
    public void doFilter(ServletRequest request, ServletResponse response, FilterChain chain) throws IOException, ServletException {
        //使用HttpServletRequest包装原始请求达到修改post请求中body内容的目的
        chain.doFilter(new CustometRequestWrapper(request), response);
    }

    @Override
    public void destroy() {}

    private static class CustometRequestWrapper extends HttpServletRequestWrapper {
        CustometRequestWrapper(ServletRequest request) {
            super((HttpServletRequest) request);
        }

        @Override
        public ServletInputStream getInputStream() {
            return new ServletInputStream() {
                @Override
                public boolean isFinished() {return true; }
                @Override
                public boolean isReady() {return false;}
                @Override
                public void setReadListener(ReadListener readListener) {}
                @Override
                public int read() {
                    return -1;
                }
            };
        }
    }

}
添加扫描注解 @ServletComponentScan
package com;

import org.springframework.boot.SpringApplication;
import org.springframework.boot.autoconfigure.SpringBootApplication;
import org.springframework.boot.web.servlet.ServletComponentScan;
import org.springframework.cloud.config.server.EnableConfigServer;

/**
 * 配置中心
 */
@SpringBootApplication
@EnableConfigServer
@ServletComponentScan
public class ConfigServerApplication {
    public static void main(String[] args) {
        SpringApplication.run(ConfigServerApplication.class,args);
    }

}
四、测试:
1》启动运行Eureka-Server,Config-Server,Config-Client;
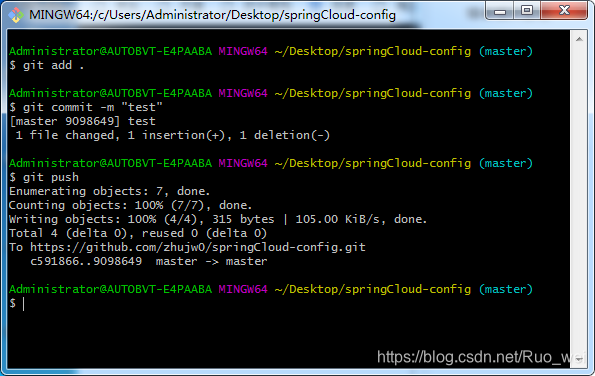
2》git clone git仓库路径 ,下载项目到本地 修改后提交
3》 Config-Server 访问http://www.client.com:8085/config/application.yml
Config-Client 访问http://www.client.com:8081/client1/configtest


 4333
4333

 被折叠的 条评论
为什么被折叠?
被折叠的 条评论
为什么被折叠?
 到【灌水乐园】发言


