


- 生成默认的crypto-config.yaml文件
cryptogen showtemplate > crypto-config.yaml
- 修改crypto-config.yaml文件的配置
已修改过的,配置4个peer,1个orderer的文件见与本文档一起打包的crypto-config.yaml
- 生成所有的证书文件
cryptogen generate --config=crypto-config.yaml
会生成一个文件夹crypto-config
- 使用configtx.yaml创建通道
以fabric-samples/test-network/configtx/configtx.yaml为例进行修改,得到自己定制网络的configtx.yaml,修改后的configtx.yaml见文件夹
- 使用官方的configtxgen工具进行通道配置
(1)输出初始块:configtxgen -outputBlock ./channel-artifacts/genesis.block -profile SupplyOrdererGenesis(与configtx.yaml中profile下的一致) -channelID fabric-channel
生成创世块时的channelID要与后面的不同

(2)生成通道文件:configtxgen -outputCreateChannelTx ./channel-artifacts/channel.tx -profile SupplyChannel(与configtx.yaml中profile下的一致) -channelID mychannel

得到channel-artifacts文件夹

- 部署节点
使用docker容器启动peer节点和orderer节点,docker配置文件例子:fabric-samples/test-network/docker/docker-compose-test-net.yaml
修改后适用于自己的docker-compose.yaml见文件夹
- 在docker-compose.yaml文件所在的文件夹下启动节点:
docker-compose up -d(在后端执行)
会生成一个chaincode/go的文件夹,存链码
- 清除之前docker挂载内容:docker volume prune
- 通过cli1进入peer节点容器中:docker exec -it cli1 bash
- 在cli1中创建通道:
peer channel create -o orderer.example.com:7050 -c mychannel -f ./channel-artifacts/channel.tx --tls true --cafile /opt/gopath/src/github.com/hyperledger/fabric/peer/crypto/ordererOrganizations/example.com/msp/tlscacerts/tlsca.example.com-cert.pem
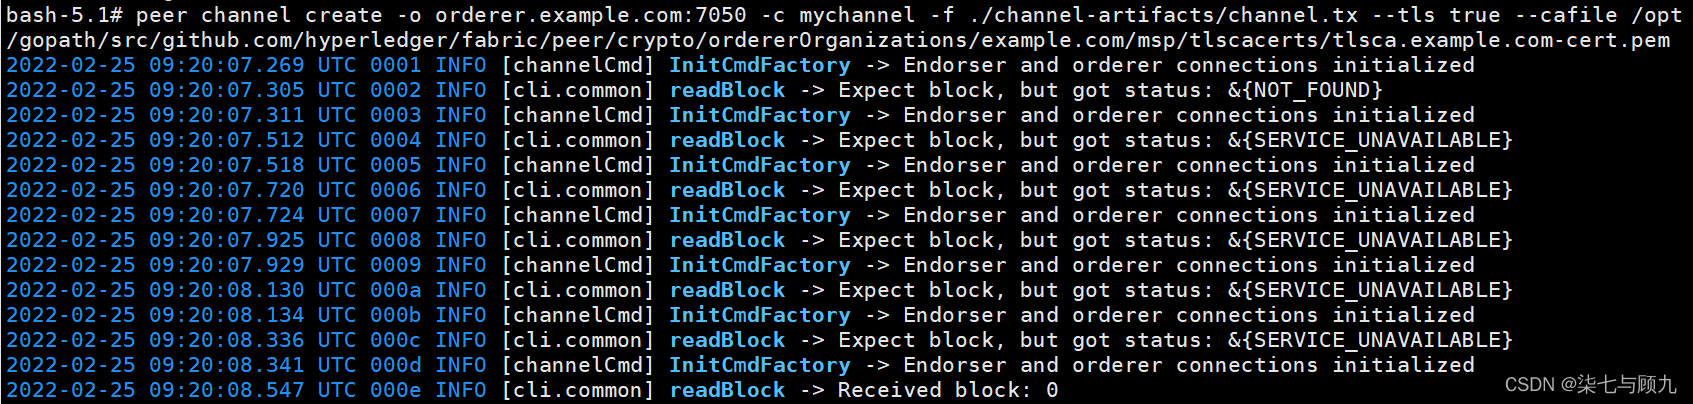
会生成mychannel.block文件

- 将cli1中的mychannel.block文件拷贝到本地文件夹中:
docker cp cli1:/opt/gopath/src/github.com/hyperledger/fabric/peer/mychannel.block ./

- 将本地的mychannel.block文件拷贝到其他cli peer的容器中:
docker cp ./mychannel.block cli2:/opt/gopath/src/github.com/hyperledger/fabric/peer

- 将peer节点加入通道
从本地切换到docker cli:docker exec -it cli1 bash
在cli1中将peer节点加入通道:peer channel join -b mychannel.block

其他cli2 cli3 cli4同理加入通道中,不再赘述。
- 打包链码
从docker cli切换到本地:链码文件放在chaincode/go中:例:fabric-samples/chaincode/sacc/sacc.go

切换到docker cil,进入链码所在的路径:
cd /opt/gopath/src/github.com/hyperledger/fabric-cluster/chaincode/go
打包链码前准备工作:
go env -w GOPROXY=https://goproxy.cn,direct
go mod init(创建go.mod文件)
go mod vendor(依赖)
切换工作目录:cd /opt/gopath/src/github.com/hyperledger/fabric/peer
打包链码:peer lifecycle chaincode package sacc.tar.gz --path /opt/gopath/src/github.com/hyperledger/fabric-cluster/chaincode/go --label sacc_1

- 将cli1中的链码copy到本地:
切换到本地目录,然后copy:
docker cp cli1: /opt/gopath/src/github.com/hyperledger/fabric/peer/sacc.tar.gz ./

- 将本地sacc.tar.gz复制到cli2,cli3,cli4
docker cp sacc.tar.gz cli2:/opt/gopath/src/github.com/hyperledger/fabric/peer
cli3,cli4同理
- 切换到cli1中安装链码:peer lifecycle chaincode install sacc.tar.gz

cli2,cli3,cli4安装链码同理
- 在cli1中批准链码
peer lifecycle chaincode approveformyorg --channelID mychannel --name sacc --version 1.0 --init-required --package-id sacc_1:28225b3579fb9528bdd974e7d3fe9fb9aa51533c86cd48540140b482b9fa1032 --sequence 1 --tls true --cafile /opt/gopath/src/github.com/hyperledger/fabric/peer/crypto/ordererOrganizations/example.com/orderers/orderer.example.com/msp/tlscacerts/tlsca.example.com-cert.pem

cli2,cli3,cli4同理批准链码
- 检查是否所有通道成员批准链码
peer lifecycle chaincode checkcommitreadiness --channelID mychannel --name sacc --version 1.0 --init-required --sequence 1 --tls true --cafile /opt/gopath/src/github.com/hyperledger/fabric/peer/crypto/ordererOrganizations/example.com/orderers/orderer.example.com/msp/tlscacerts/tlsca.example.com-cert.pem --output json

cli2,cli3,cli4同理检查是否所有成员批准链码.
- 在cli1中提交链码
peer lifecycle chaincode commit -o orderer.example.com:7050 --channelID mychannel --name sacc --version 1.0 --init-required --sequence 1 --tls true --cafile /opt/gopath/src/github.com/hyperledger/fabric/peer/crypto/ordererOrganizations/example.com/orderers/orderer.example.com/msp/tlscacerts/tlsca.example.com-cert.pem --peerAddresses peer0.deliverer.example.com:7051 --tlsRootCertFiles /opt/gopath/src/github.com/hyperledger/fabric/peer/crypto/peerOrganizations/deliverer.example.com/peers/peer0.deliverer.example.com/tls/ca.crt --peerAddresses peer0.manufacturer.example.com:9051 --tlsRootCertFiles /opt/gopath/src/github.com/hyperledger/fabric/peer/crypto/peerOrganizations/manufacturer.example.com/peers/peer0.manufacturer.example.com/tls/ca.crt --peerAddresses peer0.producer.example.com:11555 --tlsRootCertFiles /opt/gopath/src/github.com/hyperledger/fabric/peer/crypto/peerOrganizations/producer.example.com/peers/peer0.producer.example.com/tls/ca.crt --peerAddresses peer0.retailer.example.com:10051 --tlsRootCertFiles /opt/gopath/src/github.com/hyperledger/fabric/peer/crypto/peerOrganizations/retailer.example.com/peers/peer0.retailer.example.com/tls/ca.crt
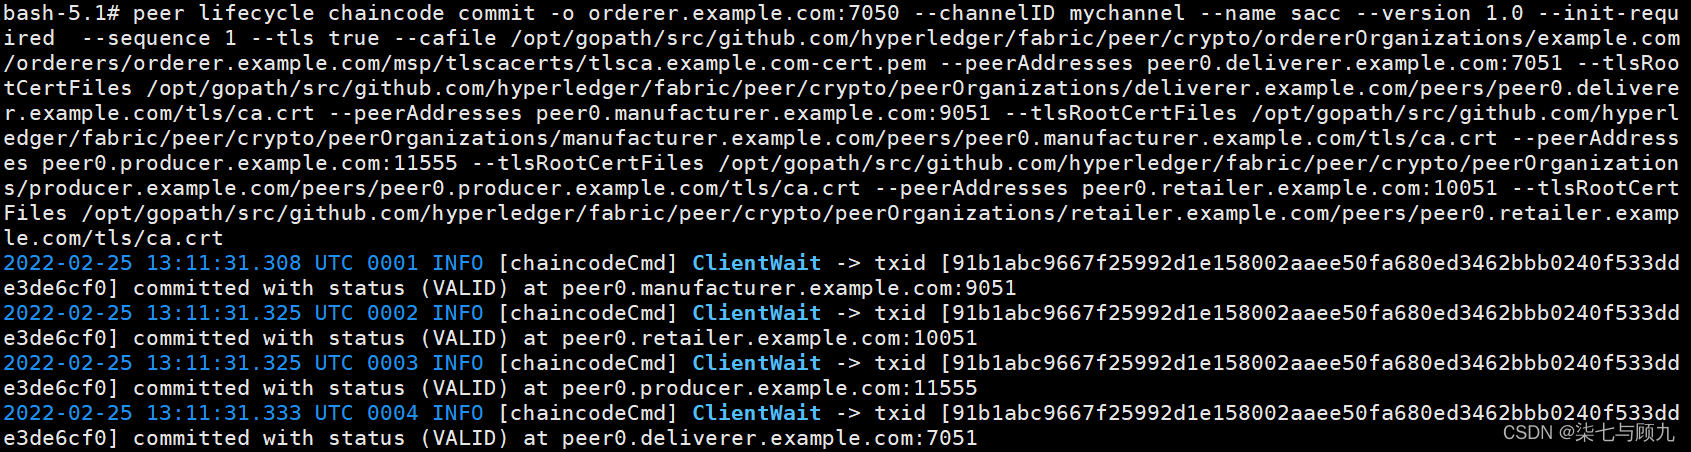
在cli1中提交链码即可,不需要在cli2,cli3,cli4中再次执行提交操作
- 在cli1中调用链码
peer chaincode invoke -o orderer.example.com:7050 --isInit --ordererTLSHostnameOverride orderer.example.com --tls true --cafile /opt/gopath/src/github.com/hyperledger/fabric/peer/crypto/ordererOrganizations/example.com/orderers/orderer.example.com/msp/tlscacerts/tlsca.example.com-cert.pem --channelID mychannel --name sacc --peerAddresses peer0.deliverer.example.com:7051 --tlsRootCertFiles /opt/gopath/src/github.com/hyperledger/fabric/peer/crypto/peerOrganizations/deliverer.example.com/peers/peer0.deliverer.example.com/tls/ca.crt --peerAddresses peer0.manufacturer.example.com:9051 --tlsRootCertFiles /opt/gopath/src/github.com/hyperledger/fabric/peer/crypto/peerOrganizations/manufacturer.example.com/peers/peer0.manufacturer.example.com/tls/ca.crt --peerAddresses peer0.producer.example.com:11555 --tlsRootCertFiles /opt/gopath/src/github.com/hyperledger/fabric/peer/crypto/peerOrganizations/producer.example.com/peers/peer0.producer.example.com/tls/ca.crt --peerAddresses peer0.retailer.example.com:10051 --tlsRootCertFiles /opt/gopath/src/github.com/hyperledger/fabric/peer/crypto/peerOrganizations/retailer.example.com/peers/peer0.retailer.example.com/tls/ca.crt -c '{"Args":["a","bb"]}'

- 在cli2中查询a的值
peer chaincode query -C mychannel -n sacc -c '{"Args":["query","a"]}'
![]()
- 在cli2中调用链码修改a的值
peer chaincode invoke -o orderer.example.com:7050 --tls true --cafile /opt/gopath/src/github.com/hyperledger/fabric/peer/crypto/ordererOrganizations/example.com/orderers/orderer.example.com/msp/tlscacerts/tlsca.example.com-cert.pem --channelID mychannel --name sacc --peerAddresses peer0.deliverer.example.com:7051 --tlsRootCertFiles /opt/gopath/src/github.com/hyperledger/fabric/peer/crypto/peerOrganizations/deliverer.example.com/peers/peer0.deliverer.example.com/tls/ca.crt --peerAddresses peer0.manufacturer.example.com:9051 --tlsRootCertFiles /opt/gopath/src/github.com/hyperledger/fabric/peer/crypto/peerOrganizations/manufacturer.example.com/peers/peer0.manufacturer.example.com/tls/ca.crt --peerAddresses peer0.producer.example.com:11555 --tlsRootCertFiles /opt/gopath/src/github.com/hyperledger/fabric/peer/crypto/peerOrganizations/producer.example.com/peers/peer0.producer.example.com/tls/ca.crt --peerAddresses peer0.retailer.example.com:10051 --tlsRootCertFiles /opt/gopath/src/github.com/hyperledger/fabric/peer/crypto/peerOrganizations/retailer.example.com/peers/peer0.retailer.example.com/tls/ca.crt -c '{"Args":["set","a","cc"]}'

- 在cli3中查看修改后a的值
peer chaincode query -C mychannel -n sacc -c '{"Args":["query","a"]}'

至此,基础网络搭建完成。


 2846
2846


 被折叠的 条评论
为什么被折叠?
被折叠的 条评论
为什么被折叠?
 到【灌水乐园】发言


