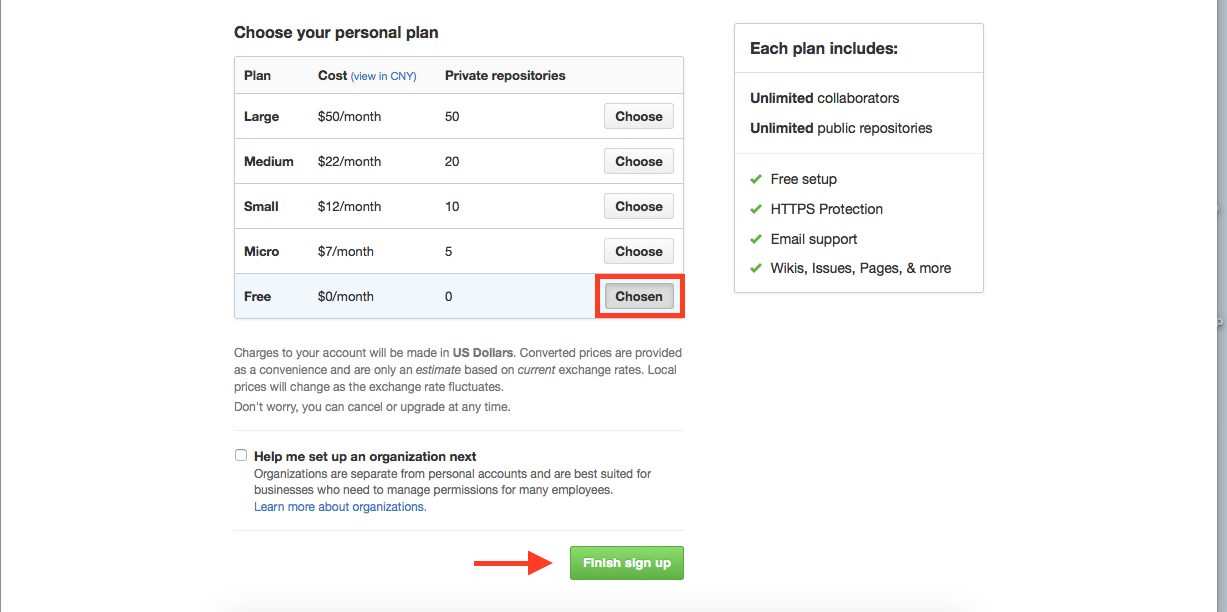
1、准备工作
- 注册github账号:https://github.com
提示:
- 文本框后面如果不是绿色对号
- 用户名已经存在(换一个喽)
- 邮箱已经注册或不存在
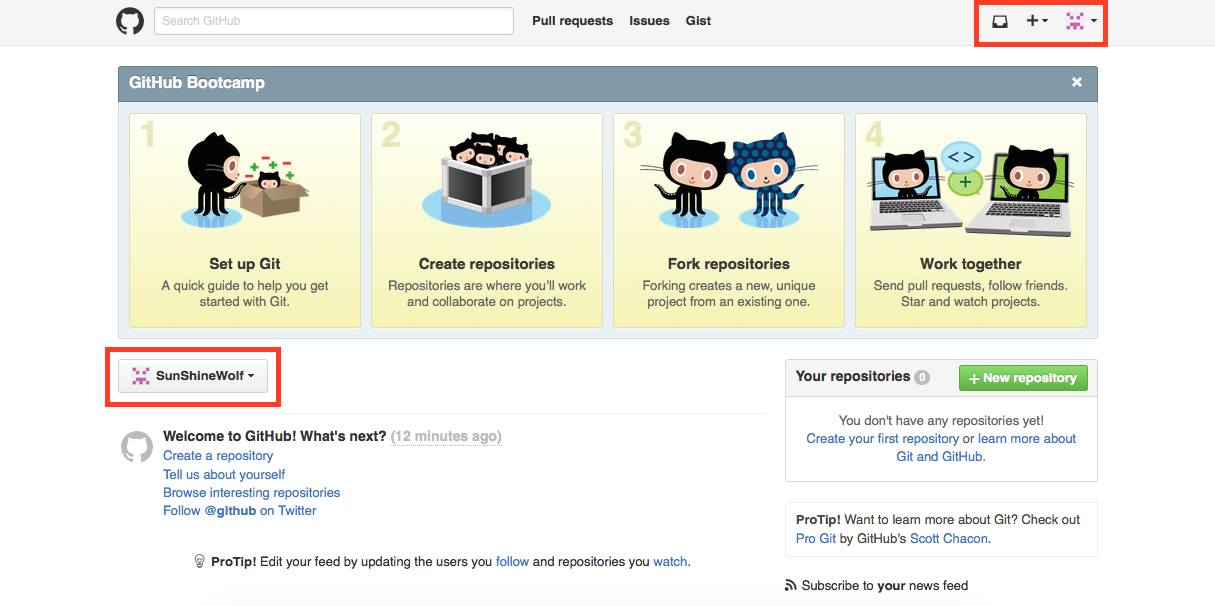
注册完毕即以新注册的账号自动登录,在首页右上方的导航条,可以看到当前 登录用户的名称,点击导航条中的“Account Settings”,对账号进行进一步设置。
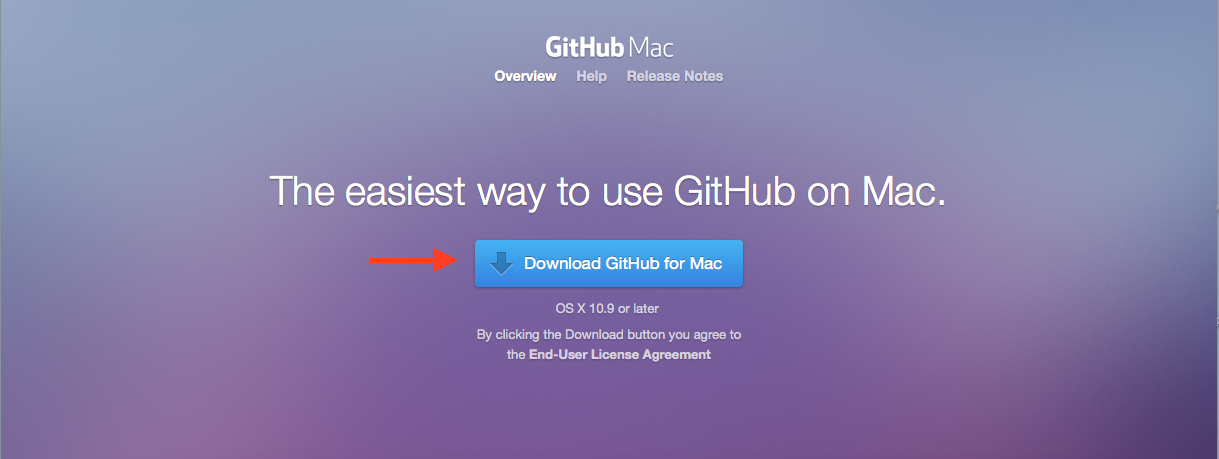
2.安装github客户端:https://mac.github.com
下载完安装,安装过程就不啰嗦啦!(好像是有点婆婆妈妈的哈)
2、配置github
- 创建ssh
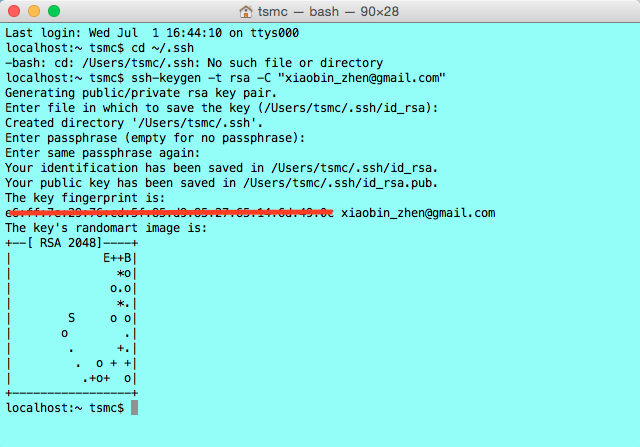
打开终端(terminal)
$cd ~/.ssh //检查是否已经存在ssh
如果存在,将已有的ssh备份
若果不存在,继续执行
$ssh-keygen -t rsa -C “xxxxx@gmail.com”
// 刚刚注册github时的email)
执行完,然后一直回车就可以了(3次)。
* 提示:*
* 如果要修改ssh生成目录,可以在Enter file in which to save the key (/Users/tsmc/.ssh/id_rsa): 处输入要生成的路径,选择默认的话,会生成在 ~/.ssh下
现在ssh秘钥已经生成了,在Finder中找到刚生成的id_rsa.pub文件(打开Finder,使用快捷键cmd + shift + G,输入~/.ssh, 前往目录)
2. 把ssh秘钥添加到github
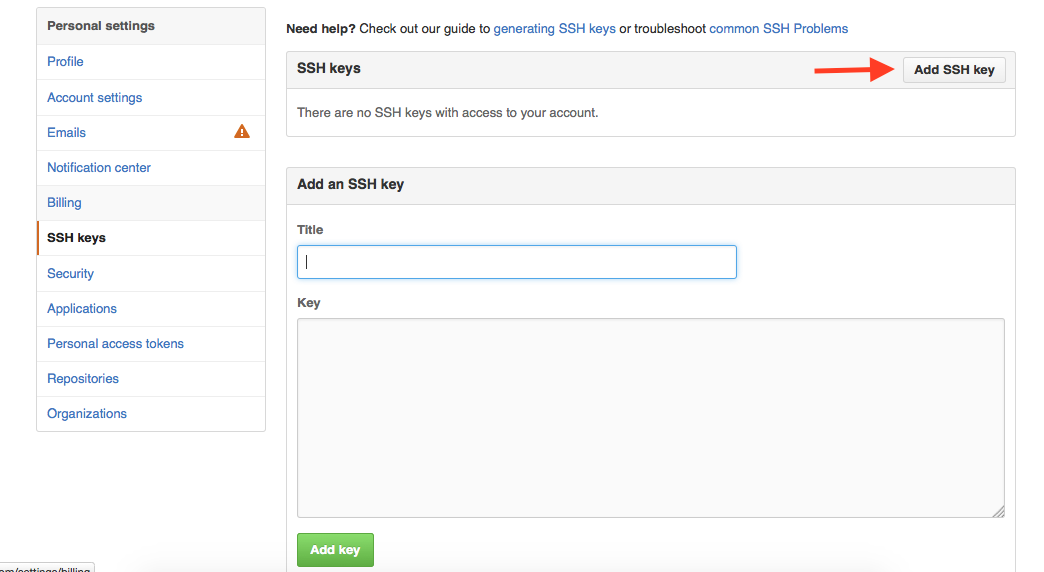
直接上图吧!(喜欢用图说话)
a、settings
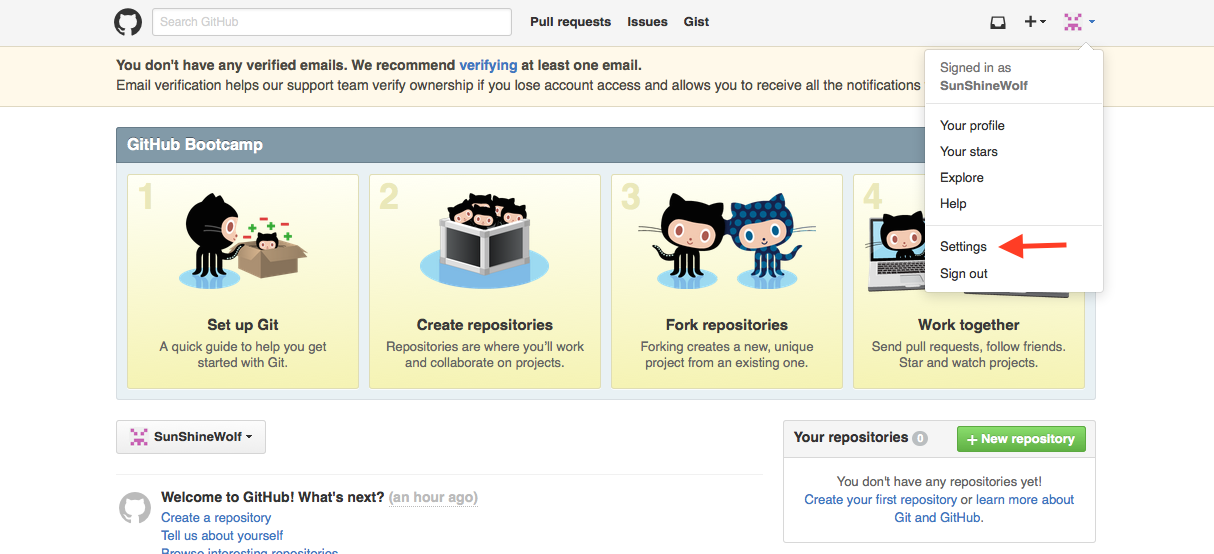
b、SSH keys
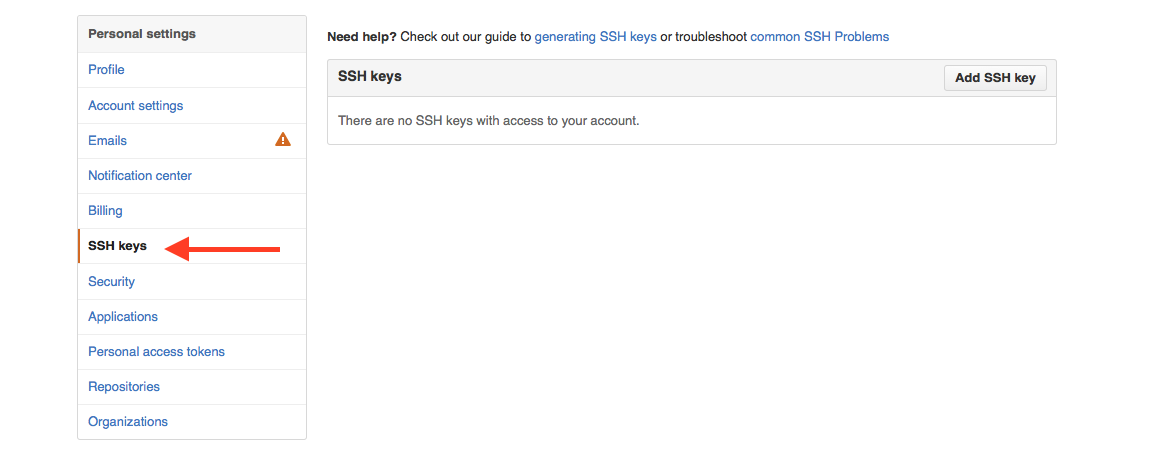
c、Add SSH key
Title:xxxx@gmail.com(随便写的,自己能区别的名字就好)
Key:打开刚刚生成的id_rsa.pub文件,将其中内容拷贝到这里。
填写完了,点击Add key。
3、测试帐号与github连接:
ssh -T git@github.com
执行后,是这样的就是连接成功了
Hi SunshineWolf! You’ve successfully authenticated, but GitHub does not provide shell access.
提示
如果出现这样的东东,输入yes,回车就OK
The authenticity of host ‘github.com (207.97.227.239)’ can’t be established.RSA key fingerprint is 16:27:ac:a5:76:28:2d:36:63:1b:56:4d:eb:df:a6:48.Are you sure you want to continue connecting (yes/no)?
4、上传代码
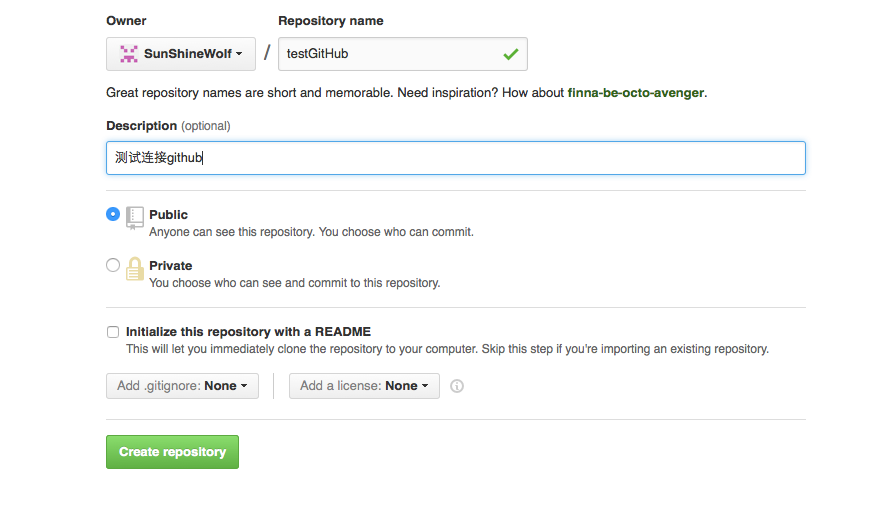
在github下建自己的Repository。Create a New Repository如下:
a、New Repository

b、Create Repository
- Repository name:自己创建的工程名
- Description:工程的描述。
- 选择Public
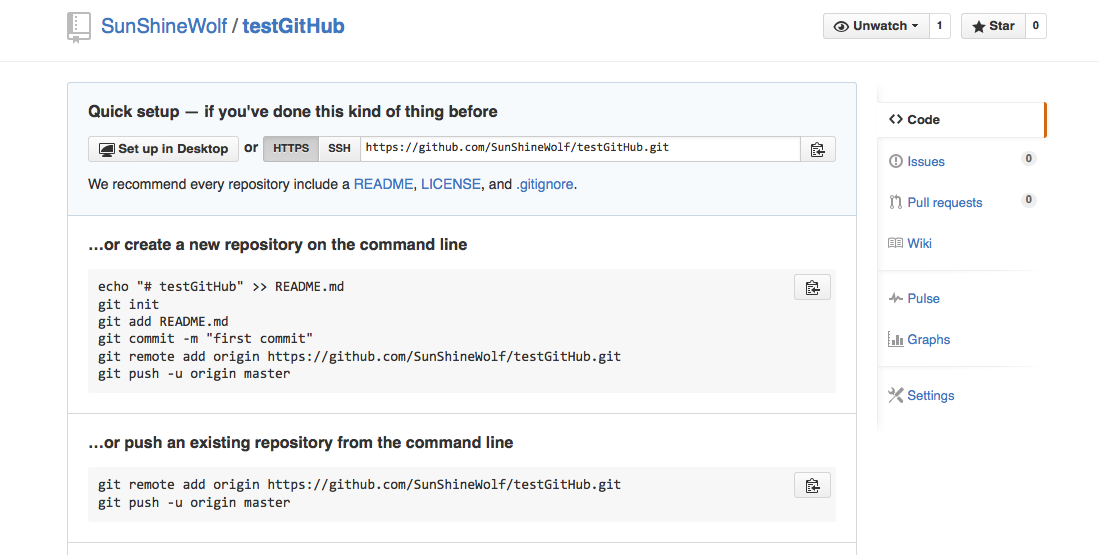
点击 “Create repository”,出现如下图:
按照上面的步骤在终端执行就好了
提示
执行的时候切换到你要上传的工程目录下。
5、设置用户信息
$git config –global user.name “defnngj” //用户名
$git config –global user.name “xxxxx@gmail.com” //邮箱
6、客户端与xcode连接,同步到github上
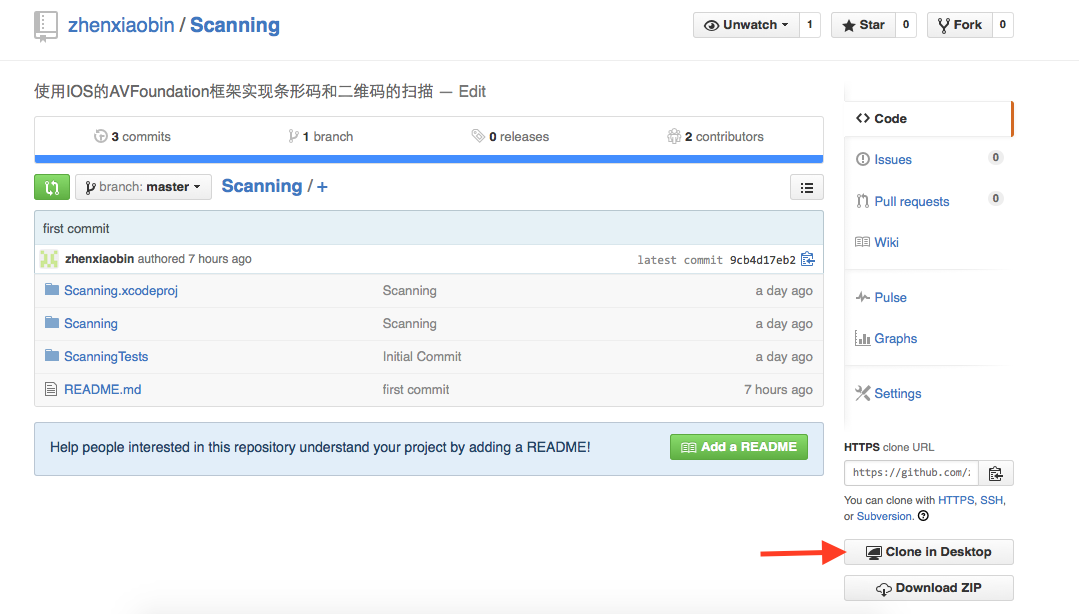
选择我们要同步的项目,Clone In Desktop
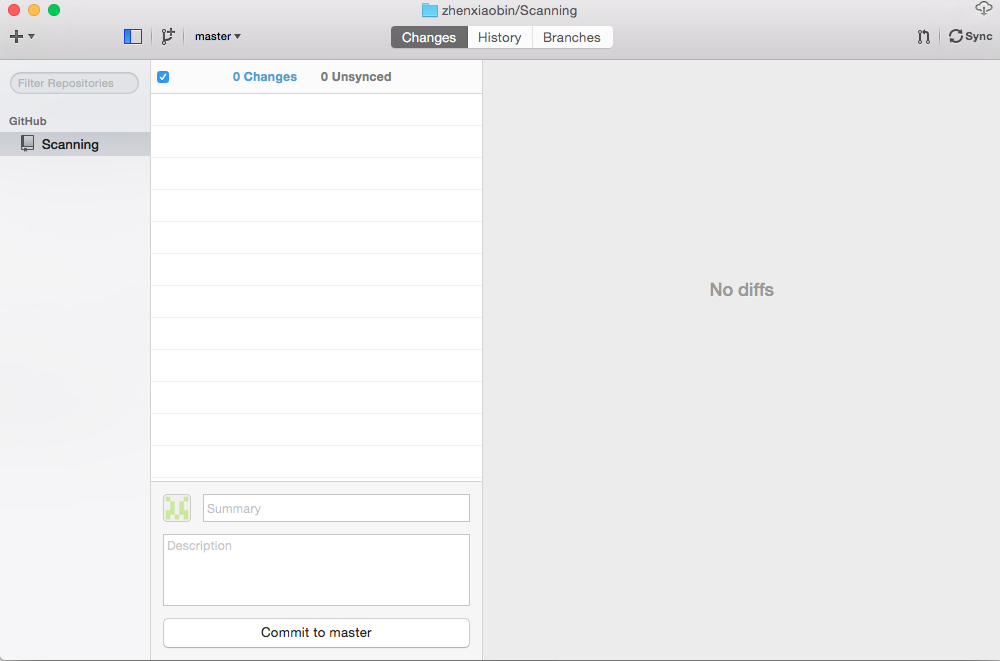
项目clone到客户端
选中项目,点击出现如图
- View on GitHub:在网页github中查看项目
- Open in Finder:在Finder中用xcode打开项目,修改完,可以commit到本地,也可以直接commit到github
- Open in Terminal:在终端打开。
有问题会持续更新。。。




 2907
2907

 被折叠的 条评论
为什么被折叠?


