一、建一个spring空项目
二、新建student.java类
package com.printValue;

public class Student {
    private String age;

    public String getAge() {
        return age;
    }

    public void setAge(String age) {
        this.age = age;
    }

    public void p(){
        System.out.println("注入类");
    }

    @Override
    public String toString() {
        return "age:"+age;
    }

}
三、新建SpringCollection.java类
package com.printValue;
import java.util.List;
import java.util.Map;
import java.util.Map.Entry;
import java.util.Set;
public class SpringCollection {
private String name;
private List<Object> list;
private Map<String,String> map;
private Set<String> set;
private Student student;
private String[] strArr;
public SpringCollection(String name){
this.name = name;
System.out.println("constructor注入:"+name);
}
public void setName(String name) {
this.name = name;
}
public void setList(List<Object> list) {
this.list = list;
}
public void setMap(Map<String, String> map) {
this.map = map;
}
public void setSet(Set<String> set) {
this.set = set;
}
public void setStudent(Student student) {
this.student = student;
}
public void setStrArr(String[] strArr) {
this.strArr = strArr;
}
public void print(){
System.out.println("property注入:"+name);
System.out.println("----list----");
for(Object l:list){
System.out.print(l+" ");
}
System.out.println();
System.out.println("---set---");
for(String s:set){
System.out.print(s+" ");
}
System.out.println();
System.out.println("---map---");
for(Entry<String, String> entity:map.entrySet()){
System.out.print(entity.getKey()+":"+entity.getValue()+" ");
}
System.out.println();
System.out.println("----注入类----");
student.p();
System.out.println();
System.out.println("----注入数组----");
for(String s1:strArr){
System.out.print(s1+" ");
}
}
}
四、新建beans.xml文件。
<?xml version="1.0" encoding="UTF-8"?>
<beans xmlns="http://www.springframework.org/schema/beans"
xmlns:xsi="http://www.w3.org/2001/XMLSchema-instance"
xsi:schemaLocation="http://www.springframework.org/schema/beans
http://www.springframework.org/schema/beans/spring-beans.xsd">
<bean name="collection" class="com.printValue.SpringCollection">
<constructor-arg index="0" type="java.lang.String" value="constructor"></constructor-arg>
<property name="name" value="sjt"></property>
<property name="list">
<list>
<value>1</value>
<value>2</value>
<value>1</value>
<value>2</value>
<ref bean="stu"/>
</list>
</property>
<property name="set">
<set>
<value>1</value>
<value>2</value>
<value>1</value>
<value>2</value>
</set>
</property>
<property name="map">
<map>
<entry key="1" value="sjt1"></entry>
<entry key="2" value="sjt2"></entry>
<entry key="1" value="sjt11"></entry>
<entry key="2" value="sjt22"></entry>
</map>
</property>
<property name="student" ref="stu" ></property>
<property name="strArr">
    <list>
        <value>1</value>
        <value>2</value>
        <value>3</value>
        <value>4</value>
    </list>
</property>
</bean>
<bean name="stu" class="com.printValue.Student">
        <property name="age" value="12"></property>
</bean>
</beans>
五、新建测试类SpringCollectionTest.java
package com.nuc.test
import org.junit.Test
import org.springframework.context.ApplicationContext
import org.springframework.context.support.ClassPathXmlApplicationContext
import com.printValue.SpringCollection
public class SpringCollectionTest {
ApplicationContext ac = new ClassPathXmlApplicationContext("beans_collection.xml")
@Test
public void test(){
SpringCollection sc = (SpringCollection) ac.getBean("collection")
sc.print()
}
}
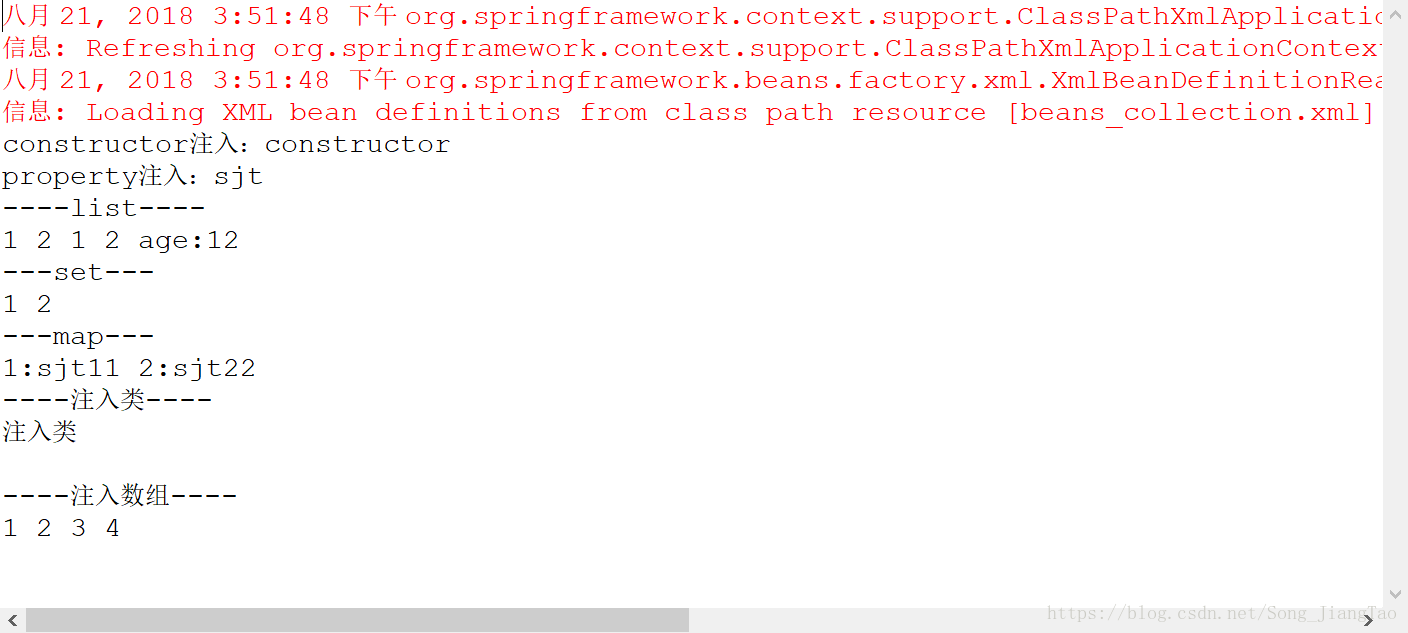
六、测试结果
七、注意事项:
<property name="strArr">
<list>
<value>1</value>
<value>2</value>
<value>3</value>
<value>4</value>
</list>
</property>
- 对象注入的时候,是另外写一个bean,然后用引入到你想引入的bean
<bean name="stu" class="com.printValue.Student">
<property name="age" value="12"></property>
</bean>
- map输出的时候,是要用entry,并且map得调用entrySet方法。
for(Entry<String, String> entity:map.entrySet()){
System.out.print(entity.getKey()+":"+entity.getValue()+" ")
}
@Override
public String toString() {
    return "age:"+age;
}


 1616
1616


 被折叠的 条评论
为什么被折叠?
被折叠的 条评论
为什么被折叠?
 到【灌水乐园】发言


