


〇、目标
1、使用pycharm工具创建项目demo;
2、使用python语言实现KNN算法。
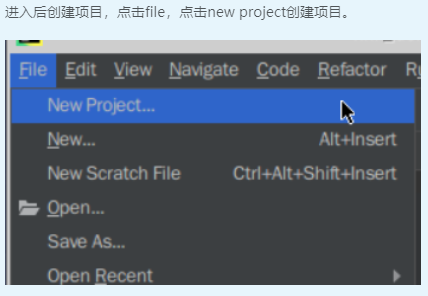
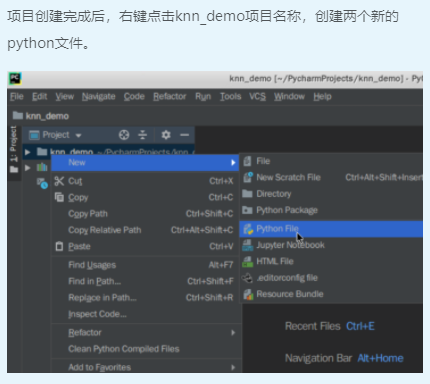
一、创建脚本文件


二、编写KNN算法程序

KNN算法所阐述的核心思想在KNN.py文件的注释部分具有详细的介绍,编辑KNNTest.py文件进行KNN算法思想的验证实现。KNN.py代码为:
# coding=utf-8

from numpy import *
import operator

def createDataSet():
    group = array([[1.0, 0.9], [1.0, 1.0], [0.1, 0.2], [0.0, 0.1]])
    labels = ['A', 'A', 'B', 'B']
    return group, labels


def KNNClassify(newInput, dataSet, labels, k):
    numSamples = dataSet.shape[0]   # shape[0]表示行数

    diff = tile(newInput, (numSamples, 1)) - dataSet  # 按元素求差值
    squaredDiff = diff ** 2  # 将差值平方
    squaredDist = sum(squaredDiff, axis = 1)   # 按行累加
    distance = squaredDist ** 0.5  # 将差值平方和求开方,即得距离

    sortedDistIndices = argsort(distance)
    classCount = {} # define a dictionary (can be append element)
    for i in range(k):
        voteLabel = labels[sortedDistIndices[i]]
        classCount[voteLabel] = classCount.get(voteLabel, 0) + 1

    maxCount = 0
    for key, value in classCount.items():
        if value > maxCount:
            maxCount = value
            maxIndex = key

    return maxIndex
KNNTest.py代码为:
# coding=utf-8
import KNN
from numpy import *
dataSet, labels = KNN.createDataSet()
testX = array([1.2, 1.0])
k = 3
outputLabel = KNN.KNNClassify(testX, dataSet, labels, 3)
print("Your input is:", testX, "and classified to class: ", outputLabel)

testX = array([0.1, 0.3])
outputLabel = KNN.KNNClassify(testX, dataSet, labels, 3)
print("Your input is:", testX, "and classified to class: ", outputLabel)
三、运行观察结果


 227
227


 被折叠的 条评论
为什么被折叠?
被折叠的 条评论
为什么被折叠?
 到【灌水乐园】发言


