


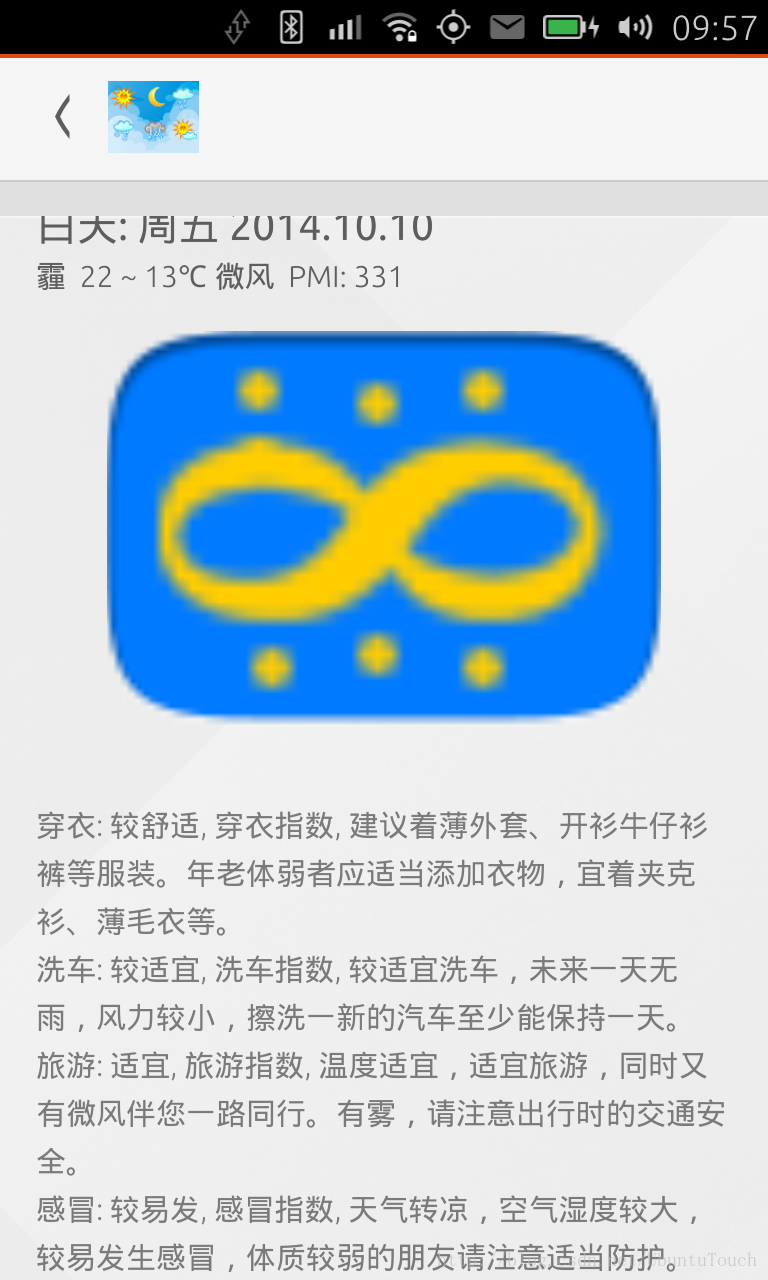
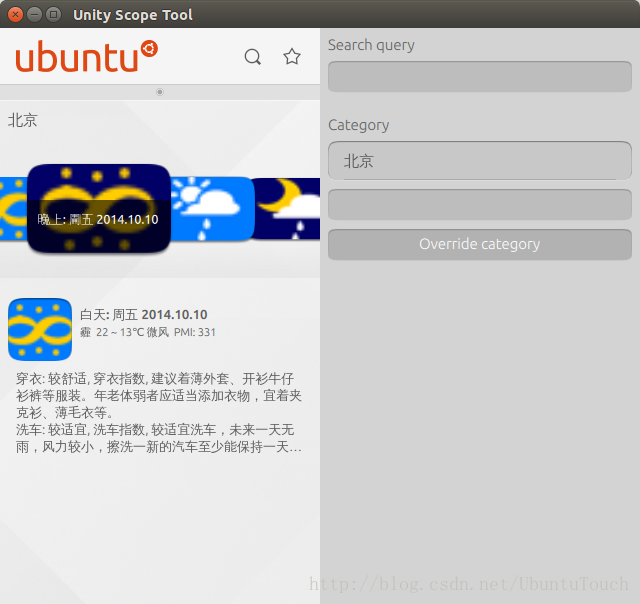
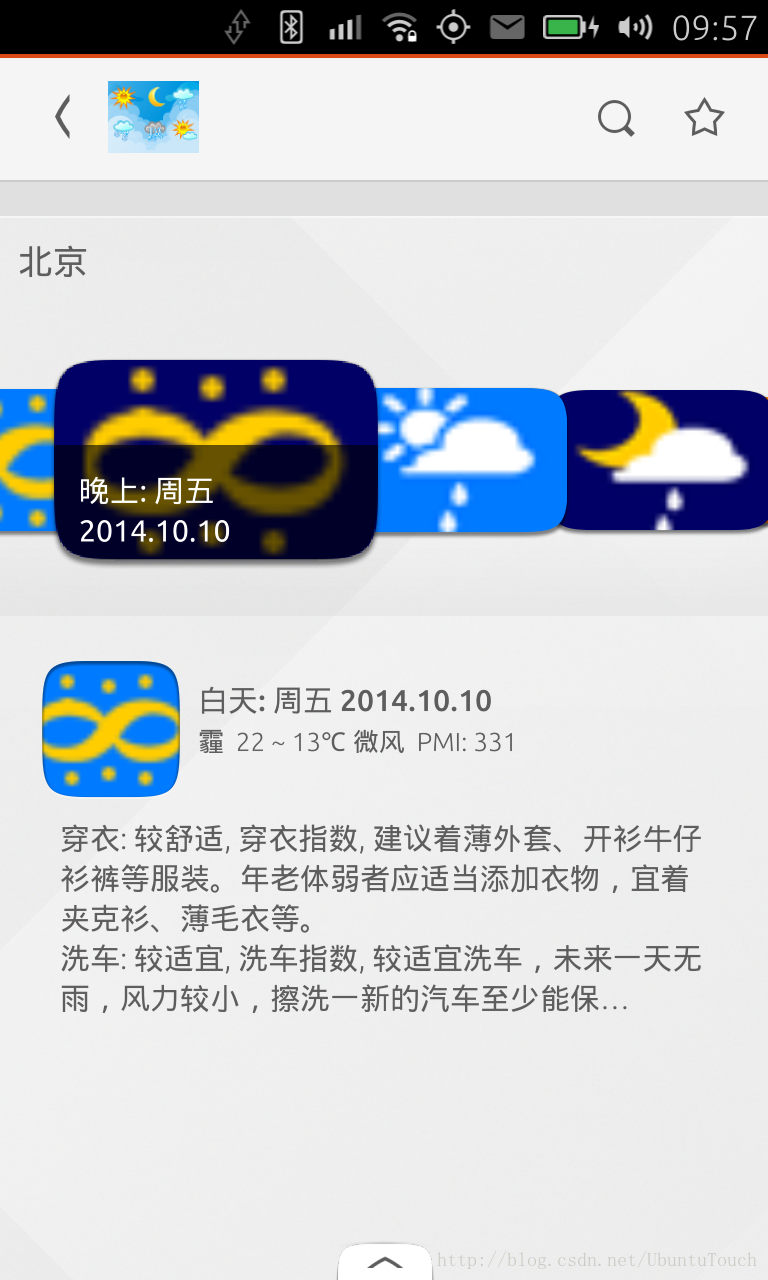
在这篇文章里,我们将使用Ubuntu SDK从零开始来创建一个“中国天气”的Scope应用。通过这个过程,让开发者了解Scope在Ubuntu上的开发流程,以及对Scope有更深的认识。该应用完全使用Qt C++及std C++来完成的。更多关于Scope的知识,可以在网址:http://developer.ubuntu.com/scopes/。我们开发应用的最终显示图为:

在上一篇文章中,我们已经使用std C++完成了一个同样的Scope应用。这里我们来使用Qt C++ APIs来完成这个同样的应用。
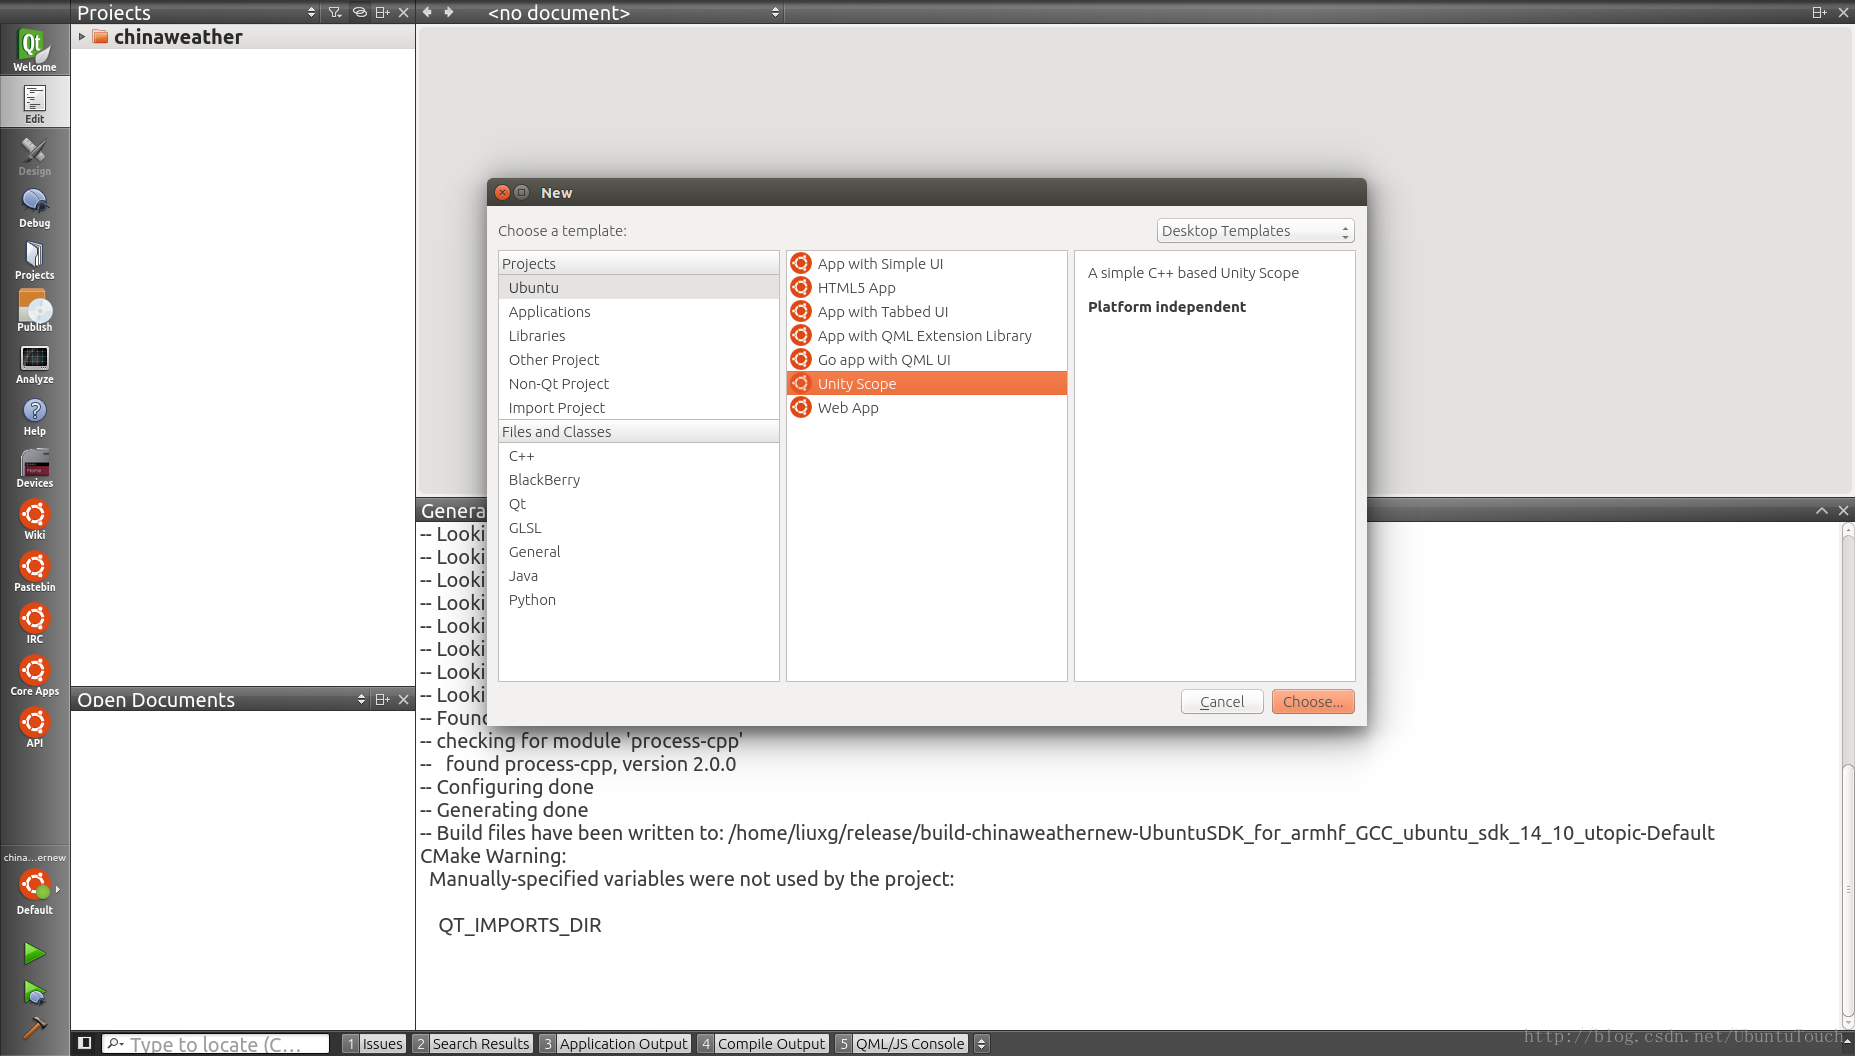
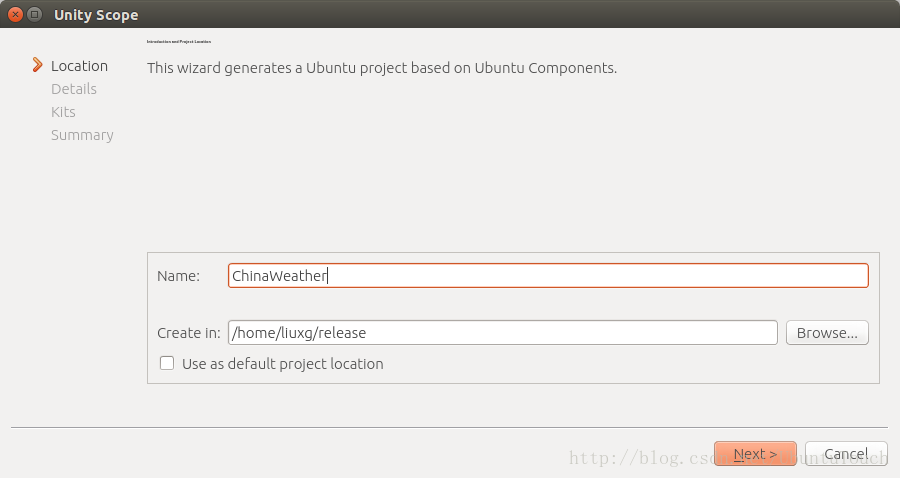
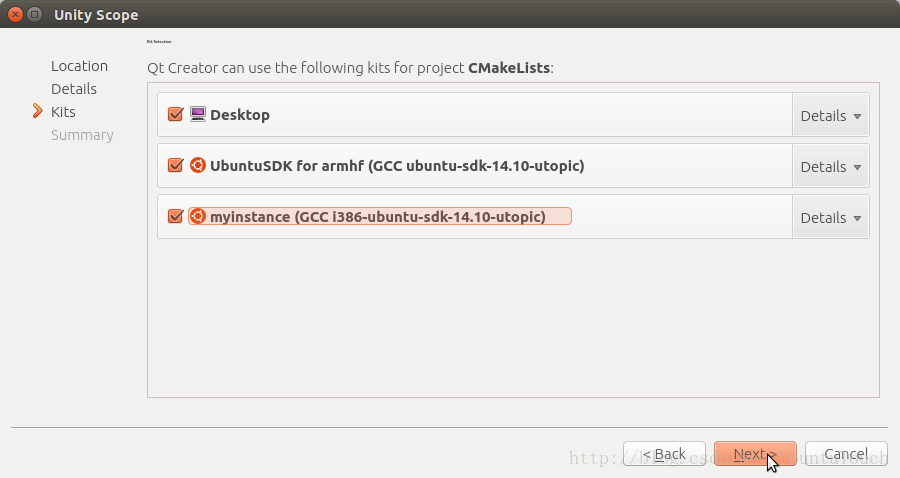
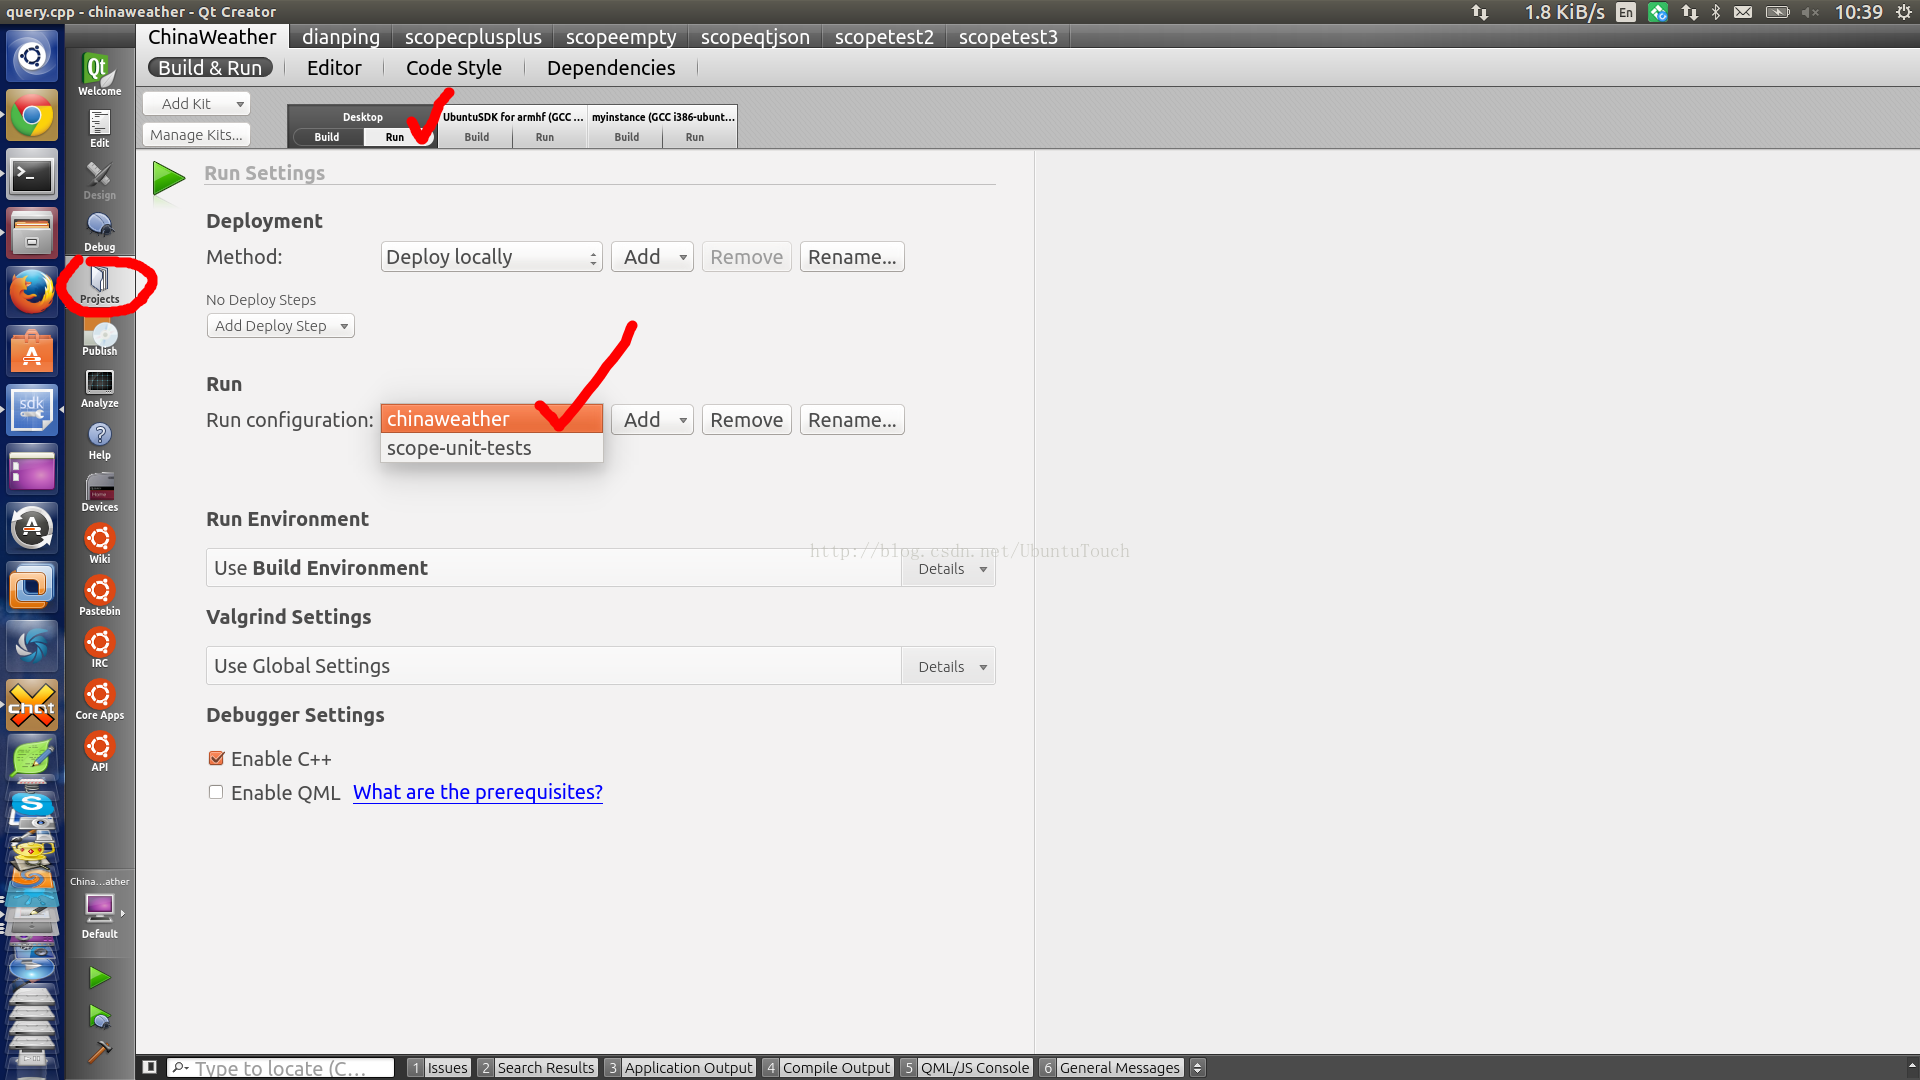
1)启动Ubuntu SDK来创建一个基本的Scope应用

2)加入对Qt的支持
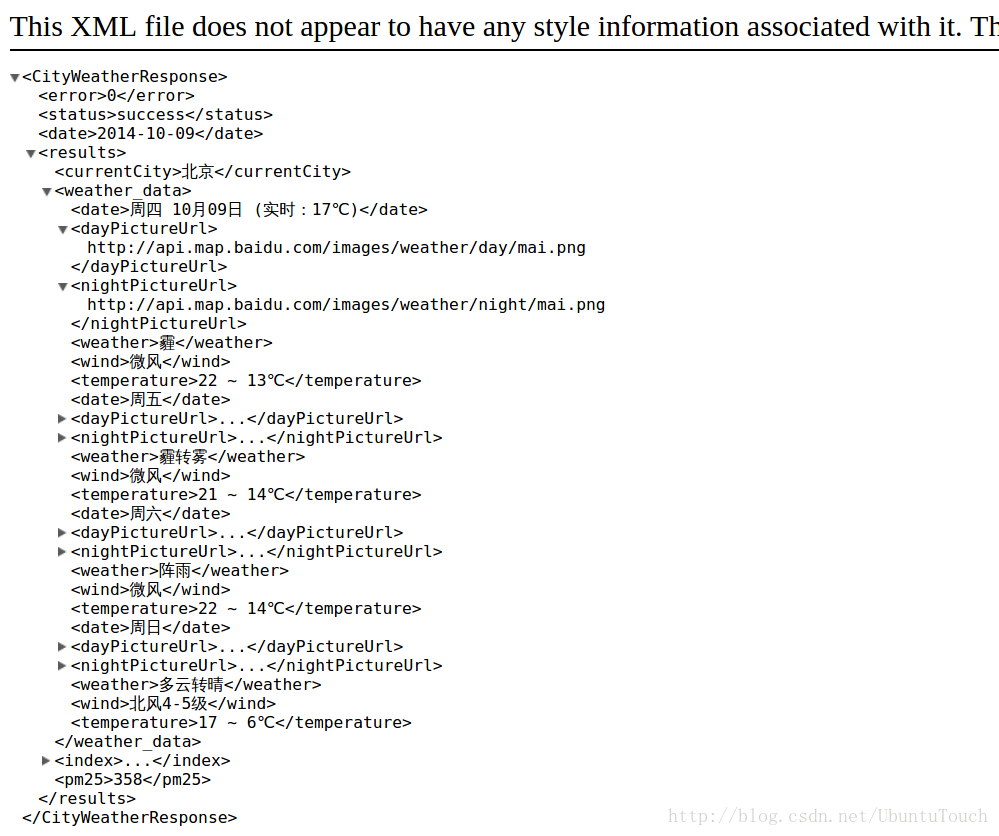
首先,我们可以看到API是工作的。没有任何问题。显示的架构是xml格式的。由于我们要使用Qt及Qt中的xml库来帮助我们解析我们得到的xml格式的数据,我们在项目中加入对Qt的支持。我们首先打开在“src”中的CMakeLists.txt文件,并加入如下的句子:
add_definitions(-DQT_NO_KEYWORDS)
find_package(Qt5Network REQUIRED)
find_package(Qt5Core REQUIRED)
find_package(Qt5Xml REQUIRED)

include_directories(${Qt5Core_INCLUDE_DIRS})
include_directories(${Qt5Network_INCLUDE_DIRS})
include_directories(${Qt5Xml_INCLUDE_DIRS})

....

# Build a shared library containing our scope code.
# This will be the actual plugin that is loaded.
add_library(
  scope SHARED
  $<TARGET_OBJECTS:scope-static>
)

qt5_use_modules(scope Core Xml Network)

# Link against the object library and our external library dependencies
target_link_libraries(
  scope
  ${SCOPE_LDFLAGS}
  ${Boost_LIBRARIES}
)
# Our test executable.
# It includes the object code from the scope
add_executable(
  scope-unit-tests
  scope/test-scope.cpp
  $<TARGET_OBJECTS:scope-static>
)

# Link against the scope, and all of our test lib dependencies
target_link_libraries(
  scope-unit-tests
  ${GTEST_BOTH_LIBRARIES}
  ${GMOCK_LIBRARIES}
  ${SCOPE_LDFLAGS}
  ${TEST_LDFLAGS}
  ${Boost_LIBRARIES}
)

qt5_use_modules(scope-unit-tests Core Xml Network)

# Register the test with CTest
add_test(
  scope-unit-tests
  scope-unit-tests
)
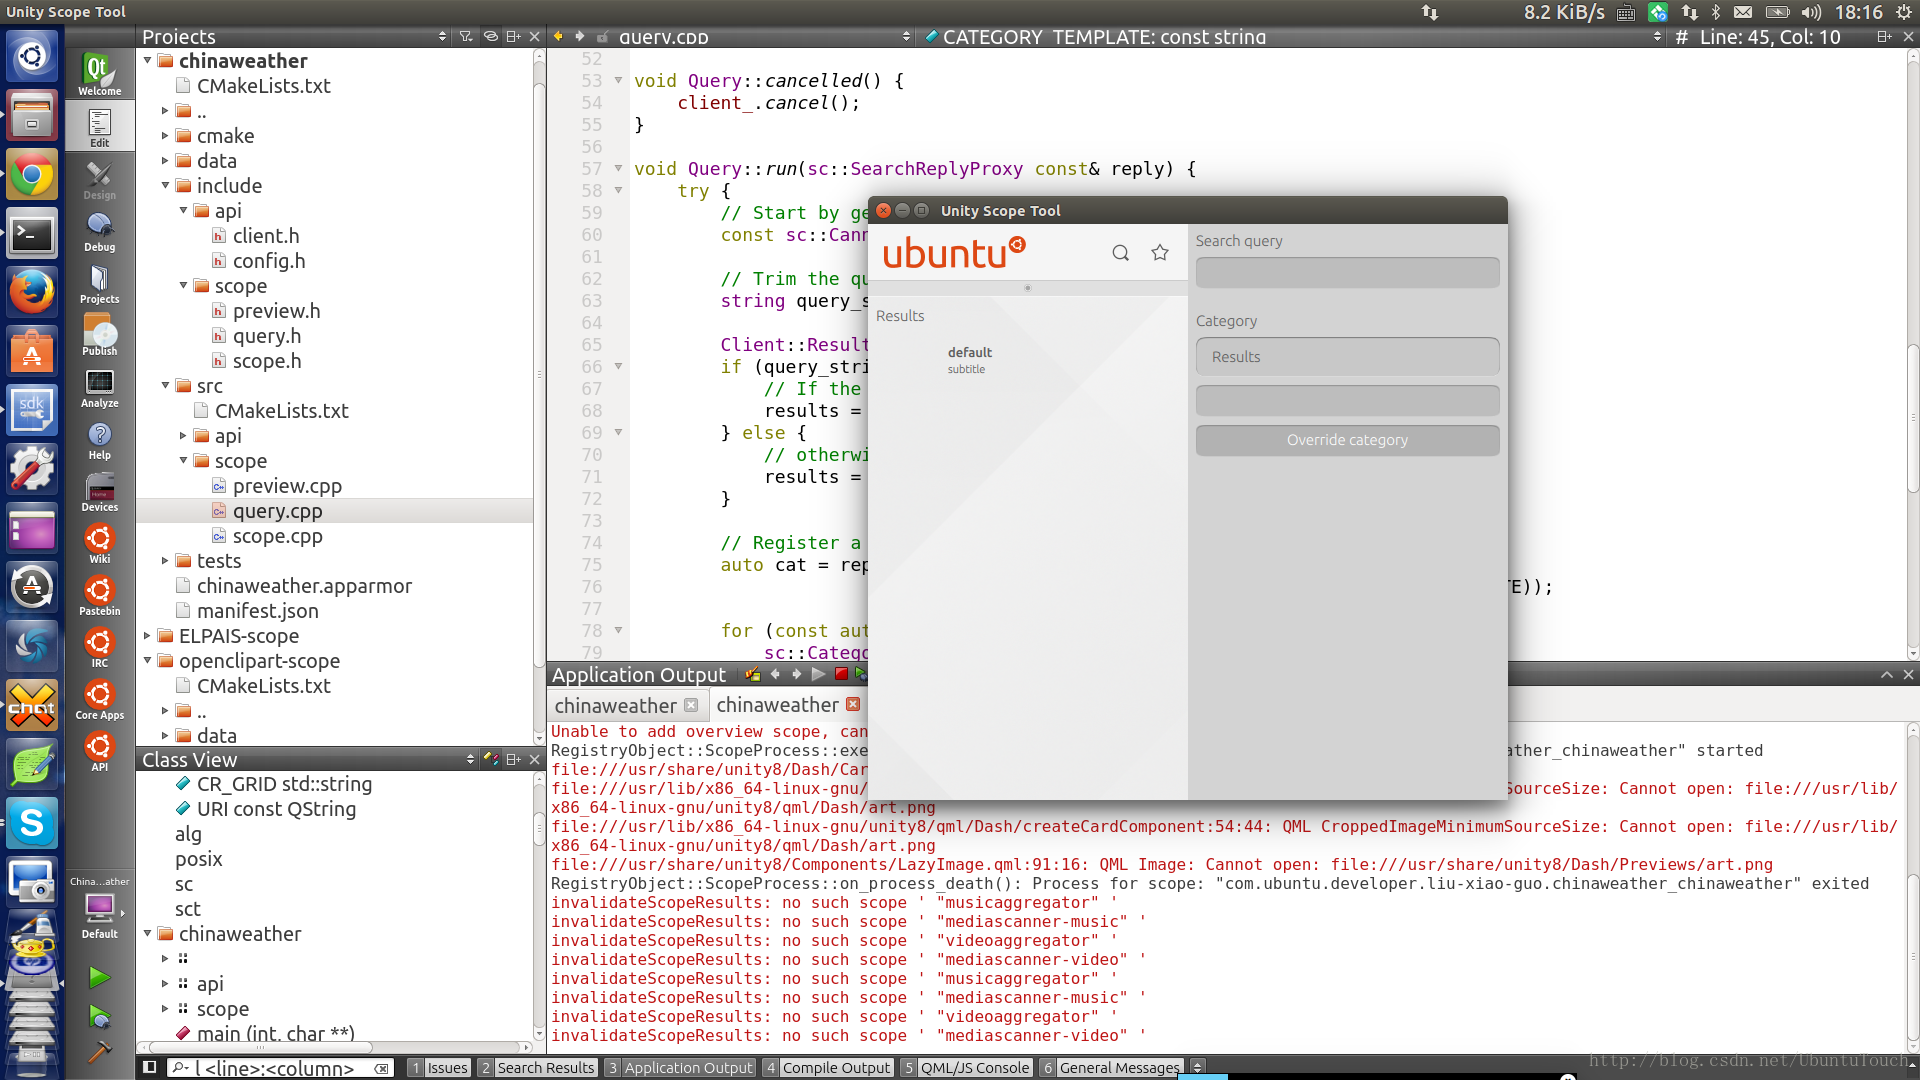
我们再重新编译我们的应用,如果我们没有错误的话,我们的Scope可以直接在desktop下直接运行。这里我们加入了一个”QCoreApplication”变量。这主要是为了我们能够使用signal/slot机制及生成一个Qt应用。我们来修改scope.h文件,并加QoreApplication的变量app及forward申明。我们也必须同时加入一个方法"run"。
class QCoreApplication; // added

namespace scope {
class Scope: public unity::scopes::ScopeBase {
public:
    void start(std::string const&) override;
    void stop() override;
    void run(); // added
    unity::scopes::PreviewQueryBase::UPtr preview(const unity::scopes::Result&,
                                                  const unity::scopes::ActionMetadata&) override;
    unity::scopes::SearchQueryBase::UPtr search(
            unity::scopes::CannedQuery const& q,
            unity::scopes::SearchMetadata const&) override;

protected:
    api::Config::Ptr config_;
    QCoreApplication *app; //added
};#include <QCoreApplication> // added
...
void Scope::stop() {
/* The stop method should release any resources, such as network connections where applicable */
delete app;
}
void Scope::run()
{
int zero = 0;
app = new QCoreApplication(zero, nullptr);
}3)代码讲解
src/scope/scope.cpp
这个文件定义了一个unity::scopes::ScopeBase的类。它提供了客户端用来和Scope交互的起始接口。
- 这个类定义了“start", "stop"及"run"来运行scope。绝大多数开发者并不需要修改这个类的大部分实现。在我们的例程中,我们将不做任何的修改
- 它也同时实现了另外的两个方法:search 和 preview。我们一般来说不需要修改这俩个方法的实现。但是他们所调用的函数在具体的文件中必须实现
注意:我们可以通过研究Scope API的头文件来对API有更多的认识。更多的详细描述,开发者可以在http://developer.ubuntu.com/api/scopes/sdk-14.10/查看。
src/scope/query.cpp
这个文件定义了一个unity::scopes::SearchQueryBase类。
这个类用来产生由用户提供的查询字符串而生产的查询结果。这个结果可能是基于json或是xml的。这个类可以用来进行对返回的结果处理并显示。
- 得到由用户输入的查询字符串
- 向web services发送请求
- 生成搜索的结果(根据每个不同而不同)
- 创建搜索结果category(比如不同的layout-- grid/carousel)
- 根据不同的搜寻结果来绑定不同的category以显示我们所需要的UI
- 推送不同的category来显示给最终用户
创建并注册CategoryRenderers
在本例中,我们创建了两个JSON objects. 它们是最原始的字符串,如下所示,它有两个field:template及components。template是用来定义是用什么layout来显示我们所搜索到的结果。这里我们选择的是”vertical-journal"和carousel的layout。components项可以用来让我们选择预先定义好的field来显示我们所需要的结果。这里我们添加了"title"及“art"。
std::string CAT_GRID = R"(
{
    "schema-version" : 1,
    "template" : {
        "category-layout" : "vertical-journal",
        "card-layout": "horizontal",
        "card-size": "small",
        "collapsed-rows": 0
     },
    "components" : {
        "title" : "title",
        "subtitle":"subtitle",
        "summary":"summary",
        "art":{
        "field": "art2",
        "aspect-ratio": 1
        }
    }
 } )";

//Create a JSON string to be used tro create a category renderer - uses carousel layout
std::string CR_CAROUSEL = R"(
    {
        "schema-version" : 1,
        "template" : {
            "category-layout" : "carousel",
            "card-size": "large",
            "overlay" : true
        },
        "components" : {
            "title" : "title",
            "art" : {
                "field": "art",
                "aspect-ratio": 1.6,
                "fill-mode": "fit"
            }
        }
    }
)";
void Query::run(sc::SearchReplyProxy const& reply) {
/* This is where the actual processing of the current search query takes place.
* It's where you may want to query a local or remote data source for results
* matching the query.*/
// Trim the query string of whitespace
const CannedQuery &query(sc::SearchQueryBase::query());
string query_string = alg::trim_copy(query.query_string());
if ( query_string.empty() ) {
query_string = "北京";
}
QString queryUri = BASE_URI.arg(query_string.c_str());
qDebug() << "queryUrl: " << queryUri;
// Generate a network request to the OpenClipArt server and parse the result
QEventLoop loop;
QNetworkAccessManager manager;
QObject::connect(&manager, SIGNAL(finished(QNetworkReply*)), &loop, SLOT(quit()));
QObject::connect(&manager, &QNetworkAccessManager::finished,
[reply, query_string, this](QNetworkReply *msg){
QByteArray data = msg->readAll();
qDebug() << "XML data is: " << data.data();
Query::rssImporter(data,reply, QString::fromStdString(query_string));
});
// The query is the search string and was passed to this Query object's constructor by the client
// Empty search string yields no results with openclipart API.
manager.get(QNetworkRequest(QUrl(queryUri)));
loop.exec();
}
void Query::rssImporter(QByteArray &data, unity::scopes::SearchReplyProxy const& reply, QString title) {
QDomElement docElem;
QDomElement rootElem;
QDomDocument xmldoc;
QString query = title;
qDebug() << "query string: " << query;
if ( !xmldoc.setContent(data) ) {
qWarning()<<"Error importing data";
return;
}
rootElem = xmldoc.documentElement();
// Shows the CityWeatherResponse
qDebug() << "TagName: " << rootElem.tagName();
// Find CityWeatherResponse
docElem = rootElem.firstChildElement("date");
if (docElem.isNull()) {
qWarning()<< "Error in data," << "CityWeatherResponse" << " not found";
return;
}
QString date = docElem.text();
qDebug() << "date: " << date;
int indexYear = date.indexOf("-");
QString year = date.left(indexYear);
// Get the month
int indexMonth = date.indexOf("-", indexYear + 1);
QString month = date.mid(indexYear + 1, indexMonth - indexYear - 1);
// Get the day
QString day = date.right(date.length() - indexMonth - 1);
QDate qDate( year.toInt(), month.toInt(), day.toInt());
qDebug() << "Date: " << qDate.toString();
docElem = rootElem.firstChildElement("results");
QDomElement sum = docElem.firstChildElement("index");
QString summary = getSummary(sum);
qDebug() << "summary: " << summary;
QString pmiIndex = docElem.firstChildElement("pm25").text();
qDebug() << "PMI index: " << pmiIndex;
QDomElement cityElem = docElem.firstChildElement("currentCity");
QString city = cityElem.text();
qDebug() << "city: " << city;
docElem = docElem.firstChildElement("weather_data");
QDomNodeList dateList = docElem.elementsByTagName("date");
// Below is also a way to get the list of the dates
int count = dateList.count();
for ( int i = 0; i < count; i ++ ) {
QDomNode node = dateList.at(i);
qDebug() << "date: " << node.toElement().text();
}
/* We're now registering (creating) two new categoryies, one with grid layout, the other wiht carousel.
* Categories can be created at any point
* during query processing inside the run method, but it's recommended
* to create them as soon as possible (ideally as soon as they are known to the scope) */
CategoryRenderer rdrGrid(CAT_GRID);
CategoryRenderer rdrCarousel(CR_CAROUSEL);
auto catCar = reply->register_category("openclipartcarousel", city.toStdString(), "", rdrCarousel);
auto catGrid = reply->register_category("Chineweather", "", "", rdrGrid);
QDomElement result = docElem.firstChildElement("date");
int index = 0;
bool done = false;
while (!result.isNull()) {
QString date = result.text();
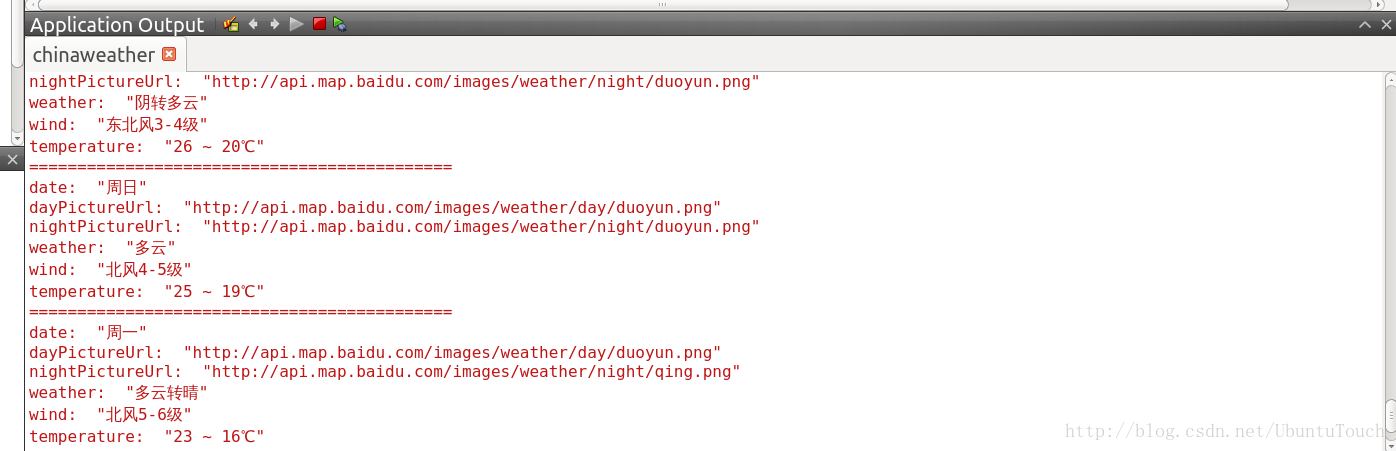
qDebug() << "date: " << date;
QString dayPictureUrl = result.nextSiblingElement("dayPictureUrl").text();
qDebug() << "dayPictureUrl: " << dayPictureUrl;
QString nightPictureUrl = result.nextSiblingElement("nightPictureUrl").text();
qDebug() << "nightPictureUrl: " << nightPictureUrl;
QString weather = result.nextSiblingElement("weather").text();
qDebug() << "weather: " << weather;
QString wind = result.nextSiblingElement("wind").text();
qDebug() << "wind: " << wind;
QString temperature = result.nextSiblingElement("temperature").text();
qDebug() << "temperature: " << temperature;
result = result.nextSiblingElement("date");
QString daytime;
daytime.append("白天: ");
daytime.append(qDate.addDays(index).toString("ddd yyyy.MM.dd"));
CategorisedResult catres(catCar);
// Set the picture for the day
catres.set_uri(URI.toStdString());
catres.set_dnd_uri(URI.toStdString());
catres.set_title(daytime.toStdString());
catres.set_art(dayPictureUrl.toStdString());
// Add some extra data, and they will be shown in the preview
catres["weather"] = Variant(weather.toStdString());
catres["temperature"] = Variant(temperature.toStdString());
catres["wind"] = Variant(wind.toStdString());
//push the categorized result to the client
if (!reply->push(catres)) {
break; // false from push() means search waas cancelled
}
// Set the picture for the night
catres.set_uri(URI.toStdString());
catres.set_dnd_uri(URI.toStdString());
QString nighttime;
nighttime.append("晚上: ");
// nighttime.append(date1);
nighttime.append(qDate.addDays(index).toString("ddd yyyy.MM.dd"));
catres.set_title(nighttime.toStdString());
catres.set_art(nightPictureUrl.toStdString());
//push the categorized result to the client
if (!reply->push(catres)) {
break; // false from push() means search waas cancelled
}
if ( index == 0 && !done ) {
CategorisedResult catres(catGrid);
// we handle it specially for today
catres.set_uri(URI.toStdString());
catres.set_art(dayPictureUrl.toStdString());
QString sub = weather + " " + " " + temperature + " " + wind + " PMI: " + pmiIndex;
catres["subtitle"] = sub.toStdString();
catres["weather"] = Variant(sub.toStdString());
catres["summary"]= summary.toStdString();
catres["wind"] = Variant(summary.toStdString());
QDateTime current = QDateTime::currentDateTime();\
QTime time = current.time();
QString daytime;
if ( time.hour() > 6 && time.hour() < 18 ) {
catres["art2"] = dayPictureUrl.toStdString();
daytime.append("白天: ");
daytime.append(qDate.addDays(index).toString("ddd yyyy.MM.dd"));
} else {
catres["art2"] = nightPictureUrl.toStdString();
daytime.append("晚上: ");
daytime.append(qDate.addDays(index).toString("ddd yyyy.MM.dd"));
}
catres.set_title(daytime.toStdString());
if (!reply->push(catres)) {
break; // false from push() means search waas cancelled
}
done = true;
continue;
}
index ++;
qDebug() << "============================================";
}
qDebug()<<"parsing ended";
}
// This function is used to get the summary of the day
QString Query::getSummary(QDomElement &docElem) {
QDomElement result = docElem.firstChildElement("title");
QString summary;
while (!result.isNull()) {
summary += result.text() + ": ";
summary += result.nextSiblingElement("zs").text() + ", ";
summary += result.nextSiblingElement("tipt").text() + ", ";
summary += result.nextSiblingElement("des").text() + "\n";
result = result.nextSiblingElement("title");
}
return summary;
}为了能够顺利地进行编译,我们必须修改query.h的头文件,加入我们需要的方法定义及include一些头文件:
#ifndef SCOPE_QUERY_H_
#define SCOPE_QUERY_H_

#include <api/client.h>

#include <unity/scopes/SearchQueryBase.h>
#include <unity/scopes/ReplyProxyFwd.h>

#include <QByteArray> // added
#include <QString>     // added
#include <QDomDocument> // added
#include <QDomElement>  // added

namespace scope {

/**
 * Represents an individual query.
 *
 * A new Query object will be constructed for each query. It is
 * given query information, metadata about the search, and
 * some scope-specific configuration.
 */
class Query: public unity::scopes::SearchQueryBase {
public:
    Query(const unity::scopes::CannedQuery &query,
          const unity::scopes::SearchMetadata &metadata, api::Config::Ptr config);

    ~Query() = default;

    void cancelled() override;

    void run(const unity::scopes::SearchReplyProxy &reply) override;

private:
    void rssImporter(QByteArray &data, unity::scopes::SearchReplyProxy const& reply, QString title); // added
    QString getSummary(QDomElement &docElem);  // added

private:
    api::Client client_;
};

}

#endif // SCOPE_QUERY_H_
我们同时打开scope.cpp文件,并在文件的开头部分加入如下的代码:
#include <QDebug>
#include <QJsonArray>
#include <QJsonDocument>
#include <QJsonObject>
#include <QNetworkAccessManager>
#include <QNetworkReply>
#include <QNetworkRequest>
#include <QUrl>
#include <QCoreApplication>
const QString BASE_URI = "http://api.map.baidu.com/telematics/v3/weather?location=%1&output=xml&ak=DdzwVcsGMoYpeg5xQlAFrXQt";
const QString URI = "http://www.weather.com.cn/html/weather/101010100.shtml";
// add this one to avoid too many typing
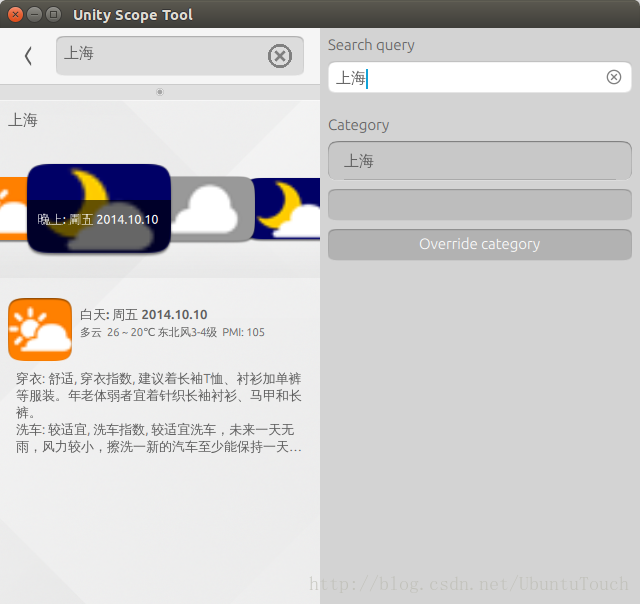
using namespace unity::scopes;重新编译我们的scope。如果有错误请及时修正。同时在desktop或emulator中运行我们的应用。我们可以看到如下的画面。我们也可以在Unity Scope Tool的输入框中输入"上海",我们可以看到内容会发生变化。

更多关于 CategoryRenderer 类的介绍可以在 docs找到。
我们为每个JSON Object创建了一个CategoryRenderer,并同时向reply object注册。我们修改我们的run方法来实现显示:
src/scope/preview.cpp
这个文件定义了一个unity::scopes::PreviewQueryBase类。
这个类定义了一个widget及一个layout来展示我们搜索到的结果。这是一个preview结i果,就像它的名字所描述的那样。
- 定义在preview时所需要的widget
- 让widget和搜索到的数据field一一对应起来
- 定义不同数量的layout列(由屏幕的尺寸来定)
- 把不同的widget分配到layout中的不同列中
- 把reply实例显示到layout的widget中
大多数的代码在“run"中实现。跟多关于这个类的介绍可以在http://developer.ubuntu.com/api/scopes/sdk-14.10/previewwidgets/找到。
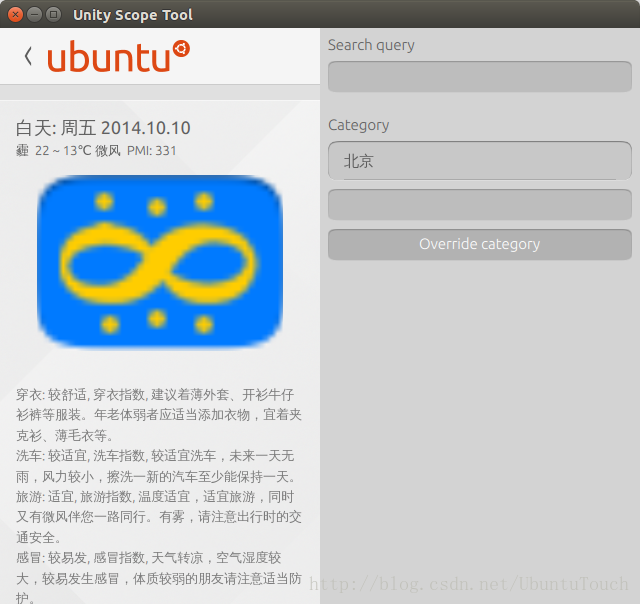
Preview
Preview需要来生成widget并连接它们的field到CategorisedResult所定义的数据项中。它同时也用来为不同的显示环境(比如屏幕尺寸)生成不同的layout。根据不同的显示环境来生成不同数量的column。
Preview Widgets
这是一组预先定义好的widgets。每个都有一个类型。更据这个类型我们可以生成它们。你可以在这里找到Preview Widget列表及它们提供的的field类型。
这个例子使用了如下的widgets
- header:它有title及subtitle field
- image:它有source field有来显示从哪里得到这个art
- text:它有text field
- action:用来展示一个有"Open"的按钮。当用户点击时,所包含的URI将被打开
如下是一个例子,它定义了一个叫做“headerId"的PreviewWidget。第二个参数是它的类型"header"。
- PreviewWidget w_header("headerId", "header");
#include <QString>  // added
#include <QDebug> // added

using namespace unity::scopes; // added

....

void Preview::run(sc::PreviewReplyProxy const& reply) {
    //
    // This preview handler just reuses values of the original result via
    // add_attribute_mapping() calls, but it could also do another network
    // request for more details if needed.
    //

    // Client can display Previews differently depending on the context
    // By creates two layouts (one with one column, one with two) and then
    // adding widgets to them differently, Unity can pick the layout the
    // scope developer thinks is best for the mode
    ColumnLayout layout1col(1), layout2col(2);

    // add columns and widgets (by id) to layouts.
    // The single column layout gets one column and all widets
    layout1col.add_column({"headerId", "artId", "tempId", "windId", "actionsId"});

    // The two column layout gets two columns.
    // The first column gets the art and header widgets (by id)
    layout2col.add_column({"artId", "headerId"});
    // The second column gets the info and actions widgets
    layout2col.add_column({"infoId", "windId", "actionsId"});

    // Push the layouts into the PreviewReplyProxy intance, thus making them
    // available for use in Preview diplay
    reply->register_layout({layout1col, layout2col});

    //Create some widgets
    // header type first. note 'headerId' used in layouts
    // second field ('header) is a standard preview widget type
    PreviewWidget w_header("headerId", "header");
    // This maps the title field of the header widget (first param)  to the
    // title field in the result to be displayed in this preview, thus providing
    // the result-specific data to the preview for display
    w_header.add_attribute_mapping("title", "title"); // attribute, result field name
    // Standard subtitle field here gets our 'artist' key value
    w_header.add_attribute_mapping("subtitle", "weather");

    PreviewWidget w_art("artId", "image");
    w_art.add_attribute_mapping("source", "art"); // // key, result field name

    PreviewWidget w_info("tempId", "text");
    w_info.add_attribute_mapping("text", "temperature");

    PreviewWidget w_wind("windId", "text");
    w_wind.add_attribute_mapping("text", "wind");

    Result result = PreviewQueryBase::result();
    QString urlString(result["uri"].get_string().c_str());
    qDebug() << "[Details] GET " << urlString;
    // QUrl url = QUrl(urlString);

    // Create an Open button and provide the URI to open for this preview result
    PreviewWidget w_actions("actionsId", "actions");
    VariantBuilder builder;
    builder.add_tuple({
            {"id", Variant("open")},
            {"label", Variant("Open")},
            {"uri", Variant(urlString.toStdString())} // uri set, this action will be handled by the Dash
        });
    w_actions.add_attribute_value("actions", builder.end());

    // Bundle out widgets as required into a PreviewWidgetList
    PreviewWidgetList widgets({w_header, w_art, w_info, w_wind, w_actions});
    // And push them to the PreviewReplyProxy as needed for use in the preview
    reply->push(widgets);
}
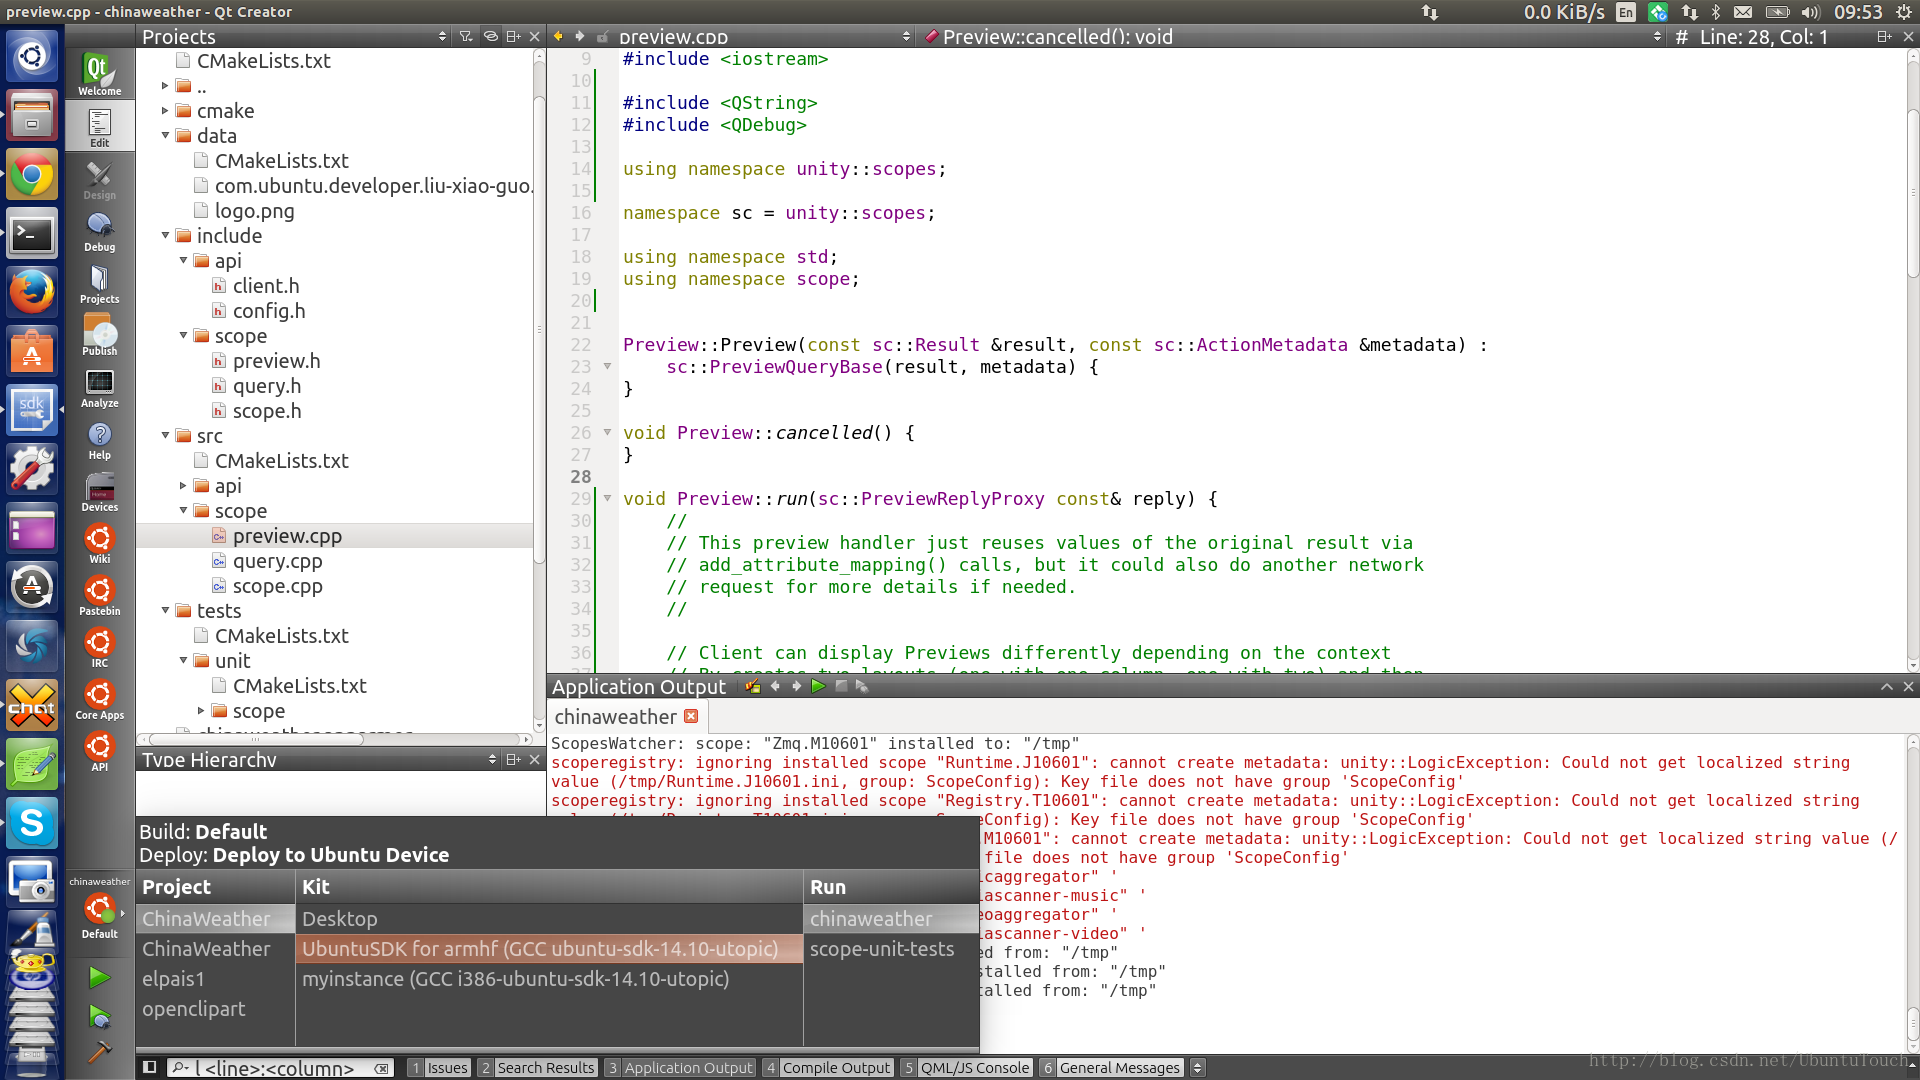

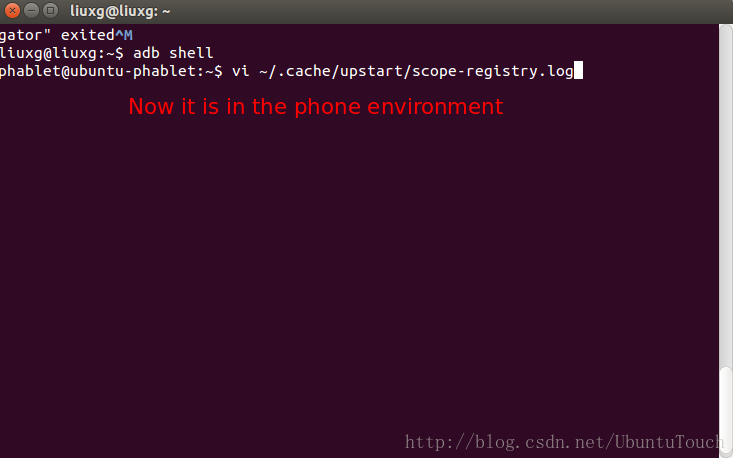
4)调试应用


 1429
1429

 被折叠的 条评论
为什么被折叠?
被折叠的 条评论
为什么被折叠?
 到【灌水乐园】发言


