


 本文介绍了如何在VisualStudio2019环境下下载、解压并编译libtiff库,以及如何配置项目以读取16位灰度值的TIF图片,还提到了遇到的常见问题和解决方法。
vs2019 libtiff安装及应用
1.下载libtiff
从libtiff 下载地址下载一个版本,这里选择4.0.8.

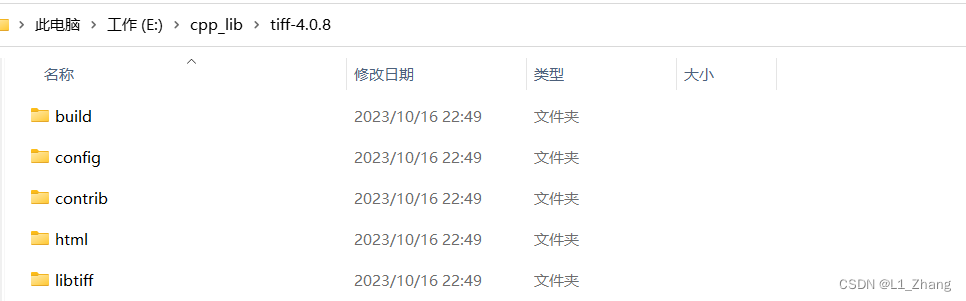
2.解压并编译
- 解压至目的地址:
E:\cpp_lib\tiff-4.0.8
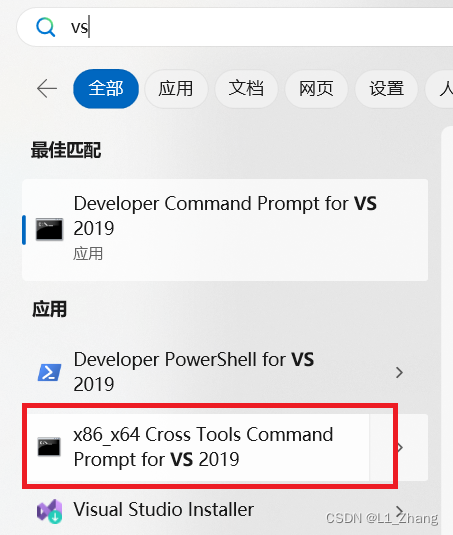
- 编译
使用vs自带工具进行编译。
这里要选择x86_x64 Cross Tools Command Prompt for VS 2019。
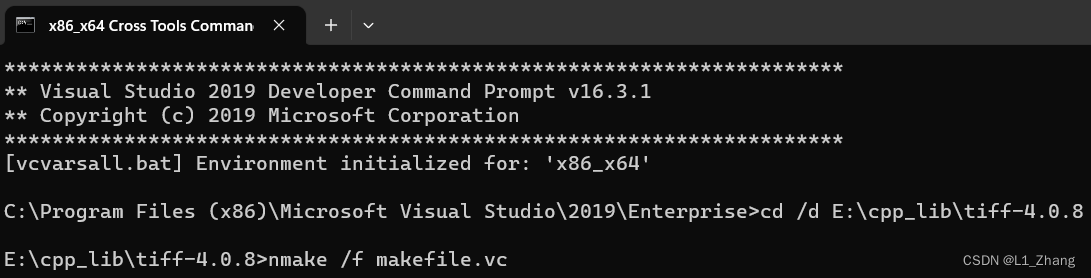
点击输入以下命令:
cd /d E:\cpp_lib\tiff-4.0.8
nmake /f makefile.vc
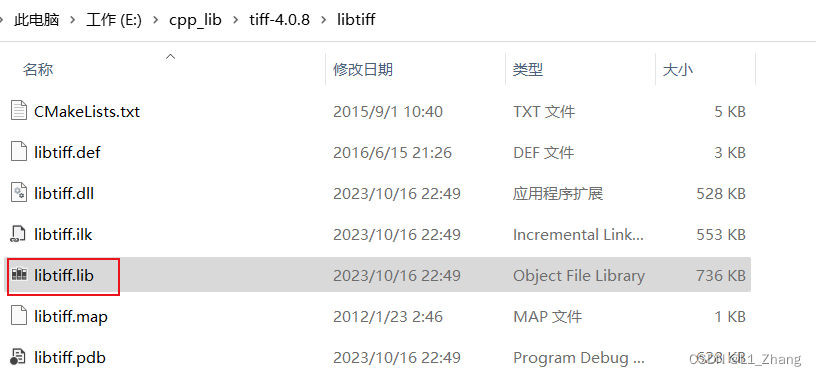
3.查看编译结果
4.demo测试
新建一个cpp项目。
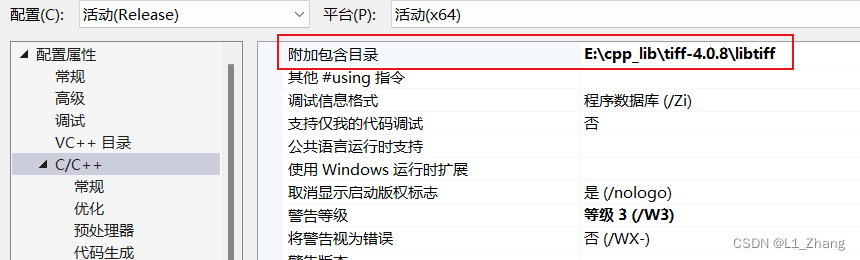
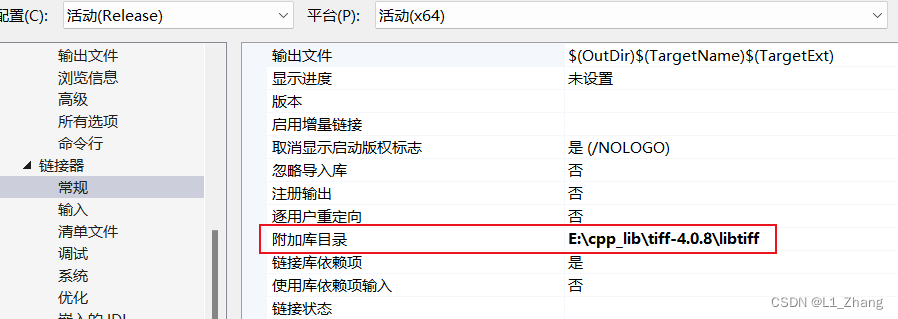
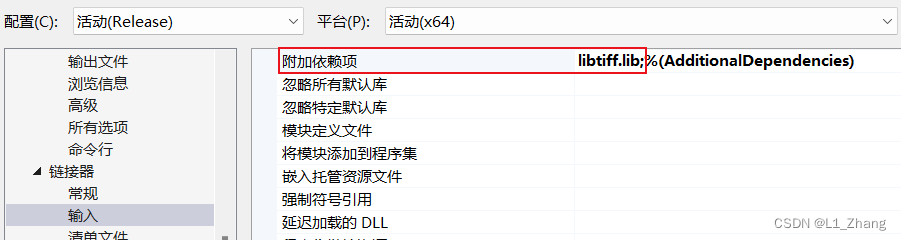
4.1 配置项目
- 配置包含目录
- 配置库目录
- 添加库文件
4.2 读取16位灰度值的tiff图片
#include<iostream>
using namespace std;
#include "tiffio.h"
int main()
{
	int m_ImWidth, m_ImHeight;
	uint16_t bits_per_sample, samples_per_pixel;

	TIFF* tif = TIFFOpen("E:/1.tif", "r");
	TIFFGetField(tif, TIFFTAG_IMAGEWIDTH, &m_ImWidth);
	TIFFGetField(tif, TIFFTAG_IMAGELENGTH, &m_ImHeight);
	TIFFGetField(tif, TIFFTAG_BITSPERSAMPLE, &bits_per_sample);
	TIFFGetField(tif, TIFFTAG_SAMPLESPERPIXEL, &samples_per_pixel);

	cout << m_ImWidth << " " << m_ImHeight << endl;
	cout << bits_per_sample << " " << samples_per_pixel << endl;

	size_t scanline_size = TIFFScanlineSize(tif);
	cout << " scanline_size:" << scanline_size << endl;
	uint16_t* m_ImFFT0 = (uint16_t*)_TIFFmalloc(m_ImWidth * m_ImHeight* bits_per_sample);

	for (uint32_t row = 0; row < m_ImHeight; row++)
	{
		TIFFReadScanline(tif, m_ImFFT0 + row * m_ImWidth, row);
	}
	TIFFClose(tif);
    return 0;
}
结果为:
3136 2704
5. 遇到的bug
使用libtiff库出现无法解析的外部符号的错误,可参考vs c++ debug 之路。


 644
644

 被折叠的 条评论
为什么被折叠?
被折叠的 条评论
为什么被折叠?
 到【灌水乐园】发言


