


uniapp编辑微信小程序部分本地背景图片无法显示
微信小程序不支持css中使用本地文件,包含背景图片和字体样式。需要转译成base64才可以使用
unuapp本地背景图片小于40kb时,会被转成base64编码
自定义导航栏
在pages.json文件夹下的pages数组对应的style下添加"navigationStyle": “custom”
注意:自定义导航栏会导致原生导航栏丢失,在非H5端,手机顶部的状态栏也会丢失。可以使用uniapp提供的–status-bar-height
<template>
	<view class="">
		<view class="status_bar">
		<!-- 这里是状态栏 -->
		</view>
		<view class="">
			<!-- 导航栏 -->
		</view>
		<view class="">
			<!-- 内容区 -->
		</view>
	</view>
</template>

<script>
</script>

<style>
	.status_bar{
		height: var(--status-bar-height);
		width: 100%;
	}
</style>
easycom
在compones下定义的,符合compones/组件名称/组件名称.vue的组件可以直接引用。无需引用、注册
参考地址:https://uniapp.dcloud.net.cn/collocation/pages.html#easycom
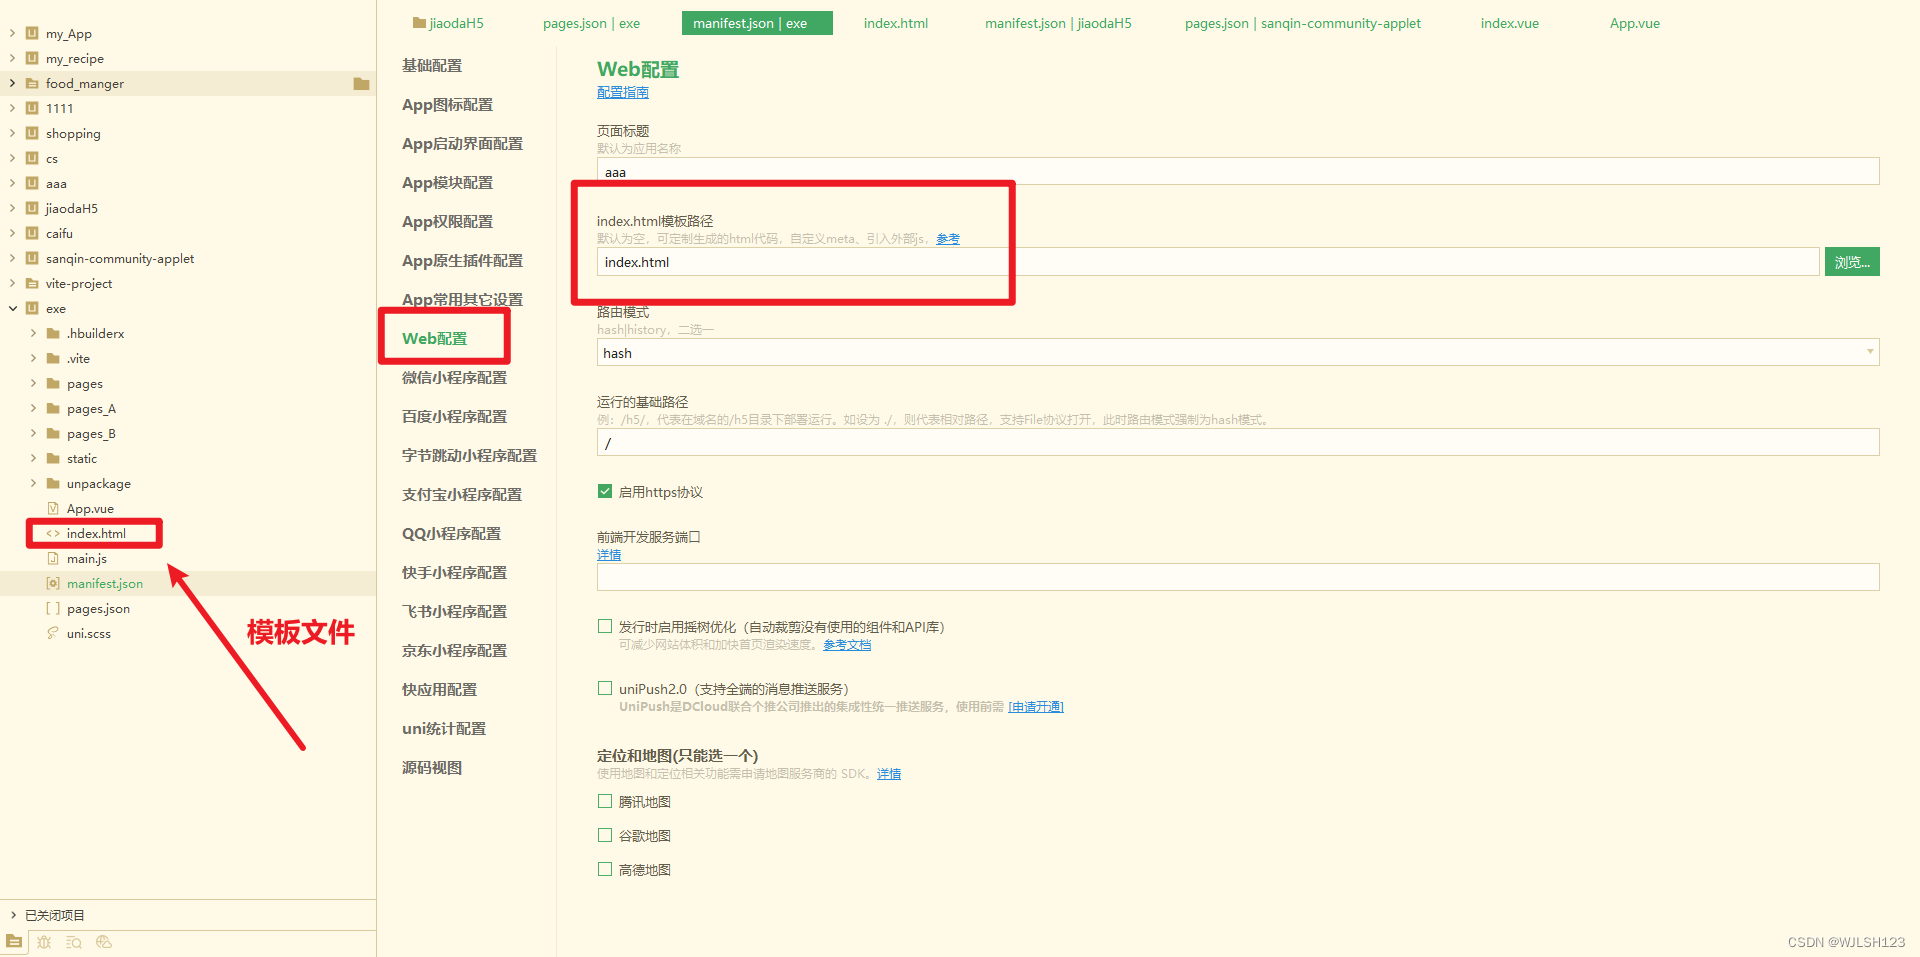
h5自定义模板
- 工程根目录下新建一个html文件;
- 复制下面的基本模板内容,到这个html文件,在此基础上修改meta和引入js;
- 在 manifest.json->h5->template 节点中关联这个html文件的路径。
参考: [https://uniapp.dcloud.net.cn/collocation/manifest.html#h5-template(https://uniapp.dcloud.net.cn/collocation/manifest.html#h5-template)
组件路由跳转
navigator
页面跳转。
该组件类似HTML中的<a>组件,但只能跳转本地页面。目标页面必须在pages.json中注册。
<template>
	<view>
		<view class="page-body">
			<view class="btn-area">
				<navigator url="navigate/navigate?title=navigate" hover-class="navigator-hover">
					<button type="default">跳转到新页面</button>
				</navigator>
				<navigator url="redirect/redirect?title=redirect" open-type="redirect" hover-class="other-navigator-hover">
					<button type="default">在当前页打开</button>
				</navigator>
				<navigator url="/pages/tabBar/extUI/extUI" open-type="switchTab" hover-class="other-navigator-hover">
					<button type="default">跳转tab页面</button>
				</navigator>
			</view>
		</view>
	</view>
</template>
<script>
// navigate.vue页面接受参数
export default {
	onLoad: function (option) { //option为object类型,会序列化上个页面传递的参数
		console.log(option.id); //打印出上个页面传递的参数。
		console.log(option.name); //打印出上个页面传递的参数。
	}
}
</script>
注:navigator 下的 open-type属性规定跳转方式,默认为跳转新页面。默认值:navigate
参考: https://uniapp.dcloud.net.cn/component/navigator.html#navigator
注册全局组件
方法1
官方描述:https://uniapp.dcloud.io/collocation/pages?id=easycom
- 将组件安装在项目的components目录下,并符合components/组件名称/组件名称.vue目录结构。可以不用引用、注册,直接在页面中使用。
- pages.json中要设置autoscan为true
"globalStyle": {
		"autoscan":true
	}
- 页面中调用
方法2
- 新建 .vue 文件,可以放在自定义文件夹下,我这里新建了一个global.vue
- 在main.js中注册
import global from "@/components/global.vue"

Vue.component('global', global)
- 在需要组件的地方直接使用
<template>
   <view class="content">
   	<global></global>
   </view>
</template>


 2299
2299


 被折叠的 条评论
为什么被折叠?
被折叠的 条评论
为什么被折叠?
 到【灌水乐园】发言


