


| 日期 | 2019年6月 17日 | 第 3 天 共 10天 | ||||
| 实习地点 | 科技楼423 | |||||
| 教学大纲中规定的实习教学内容 | 校内综合实训是系统讲授微信小程序开发技术,通过小程序开发项目实例来训练学生的实践能力,检验学生对微信小程序开发技术所学知识的综合运用能力的重要环节。每位学生需完成老师布置的实验内容,并完成综合性实训项目的开发。从而达到对所学知识的深刻理解,进而为今后更深入的学习和应用打下坚实的基础。 | |||||
| 实习 目的及 要求 | 1、掌握微信小程序项目环境搭建; 2、掌握微信小程序项目界面设计编写;; 3、掌握微信小程序项目业务逻辑处理; 4、掌握MVVM设计模式框架开发; 5、通过本课程的学习,培养学生观察、分析、解决问题的能力; 6、培养学生严肃认真、实事求是的良好作风。 | |||||
| 任务 完成 情况、 主要 收获 与 体会 |
实训的第三天主要内容是微信小程序项目结构分析。老师继续给我们讲解有关小程序的各种组件、框架和API的应用,一开始我们先学习了轮播图的用法,然后讲了有关wxml的数据绑定、三元运算、条件渲染和模板的使用等。之后老师为我们演示了map地图的用法。 我们在课余时间完善了map地图,使之能定位到当前位置和显示markers,还有利用接口输出了手机的相关信息等作业 在学习过程中我对小程序的框架、组件和API有了进一步理解,但是需要学习的东西还有很多,我会在之后的实训时间里中不断去学习
| |||||
| 教师 指导 (辅导) 内容 | 指导学生对微信小程序项目结构进行分析 | |||||
| 指导方式 | 面授 | 指导时长(分钟) | 300 | |||
| 其它 需说 明的 情况 |
| |||||
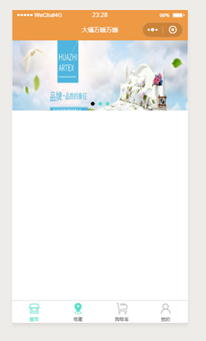
轮播图实现图片换页
<swiper indicator-dots="trye" indicator-color="#fff" indicator-color="#5fdec9">
  <block>
    <swiper-item>
    <image src='../../images/b1.jpg' style='width:100%; height:260px'>
    </image>
    </swiper-item>
  </block>

  <block>
    <swiper-item>
    <image src='../../images/b2.jpg' style='width:100%; height:260px'>
    </image>
    </swiper-item>
  </block>

  <block>
    <swiper-item>
    <image src='../../images/b3.jpg' style='width:100%; height:260px'>
    </image>
    </swiper-item>
  </block>
</swiper>
地图设计
js
// pages/classify/classify.js
Page({
  data: {
    longitude:0,
    latitude:0,
    markers: [{
      id: 0,
      iconPath: "../../assets/icons/position2.png",
      latitude: 23.099994,
      longitude: 113.324520,
      width: 50,
      height: 50
    }]
  },
  onLoad: function () {
    console.log(this)
  },
  onReady: function () {

    var _this = this;
    wx.getLocation({
      success: function(res) {
        console.log(res)
        _this.setData({
          longitude: res.longitude,
          latitude: res.latitude,
          markers: [{
            longitude: res.longitude,
            latitude: res.latitude
          }]
        })
      },
    })
  },

  onShow: function () {},
  onHide: function () {},
  onUnload: function () {},
  onPullDownRefresh: function () {},
  onReachBottom: function () {},
  onShareAppMessage: function () {}
})
wxml
{{longitude}},{{latitude}}
<view style='width:100%;height:100%'>
  <map longitude="{{longitude}}" latitude="{{latitude}}" markers="{{markers}}" scale="13" style='width:100%;height:100%'></map>
</view>
wxss
/* pages/classify/classify.wxss */
page{
  height: 100%;
}

我的页面
wxml
<view class='header'>
    <view class="userinfo-avatar">
      <open-data  type="userAvatarUrl"></open-data>
    </view>
    <view>
      <open-data type="userNickName"></open-data>
    </view>
  </view>

 <view class='center'>
    <view>手机型号:{{mobileModel}}</view>
  </view>

   <view class='center'>
    <view>手机型号:{{mobileBrand}}</view>
  </view>

  <view class='center'>
    <view>手机宽:{{mobileScreenWidth}}</view>
  </view>

   <view class='center'>
    <view>手机高:{{mobileScreenHeight}}</view>
  </view>

   <view class='center'>
    <view>手机像素:{{mm}}</view>
  </view>
js
Page({

  data: {
    mobileModel: '',
    mobileeBrand: '',
    mobileeScreenWidth: '',
    mobileeScreenHeight: '',
    mm:''
  },
  onLoad: function () {
    var that = this;
    wx.getSystemInfo({
      success: function (res) {
        that.setData({
          mobileModel: res.model,
          mobileBrand: res.brand,
          mobileScreenWidth: res.screenWidth,
          mobileScreenHeight: res.screenHeight,
          mm: res.screenWidth * res.screenHeight,
        })
      }
    })
  },
  onReady: function () {},
  onShow: function () {},
  onHide: function () {},
  onUnload: function () {},
  onPullDownRefresh: function () {},
  onReachBottom: function () {},
  onShareAppMessage: function () {}
})
wxss

.header {
  position: relative;
  margin: 90rpx 0 90rpx 50rpx;
  width: 650rpx;
  height: 320rpx;
  color: #fff;
  display: flex;
  flex-direction: column;
  align-items: center;
  border-bottom: 1px solid #ccc;
}
.userinfo-avatar {
  overflow:hidden;
  display: block;
  width: 160rpx;
  height: 160rpx;
  margin: 20rpx;
  margin-top: 50rpx;
  border-radius: 50%;
  border: 2px solid #fff;
  box-shadow: 3px 3px 10px rgba(0, 0, 0, 0.2);
}
.center {
    text-align: center;
}

学习体会
实训的第三天主要内容是微信小程序项目结构分析。老师继续给我们讲解有关小程序的各种组件、框架和API的应用,一开始我们先学习了轮播图的用法,然后讲了有关wxml的数据绑定、三元运算、条件渲染和模板的使用等。之后老师为我们演示了map地图的用法。
我们在课余时间完善了map地图,使之能定位到当前位置和显示markers,还有利用接口输出了手机的相关信息等作业
在学习过程中我对小程序的框架、组件和API有了进一步理解,但是需要学习的东西还有很多,我会在之后的实训时间里中不断去学习


 1万+
1万+


 被折叠的 条评论
为什么被折叠?
被折叠的 条评论
为什么被折叠?
 到【灌水乐园】发言


