


目录
AdapterView与Adapter
ListView
GridView
Spinner
AutoCompleteListView
Gallery
ExpandableListView
·ListView (类似MVC) 不允许使用OnClickListener应使用 setOnItemClickListener
ArrayAdapter只能放一个文本
SimpleAdapter可以放多个文本
两者都是系统中原本的Adapter
ArrayAdapter 步骤:
i 先创建一个布局内部只有ListView
<?xml version="1.0" encoding="utf-8"?>
<LinearLayout xmlns:android="http://schemas.android.com/apk/res/android"
    android:orientation="vertical" android:layout_width="match_parent"
    android:layout_height="match_parent">
<!-- 内部只有ListView -->
    <ListView
        android:id="@+id/mylistview"
        android:layout_width="match_parent"
        android:layout_height="wrap_content"
         />
</LinearLayout>
ii
 private String[] array = {"张三", "李四", "王五", "赵六"};//单个文本内容
  /**
     * 系统自带的ArrayAdapter的测试方法
     */
    public void ListViewTest_Computer_ArrayAdapter(){
//        系统自带的ArrayAdapter
        ArrayAdapter<String> adapter = new ArrayAdapter<String>(this,R.layout.item_arrayadapter,array);//R.layout.item_arrayadapter是有一定格式的。
        mListView.setAdapter(adapter);
    }
R.layout.item_arrayadapter:
<?xml version="1.0" encoding="utf-8"?>
<!-- android:id="@android:id/text1" 不能改变-->
<TextView xmlns:android="http://schemas.android.com/apk/res/android"
    android:id="@android:id/text1"
    android:layout_width="match_parent"
    android:layout_height="wrap_content"
    android:textAppearance="?android:attr/textAppearanceListItemSmall"
    android:gravity="center_vertical"
    android:textColor="@color/red"
    android:minHeight="?android:attr/listPreferredItemHeightSmall"
    android:background="#0099ff"/>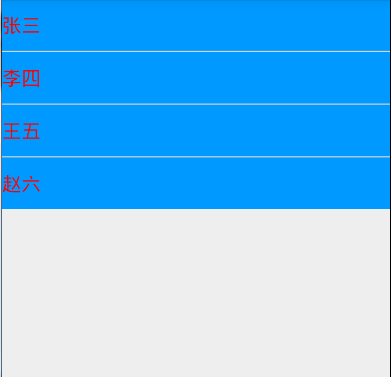
SimpleAdapter 步骤:
i 同上,建一个只有ListView的布局
ii 数据存放在含有HashMap的List中:
private List<HashMap<String, String>> mData;

    /**
     * 系统自带的SimpleAdapter的测试方法
     */
    public void ListViewTest_Computer_SimpleAdapter(){


        //SimpleAdapter测试
        initData();
//        R.layout.item_simple_adapter 是一种布局
        SimpleAdapter simpleAdapter = new SimpleAdapter(this, mData, R.layout.item_simple_adapter,
                new String[]{"name", "sex", "age", "hobby"}, new int[]{R.id.textview_name, R.id.textview_sex, R.id.textview_age, R.id.textview_hobby});
        mListView.setAdapter(simpleAdapter);
//        mListView.setOnClickListener() ListView不允许使用setOnClickListener;

//        mListView.setOnItemLongClickListener();长按
        mListView.setOnItemLongClickListener(new AdapterView.OnItemLongClickListener() {
            @Override
            public boolean onItemLongClick(AdapterView<?> parent, View view, int position, long id) {
                HashMap<String,String> itemData_long = mData.get(position);
                Log.d("data",itemData_long.get("name")+itemData_long.get("sex")+itemData_long.get("age")+itemData_long.get("hobby"));
                return false;
            }
        });
        //点击的时候的事件
        mListView.setOnItemClickListener(new AdapterView.OnItemClickListener() {
            @Override
            public void onItemClick(AdapterView<?> parent, View view, int position, long id) {
//                position表示点击中的第position条数据
                HashMap<String,String> itemData = mData.get(position);
                Log.d("data",itemData.get("name")+itemData.get("sex")+itemData.get("age")+itemData.get("hobby"));
            }
        });
    }
    /**
     * 数据的封装,封装到List中
     */
    private void initData() {
        mData = new ArrayList<>();
        HashMap<String, String> zhangsan = createHashMap("张三", "男", "20", "爱好打篮球");
        mData.add(zhangsan);
        HashMap<String, String> lisi = createHashMap("李四", "男", "18", "爱好打LOL");
        mData.add(lisi);
        HashMap<String, String> Queue = createHashMap("Queue", "女", "21", "爱好睡觉");
        mData.add(Queue);
        HashMap<String, String> King = createHashMap("King", "男", "21", "爱好魔方");
        mData.add(King);
    }

    /**
     * 将姓名、性别、年龄、爱好,放在HashMap中
     *
     * @param name  姓名
     * @param sex   性别
     * @param age   年龄
     * @param hobby 爱好
     * @return 返回一个HashMap
     */
    private HashMap<String, String> createHashMap(String name, String sex, String age, String hobby) {
        HashMap<String, String> map = new HashMap<>();
        map.put("name", name);
        map.put("sex", sex);
        map.put("age", age);
        map.put("hobby", hobby);
        return map;
    }
SimpleAdapter需要按照一定格式将数据放在ListView中,即:R.layout.item_simple_adapter :
<?xml version="1.0" encoding="utf-8"?>
<LinearLayout xmlns:android="http://schemas.android.com/apk/res/android"
    android:orientation="horizontal" android:layout_width="match_parent"
    android:layout_height="match_parent"
    android:layout_margin="15dp"
    android:gravity="center_vertical">
    <ImageView
        android:id="@+id/imageview_photo"
        android:layout_width="150dp"
        android:layout_height="150dp" />
    <TextView
        android:id="@+id/textview_name"
        android:layout_width="wrap_content"
        android:layout_height="wrap_content"
        android:text="姓名"/>
    <LinearLayout
        android:layout_width="wrap_content"
        android:layout_height="wrap_content"
        android:orientation="vertical"
        android:layout_margin="10dp">
        <TextView
            android:id="@+id/textview_sex"
            android:layout_width="wrap_content"
            android:layout_height="wrap_content"
            android:text="性别"/>
        <TextView
            android:id="@+id/textview_age"
            android:layout_width="wrap_content"
            android:layout_height="wrap_content"
            android:text="年龄"/>
    </LinearLayout>
    <TextView
        android:id="@+id/textview_hobby"
        android:layout_width="wrap_content"
        android:layout_height="wrap_content"
        android:text="爱好"/>
</LinearLayout>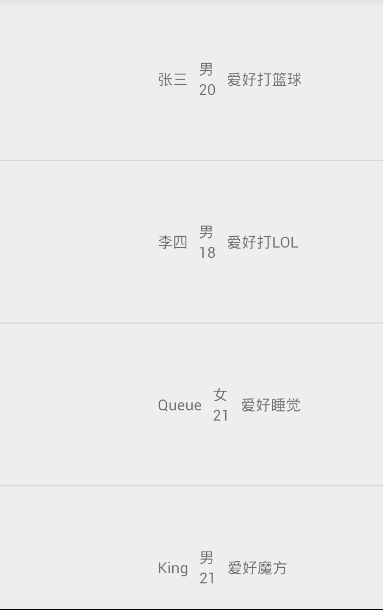
自定义Adapter
ListView的自定义adapter要继承于BaseAdapter
i 同上,创建一个只有ListView的布局
ii 创建一个包只放Model(数据)即学生类:属性:name,sex,age,hobby,img(int型id)Set、Get方法
iii 创建一个包只放Adapter(类似View)
/**
 * 自定义Adapter需要继承于BaseAdapt
 * Created by Administrator on 2015/8/24.
 */
public class StudentAdapter extends BaseAdapter{
    private List<Student> mData;
    private LayoutInflater mInflater;
    public StudentAdapter(LayoutInflater mInflater,List<Student> mData){
        this.mInflater = mInflater;
        this.mData = mData;
    }

    @Override
    public int getCount() {
        //表示要显示的条数,一般是数据多少条显示多少条
        return mData.size();
    }

    @Override
    public Object getItem(int position) {
        return position;
    }

    @Override
    public long getItemId(int position) {
        return position;
    }

    @Override
    public View getView(int position, View convertView, ViewGroup parent) {
//        LayoutInflater
        Student student = mData.get(position);//获得第position个的student
        View view = mInflater.inflate(R.layout.item_simple_adapter,null);//通过mInflater获得view
        //得到view中的每个空间
        ImageView imageView_photo = (ImageView) view.findViewById(R.id.imageview_photo);
        TextView textView_name = (TextView) view.findViewById(R.id.textview_name);
        TextView textView_sex = (TextView) view.findViewById(R.id.textview_sex);
        TextView textView_age = (TextView) view.findViewById(R.id.textview_age);
        TextView textView_hobby = (TextView) view.findViewById(R.id.textview_hobby);
        //将每个控件设置上数据
        imageView_photo.setImageResource(student.getImg());
        textView_name.setText(student.getName());
        textView_sex.setText(student.getSex());
        textView_age.setText(student.getAge());
        textView_hobby.setText(student.getHobby());
        return view;
    }
}
iv 需要创建含有Student类的List对象,创建一个mInflater,为了给自定义的adapter传Inflater,以便于找到view。
 private List<Student> mStudentData;
 private LayoutInflater mInflater;


     /**
     * 测试自定义的Adapter
     */
    public void AdapterDoMyTest(){
        mInflater = getLayoutInflater();//初始化mInflater
        initStudentData();
        StudentAdapter studentAdapter = new StudentAdapter(mInflater,mStudentData);
        mListView.setAdapter(studentAdapter);
    }
    /**
     * 封装Student中的数据
     */
    private void initStudentData() {
        mStudentData =new ArrayList<Student>();
        Student zhangsan = new Student("张三","男","20","打篮球",R.mipmap.tangyan);
        Student lisi = new Student("李四","男","18","打LOL",R.mipmap.ty);
        Student Queue = new Student("Queue","女","22","游泳",R.mipmap.tangyan);
        Student King = new Student("King","男","22","看小说",R.mipmap.ty);
        mStudentData.add(zhangsan);
        mStudentData.add(lisi);
        mStudentData.add(Queue);
        mStudentData.add(King);
    }
有几条就会getView几次,当项数很大时,性能将会下降,android有个缓存机制类似滚轮:convertView 表示划出屏幕的view,但是一般耗时,为了减少耗时,ViewHolder 内部类 class ViewHolder
无ListView点击事件的convertView_ViewHolder
自定义Adapter中的getView方法级ViewHolder类:
@Override
    public View getView(final int position, View convertView, ViewGroup arg2) {
        // TODO Auto-generated method stub
        ViewHolder vh;
//      convertView类似滚轮,会预先缓存几个view
        if (convertView == null) {
            vh = new ViewHolder();
            convertView = mInflater.inflate(R.layout.item_main_listview, null);
            vh.checkBox = (CheckBox) convertView.findViewById(R.id.item_main_checkbox);
            vh.imageView = (ImageView) convertView.findViewById(R.id.item_main_imageview);
            vh.textView = (TextView) convertView.findViewById(R.id.item_main_textview);
            convertView.setTag(vh);
        }else{
            vh = (ViewHolder) convertView.getTag();
        }
        Fruit fruit = mFruits.get(position);
        vh.imageView.setImageResource(fruit.getImg());
        vh.textView.setText(fruit.getName());
        vh.checkBox.setOnCheckedChangeListener(new OnCheckedChangeListener() {

            @Override
            public void onCheckedChanged(CompoundButton arg0, boolean isChecked) {
                mManageFruits[position] = isChecked;
                notifyDataSetChanged();
            }
        });
        vh.checkBox.setChecked(mManageFruits[position]);
        return convertView;
    }
    /**
     * 自写一个ViewHolder类
     * @author Administrator
     *
     */
    class ViewHolder{
        CheckBox checkBox;
        ImageView imageView;
        TextView textView;
    }
结果如图:
有ListView点击事件的convertView_ViewHolder
在Activity中的ListView上添加了一个setOnItemClickListener:
//Activity中添加的
mListView.setOnItemClickListener(new OnItemClickListener() {

            @Override
            public void onItemClick(AdapterView <?> arg0, View arg1, int position,
                    long arg3) {
                // TODO Auto-generated method stub
                //mAdapter是全局变量
                mAdapter.selecter(position);
            }
        });


//FruitAdapter中添加一个选中的方法:即将每个view的checkedBox设置成非之前状态
    /**
     * 当点击itemListView时,checkBox会得到响应
     * @param position
     */
    public void selecter(int position){
        mManageFruits[position] = !mManageFruits[position];
        notifyDataSetChanged();
    }
结果如图:
全选与反选
i 创建两个xml,表示HeaderView与FooterView
<!--HeadererView-->
<?xml version="1.0" encoding="utf-8"?>
<LinearLayout xmlns:android="http://schemas.android.com/apk/res/android"
    android:layout_width="match_parent"
    android:layout_height="match_parent"
    android:orientation="vertical" >

    <Button
        android:id="@+id/selectall"
        android:layout_width="wrap_content"
        android:layout_height="wrap_content"
        android:text="全选"/>
</LinearLayout>
<!--FooterView-->
<?xml version="1.0" encoding="utf-8"?>
<LinearLayout xmlns:android="http://schemas.android.com/apk/res/android"
    android:layout_width="match_parent"
    android:layout_height="match_parent"
    android:orientation="vertical" >

<Button
    android:id="@+id/unselectall"
    android:layout_width="wrap_content"
    android:layout_height="wrap_content"
    android:text="反选"/>
</LinearLayout>
ii 在Activity中创建两个View(HeaderView与FooterView),赋值时,用mInflater.inflat()赋值。创建Button时,分别用两个view.findViewById()找。
//两个view表示HeaderView与FooterView
headerView = mInflater.inflate(R.layout.fruit_listview_header, null);
footerView = mInflater.inflate(R.layout.fruit_listview_footer, null);

//两个按钮表示“全选”“反选”
mBtnSelectAll = (Button) headerView.findViewById(R.id.selectall);
mBtnSelectAll.setOnClickListener(new OnClickListener() {

            @Override
            public void onClick(View arg0) {
                // TODO Auto-generated method stub
                mAdapter.selecterAll();
            }
        });
mBtnUnSelectAll = (Button) footView.findViewById(R.id.unselectall);
mBtnUnSelectAll.setOnClickListener(new OnClickListener() {

            @Override
            public void onClick(View arg0) {
                // TODO Auto-generated method stub
                mAdapter.unSelectAll();
            }
        });
iii 在FruitAdapter中写两个方法表示全选与反选
    /**
     * 全选
     */
    public void selecterAll(){
        for (int i = 0; i < mManageFruits.length; i++) {
            if(mManageFruits[i]){
                mManageFruits[i] = false;
            }else {
                mManageFruits[i] = true;
            }
        }
        notifyDataSetChanged();//一定要有
    }
    /**
     * 反选
     */
    public void unSelectAll(){
        for (int i = 0; i  <mManageFruits.length; i++) {
            mManageFruits[i]=!mManageFruits[i];
        }
        notifyDataSetChanged();//一定要有
    }
结果如图:
全选
GridView
numColums表示列数
item_gridview_layout.xml
<?xml version="1.0" encoding="utf-8"?>
<LinearLayout xmlns:android="http://schemas.android.com/apk/res/android"
    android:orientation="vertical" android:layout_width="match_parent"
    android:layout_height="match_parent"
    android:gravity="center"
    android:background="@color/white">
    <ImageView
        android:id="@+id/item_fruit_imageview"
        android:layout_width="80dp"
        android:layout_height="80dp" />
    <TextView
        android:id="@+id/item_fruit_textview"
        android:layout_width="wrap_content"
        android:layout_height="wrap_content" />
</LinearLayout>
1.先建立Activity
setContentView
2.在XML文件中添加GridView.xml文件
3.findViewById
4.GridView显示数据必须设置adapter
5.初始化数据
6.初始化Adapter
7.调用GridView.SetAdapter()
1.继承BaseAdapter
2.实现四个方法
3.getView方法
4.内部类ViewHolder
点击图片给图片添上一层蒙板
需要修改的xml(需要添加一个CheckBox 一个ImageView,让ImageView覆盖在图片上边,背景设置成半透明色)(ImageView的src与background的区别,background是ImageView的所有的地方)
<?xml version="1.0" encoding="utf-8"?>
<FrameLayout xmlns:android="http://schemas.android.com/apk/res/android"
    android:layout_width="match_parent"
    android:layout_height="match_parent"
    android:background="@drawable/tint_selecter">

    <RelativeLayout
        android:layout_width="match_parent"
        android:layout_height="match_parent">

        <LinearLayout
            android:layout_width="match_parent"
            android:layout_height="match_parent"
            android:gravity="center"
            android:orientation="vertical">

            <ImageView
                android:id="@+id/item_fruit_imageview"
                android:layout_width="90dp"
                android:layout_height="90dp"
                android:src="@mipmap/apple" />

            <TextView
                android:id="@+id/item_fruit_textview"
                android:layout_width="wrap_content"
                android:layout_height="wrap_content"
                android:layout_below="@id/item_fruit_imageview"
                android:text="苹果" />
        </LinearLayout>

        <CheckBox
            android:id="@+id/checkbox"
            android:layout_width="wrap_content"
            android:layout_height="wrap_content"
            android:layout_alignParentRight="true"
            android:button="@drawable/check_checked"
            android:focusable="false"
            android:padding="7dp" />

    </RelativeLayout>

    <ImageView
        android:id="@+id/imageview_tint"
        android:layout_width="match_parent"
        android:layout_height="match_parent"
        android:background="#55ff0000"
        android:visibility="invisible" />

</FrameLayout>
//checkBox的点击事件之后
vh.checkBox.setChecked(mManagerCheckBox[position]);
if (mManagerCheckBox[position]){
vh.imageViewTint.setVisibility(View.VISIBLE);
}else {
vh.imageViewTint.setVisibility(View.INVISIBLE);
}
return convertView;
结果如图:选中CheckBox后会出现一层红色半透明的蒙板覆盖在图片上:
Spinner
修改的系统自带的R.layout.spinner….文件
<?xml version="1.0" encoding="utf-8"?>
<CheckedTextView xmlns:android="http://schemas.android.com/apk/res/android"
    android:id="@android:id/text1"
    style="?android:attr/spinnerDropDownItemStyle"
    android:singleLine="true"
    android:layout_width="match_parent"
    android:layout_height="wrap_content"
    android:ellipsize="marquee"
    android:background="@color/deep_purple"/>
public class MainActivity extends AppCompatActivity {
private String[] mData = {"110","119","120","10086","10010","256400"};//数据
private Spinner mSpinner;
private ArrayAdapter mApater;
@Override
protected void onCreate(Bundle savedInstanceState) {
super.onCreate(savedInstanceState);
setContentView(R.layout.activity_main);
mSpinner = (Spinner) findViewById(R.id.spinner);
mApater = new ArrayAdapter<String>(this,R.layout.my_spinner_item,mData);//可以自定义xml不过要复制系统文件xml
mSpinner.setAdapter(mApater);
}
}
AutoCompleteListView (自动提示)
需要自建一个AutoCompleteListView的XML文件
//数据
private String[] mData = {"110","119","120","10086","10010","256400"};

 mAutoTextView = (AutoCompleteTextView) findViewById(R.id.autotextveiw);
        mAdapter = new ArrayAdapter<String>(this,android.R.layout.simple_list_item_1,mData);//系统自带的xml文件,如需自定义,需拷贝系统文件修改
        mAutoTextView.setAdapter(mAdapter);
Gallery (已摒弃,不常用)
i在main_activity.xml中写一个Gallery。
    <!--android:spacing="-30dp"表示两张图片相距-15dp-->
    <!--android:unselectedAlpha="0.6"表示未选中的透明度 浮点型 -->
    <Gallery
        android:id="@+id/gallery"
        android:layout_width="match_parent"
        android:layout_height="wrap_content"
        android:spacing="-30dp"
        android:unselectedAlpha="0.6"></Gallery>
在layout中写一个item_gallery.xml表示格式
ii写一个model和一个adapter包,分别盛放数据和自定义adapter

ExpandableListView (类似QQ好友列表界面)
两层:一层是分组,一层是分组中的条数
i 在主活动的xml文件中添加ExpandableListView,在layout中写两个xml文件,分别表示班级(clazz)和学生(Student)
<!--班级 item_clazz.xml-->
<?xml version="1.0" encoding="utf-8"?>
<LinearLayout xmlns:android="http://schemas.android.com/apk/res/android"
    android:layout_width="match_parent"
    android:layout_height="match_parent"
    android:orientation="horizontal"
    android:background="#55ffaaee"
    >
    <TextView
        android:id="@+id/item_clazz_name"
        android:layout_width="wrap_content"
        android:layout_height="30dp"
        android:layout_marginLeft="25dp"
        android:gravity="center_vertical"/>

    <TextView
        android:id="@+id/item_clazz_num"
        android:layout_width="wrap_content"
        android:layout_height="30dp"
        android:gravity="center_vertical"/>

    <TextView
        android:id="@+id/item_clazz_students"
        android:layout_width="wrap_content"
        android:layout_height="30dp"
        android:gravity="center_vertical"/>


<!--学生 item_student.xml-->
<?xml version="1.0" encoding="utf-8"?>
<LinearLayout xmlns:android="http://schemas.android.com/apk/res/android"
    android:orientation="horizontal" android:layout_width="match_parent"
    android:layout_height="match_parent">
    <ImageView
        android:id="@+id/item_student_img"
        android:layout_width="50dp"
        android:layout_height="50dp"
        />
    <LinearLayout
        android:layout_width="match_parent"
        android:layout_height="wrap_content"
        android:orientation="vertical"
        android:layout_gravity="center_vertical">
        <LinearLayout
            android:layout_width="match_parent"
            android:layout_height="wrap_content">
            <TextView
                android:id="@+id/item_student_name"
                android:layout_width="wrap_content"
                android:layout_height="wrap_content" />
            <TextView
                android:id="@+id/item_student_sex"
                android:layout_width="wrap_content"
                android:layout_height="wrap_content" />
            <TextView
                android:id="@+id/item_student_age"
                android:layout_width="wrap_content"
                android:layout_height="wrap_content" />
        </LinearLayout>
        <TextView
            android:id="@+id/item_student_label"
            android:layout_width="wrap_content"
            android:layout_height="wrap_content" />
    </LinearLayout>
</LinearLayout>
</LinearLayout>ii创建两个包:model、adapter,盛放Clazz、Student和自定义的adapter(需要继承BaseExpandableListAdapter)
Student 学生类
/**
 * Created by Administrator on 2015/8/26.
 */
public class Student {
    private String name;
    private String age;
    private String sex;
    private String label;
    private int img;

    public int getImg() {
        return img;
    }

    public void setImg(int img) {
        this.img = img;
    }

    public Student(String name, String age, String sex, String label,int img) {
        this.name = name;
        this.age = age;
        this.sex = sex;
        this.label = label;
        this.img = img;
    }

    public String getName() {
        return name;
    }

    public void setName(String name) {
        this.name = name;
    }

    public String getAge() {
        return age;
    }

    public void setAge(String age) {
        this.age = age;
    }

    public String getSex() {
        return sex;
    }

    public void setSex(String sex) {
        this.sex = sex;
    }

    public String getLabel() {
        return label;
    }

    public void setLabel(String label) {
        this.label = label;
    }
}
Clazz 班级类
/**
 * Created by Administrator on 2015/8/26.
 */
public class Clazz {
    private String clazzName;
    private String clazzNum;
    private List<Student> students;

    public Clazz(String clazzName, String clazzNum) {
        this.clazzName = clazzName;
        this.clazzNum = clazzNum;
    }

    public String getClazzName() {
        return clazzName;
    }

    public void setClazzName(String clazzName) {
        this.clazzName = clazzName;
    }

    public List<Student> getStudents() {
        return students;
    }

    public void setStudents(List<Student> students) {
        this.students = students;
    }

    public String getClazzNum() {
        return clazzNum;
    }

    public void setClazzNum(String clazzNum) {
        this.clazzNum = clazzNum;
    }
}
自定义Adapter :ClazzExpandAdapter
/**
 * Created by Administrator on 2015/8/26.
 */
public class ClazzExpandAdapter extends BaseExpandableListAdapter {
    private List<Clazz> mClazz;
    private LayoutInflater mInflater;

    public ClazzExpandAdapter(List<Clazz> mClazz, LayoutInflater mInflater) {
        this.mClazz = mClazz;
        this.mInflater = mInflater;
    }

    @Override
    public int getGroupCount() {
        return mClazz.size();
    }

    @Override
    public int getChildrenCount(int groupPosition) {
        return mClazz.get(groupPosition).getStudents().size();//得到当前班学生的数量
    }

    @Override
    public Object getGroup(int groupPosition) {
        return groupPosition;
    }

    @Override
    public Object getChild(int groupPosition, int childPosition) {
        return childPosition;
    }

    @Override
    public long getGroupId(int groupPosition) {
        return groupPosition;
    }

    @Override
    public long getChildId(int groupPosition, int childPosition) {
        return childPosition;
    }

    @Override
    public boolean hasStableIds() {
        return false;
    }

    @Override
    public View getGroupView(int groupPosition, boolean isExpanded, View convertView, ViewGroup parent) {
        convertView = mInflater.inflate(R.layout.item_clazz, null);
        TextView textViewClazzName = (TextView) convertView.findViewById(R.id.item_clazz_name);
        TextView textViewClazzNum = (TextView) convertView.findViewById(R.id.item_clazz_num);
        TextView textViewClazzStudents = (TextView) convertView.findViewById(R.id.item_clazz_students);
        Clazz clazz = mClazz.get(groupPosition);
        textViewClazzName.setText(clazz.getClazzName());
        textViewClazzNum.setText(clazz.getClazzNum());
        textViewClazzStudents.setText("" + clazz.getStudents().size());//如果setText()内是整形,系统会将其认为是资源,但资源中没有,会报错。需要将整形转换成字符串
        return convertView;
    }

    @Override
    public View getChildView(int groupPosition, int childPosition, boolean isLastChild, View convertView, ViewGroup parent) {
        convertView = mInflater.inflate(R.layout.item_student, null);
        TextView textViewStduentName = (TextView) convertView.findViewById(R.id.item_student_name);
        TextView textViewStudentAge = (TextView) convertView.findViewById(R.id.item_student_age);
        TextView textViewStduentSex = (TextView) convertView.findViewById(R.id.item_student_sex);
        TextView textViewStduentLabel = (TextView) convertView.findViewById(R.id.item_student_label);
        ImageView imageViewStudentImg = (ImageView) convertView.findViewById(R.id.item_student_img);
        Clazz clazz = mClazz.get(groupPosition);
        textViewStduentName.setText(clazz.getStudents().get(childPosition).getName());
        textViewStudentAge.setText(clazz.getStudents().get(childPosition).getAge());
        textViewStduentSex.setText(clazz.getStudents().get(childPosition).getSex());
        textViewStduentLabel.setText(clazz.getStudents().get(childPosition).getLabel());
        imageViewStudentImg.setImageResource(clazz.getStudents().get(childPosition).getImg());
        return convertView;
    }

    @Override
    public boolean isChildSelectable(int groupPosition, int childPosition) {
        return false;
    }
}
含有ExpandableListView的Acitivity中:
    /**
     * 数据的封装
     */
    private void initData() {
        mClazzs = new ArrayList<>();
        Clazz clazz1 = new Clazz("一班","20150801");
        List<Student> students1 = new ArrayList<>();
        students1.add(new Student("张三","20","男","这个人很懒",R.mipmap.aa));
        students1.add(new Student("张三丰","18","男","太极",R.mipmap.bb));
        students1.add(new Student("工藤新一","22","男","真相只有一个",R.mipmap.cc));
        students1.add(new Student("毛利兰","22","女","空手道",R.mipmap.dd));
        Student student11 = new Student("柯南","12","男","真相只有一个",R.mipmap.ee);
        students1.add(student11);
        clazz1.setStudents(students1);
        Clazz clazz2 = new Clazz("二班","20150802");
        List<Student> students2 = new ArrayList<>();
        students2.add(new Student("小红","16","女","心情愉悦",R.mipmap.ff));
        students2.add(new Student("小明","16","男","我就是小明",R.mipmap.gg));
        students2.add(new Student("李华","18","男","英语作文专业户",R.mipmap.hh));
        clazz2.setStudents(students2);
        Clazz clazz3 = new Clazz("三班","20150803");
        List<Student> students3 = new ArrayList<>();
        students3.add(new Student("Queue","21","女","恩",R.mipmap.ee));
        students3.add(new Student("King","21","男","我就是我,不一样的烟火",R.mipmap.cc));
        clazz3.setStudents(students3);
        Clazz clazz4 = new Clazz("四班","20150804");
        List<Student> students4 = new ArrayList<>();
        students4.add(new Student("JX","22","女","周杰伦",R.mipmap.dd));
        clazz4.setStudents(students4);
        mClazzs.add(clazz1);
        mClazzs.add(clazz2);
        mClazzs.add(clazz3);
        mClazzs.add(clazz4);
    }
·4.0中的ViewPager
·5.0中的RecyclerView 5.0新特性中会讲


 2122
2122


 被折叠的 条评论
为什么被折叠?
被折叠的 条评论
为什么被折叠?
 到【灌水乐园】发言


