


应用一:旋转木马初相识
我也就是玩玩,刚开始学前端,多查了点东西,还想加个导航栏还没完工,就先这样吧:
<!DOCTYPE html>
<!--目的是给不同浏览器初始化,让解析效果达到更一致的效果;-->
<!--[if lt IE 7 ]> <html class="ie ie6 ie-lt10 ie-lt9 ie-lt8 ie-lt7 no-js" lang="en-US"> <![endif]-->
<!--[if IE 7 ]>    <html class="ie ie7 ie-lt10 ie-lt9 ie-lt8 no-js" lang="en-US"> <![endif]-->
<!--[if IE 8 ]>    <html class="ie ie8 ie-lt10 ie-lt9 no-js" lang="en-US"> <![endif]-->
<!--[if IE 9 ]>    <html class="ie ie9 ie-lt10 no-js" lang="en-US"> <![endif]-->
<!--目的是no-js 是配合 Modernizr 一起使用的类名(class)Modernizr 是一个 javascript 库,检查你的游览器是否支持 CSS3 或者 HTML5 的特性而自动添加一些类名(class)到 <html> 并 替换掉原来的 .no-js(简单来说,Modernizr
就是一个CSS3/HTML5 的测试器,你需要测试什么,这可以到它的官方网站配置,选择自己需要测试的元素)。还有让你的游览器支持 HTML5 中的新的标签,;-->
<!--[if gt IE 9]><!--><html class="no-js" lang="en-US"><!--<![endif]-->

   <head>
   <meta charset="utf-8" />
   <title>萌宠升级版</title>
   <link rel="stylesheet" type="text/css" href="mgr1.css">
   <!--
layout viewport 是网页的所有内容,他可以全部或者部分展示给用户。
visual viewport 就是当前显示给用户内容的窗口,你可以拖动或者放大缩小网页。-->
     <meta http-equiv="Content-Type" content="text/html; charset=UTF-8"/>
<!--width 属性控制设备的宽度。假设您的网站将被带有不同屏幕分辨率的设备浏览,那么将它设置为 device-width
可以确保它能正确呈现在不同设备上。
initial-scale=1.0 确保网页加载时,以 1:1 的比例呈现,不会有任何的缩放。
在移动设备浏览器上,通过为 viewport meta 标签添加 user-scalable=no
可以禁用其缩放(zooming)功能。
通常情况下,maximum-scale=1.0 与 user-scalable=no
一起使用。这样禁用缩放功能后,用户只能滚动屏幕,就能让您的网站看上去更像原生应用的感觉。-->
     <meta name="viewport" content="width=device-width, initial-scale=1, maximum-scale=1.0, user-scalable=no"/>
  <meta name="keywords" content="">
  <!--网页关键词-->
  <meta name="description" content="">
  <!--这里是网页的描述,是给搜索引擎看的,搜索引擎根据这个描述进行收录排名,一般是网页内的关键字。"
可以有多个META标签,但是每个META的name不能一样。name="description"是描述的意思。
还有name="keywords",(关键字)等等。-->
<meta name="theme-color" content="#dbc34e">
    <!--读取页面中的theme-color来设置状态栏等的颜色,等同于app中style的colorPrimary-->
   <meta name="msapplication-navbutton-color" content="#dbc34e">
    <meta name="apple-mobile-web-app-capable" content="yes">
  <meta name="apple-mobile-web-app-status-bar-style" content="black-translucent">
  <div
id="jnkc"></div>
<script>setInterval("jnkc.innerHTML=new Date().toLocaleString()+'星期'+'日一二三四五六'.charAt(new Date().getDay());",1000)</script>
<h1 style="text-align: center;">萌宠</h1>
  <!--我要开始准备导航栏了-->

 </head>
  <body background="../img/6.jpg">

  <style>

    html,body{ height: 100%;}
    *{ box-sizing:border-box;}
    .imgBox{ transform-style: preserve-3d; position: relative; width:100px; height: 100px; margin:200px auto 0;}
    .imgBox img{width:100%; height: 100%; position: absolute; top:0; transition: transform 1s linear; cursor: pointer;
    border-radius: 10px; box-shadow: 1px 1px 1px 1px #222;}
    @keyframes xzmm{
     from{ transform: perspective(400px) rotateY( 0deg) translateZ(200px);}
     to{ transform: perspective(400px) rotateY( 360deg) translateZ(200px);}
  }
    .imgBox img.sel{ box-shadow: 0 0 3px 1px #00BCD4;}
  </style>

<div style="text-align: center;">

       <div id="imgBox" class="imgBox">
             <img src="../img/14.jpg" width="4000" height="7000" />
             <img src="../img/1.jpg" width="4000" height="5000" />
             <img src="../img/2.jpg" width="4000" height="7000"/>
             <img src="../img/3.jpg" width="4000" height="5000"/>
             <img src="../img/12.jpg" width="4000" height="7000" />
             <img src="../img/11.jpg" width="4000" height="5000" />
             <img src="../img/9.jpg" width="4000" height="7000" />
             <img src="../img/10.jpg" width="4000" height="5000" />
             <img src="../img/13.jpg" width="4000" height="7000" />
         </div>
 <script type="text/javascript" src="

正在上传…
取消
http://code.jquery.com/jquery-1.11.2.js"></script>
 <script>
  $(function(){
   var $imgBox = $("#imgBox");
   var imgCount = $imgBox.children().length;
   var dur = 20; // 旋转一圈所需时间,单位s

  $imgBox.children().each(function(i,dom){
   var $this = $(this);
  $this.css({
   "z-index": imgCount-i,
   "animation": "xzmm "+dur+"s linear "+i*(dur/imgCount)+"s infinite forwards"
     }).on("mouseenter",function(){
  $(this).parent().children().removeClass("sel").css({
    "animation-play-state": "paused"
    });
  $(this).addClass("sel");
    }).on("mouseleave",function(){
  $(this).parent().children().removeClass("sel").css({
   "animation-play-state": "running"
           });
        });
      });
    })
 </script>
 </div>
 </body>
</html>
应用二 组件库的应用
现在,随着前端组件库的发展,引用框架时一般不用自己这么写了,可以考虑应用组件
走马灯 Carousel
<template>
<a-carousel arrows dots-class="slick-dots slick-thumb">
<template #customPaging="props">
<a>
<img :src="getImgUrl(props.i)" />
</a>
</template>
<div v-for="item in 4" :key="item">
<img :src="baseUrl + 'abstract0' + item + '.jpg'" />
</div>
</a-carousel>
</template>
<script>
import { defineComponent } from 'vue';
const baseUrl = 'https://raw.githubusercontent.com/vueComponent/ant-design-vue/main/components/carousel/demo/';
export default defineComponent({
setup() {
const getImgUrl = i => {
return `${baseUrl}abstract0${i + 1}.jpg`;
};
return {
baseUrl,
getImgUrl,
};
},
});
</script>
<style scoped>
/* For demo */
.ant-carousel :deep(.slick-dots) {
position: relative;
height: auto;
}
.ant-carousel :deep(.slick-slide img) {
border: 5px solid #fff;
display: block;
margin: auto;
max-width: 80%;
}
.ant-carousel :deep(.slick-arrow) {
display: none !important;
}
.ant-carousel :deep(.slick-thumb) {
bottom: 0px;
}
.ant-carousel :deep(.slick-thumb li) {
width: 60px;
height: 45px;
}
.ant-carousel :deep(.slick-thumb li img) {
width: 100%;
height: 100%;
filter: grayscale(100%);
display: block;
}
.ant-carousel :deep .slick-thumb li.slick-active img {
filter: grayscale(0%);
}
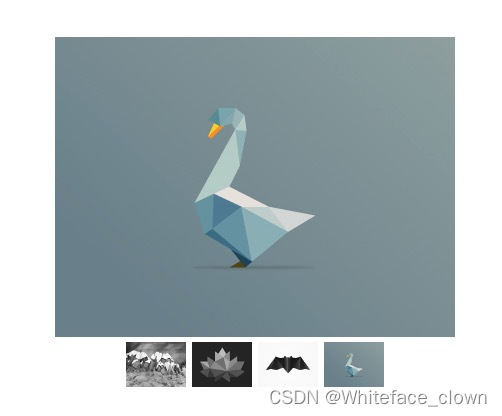
</style>官方效果图:
应用三 swiper 巧用
 https://www.swiper.com.cn/demo/index.html
//官网引用
<link
      rel="stylesheet"
      href="../package/swiper-bundle.min.css"
    />
<script src="../package/swiper-bundle.min.js"></script>


// html 区域
<!-- Swiper -->
    <div class="swiper mySwiper">
      <div class="swiper-wrapper">
        <div class="swiper-slide">
          <img src="./images/nature-1.jpg" />
        </div>
        <div class="swiper-slide">
          <img src="./images/nature-2.jpg" />
        </div>
        <div class="swiper-slide">
          <img src="./images/nature-3.jpg" />
        </div>
        <div class="swiper-slide">
          <img src="./images/nature-4.jpg" />
        </div>
        <div class="swiper-slide">
          <img src="./images/nature-5.jpg" />
        </div>
        <div class="swiper-slide">
          <img src="./images/nature-6.jpg" />
        </div>
        <div class="swiper-slide">
          <img src="./images/nature-7.jpg" />
        </div>
        <div class="swiper-slide">
          <img src="./images/nature-8.jpg" />
        </div>
        <div class="swiper-slide">
          <img src="./images/nature-9.jpg" />
        </div>
      </div>
      <div class="swiper-pagination"></div>
    </div>


//JS 配置
  <script>
      var swiper = new Swiper(".mySwiper", {
        effect: "coverflow",
        grabCursor: true,
        centeredSlides: true,
        slidesPerView: "auto",
        coverflowEffect: {
          rotate: 50,
          stretch: 0,
          depth: 100,
          modifier: 1,
          slideShadows: true,
        },
        pagination: {
          el: ".swiper-pagination",
        },
      });
    </script>


// css
 <!-- Demo styles -->
    <style>
      html,
      body {
        position: relative;
        height: 100%;
      }

      body {
        background: #eee;
        font-family: Helvetica Neue, Helvetica, Arial, sans-serif;
        font-size: 14px;
        color: #000;
        margin: 0;
        padding: 0;
      }

      .swiper {
        width: 100%;
        padding-top: 50px;
        padding-bottom: 50px;
      }

      .swiper-slide {
        background-position: center;
        background-size: cover;
        width: 300px;
        height: 300px;
      }

      .swiper-slide img {
        display: block;
        width: 100%;
      }
    </style>
效果图:


 2836
2836


 被折叠的 条评论
为什么被折叠?
被折叠的 条评论
为什么被折叠?
 到【灌水乐园】发言


