


github官方文档传送门
本地项目上传到Github方法
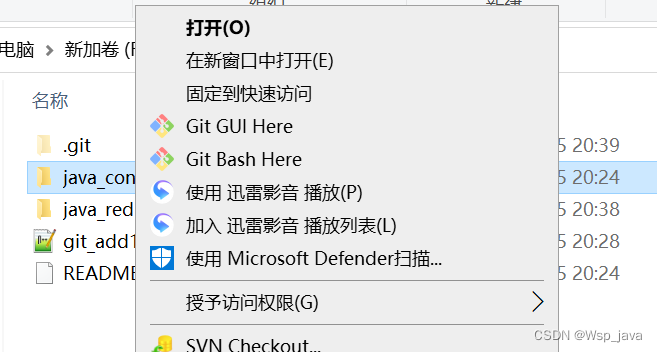
选择一个本地目录,右键点击"Git Base Here",会打开git对应的shell命令行,输入下面的命令,会在目录下生成一个".git"文件夹。
git init #Create an empty Git repository or reinitialize an existing one
1.复制github的 https的URL
git clone httpsUrl #Clone a repository into a new directory
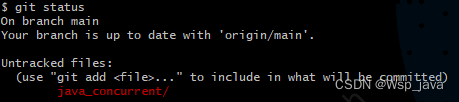
2.查看可提交文件,可提交文件标红
git status #Clone a repository into a new directory
3.add 文件
git add fielName #也可以是文件夹

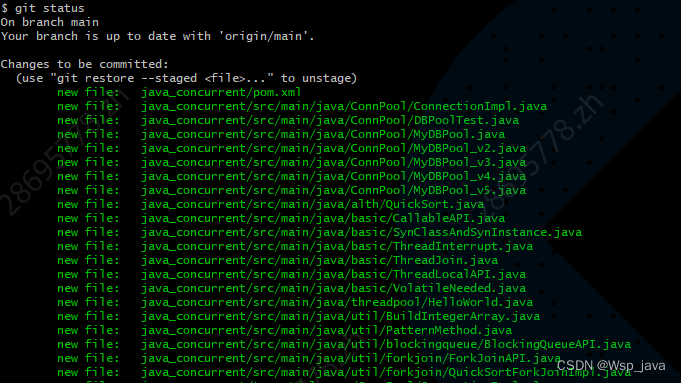
4. git status
可以看到之前提交的文件已经是绿色的了(文件夹的话,会出现很多文件)
5.git commit -m ‘comment’(提交到本地仓库)
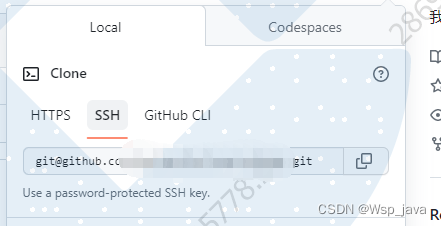
6.git push(这里遇坑了)
git remote set-url origin SSHUrl #注意这里是SSH的地址,如下图展示
输入下面的命令,生成秘钥
$ ssh-keygen -t ed25519 -C "your_email@example.com"
会生成如下的两个文件

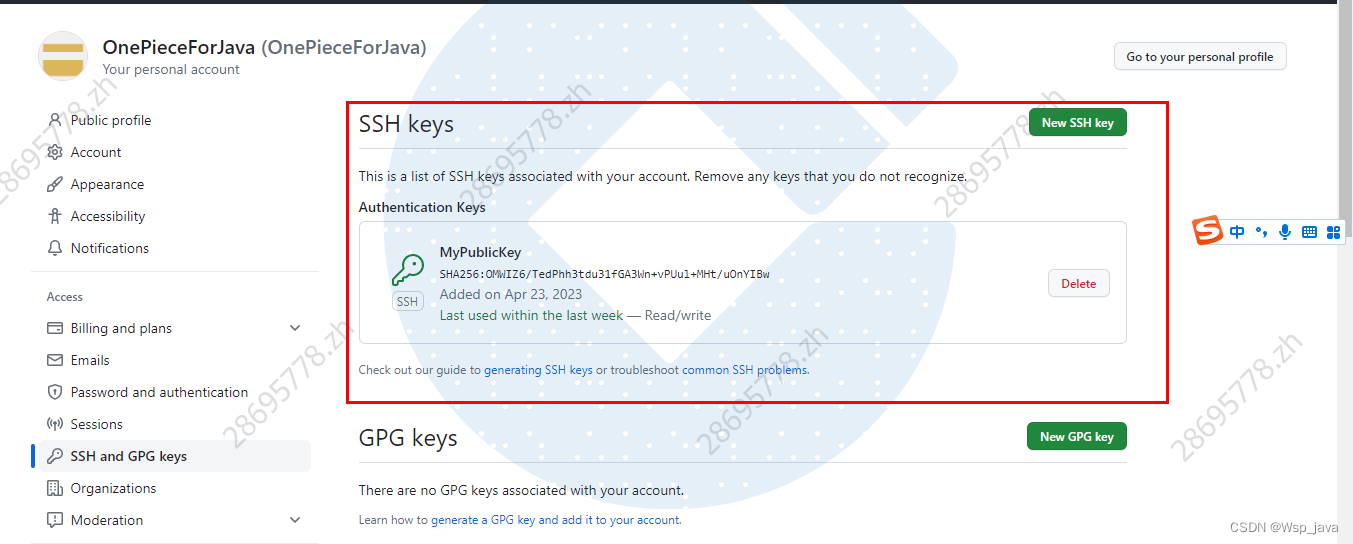
将公钥配置到github中
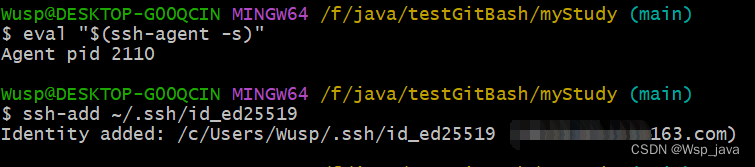
$ eval "$(ssh-agent -s)" #这个命令是干嘛的???
Agent pid 1383
$ ssh-add ~/.ssh/id_ed25519  #???
Enter passphrase for /c/Users/chenh/.ssh/id_ed25519:
Identity added: /c/Users/chenh/.ssh/id_ed25519 (18155469483@163.com)
J000000979@CFI-5MHMIF0BH3L MINGW64 /d/02-workspace/ij_workspace/myStudy (main)
$ git remote set-url origin git@github.com:OnePieceForJava/myStudy.git

$ git remote -v
origin  git@github.com:OnePieceForJava/myStudy.git (fetch)
origin  git@github.com:OnePieceForJava/myStudy.git (push)

$ git push
The authenticity of host 'github.com (20.205.243.166)' can't be established.
ECDSA key fingerprint is SHA256:p2QAMXNIC1TJYWeIOttrVc98/R1BUFWu3/LiyKgUfQM.
Are you sure you want to continue connecting (yes/no/[fingerprint])? yes
Warning: Permanently added 'github.com,20.205.243.166' (ECDSA) to the list of known hosts.
Enumerating objects: 77, done.
Counting objects: 100% (77/77), done.
Delta compression using up to 8 threads
Compressing objects: 100% (68/68), done.
Writing objects: 100% (76/76), 46.57 KiB | 1.01 MiB/s, done.
Total 76 (delta 6), reused 0 (delta 0), pack-reused 0
remote: Resolving deltas: 100% (6/6), done.
To github.com:OnePieceForJava/myStudy.git
   52687e1..2693016  main -> main
搭建过程中查看过的相关技术文章
github文件上传全流程-新手入门系列(超详细!!!)
remote: Support for password authentication was removed on August 13, 2021
Git clone 克隆私有项目
生成新SSH密钥并添加到ssh-agent
官方文档:
生成新的 SSH 密钥并将其添加到 ssh-agent
简单轻松的将本地项目上传到Github的两种简单方法
换了一台电脑,下载我Github上的项目并修改提交(2023/05/15补充)
git config命令
查看git的配置数据
#-h --help查看git config命令的使用
git config --help
#查看配置信息
git config --global --list
安装好git后的第一步是配置用户名与邮箱,这是非常重要的,因为每次Git提交都会使用该信息。它被永远的嵌入到了你的提交中,实际上
git config --global user.name  ${user.name}
git config --global user.email ${user.email}
git config -help可以得到 git config命令的用法
语法: git config [<options>]
文件位置
    --global                  #use global config file 使用全局配置文件
    --system                  #use system config file 使用系统配置文件
    --local                   #use repository config file    使用存储库配置文件
    -f, --file <file>         #use given config file    使用给定的配置文件
    --blob <blob-id>          #read config from given blob object    从给定的对象中读取配置

动作
    --get                     #get value: name [value-regex]    获得值:[值]名[正则表达式]
    --get-all                 #get all values: key [value-regex]    获得所有值:[值]名[正则表达式]
    --get-regexp          #get values for regexp: name-regex [value-regex]    得到的值根据正则
    --get-urlmatch            #get value specific for the URL: section[.var] URL    为URL获取特定的值
    --replace-all             #replace all matching variables: name value [value_regex]    替换所有匹配的变量:名称值[ value_regex ]
    --add                     #add a new variable: name value    添加一个新变量:name值
    --unset                   #remove a variable: name [value-regex]    删除一个变量名[值]:正则表达式
    --unset-all               #remove all matches: name [value-regex]    删除所有匹配的正则表达式:名称[值]
    --rename-section          #rename section: old-name new-name    重命名部分:旧名称 新名称
    --remove-section          #remove a section: name    删除部分:名称
    -l, --list                #list all    列出所有
    -e, --edit            #open an editor    打开一个编辑器
    --get-color               #find the color configured: slot [default]    找到配置的颜色:插槽[默认]
    --get-colorbool           #find the color setting: slot [stdout-is-tty]    发现颜色设置:槽[ stdout是TTY ]

类型
    --bool                    #value is "true" or "false"    值是“真”或“假”。
    --int                     #value is decimal number    值是十进制数。
    --bool-or-int             #value is --bool or --int    值--布尔或int
    --path                    #value is a path (file or directory name)    值是路径(文件或目录名)

其它
    -z, --null                #terminate values with NUL byte    终止值与null字节
    --name-only               #show variable names only    只显示变量名
    --includes                #respect include directives on lookup    尊重包括查找指令
    --show-origin             #show origin of config (file, standard input, blob, command line)    显示配置(文件、标准输入、数据块、命令行)的来源
git clone
选择文件目录,右键选择Git Bash Here
git clone ${github项目url}
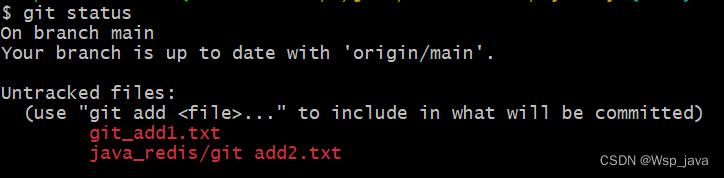
git status
查看仓库当前的状态,显示有变更的文件
新增文件,未add的文件的UI颜色是红色的,文件add之后颜色会变成绿色,后文git add会有图片展示
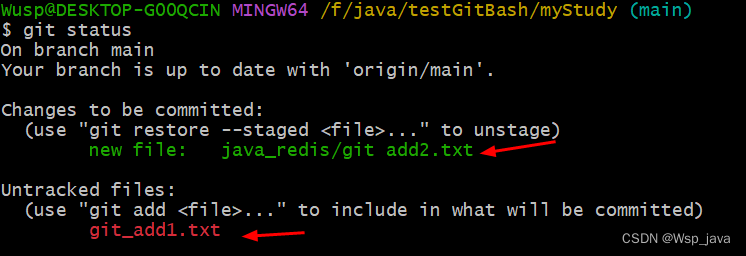
git add
#语法 添加文件到暂存区
git add ${fileName}
注意文件名称中有空格的话,用单引号括住

git status,注意add后的颜色变化
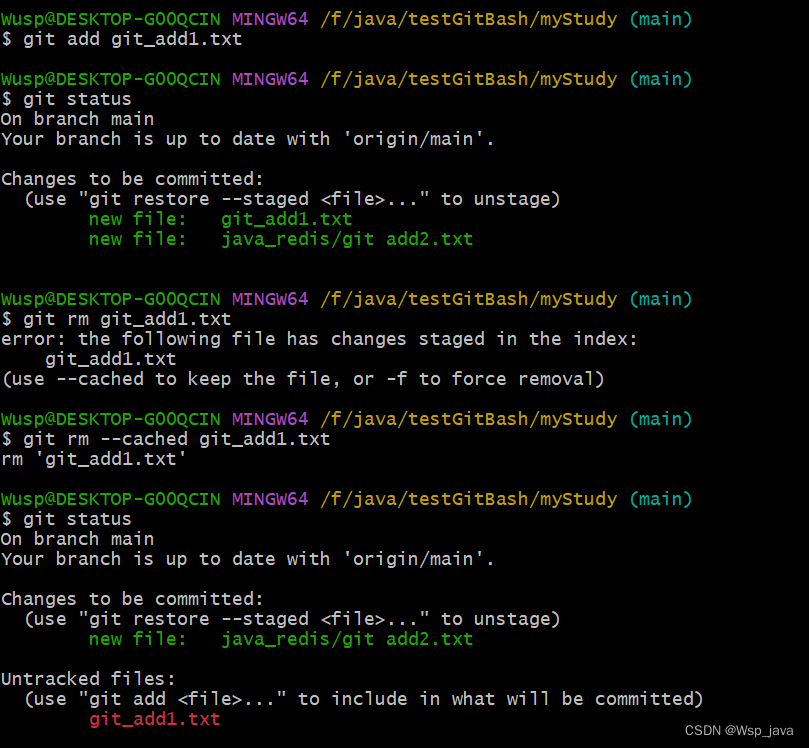
git add后undo add的操作
#将git_add1.txt 文件放到暂存区
$ git add git_add1.txt

#查看git的状态
$ git status
On branch main
Your branch is up to date with 'origin/main'.

Changes to be committed:
  (use "git restore --staged <file>..." to unstage)
        new file:   git_add1.txt
        new file:   java_redis/git add2.txt


#git rm 将文件从暂存区和工作区中删除。暂存区中的文件需要--cached选项
$ git rm git_add1.txt
error: the following file has changes staged in the index:
    git_add1.txt
(use --cached to keep the file, or -f to force removal)

$ git rm --cached git_add1.txt
rm 'git_add1.txt'

#git status 看是否从暂存区删除
$ git status
On branch main
Your branch is up to date with 'origin/main'.

Changes to be committed:
  (use "git restore --staged <file>..." to unstage)
        new file:   java_redis/git add2.txt

Untracked files:
  (use "git add <file>..." to include in what will be committed)
        git_add1.txt
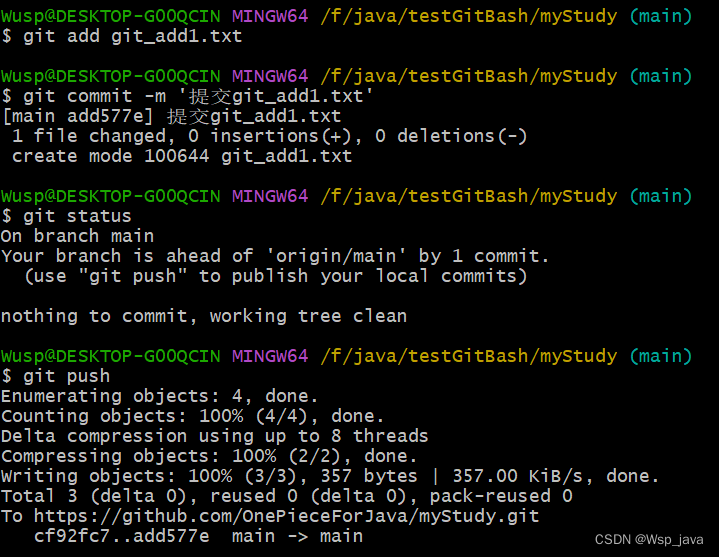
Git命令行的图片展示
git commit
#注意 -m选项一定要加上
git commit -m '提交的描述内容'
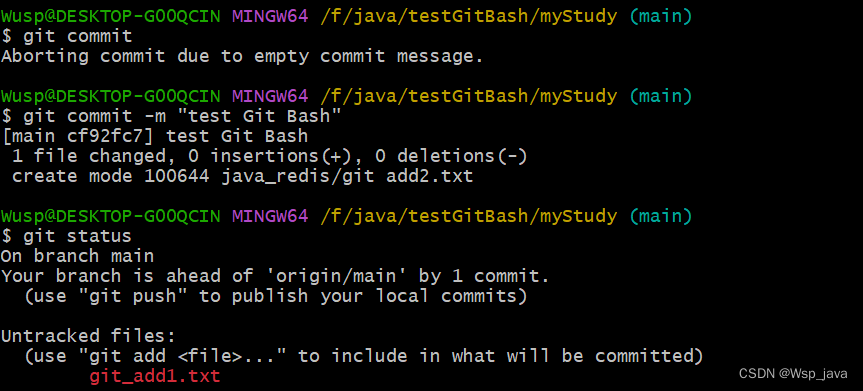
git push
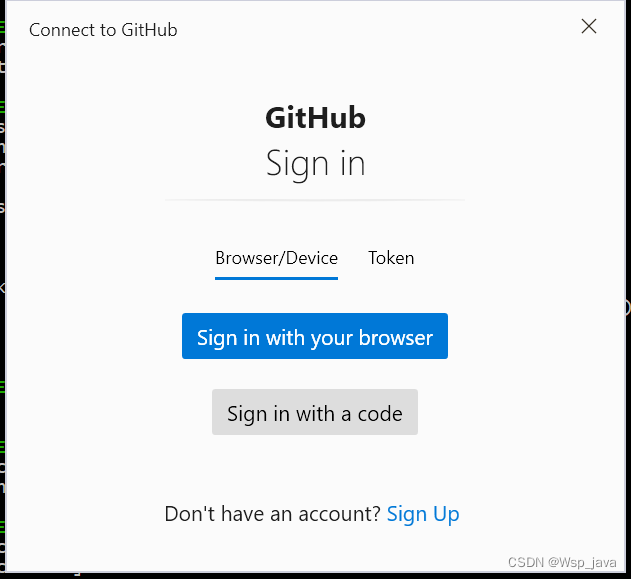
现在直接输入git push,会弹出下面的页面,点击“Sign in with your browser”登陆后其实也没什么效果
输入下面的命令,生成秘钥
$ ssh-keygen -t ed25519 -C "your_email@example.com"
会生成如下的两个文件
将公钥配置到github中
$ eval "$(ssh-agent -s)"
$ ssh-add ~/.ssh/id_ed25519
这是在git push的话,也出现了登陆的界面,点击“Sign in with your browser”后打开了浏览器,但浏览器是黑的,我关掉页面后发现文件上传成功了
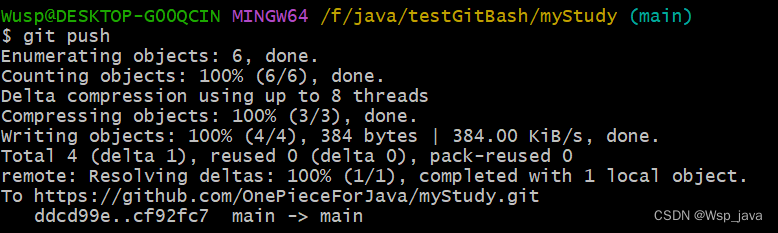
再次输入git push

我们新增了两个文件,但只提交了一个,现将剩下的文件也提交掉,git push时没在弹出登陆的页面了。
参考文档
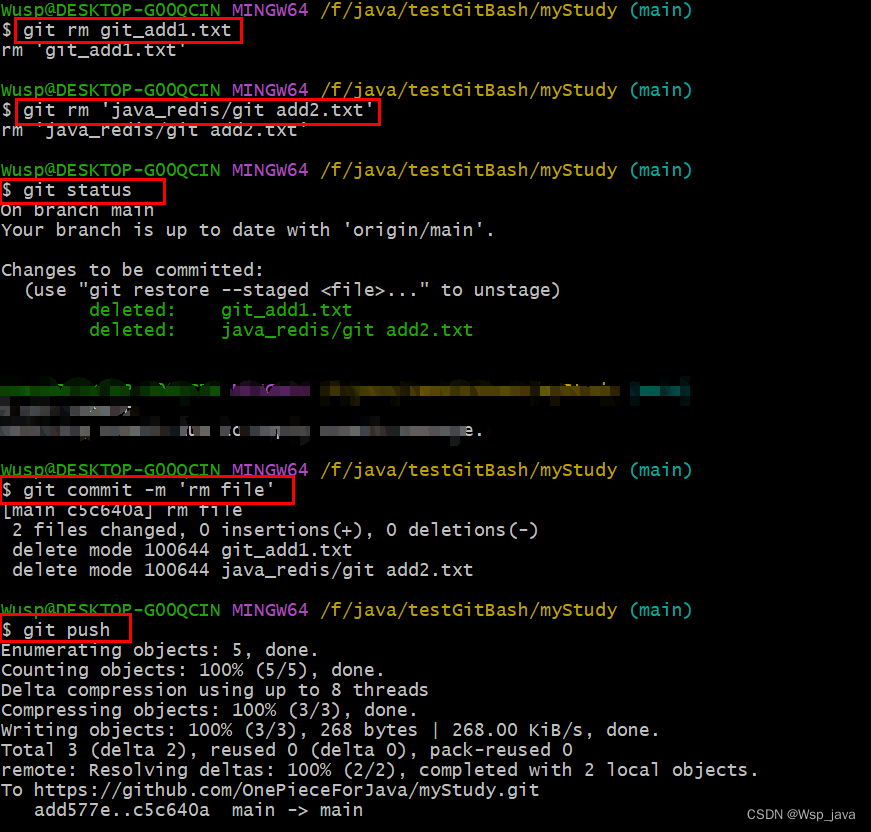
git rm
#删除git_add1.txt
$ git rm git_add1.txt
rm 'git_add1.txt'

#删除'java_redis/git add2.txt'
$ git rm 'java_redis/git add2.txt'
rm 'java_redis/git add2.txt'

#查看状态
$ git status
On branch main
Your branch is up to date with 'origin/main'.

Changes to be committed:
  (use "git restore --staged <file>..." to unstage)
        deleted:    git_add1.txt
        deleted:    java_redis/git add2.txt

#git commit 删除
$ git commit -m 'rm file'
[main c5c640a] rm file
 2 files changed, 0 insertions(+), 0 deletions(-)
 delete mode 100644 git_add1.txt
 delete mode 100644 java_redis/git add2.txt

#git push 没有在弹出登陆页面了
$ git push
Enumerating objects: 5, done.
Counting objects: 100% (5/5), done.
Delta compression using up to 8 threads
Compressing objects: 100% (3/3), done.
Writing objects: 100% (3/3), 268 bytes | 268.00 KiB/s, done.
Total 3 (delta 2), reused 0 (delta 0), pack-reused 0
remote: Resolving deltas: 100% (2/2), completed with 2 local objects.
To https://github.com/OnePieceForJava/myStudy.git
   add577e..c5c640a  main -> main


 9386
9386


 被折叠的 条评论
为什么被折叠?
被折叠的 条评论
为什么被折叠?
 到【灌水乐园】发言


