SpringBoot 2.x.x整合Spring Security5和Thymeleaf遇到的坑

今天在学习Spring Security的时候遇到了些问题,网上搜索了很久都没有找到完美的解决方案。
最后摸索了一下解决了。
主要出现了以下问题:

  1. thymeleaf-extras-springsecurity与Spring Security版本不对应导致页面中的sec:xx表达式无效
  2. html文件头部的名称空间错误导致idea无法正常提示代码

sec:xx表达式无效

表达式没有效果主要原因是thymeleaf-extras-springsecurity与Spring Security、thymeleaf版本不对应导致.

正确对应关系:

thymeleaf-extras-springsecurity版本Spring Security 版本
33.x
44.x
55.x
  • 版本3.0.4.RELEASE-适用于Thymeleaf 3.0(需要Thymeleaf 3.0.10+)
  • 版本2.1.3.RELEASE-适用于Thymeleaf 2.1(需要Thymeleaf 2.1.2+)

maven信息

  • groupId: org.thymeleaf.extras
  • artifactId:
    - Spring Security 3: thymeleaf-extras-springsecurity3
    - Spring Security 4: thymeleaf-extras-springsecurity4
    - Spring Security 5: thymeleaf-extras-springsecurity5

由于我使用的是springboot 2.2.2,pom文件依赖如图:
在这里插入图片描述

Idea无法正常提示代码

这个问题的解决方案我在网上找了很久最终在thymeleaf-extras-springsecurity官方github找到了解决方案。

标签没有提示标签无提示

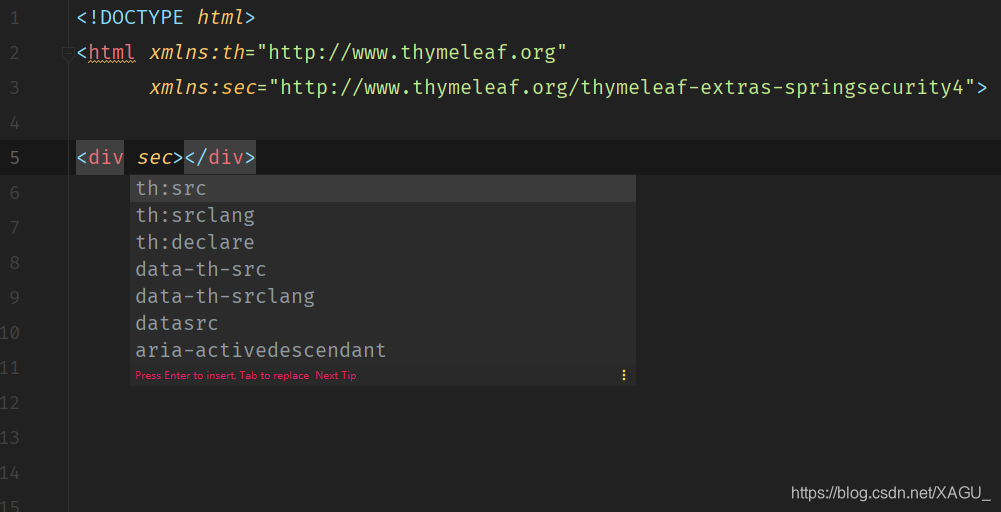
后面发现是因为html的命名空间的问题。

来到thymeleaf-extras-springsecurity的官方github:thymeleaf-extras-springsecurity

README的最后一项:

Namespace

The namespace for all versions of this dialect is http://www.thymeleaf.org/extras/spring-security.

<html xmlns:sec="http://www.thymeleaf.org/extras/spring-security">

Getting the namespace incorrect won’t impact processing of your template. It
might however impact your IDE when it comes to things like suggestions/auto-completion
in your templates.

根据提示修改html的命名空间为:html xmlns:sec=“http://www.thymeleaf.org/extras/spring-security”>

修改后的效果:
在这里插入图片描述

  • 8
    点赞
  • 3
    收藏
    觉得还不错? 一键收藏
  • 1
    评论
Spring SecuritySpring框架中的一个强大且灵活的安全框架。它为应用程序提供了一套包括认证、授权和攻击防护等方面的安全性保障。 Spring Boot是一个快速开发Web应用程序的框架,而它与Spring Security结合使用能够实现更加安全的应用程序。 下面是Spring BootSpring Security整合教程: 1. 首先需要在pom.xml文件中添加Spring Security的依赖: ``` <dependency> <groupId>org.springframework.security</groupId> <artifactId>spring-security-web</artifactId> <version>5.0.0.RELEASE</version> </dependency> ``` 2. 接着需要创建一个Sping Security的配置类,实现WebSecurityConfigurer接口,这个类中定义了一些配置项,比如安全拦截规则、用户认证等。例如: ``` @Configuration @EnableWebSecurity public class SecurityConfig extends WebSecurityConfigurerAdapter { @Autowired public void configureGlobal(AuthenticationManagerBuilder auth) throws Exception { auth.inMemoryAuthentication().withUser("user").password("password").roles("USER"); } @Override protected void configure(HttpSecurity http) throws Exception { http.authorizeRequests() .antMatchers("/", "/home").permitAll() .anyRequest().authenticated() .and() .formLogin() .loginPage("/login") .permitAll() .and() .logout() .permitAll(); } } ``` 上述代码片段中,我们定义了一个内存用户,拥有用户名为“user”和密码为“password”,具有用户角色。我们还定义了请求拦截规则,只有经过认证的用户才能访问资源。 3. 创建一个Controller类,用于处理登录请求和主页请求(即让用户通过登录页面登录),例如: ``` @Controller public class MainController { @GetMapping("/") public String home() { return "home"; } @GetMapping("/login") public String login() { return "login"; } } ``` 4. 创建一个登录页面login.html和主页面home.html,例如: ``` <!DOCTYPE html> <html xmlns:th="http://www.thymeleaf.org"> <head> <title>Spring Security Example</title> </head> <body> <div th:if="${param.error}"> Invalid username and password. </div> <div th:if="${param.logout}"> You have been logged out. </div> <form th:action="@{/login}" method="post"> <div><label>Username: <input type="text" name="username"/></label></div> <div><label>Password: <input type="password" name="password"/></label></div> <div><input type="submit" value="Log in"/></div> </form> </body> </html> ``` ``` <!DOCTYPE html> <html xmlns:th="http://www.thymeleaf.org"> <head> <title>Spring Security Example</title> </head> <body> <h1>Welcome!</h1> <p>Click <a href="/logout">here</a> to log out.</p> </body> </html> ``` 5. 最后启动应用程序,在浏览器输入localhost:8080/login访问登录页面,输入用户名、密码即可访问主页面。 以上就是Spring BootSpring Security整合的基本教程,实现了一个简单的登录功能,其它更多的配置和功能请参考Spring Security官方文档。

“相关推荐”对你有帮助么?

  • 非常没帮助
  • 没帮助
  • 一般
  • 有帮助
  • 非常有帮助
提交
评论 1
添加红包

请填写红包祝福语或标题

红包个数最小为10个

红包金额最低5元

当前余额3.43前往充值 >
需支付:10.00
成就一亿技术人!
领取后你会自动成为博主和红包主的粉丝 规则
hope_wisdom
发出的红包
实付
使用余额支付
点击重新获取
扫码支付
钱包余额 0

抵扣说明:

1.余额是钱包充值的虚拟货币,按照1:1的比例进行支付金额的抵扣。
2.余额无法直接购买下载,可以购买VIP、付费专栏及课程。

余额充值