为view添加阴影效果

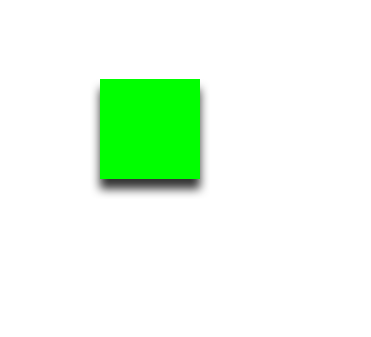
UIView *view = [[UIView alloc] initWithFrame:CGRectMake(100, 300, 100, 100)];
view.backgroundColor = [UIColor greenColor];
[self.view addSubview:view];
view.layer.shadowColor = [[UIColor blackColor] CGColor]; // 阴影颜色
view.layer.shadowOffset = CGSizeMake(0, 10); // 偏移 +X向右  -X向左   +Y向下  -Y向上
view.layer.shadowOpacity = 0.8; // 阴影透明度
view.layer.shadowRadius = 5.0; //  阴影半径

这里写图片描述

在 Android 中实现阴影效果有多种方法,以下是其中两种比较常用的方法: 1. 使用 elevation 属性 在 Android 5.0 及以上版本中,可以使用 View 的 elevation 属性为 View 添加阴影效果。具体实现方法如下: ```xml <androidx.cardview.widget.CardView android:layout_width="match_parent" android:layout_height="wrap_content" android:elevation="8dp" app:cardCornerRadius="8dp"> <!-- 在 CardView添加需要显示阴影的子 View --> </androidx.cardview.widget.CardView> ``` 其中,elevation 属性用于设置阴影的高度,单位为 dp;cardCornerRadius 属性用于设置 CardView 的圆角半径。 2. 使用自定义阴影背景 如果需要更精细的阴影效果,可以使用自定义阴影背景。具体实现方法如下: 1. 在 drawable 目录下创建一个 shape 文件,例如 shadow_background.xml,内容如下: ```xml <shape xmlns:android="http://schemas.android.com/apk/res/android"> <padding android:left="8dp" android:top="8dp" android:right="8dp" android:bottom="8dp" /> <solid android:color="@android:color/white" /> <corners android:radius="8dp" /> <stroke android:width="1dp" android:color="@android:color/darker_gray" /> <gradient android:startColor="@android:color/white" android:endColor="@android:color/darker_gray" android:angle="270" /> </shape> ``` 2. 在需要显示阴影View 的背景中设置刚创建的 shape 文件,例如: ```xml <View android:layout_width="match_parent" android:layout_height="wrap_content" android:background="@drawable/shadow_background" /> ``` 其中,shadow_background.xml 文件中的 padding 属性用于设置阴影的大小,solid 属性用于设置背景色,corners 属性用于设置圆角半径,stroke 属性用于设置边框,gradient 属性用于设置渐变色。 以上是两种常用的实现阴影效果的方法,根据具体情况选择合适的方法。
评论
添加红包

请填写红包祝福语或标题

红包个数最小为10个

红包金额最低5元

当前余额3.43前往充值 >
需支付:10.00
成就一亿技术人!
领取后你会自动成为博主和红包主的粉丝 规则
hope_wisdom
发出的红包
实付
使用余额支付
点击重新获取
扫码支付
钱包余额 0

抵扣说明:

1.余额是钱包充值的虚拟货币,按照1:1的比例进行支付金额的抵扣。
2.余额无法直接购买下载,可以购买VIP、付费专栏及课程。

余额充值