


一、说一说springboot
springboot它简化了spring的配置,主要是因为由自动装配功能的的存在,可以直接启动,因为它内嵌了tomcat容器;连接springboot的内部原理,有助于帮助我们做扩展,更能验证我们的学习能力。springboot是依赖于spring的,除了用于spring的全部功能外,springboot没有繁琐的xml配置,并且springboot内部内嵌了tomcat、jetty、等web容器,并集成了springmvc,这使得springboot可以直接运行,不在需要额外配置其他容器,更提供了一些大型项目中常见的功能特性,例如嵌入式服务器、安全、指标、健康检查、外部配置等。
二、SpringApplication的初始化
说起SpringApplication的初始化,我们可以直接看
SpringApplication#run(java.lang.Class<?>[], java.lang.String[])方法
  public static ConfigurableApplicationContext run(Class<?> primarySource, String... args) {
    return run(new Class<?>[] { primarySource }, args);
  }
首先看SpringApplication的构造函数
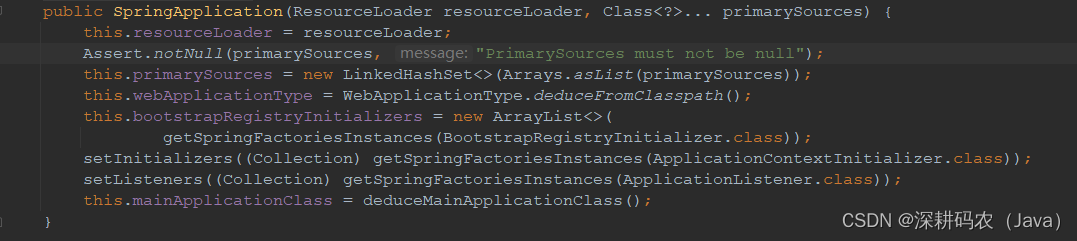
  public SpringApplication(ResourceLoader resourceLoader, Class<?>... primarySources) {
    this.resourceLoader = resourceLoader;
    Assert.notNull(primarySources, "PrimarySources must not be null");
    // 保存启动类信息
    this.primarySources = new LinkedHashSet<>(Arrays.asList(primarySources));
    // 初始化环境。环境分为三种 非web环境、web环境、reactive环境三种。其判断逻辑就是判断是否存在指定的类,默认是Servlet 环境,我们这也是Servlet
    this.webApplicationType = WebApplicationType.deduceFromClasspath();
    // getSpringFactoriesInstances 方法加载了 spring.factories文件。在这里进行了首次加载spring.factoies文件。设置 ApplicationContextInitializer
    setInitializers((Collection) getSpringFactoriesInstances(ApplicationContextInitializer.class));
    // 获取监听器,也加载了spring.factories文件
    setListeners((Collection) getSpringFactoriesInstances(ApplicationListener.class));
    // 设置启动类信息
    this.mainApplicationClass = deduceMainApplicationClass();
  }
三、流程分析
我们下面直接来看 SpringApplication#run(java.lang.String...) 方法的执行流程
  public ConfigurableApplicationContext run(String... args) {
    // 开启关于启动时间的信息监控
    StopWatch stopWatch = new StopWatch();
    stopWatch.start();
    // 准备 ApplicationContext
    ConfigurableApplicationContext context = null;
    Collection<SpringBootExceptionReporter> exceptionReporters = new ArrayList<>();
        //java.awt.headless是J2SE的一种模式用于在缺少显示屏、键盘或者鼠标时的系统配置,很多监控工具如jconsole 需要将该值设置为true,系统变量默认为true
    configureHeadlessProperty();
    // 1. 获取Spring的监听器类,这里是从 spring.factories 中去获取,默认的是以 org.springframework.boot.SpringApplicationRunListener 为key,获取到的监听器类型为 EventPublishingRunListener。
    SpringApplicationRunListeners listeners = getRunListeners(args);
    // 1.1 监听器发送启动事件
    listeners.starting();
    try {
      // 封装参数
      ApplicationArguments applicationArguments = new DefaultApplicationArguments(args);
      // 2. 构造容器环境。将容器的一些配置内容加载到 environment  中
      ConfigurableEnvironment environment = prepareEnvironment(listeners, applicationArguments);
      // 配置BeanInfo的忽略 :“spring.beaninfo.ignore”,值为“true”表示跳过对BeanInfo类的搜索
      configureIgnoreBeanInfo(environment);
      // 打印信息对象
      Banner printedBanner = printBanner(environment);
      // 3. 创建上下文对象
      context = createApplicationContext();
      // 从 spring.factries 中获取错误报告的类。出错的时候会调用其方法通知
      exceptionReporters = getSpringFactoriesInstances(SpringBootExceptionReporter.class,
          new Class[] { ConfigurableApplicationContext.class }, context);
      // 4. 准备刷新上下文
      prepareContext(context, environment, listeners, applicationArguments, printedBanner);
      // 5. 刷新上下文
      refreshContext(context);
      // 结束刷新,留待扩展功能,并未实现什么
      afterRefresh(context, applicationArguments);
      // 停止监听
      stopWatch.stop();
      if (this.logStartupInfo) {
        new StartupInfoLogger(this.mainApplicationClass).logStarted(getApplicationLog(), stopWatch);
      }
      // 监听器发送启动结束时间
      listeners.started(context);
      // 调用 ApplicationRunner 和 CommandLineRunner 对应的方法
      callRunners(context, applicationArguments);
    }
    catch (Throwable ex) {
      handleRunFailure(context, ex, exceptionReporters, listeners);
      throw new IllegalStateException(ex);
    }

    try {
      // 发送容器运行事件
      listeners.running(context);
    }
    catch (Throwable ex) {
      handleRunFailure(context, ex, exceptionReporters, null);
      throw new IllegalStateException(ex);
    }
    return context;
  }
1. 获取监听器
默认的是以 org.springframework.boot.SpringApplicationRunListener 为key,获取到的监听器类型为 EventPublishingRunListener
  private SpringApplicationRunListeners getRunListeners(String[] args) {
    Class<?>[] types = new Class<?>[] { SpringApplication.class, String[].class };
    return new SpringApplicationRunListeners(logger,
        getSpringFactoriesInstances(SpringApplicationRunListener.class, types, this, args));
  }
这里需要注意的是

getSpringFactoriesInstances(SpringApplicationRunListener.class, types, this, args)

返回的是collection类型,就是说SpringApplicationRenListeners不代表一个监听器,而是为了保存监听器的集合,在默认情况下,只有一个EventPublishingRunListener.
class SpringApplicationRunListeners {

  private final Log log;

  private final List<SpringApplicationRunListener> listeners;

  SpringApplicationRunListeners(Log log, Collection<? extends SpringApplicationRunListener> listeners) {
    this.log = log;
    this.listeners = new ArrayList<>(listeners);
  }
  ...
}
总结:
在spring启动时, spring.factories文件中获取监听器集合,在时间发生时,EventPublishingRunListener 会寻找容器中的bena,并进行事件通知。
2.环境变量的构造
环境变量的作用时加载配置文件的内容
 private ConfigurableEnvironment prepareEnvironment(SpringApplicationRunListeners listeners,
      ApplicationArguments applicationArguments) {
    // Create and configure the environment
    // 获取或者创建 environment。这里获取类型是 StandardServletEnvironment
    ConfigurableEnvironment environment = getOrCreateEnvironment();
    // 将入参配置到环境配置中
    configureEnvironment(environment, applicationArguments.getSourceArgs());
    ConfigurationPropertySources.attach(environment);
    // 发布环境准备事件。
    listeners.environmentPrepared(environment);
    bindToSpringApplication(environment);
    if (!this.isCustomEnvironment) {
      environment = new EnvironmentConverter(getClassLoader()).convertEnvironmentIfNecessary(environment,
          deduceEnvironmentClass());
    }
    ConfigurationPropertySources.attach(environment);
    return environment;
  }

  private Class<? extends StandardEnvironment> deduceEnvironmentClass() {
    switch (this.webApplicationType) {
    case SERVLET:
      return StandardServletEnvironment.class;
    case REACTIVE:
      return StandardReactiveWebEnvironment.class;
    default:
      return StandardEnvironment.class;
    }
  }
2.1application.yml的加载
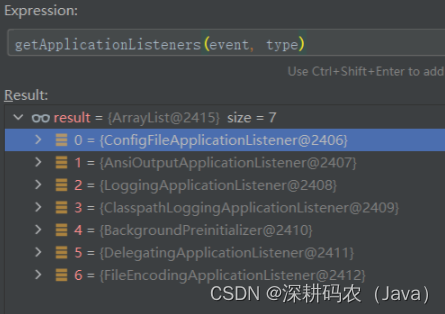
listeners.environmentPrepared(environment); 会发送环境准备事件,环境准备事件要通知七个监听器
ConfigFileApplicationListener
ConfigFileApplicationListener 的 onApplicationEvent 方法如下
  @Override
  public void onApplicationEvent(ApplicationEvent event) {
    if (event instanceof ApplicationEnvironmentPreparedEvent) {
      onApplicationEnvironmentPreparedEvent((ApplicationEnvironmentPreparedEvent) event);
    }
    if (event instanceof ApplicationPreparedEvent) {
      onApplicationPreparedEvent(event);
    }
  }
在 EventPublishingRunListener#environmentPrepared 发布事件的时候,指明了该事件为 ApplicationEnvironmentPreparedEvent
所以在调用
ConfigFileApplicationListener#onApplicationEnvironmentPreparedEven时
  private void onApplicationEnvironmentPreparedEvent(ApplicationEnvironmentPreparedEvent event) {
    // 获取 EnvironmentPostProcessor。这里也是从spring.factories 文件中获取
    List<EnvironmentPostProcessor> postProcessors = loadPostProcessors();
    // 把自身添加进入
    postProcessors.add(this);
    AnnotationAwareOrderComparator.sort(postProcessors);
    // 排序后调用 EnvironmentPostProcessor#postProcessEnvironment 方法
    for (EnvironmentPostProcessor postProcessor : postProcessors) {
      postProcessor.postProcessEnvironment(event.getEnvironment(), event.getSpringApplication());
    }
  }
也就是在 ConfigFileApplicationListener#postProcessEnvironment 方法中加载了Springboot 配置文件
  @Override
  public void postProcessEnvironment(ConfigurableEnvironment environment, SpringApplication application) {
    addPropertySources(environment, application.getResourceLoader());
  }
  ...
  protected void addPropertySources(ConfigurableEnvironment environment, ResourceLoader resourceLoader) {
    RandomValuePropertySource.addToEnvironment(environment);
    new Loader(environment, resourceLoader).load();
  }
3.创建上下文
  /**
   * The class name of application context that will be used by default for non-web
   * environments.
   */
  public static final String DEFAULT_CONTEXT_CLASS = "org.springframework.context."
      + "annotation.AnnotationConfigApplicationContext";

  /**
   * The class name of application context that will be used by default for web
   * environments.
   */
  public static final String DEFAULT_SERVLET_WEB_CONTEXT_CLASS = "org.springframework.boot."
      + "web.servlet.context.AnnotationConfigServletWebServerApplicationContext";

  /**
   * The class name of application context that will be used by default for reactive web
   * environments.
   */
  public static final String DEFAULT_REACTIVE_WEB_CONTEXT_CLASS = "org.springframework."
      + "boot.web.reactive.context.AnnotationConfigReactiveWebServerApplicationContext";


  protected ConfigurableApplicationContext createApplicationContext() {
    Class<?> contextClass = this.applicationContextClass;
    if (contextClass == null) {
      try {
        switch (this.webApplicationType) {
        case SERVLET:
          contextClass = Class.forName(DEFAULT_SERVLET_WEB_CONTEXT_CLASS);
          break;
        case REACTIVE:
          contextClass = Class.forName(DEFAULT_REACTIVE_WEB_CONTEXT_CLASS);
          break;
        default:
          contextClass = Class.forName(DEFAULT_CONTEXT_CLASS);
        }
      }
      catch (ClassNotFoundException ex) {
        throw new IllegalStateException(
            "Unable create a default ApplicationContext, please specify an ApplicationContextClass", ex);
      }
    }
    return (ConfigurableApplicationContext) BeanUtils.instantiateClass(contextClass);
  }
webApplicationType 值是 servlet,所以这里创建的是 AnnotationConfigServletWebServerApplicationContext 类型的上下文
注意:AnnotationConfigServletWebServerApplicationContext 构造函数中会创建 AnnotatedBeanDefinitionReader。而在 AnnotatedBeanDefinitionReader 构造函数中会调用
AnnotationConfigUtils.registerAnnotationConfigProcessors(this.registry);,
该方法将一些必要Bean(如ConfigurationClassPostProcessor、AutowiredAnnotationBeanPostProcessor、CommonAnnotationBeanPostProcessor 等)注入到了容器中。


 3102
3102

 被折叠的 条评论
为什么被折叠?
被折叠的 条评论
为什么被折叠?
 到【灌水乐园】发言


