


你好呀,我是小邹。
最近重写了个人博客的评论功能,因为之前使用的gitalk评论插件最近不好使了,而且还需要登录才能评论。
细心的朋友会发现,现在博客的每一条评论都添加上了IP属地,本文记录一下如何给评论加上IP属地。
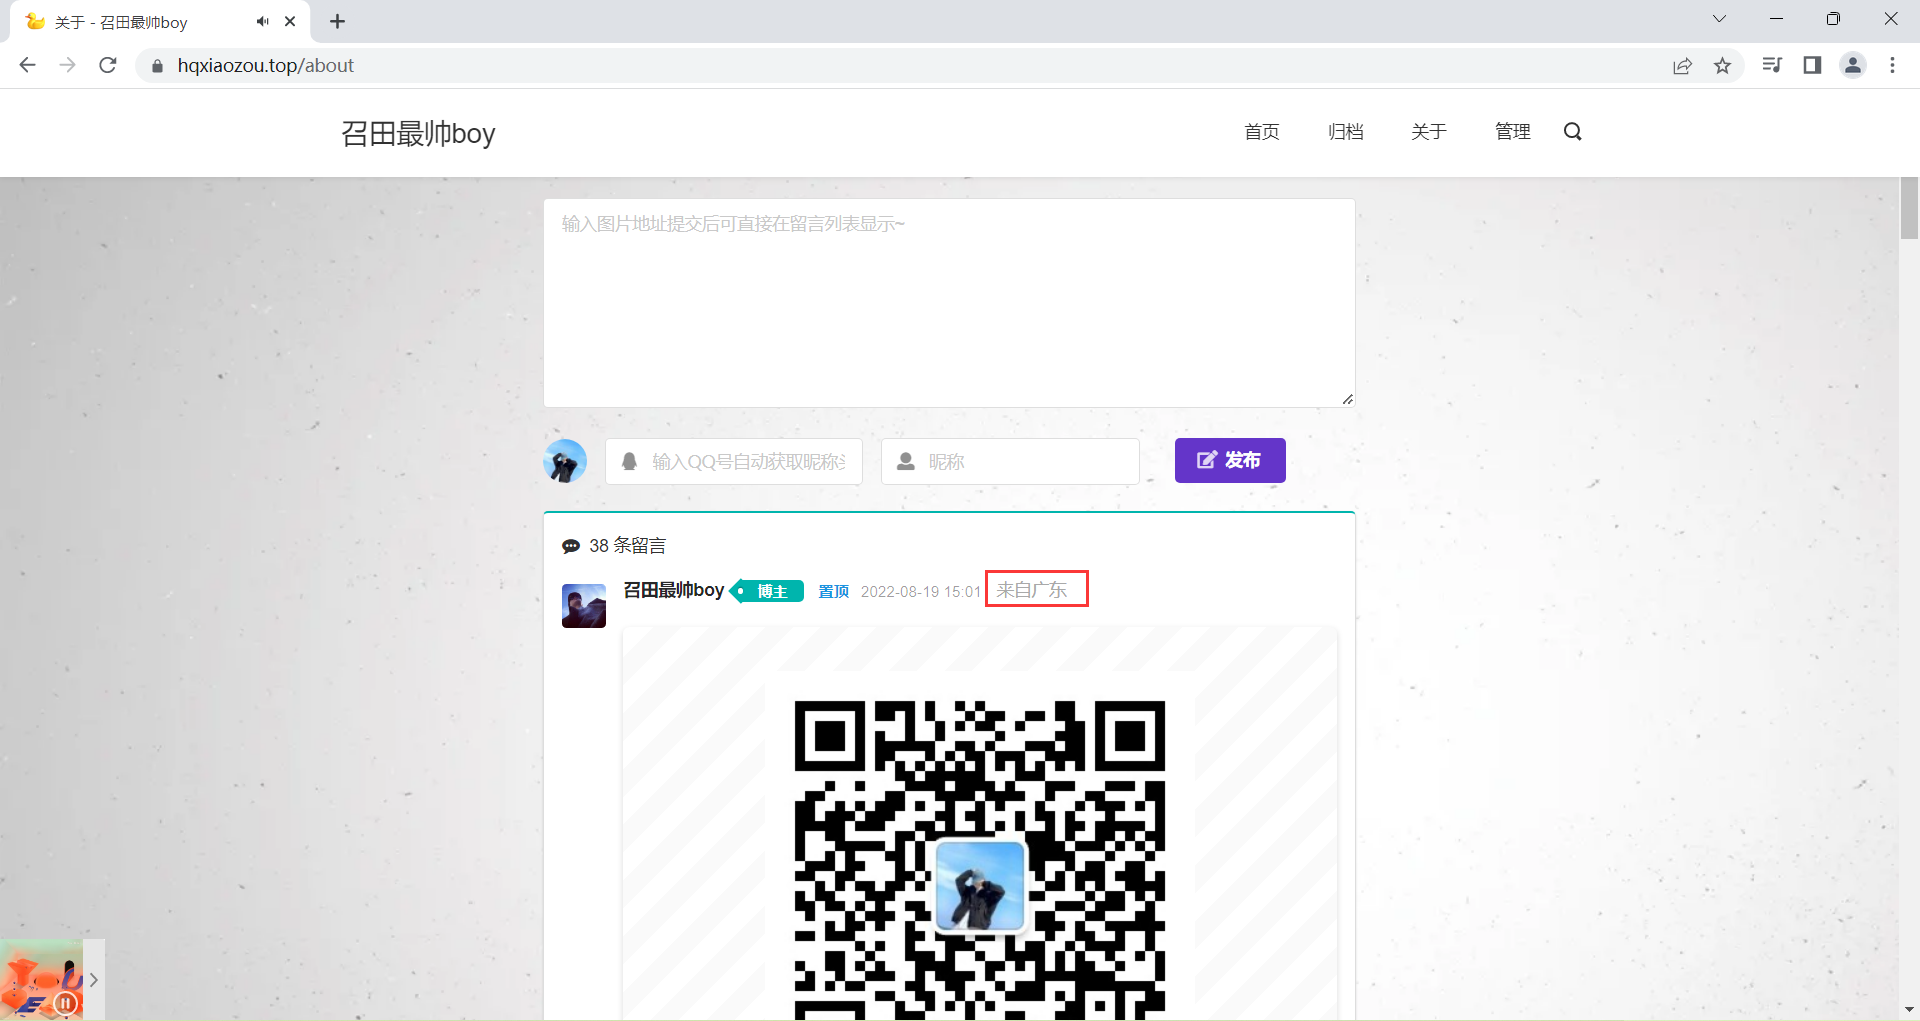
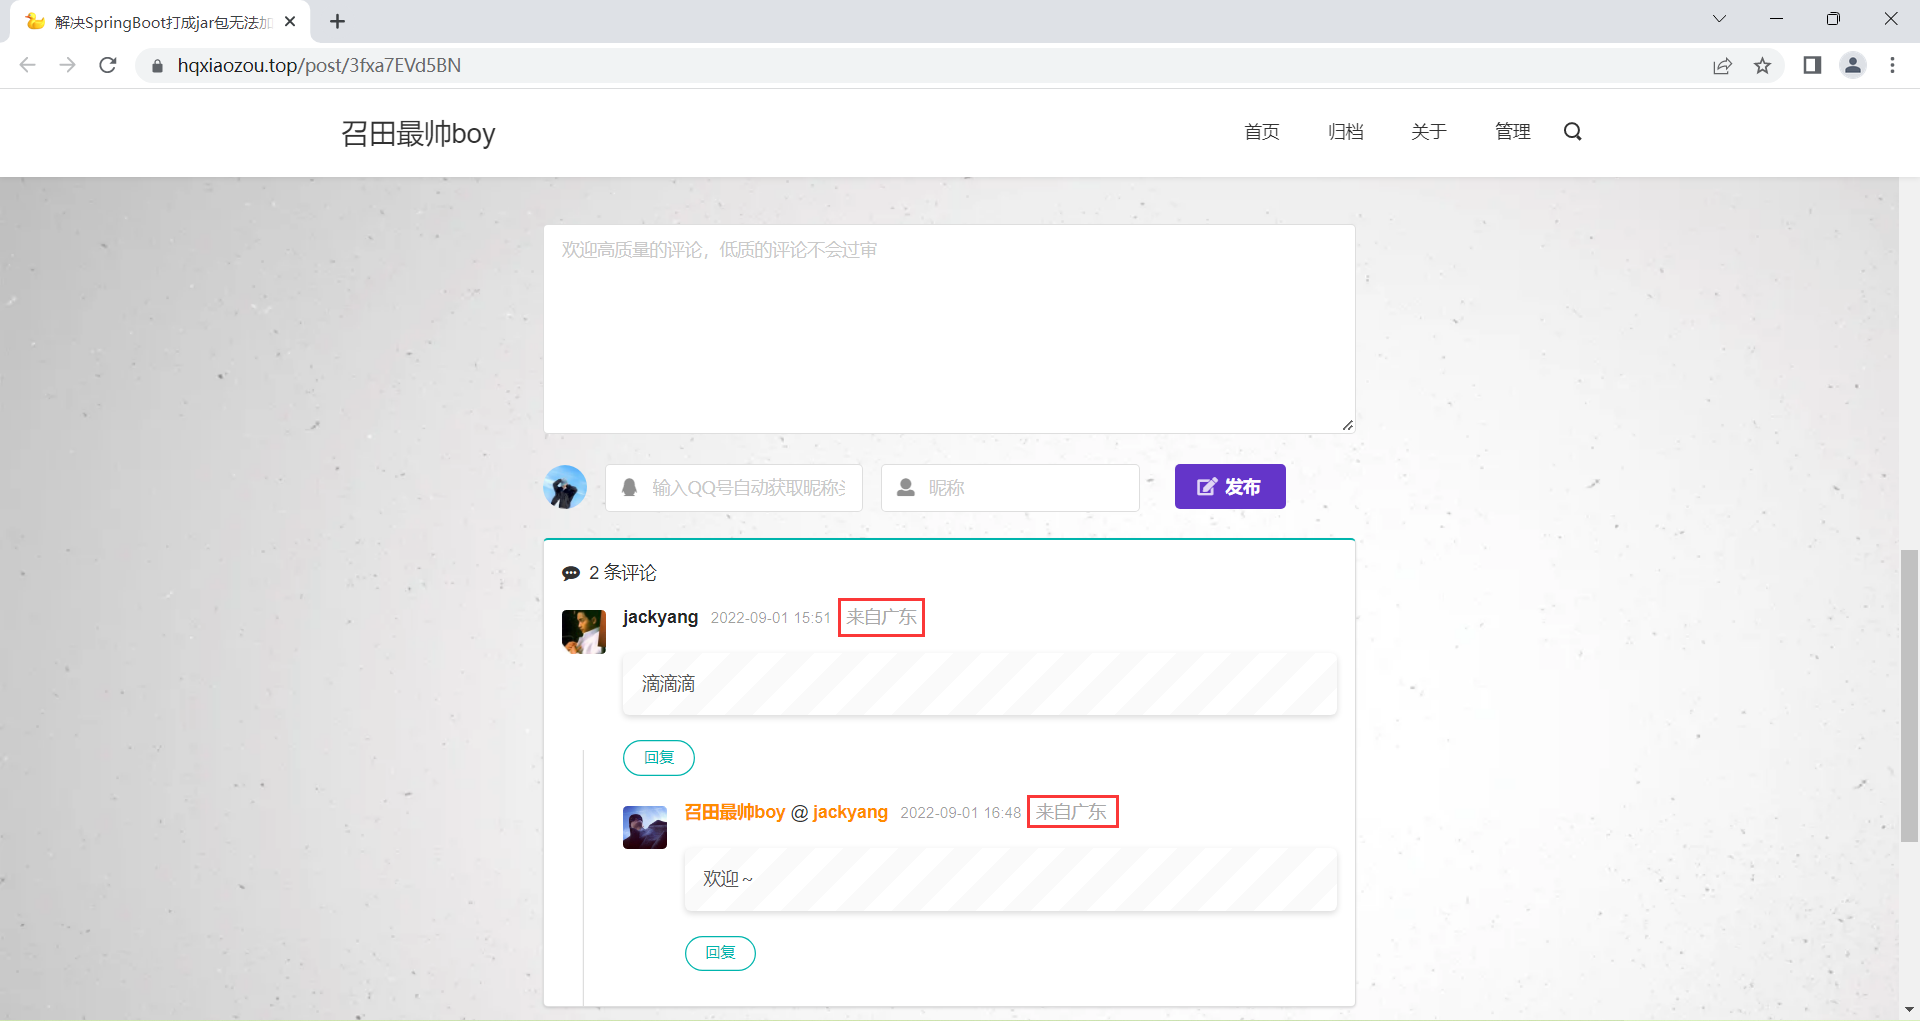
首先看一下效果图。
留言板页面:https://www.hqxiaozou.top/about
文章详情页面:https://www.hqxiaozou.top/post/3fxa7EVd5BN
后台审核页面(查看:跳转至文章详情页):

代码实现
Java 中是获取 IP 属地主要分为以下几步
- 通过 HttpServletRequest 对象,获取用户的 IP 地址
- 通过 IP 地址,获取对应的省份、城市
首先需要写一个 IP 获取的工具类,因为每一次用户的 Request 请求,都会携带上请求的 IP 地址放到请求头中。
public class IpUtil {
    public static String getIpAddr(HttpServletRequest request) {
        String ip = request.getHeader("X-Real-IP");
        if (!StringUtils.isBlank(ip) && !"unknown".equalsIgnoreCase(ip)) {
            return ip;
        }
        ip = request.getHeader("X-Forwarded-For");
        if (!StringUtils.isBlank(ip) && !"unknown".equalsIgnoreCase(ip)) {
            // 多次反向代理后会有多个IP值,第一个为真实IP。
            int index = ip.indexOf(',');
            if (index != -1) {
                return ip.substring(0, index);
            } else {
                return ip;
            }
        } else {
            return request.getRemoteAddr();
        }
    }
}
引入 maven 依赖
<!--查询ip归属地-->
<dependency>
   <groupId>org.lionsoul</groupId>
   <artifactId>ip2region</artifactId>
   <version>1.7.2</version>
</dependency>
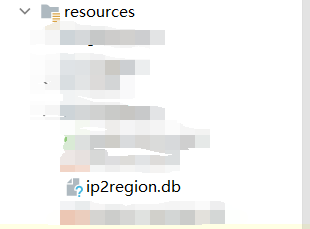
在IpUtil工具类中加载 ip2region.db 文件(ip2region.db链接:https://pan.baidu.com/s/1g5211_T4Bjp7_xxxBqurEw?pwd=xznb)
在加载的时候,需要下载仓库中的 ip2region.db 文件,然后放到 resource 目录下
然后,通过内置B-tree算法,转换用户 ip 地址
public static String getCityInfo(String ip) throws Exception {
    //获得文件流时,因为读取的文件是在打好jar文件里面,不能直接通过文件资源路径拿到文件,但是可以在jar包中拿到文件流
    ResourcePatternResolver resolver = new PathMatchingResourcePatternResolver();
    Resource[] resources = resolver.getResources("ip2region.db");
    Resource resource = resources[0];
    InputStream is = resource.getInputStream();
    File target = new File("ip2region.db");
    FileUtils.copyInputStreamToFile(is, target);
    is.close();
    if (StringUtils.isEmpty(String.valueOf(target))) {
        log.error("Error: Invalid ip2region.db file");
        return null;
    }
    DbConfig config = new DbConfig();
    DbSearcher searcher = new DbSearcher(config, String.valueOf(target));
    //查询算法
    //B-tree, B树搜索(更快)
    int algorithm = DbSearcher.BTREE_ALGORITHM;
    try {
        //define the method
        Method method;
        method = searcher.getClass().getMethod("btreeSearch", String.class);
        DataBlock dataBlock;
        if (!Util.isIpAddress(ip)) {
            log.error("Error: Invalid ip address");
        }
        dataBlock = (DataBlock) method.invoke(searcher, ip);
        String ipInfo = dataBlock.getRegion();
        if (!StringUtils.isEmpty(ipInfo)) {
            ipInfo = ipInfo.replace("|0", "");
            ipInfo = ipInfo.replace("0|", "");
        }
        return ipInfo;
    } catch (Exception e) {
        e.printStackTrace();
    }
    return null;
}
对这个方法进行一下封装,得到获取 IP 属地的信息。
public static String getIpPossession(String ip) throws Exception {
    String cityInfo = IpUtils.getCityInfo(ip);
    if (!StringUtils.isEmpty(cityInfo)) {
        cityInfo = cityInfo.replace("|", " ");
        String[] cityList = cityInfo.split(" ");
        if (cityList.length > 0) {
            // 国内的显示到具体的省
            if ("中国".equals(cityList[0])) {
                if (cityList.length > 1) {
                    return cityList[1];
                }
            }
            // 国外显示到国家
            return cityList[0];
        }
    }
    return "未知";
}
此时已经能够正常的显示 IP 属地信息了~
Controller层调用如下:
String ip = IpUtil.getIpAddr(request);
//province为解析出来的省份。
String province = IpUtil.getIpPossession(ip);
导入的包如下(按需取):
import lombok.extern.slf4j.Slf4j;
import org.apache.commons.io.FileUtils;
import org.apache.commons.lang3.StringUtils;
import org.lionsoul.ip2region.DataBlock;
import org.lionsoul.ip2region.DbConfig;
import org.lionsoul.ip2region.DbSearcher;
import org.lionsoul.ip2region.Util;
import org.springframework.context.annotation.Configuration;
import org.springframework.core.io.Resource;
import org.springframework.core.io.support.PathMatchingResourcePatternResolver;
import org.springframework.core.io.support.ResourcePatternResolver;

import javax.servlet.http.HttpServletRequest;
import java.io.File;
import java.io.InputStream;
import java.lang.reflect.Method;
Nginx配置(线上环境):
location / {
	#是监听的端口默认访问的地址,这里如果没有做tomcat的转发则会进入nginx的html目录下的index.html
    root   html;

    #这里是编写监听到的请求所转发的端口号,即tomct端口
	proxy_pass http://localhost:8080;

	#设置nginx 的默认显示页
    index  index.html index.htm;

	#用户真实ip配置
	proxy_set_header Host $host;
    proxy_set_header X-Real-IP $remote_addr;
    proxy_set_header X-Forwarded-For $proxy_add_x_forwarded_for;
}


 1109
1109


 被折叠的 条评论
为什么被折叠?
被折叠的 条评论
为什么被折叠?
 到【灌水乐园】发言


