


关于Service的知识,详见郭霖大牛的
Android Service完全解析,关于服务你所需知道的一切(上)
1. startService和bindService关系?
服务不能自己运行。一旦Activity中调用了startService()方法启动Service后,Activity就不能直接控制Service了。这时就需要bindService()把Activity和Service联系起来,之后就能在Activity中指挥Service去工作了。
startService()和bindService()都能启动Service,它们的调用顺序也会对Service产生影响,具体影响见下文。
2. startService ()时Service的生命周期
通过startService(),Service会经历 onCreate() –> onStart() 启动Service。然后stopService()的时候直接onDestroy()。如果调用者直接退出而没有调用stopService(),那么Service会一直在后台运行。 注意在Service的一个生命周期之内只会调用一次onCreate()方法,stopService()之前若多次startService()则只会调用onStart()方法。
3. bindService()时Service的生命周期
如果打算采用bindService()方法启动服务,在服务未被创建时,系统会先调用服务的onCreate()方法,接着调用onBind()方法。这个时候调用者和服务绑定在一起,调用者unbindService()退出了,系统就会先调用服务的onUnbind()方法,接着调用onDestroy()方法。多次调用bindService()方法并不会导致多次创建服务及绑定(也就是说onCreate()和onBind()方法并不会被多次调用)。
如果bindService()之前Service已经在运行了,那么这是调用unbindService()只会onUnbind()而不会onDestory()。
4. 实例
首先做一个测试用的Service,在各种on方法中logd。
注:onStart()已经被onStartCommand()代替,官方文档见 [http://developer.android.com/reference/android/app/Service.html#onStart%28android.content.Intent,%20int%29]。
先做一个TestService类,记得要在AndroidManifest注册。
public class TestService extends Service {
    private static final String TAG="TestService";
    private TestBinder mBinder =new TestBinder();
    class TestBinder extends Binder{
    }

    @Override
    public int onStartCommand(Intent intent, int flags, int startId) {
        Log.d(TAG, "onStartCommand");
        return super.onStartCommand(intent, flags, startId);
    }

    @Override
    public void onCreate() {
        Log.d(TAG, "onCreate ");
        super.onCreate();
    }

    @Override
    public void onDestroy() {
        Log.d(TAG, "onDestroy ");
        super.onDestroy();
    }

    @Nullable
    @Override
    public IBinder onBind(Intent intent) {
        Log.d(TAG, "onBind ");
        return mBinder;
    }

    @Override
    public void onRebind(Intent intent) {
        super.onRebind(intent);
        Log.d(TAG, "onRebind ");
    }

    @Override
    public boolean onUnbind(Intent intent) {
        Log.d(TAG, "onUnbind ");
        return super.onUnbind(intent);
    }
}
然后主界面设置4个相应的按钮,布局文件相当简单:
<LinearLayout
    android:layout_width="match_parent"
    android:layout_height="wrap_content"
    android:orientation="vertical"
    xmlns:android="http://schemas.android.com/apk/res/android">

    <Button
        android:id="@+id/btnStart"
        android:layout_width="match_parent"
        android:layout_height="wrap_content"
        android:text="StartService"/>
    <Button
        android:id="@+id/btnStop"
        android:layout_width="match_parent"
        android:layout_height="wrap_content"
        android:text="StopService"/>
    <Button
        android:id="@+id/btnBind"
        android:layout_width="match_parent"
        android:layout_height="wrap_content"
        android:text="bindService"/>
    <Button
        android:id="@+id/btnUnbind"
        android:layout_width="match_parent"
        android:layout_height="wrap_content"
        android:text="unbindService"/>
</LinearLayout>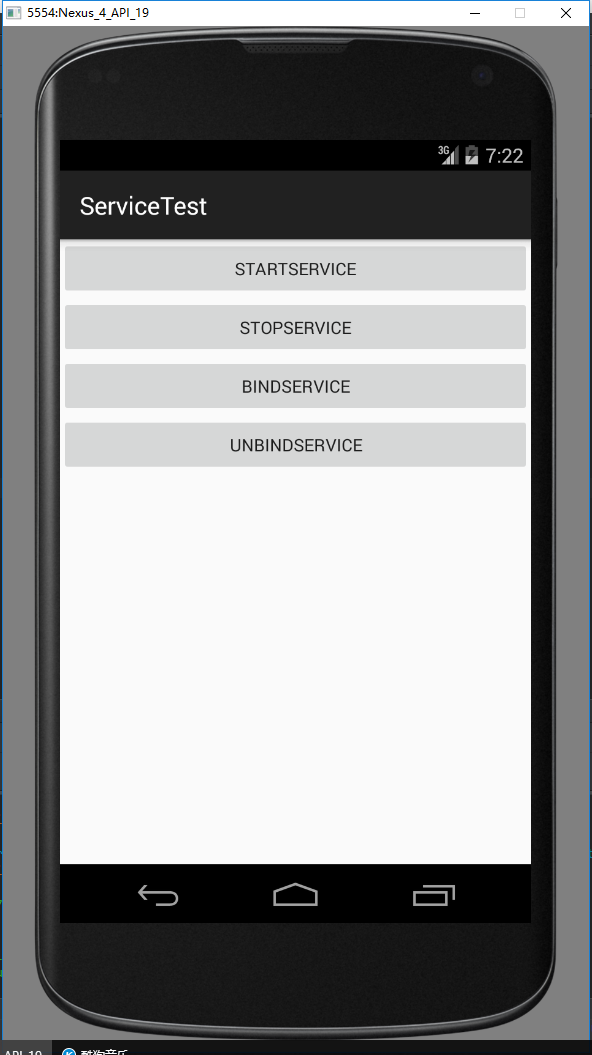
MainActivity:
package example.hp.com.servicetest;

import android.content.ComponentName;
import android.content.Intent;
import android.content.ServiceConnection;
import android.os.IBinder;
import android.support.v7.app.AppCompatActivity;
import android.os.Bundle;
import android.view.Menu;
import android.view.MenuItem;
import android.view.View;
import android.widget.Button;

public class MainActivity extends AppCompatActivity implements View.OnClickListener {

    private Button btnStart;
    private Button btnStop;
    private Button btnBind;
    private Button btnUnbind;

    private ServiceConnection connection=new ServiceConnection() {
        @Override
        public void onServiceConnected(ComponentName name, IBinder service) {
        }

        @Override
        public void onServiceDisconnected(ComponentName name) {
        }
    };


    @Override
    protected void onCreate(Bundle savedInstanceState) {
        super.onCreate(savedInstanceState);
        setContentView(R.layout.activity_main);

        btnStart=(Button)findViewById(R.id.btnStart);
        btnStop=(Button)findViewById(R.id.btnStop);
        btnBind=(Button)findViewById(R.id.btnBind);
        btnUnbind=(Button)findViewById(R.id.btnUnbind);

        btnStart.setOnClickListener(this);
        btnStop.setOnClickListener(this);
        btnBind.setOnClickListener(this);
        btnUnbind.setOnClickListener(this);
    }

    @Override
    public void onClick(View v) {
        switch (v.getId()){
            case R.id.btnStart:
                Intent startIntent=new Intent(this,TestService.class);
                startService(startIntent);
                break;
            case R.id.btnStop:
                Intent stopIntent=new Intent(this,TestService.class);
                stopService(stopIntent);
                break;
            case R.id.btnBind:
                Intent bindIntent=new Intent(this,TestService.class);
                bindService(bindIntent,connection,BIND_AUTO_CREATE);
                break;
            case R.id.btnUnbind:
                unbindService(connection);
                break;
            default:
                break;
        }
    }
}
4.1 多次startService()+stopService()
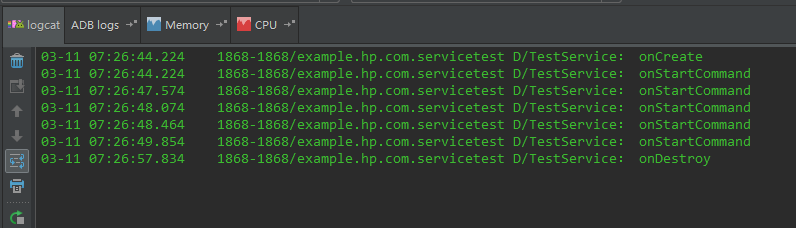
可以看到一个生命周期内,onCreate()只会调用一次,多次startService()只会调用onStartCommand()。
4.2 startService()+bindService()+unbindService()
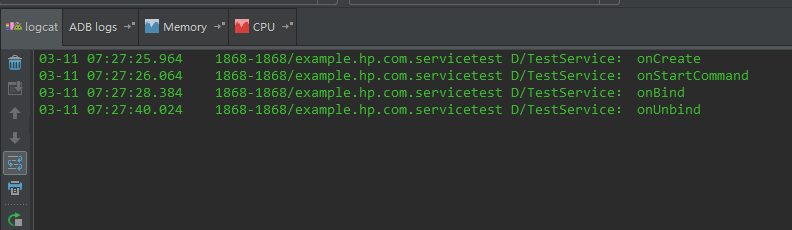
没有调用onDestory(),说明这时Service还在运作。
4.3 startService()+bindService()+stopService()(+unbindService())
无法调用stopService(),必须使用unbindService(),结果如下:
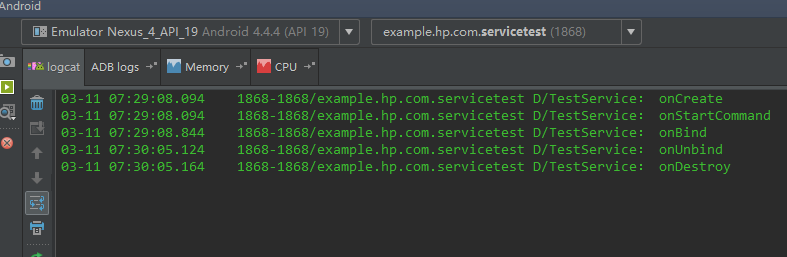
与上面不同的是,这次调用了onDestory()。应该可以理解为Service绑定后,必须等绑定者退出后他才能stopService()。
4.4 单独bindService()+unbindService()

注意到最后unbind的时候调用了onDestory()。这个与上面先startService()再bind情况不同。
另外,多次unbind会导致异常。


 2548
2548

 被折叠的 条评论
为什么被折叠?
被折叠的 条评论
为什么被折叠?
 到【灌水乐园】发言


