


文章目录
写在前面
1、安装vue前你需要先安装node.js : https://nodejs.org/zh-cn/download
请安装版本 node.js>=6,npm>3
2、如果你的npm下载依赖速度很慢,请配置淘宝镜像
npm config set registry https://registry.npm.taobao.org     // 配置淘宝镜像
npm config get registry                                     // 查看配置的是哪个地址
3、本文使用的是vue cli 2, 编码工具是vsCode
4、vue开发尽量遵循风格指南,特别是命名,避免一些冲突:https://v2.cn.vuejs.org/v2/style-guide
5、这个网站可以模拟后端接口(在后端接口还没有出来的时候用):http://rap2.taobao.org/account/login
1、创建一个vue项目
安装之前,如果你已经安装了vue 3,下面是卸载相关指令。
npm uninstall -g @vue/cli     // 卸载vue3
npm uninstall -g vue-cli     // 卸载vue2
vue -V                       // 查看vue版本
安装vue,并创建vue项目
npm install -g vue-cli // 安装vue
vue init webpack my-project // 创建vue项目my-project,模板是webpack
cd my-project // 进入项目目录
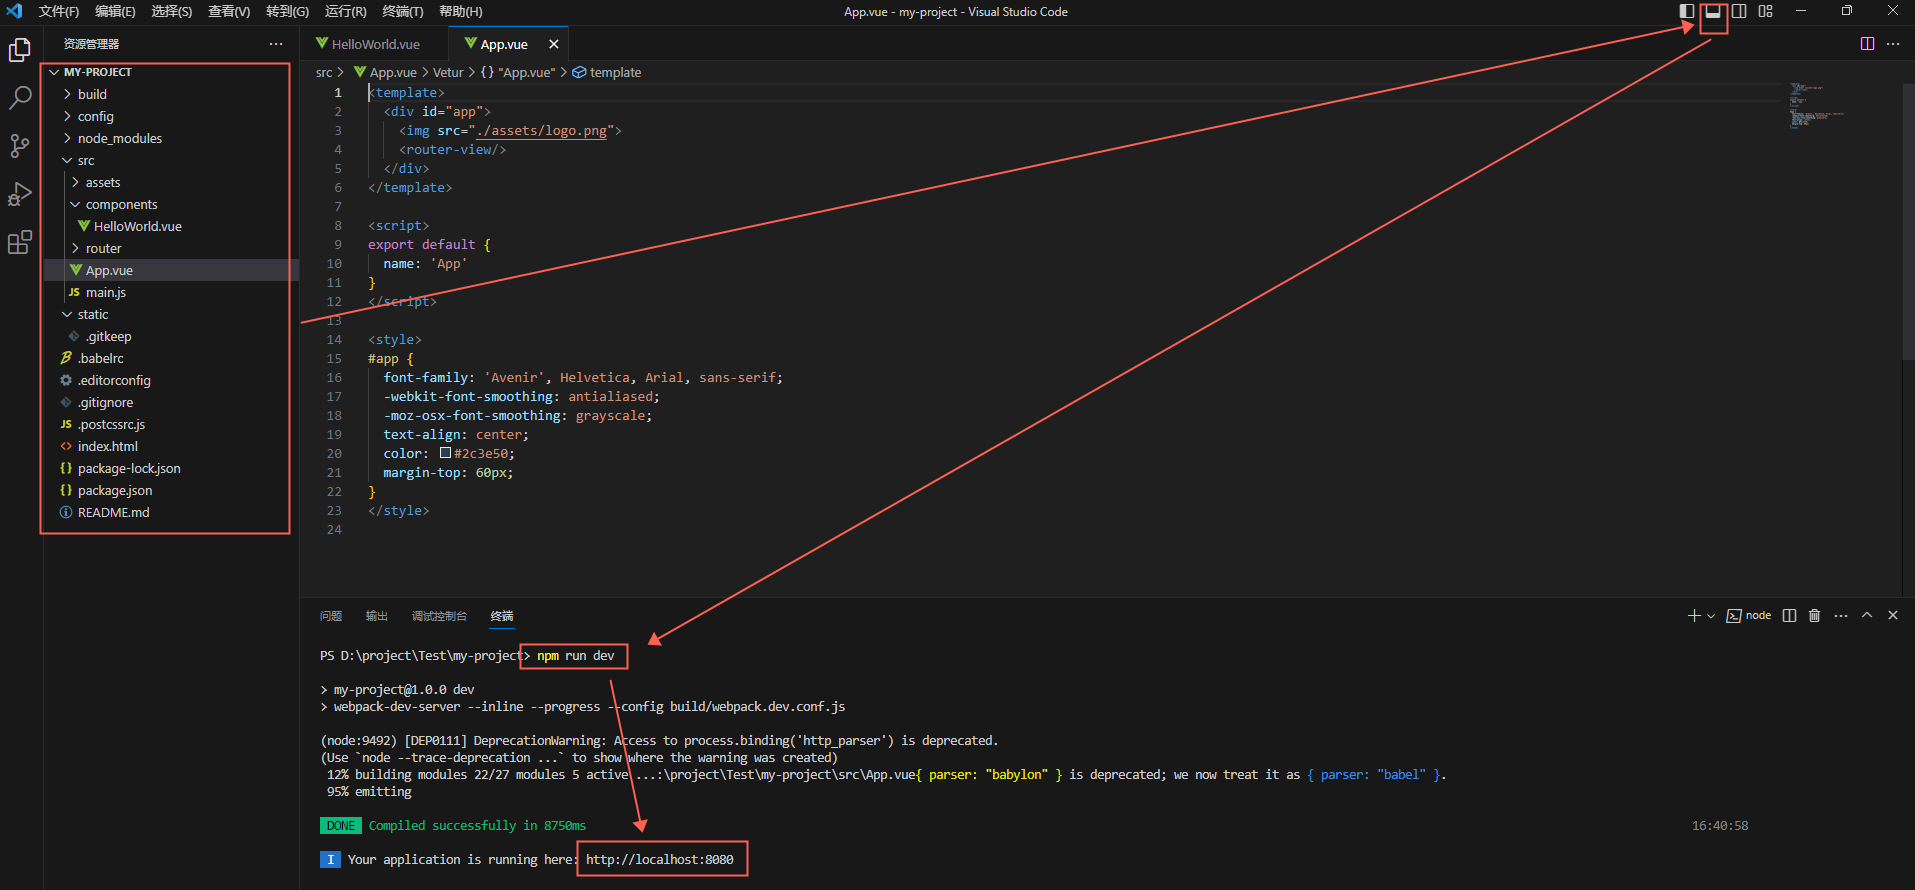
npm run dev // 启动项目
创建项目时有下面几个选项,大多数可以直接按回车
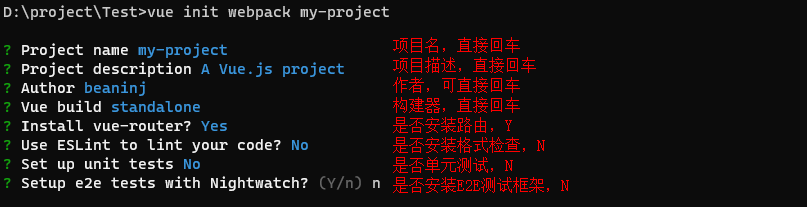
最后还有一个是否要为你运行“npm install”,选择“yes,use npm”
详见:https://blog.csdn.net/soulman1234/article/details/106021143
用vsCode打卡项目文件夹,启动后用浏览器访问 http://localhost:8080,就可以看到页面了
2、项目结构

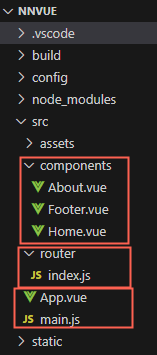
主要关注 components 文件夹(组件) 和 index.js(路由)
2.1、写两个页面试试
在components 下新写三个组件:Footer.vue、About.vue、Home.vue
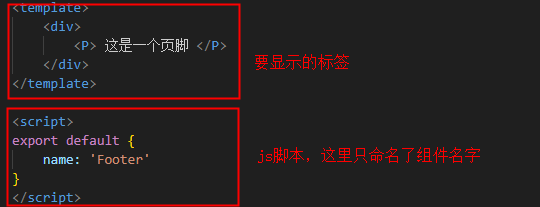
Footer.vue (显示页脚)
<template>
    <div>
        <P> 这是一个页脚 </P>
    </div>
</template>

<script>
export default {
    name: 'Footer'
}
</script>
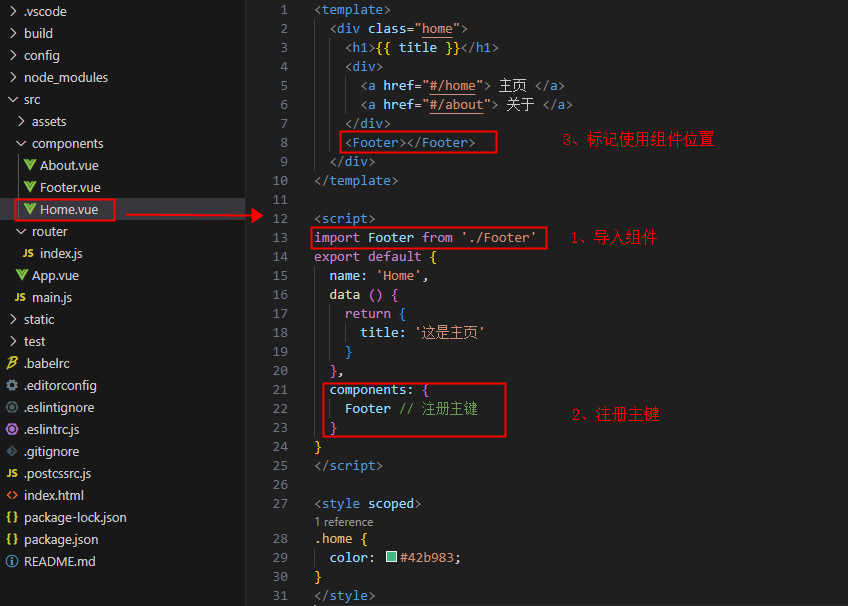
Home.vue(主页)
<template>
  <div class="home">
    <h1>{{ title }}</h1>
    <div>
      <a href="#/home"> 主页 </a>
      <a href="#/about"> 关于 </a>
    </div>
  </div>
</template>

<script>
import Footer from './Footer'
export default {
  name: 'Home',
  data () {
    return {
      title: '这是主页'
    }
  },
  components: {
    Footer // 注册主键
  }
}
</script>

<style scoped>
.home {
  color: #42b983;
}
</style>
About.vue (关于页面)
<template>
  <div class="about">
    <h1>{{ title }}</h1>
    <div class="about">
      <a href="#/home"> 主页 </a>
      <a href="#/about"> 关于 </a>
    </div>
    <Footer></Footer>
  </div>
</template>

<script>
import Footer from './Footer'

export default {
  name: 'About',
  data () {
    return {
      title: '关于我们'
    }
  },
  methods: {

  },
  components: {
    Footer // 注册主键
  }
}
</script>
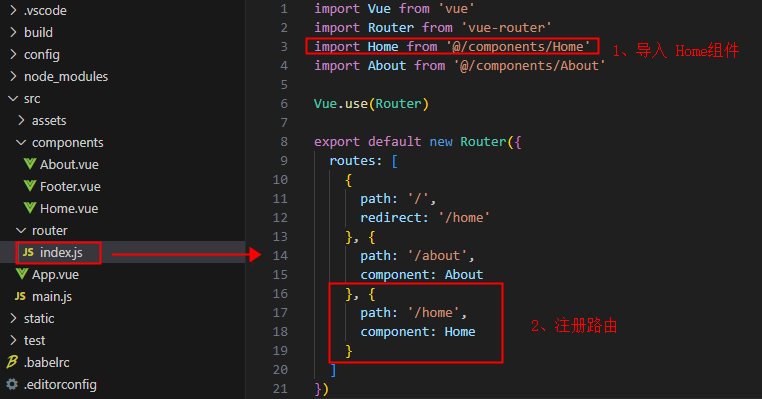
在index.js里面配置 About和Home 的路由
import Vue from 'vue'
import Router from 'vue-router'
import Home from '@/components/Home'
import About from '@/components/About'

Vue.use(Router)

export default new Router({
  routes: [
    {
      path: '/',
      redirect: '/home'
    }, {
      path: '/about',
      component: About
    }, {
      path: '/home',
      component: Home
    }
  ]
})
下面是新的目录结构(我把新建项目时生成的HelloWorld.vue删除了)
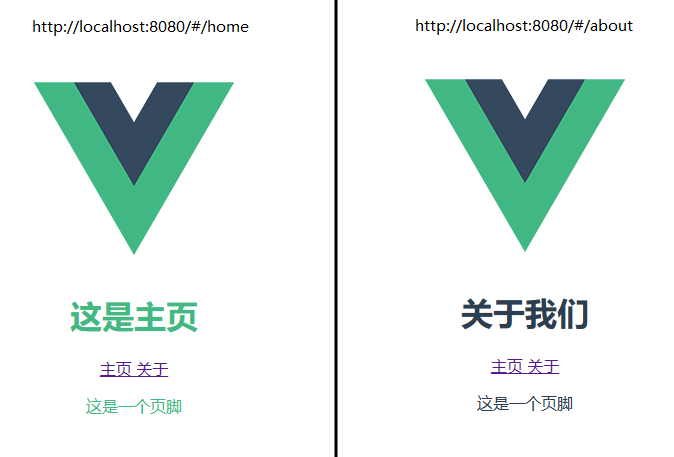
输入npm run dev启动,访问 http://localhost:8080
2.2、代码解释
Footer.vue 页脚
在Home组件里面引用 Footer组件
在路由里面注册 /home 路径
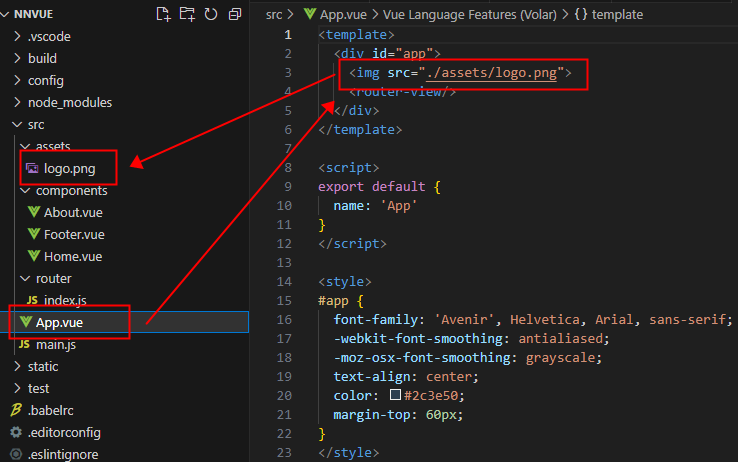
图片的引用
3、前后端对接
以下接口来自 http://rap2.taobao.org/ 模拟接口
3.1、使用 axios 发起简单请求
安装
npm install axios
在index.js中导入axios
import axios from 'axios'
Vue.prototype.$http = axios   // 替换vue内部的$http

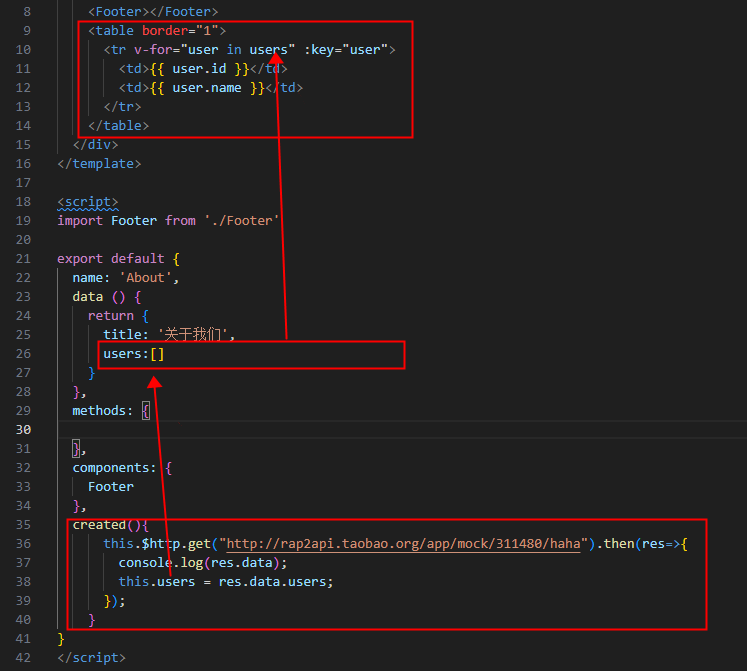
请求示例:(About.vue)
<template>
  <div class="about">
    <h1>{{ title }}</h1>
    <div class="about">
      <a href="#/home"> 主页 </a>
      <a href="#/about"> 关于 </a>
    </div>
    <Footer></Footer>
    <table border="1">
      <tr v-for="(user, index) in users" :key="index">
        <td>{{ user.id }}</td>
        <td>{{ user.name }}</td>
      </tr>
    </table>
  </div>
</template>

<script>
import Footer from './Footer'

export default {
  name: 'About',
  data () {
    return {
      title: '关于我们',
      users:[]
    }
  },
  methods: {

  },
  components: {
    Footer
  },
  created(){
      this.$http.get("http://rap2api.taobao.org/app/mock/311480/haha").then(res=>{
        console.log(res.data);
        this.users = res.data.users;
      });
    }
}
</script>
图解
3.2、 路由 的使用
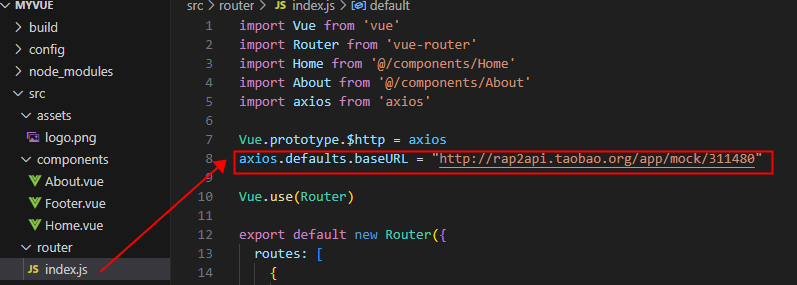
3.2.1、配置默认地址前缀
在index.js里面加入以下配置
axios.defaults.baseURL = "http://XXXXX:8081"
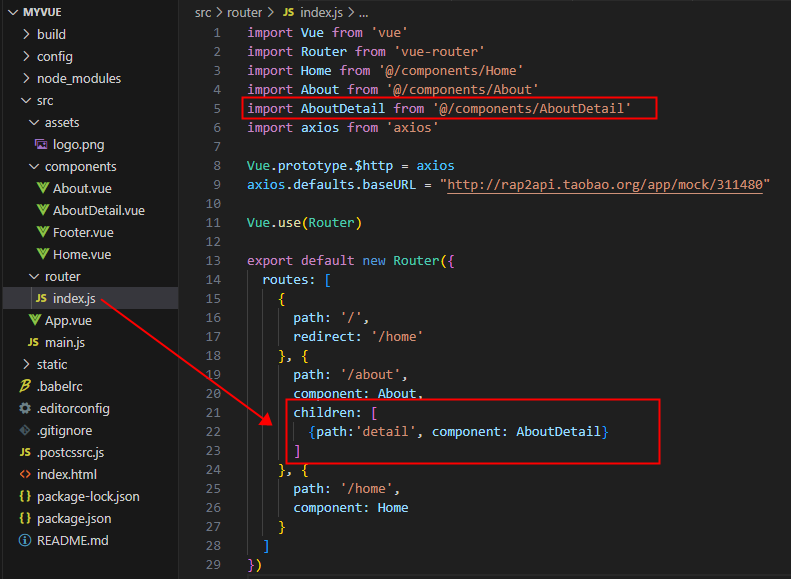
3.2.2、添加子路由
新建组件 AboutDetail.vue
<template>
    <div>
      <p>{{ info }}</p>
    </div>
 </template>

  <script>
  export default {
    data () {
      return {
        info: '这是一段关于网站的介绍'
      }
    }
  }
  </script>
在index.js中添加子路由
在 About.vue中引用
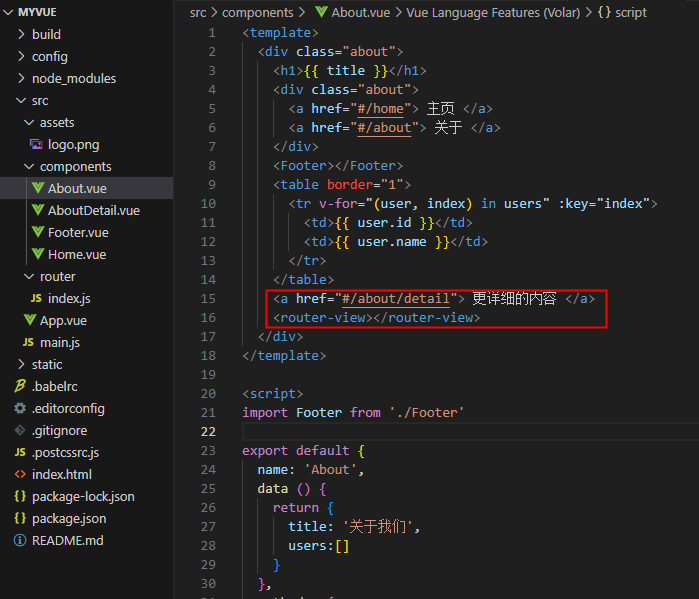
3.2.3、切换路由
3.2.4、监听路由
第一种全局监控,每次进入页面之前都会触发,可以根据需求而定操作。
router.beforeEach(){
	//你的操作
}
第二种就是写在页面里面的,这种配合vuex,或者事件管理会更方便,当然这个也是根据需求而定。
data(){
	return {}
},
computed{},
mounted{},
watch{
	'$route' (to, from) {
	      console.log(to)
	      console.log(from)
	}
}
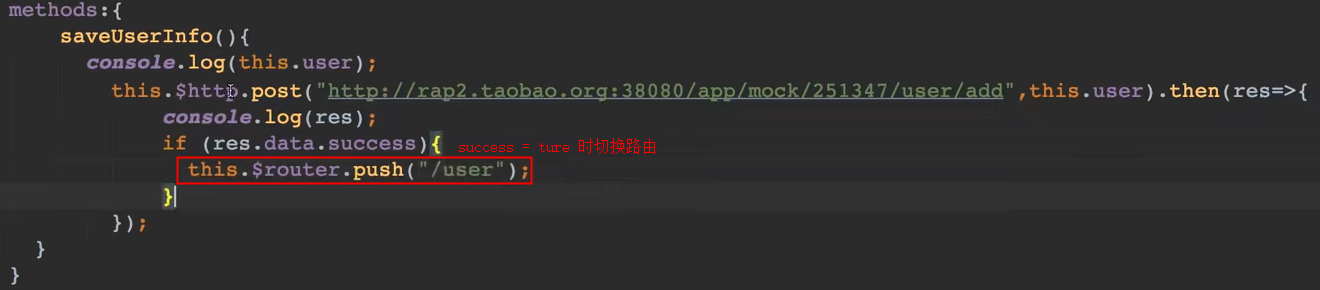
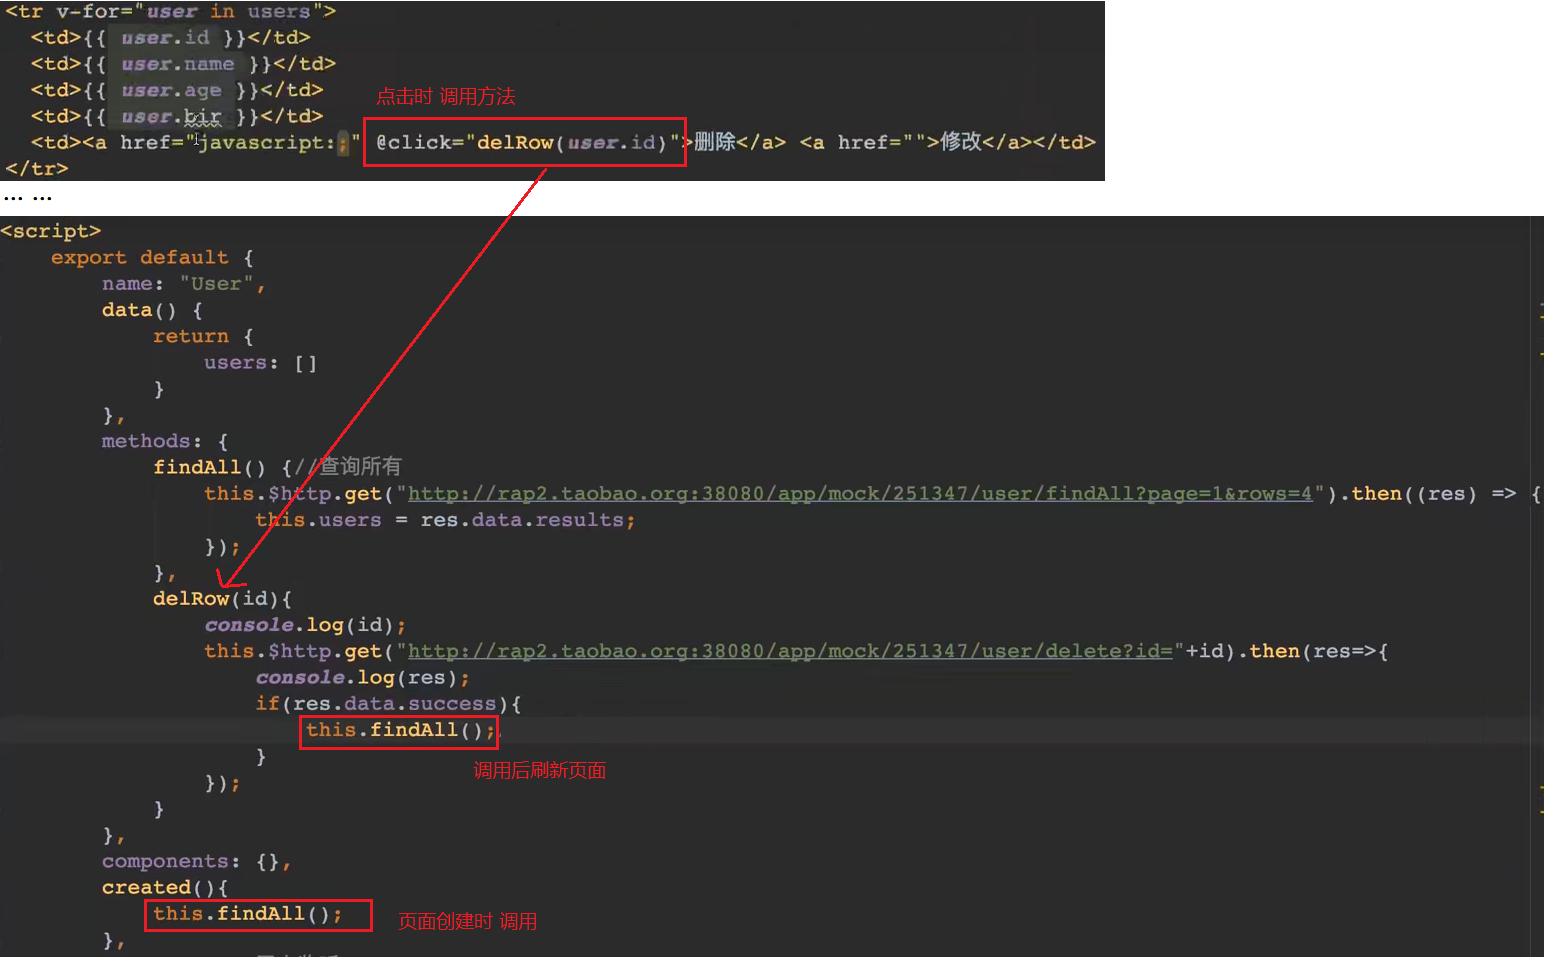
3.2.5、方法调用 与 页面刷新
3.2.6、this.$route 获取路由信息
export default {
  methods: {
    getPath() {
      const path = this.$route.path; // 获取当前路由路径
    },
    getName() {
      const name = this.$route.name; // 获取当前路由名称
    },
    getMeta() {
      const meta = this.$route.meta; // 获取当前路由元数据
    },
    redirect() {
      this.$router.push('/new-url'); // 重定向到指定路由
    },
    switchTo() {
      this.$router.push('/another-url'); // 切换到指定路由
    },
    push() {
      this.$router.push('/new-url'); // 添加路由到历史记录中
    },
    replace() {
      this.$router.replace('/another-url'); // 替换当前路由为指定路由
    },
    go(n) {
      this.$router.go(n); // 跳转到历史记录中的第 n 个路由
    },
    history() {
       return this.$router.history; // 访问当前路由的历史记录
    },
   	getQueryParams() {
      const params = this.$route.query; // 获取 URL 查询参数的值
      console.log(queryParams); // 输出:{ key1: 'value1', key2: 'value2' }
    },
    getParams() {
      const params = this.$route.params; // 获取 URL 参数的值
      console.log(pathParams); // 输出:['page', '1', 'John']
    },
}
3.3、 axios 的使用
3.3.1、post请求
const obj={
  id:1,
  name: 'name'
}
this.$http.post('url接口地址',obj).then((res)=>{
  	console.log(res)
}),
3.3.2、上传文件
<form>
    <input type="text" value="" v-model="name" placeholder="请输入用户名">
    <input type="text" value="" v-model="age" placeholder="请输入年龄">
    <input type="file" @change="getFile($event)">
    <button @click="submitForm($event)">提交</button>
</form>
	data: {
          name: '',
          age: '',
          file: ''
        },
        methods: {
          getFile(event) {
            this.file = event.target.files[0];
            console.log(this.file);
          },
          submitForm(event) {
            event.preventDefault();
            let formData = new FormData();
            formData.append('name', this.name);
            formData.append('age', this.age);
            formData.append('file', this.file);

            let config = {
              headers: {
                'Content-Type': 'multipart/form-data'
              }
            }

            this.$http.post('http://127.0.0.1:8081/upload', formData, config).then(function (response) {
              if (response.status === 200) {
                console.log(response.data);
              }
            })
          }
        }
4、Vue函数生命周期
<script>
export default {
  // 在实例初始化之后,数据观测和事件配置之前被调用
  beforeCreate(){
    console.log('beforeCreate----创建前');
  },
  // 实例已经创建完成之后被调用
  created(){
    console.log('created----创建之后');
  },
  // 页面准备挂载时候被调用,此时相关的渲染函数首次被调用
  beforeMount(){
    console.log('beforeMount----挂载开始');
  },
  // 挂在完成,也就是模板中的HTML渲染到HTML页面中,此时一般可以做一些ajax操作,mounted只会执行一次。
  mounted(){
    console.log('mounted----挂载完成');
  },
  // 数据更新之前被调用
  beforeUpdate(){
    console.log('beforeUpdate----更新之前被调用');
  },
  //数据更改导致的虚拟 DOM 重新渲染和打补丁,在这之后会调用该钩子
  updated(){
    console.log('updated----更新后');
  },
  // 我们将要销毁整个页面或实例时调用
  beforeDestroy(){
    console.log('beforeDestroy----销毁前');
  },
  // 我们的整个页面或实例被销毁之后调用
  destroyed(){
    console.log('destroyed----销毁后');
  },
  // 被 keep-alive 缓存的组件激活时调用
  activated(){
    console.log('activated');
  },
  //  deactivated配合keep-alive来使用
  //  使用了keep-alive就不会调用beforeDestory和destoryed钩子了
  //  因为组件没有被销毁,而是被缓存起来了
  //  所以deactivated钩子可以看做是beforeDestory和destoryed的替代
  deactivated(){
    console.log('deactivated');
  }
}
</script>
5、打包
打包指令
npm run build
打包完成项目目录下会多一个dist目录
把整个dist放到tomcat或Nginx服务下就可以访问项目
5.1、放到spring boot中运行
yml中添加配置
spring:
  web:
    resources:
      static-locations: classpath:/static/
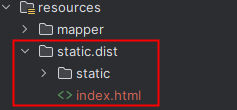
把整个dist文件放到 resources/static/ 中
然后修改index.html中资源路径(前面加上 /项目路径/dist )
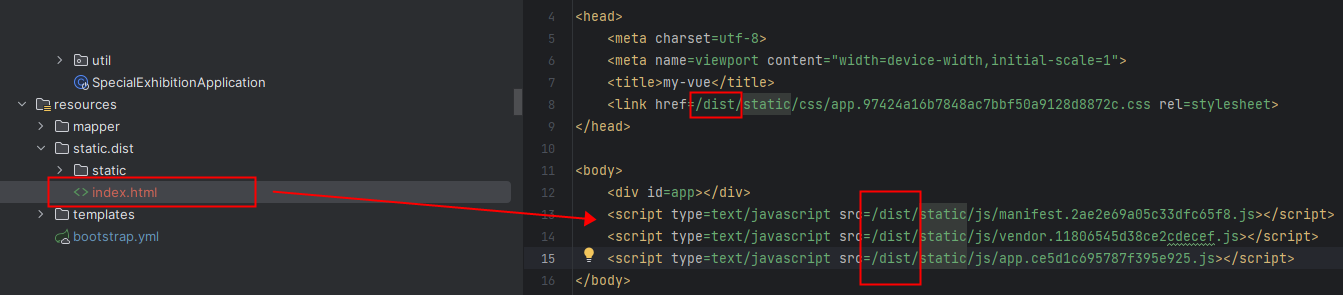
启动,访问
http://127.0.0.1:8080/dist/index.html


 2684
2684


 被折叠的 条评论
为什么被折叠?
被折叠的 条评论
为什么被折叠?
 到【灌水乐园】发言


