


官网demo地址:
 这篇讲的是如何使用聚合处理大量点数据。
为什么会用聚合呢?当我们在地图上加载了大量矢量点位数据之后,地图就会卡顿,而在地图层级缩放层级较小的时候根本也看不见点位的具体信息。这时候,使用聚合就是一个比较好的解决方案。地图缩小的时候它会将紧挨着的许多点位合并成一个矢量点,放大到一定程度才会显示具体点位信息。
首先,来生成一些点位坐标数组
 const count = 20000;
      const features = new Array(count);
      const e = 4500000;
      for (let i = 0; i < count; ++i) {
        const coordinates = [
          2 * e * Math.random() - e,
          2 * e * Math.random() - e,
        ];
        features[i] = new Feature(new Point(coordinates));
      }
此时,features里面就是两万个点位的feature。然后把它们加载到矢量数据源上
const source = new VectorSource({
        features: features,
      });
接着创建聚合类,Cluster的source是一个矢量数据源。distance表示的是feature与feature之间的距离,因为这个示例中有一个滑块动态设置间距,所以这里要设置一下minDistance最小距离。
 const clusterSource = new Cluster({
        distance: this.distanceInput,
        minDistance: this.minDistanceInput,
        source: source,
      });
然后把source加载图层上。
    this.clusterLayer = new VectorLayer({
        source: clusterSource,
      });
来看下效果:
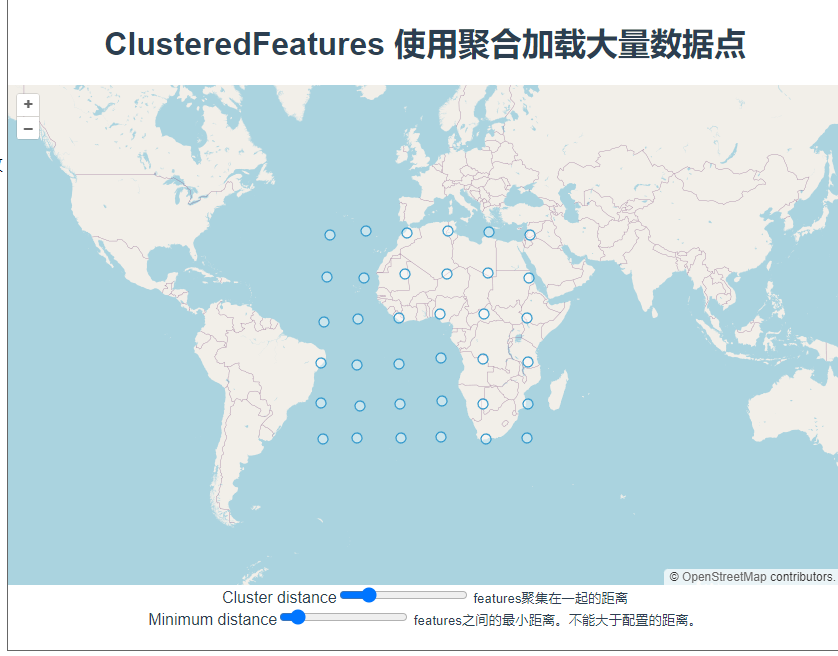
点位都出来了,接下来加点样式配置。在实例化VectorLayer时加一个style配置,函数里会返回每一个feature,每一个feature上都有一个features属性,记录着它的下级features数组,聚合的原理就是把几个相邻的点通过计算合成一个feature,我猜features里面记录的就是合成这个feature所用的数组。style后面的这个函数是个高频触发的函数,地图稍微移动一下都会触发,所以这里的使用styleCache对象做了缓存效果,以每个feature的features数组的长度作为key,这样就不用每次都重新new Style了。
const styleCache = {};
      this.clusterLayer = new VectorLayer({
        source: clusterSource,
        style: function (feature) {
          const size = feature.get("features").length;
          let style = styleCache[size];
          if (!style) {
            style = new Style({
              image: new CircleStyle({
                radius: 10,
                stroke: new Stroke({
                  color: "#fff",
                }),
                fill: new Fill({
                  color: "#3399CC",
                }),
              }),
              text: new Text({
                text: size.toString(),
                fill: new Fill({
                  color: "#fff",
                }),
              }),
            });
            styleCache[size] = style;
          }
          return style;
        },
      });
注册地图点击事件,点击每一个feature就会把地图视角定位到点击的feature处。
this.map.on("click", (e) => {
this.clusterLayer.getFeatures(e.pixel).then((clickedFeatures) => {
if (clickedFeatures.length) {
// Get clustered Coordinates
console.log("clickedFeatures[0]", clickedFeatures);
const features = clickedFeatures[0].get("features");
// console.log('features',features);
const polygon = clickedFeatures[0].getGeometry();
if (features.length > 1) {
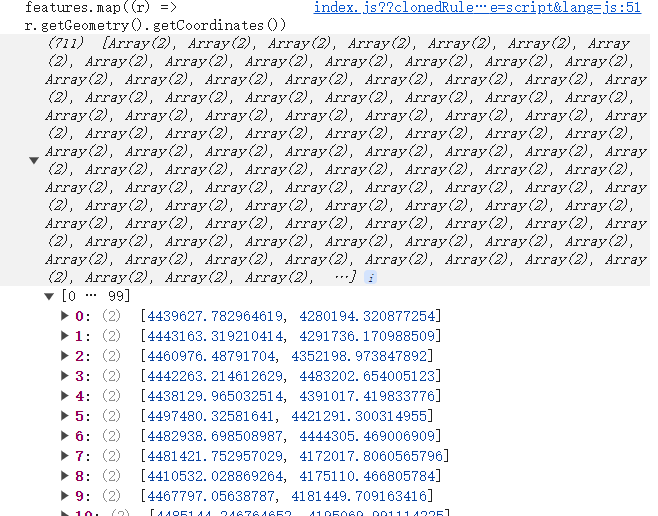
console.log(
"features.map((r) => r.getGeometry().getCoordinates())",
features.map((r) => r.getGeometry().getCoordinates())
);
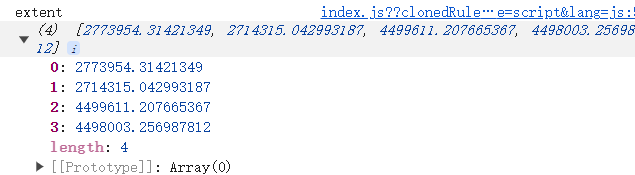
const extent = boundingExtent(
features.map((r) => r.getGeometry().getCoordinates())
);
this.map
.getView()
.fit(extent, { duration: 1000, padding: [50, 50, 50, 50] });
}
}
});
});features.map((r) => r.getGeometry().getCoordinates()) 这段获取了组成这个feature用到的所有坐标数组。
使用boundingExtent(坐标数组)方法,可以计算出extent边界值。
最后再使用fit方法进行定位,duration表示动画时间。
this.map.getView().fit(extent, { duration: 1000, padding: [50, 50, 50, 50] });小细节:
fit方法的第一个参数可以接受extent(边界值)或者geometry(几何形状)。
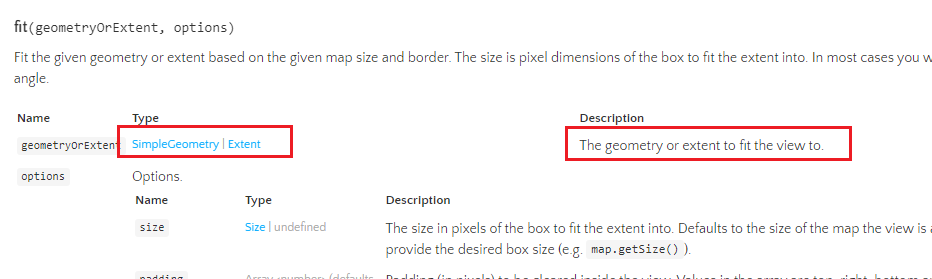
而这里为什么要用extent而不是geometry呢?使用geometry定位看看。
 const polygon = clickedFeatures[0].getGeometry();
 this.map.getView().fit(extent, { duration: 1000, padding: [50, 50, 50, 50] });
额。。。定位到了一个不知道的地方。
这是因为聚合里面,图层上的feature本来就是根据缩放层级变化的,定位过程中刚刚点击的那个feature已经不见了。而且这里我们希望地图视角移动到一个刚好能显示所有下级features的位置。所以这里使用extent更为合适。
完整代码:
<template>
  <div class="box">
    <h1>ClusteredFeatures 使用聚合加载大量数据点</h1>
    <div id="map"></div>
    <form>
      <div class="form-group">
        <label for="distance" class="col-form-label pb-0"
          >Cluster distance</label
        >
        <input
          id="distance"
          class="form-range"
          type="range"
          min="0"
          max="200"
          step="1"
          @change="distanceInputFun"
          v-model.number="distanceInput"
        />
        <small class="form-text text-muted"> features聚集在一起的距离 </small>
      </div>
      <div class="form-group">
        <label for="min-distance" class="col-form-label pb-0"
          >Minimum distance</label
        >
        <input
          id="min-distance"
          class="form-range"
          type="range"
          min="0"
          max="200"
          step="1"
          @change="minDistanceInputFun"
          v-model.number="minDistanceInput"
        />
        <small class="form-text text-muted">
          features之间的最小距离。不能大于配置的距离。
        </small>
      </div>
    </form>
  </div>
</template>

<script>
import Feature from "ol/Feature.js";
import Map from "ol/Map.js";
import Point from "ol/geom/Point.js";
import View from "ol/View.js";
import { Circle as CircleStyle, Fill, Stroke, Style, Text } from "ol/style.js";
import { Cluster, OSM, Vector as VectorSource } from "ol/source.js";
import { Tile as TileLayer, Vector as VectorLayer } from "ol/layer.js";
import { boundingExtent } from "ol/extent.js";

export default {
  name: "",
  components: {},
  data() {
    return {
      map: null,
      clusterLayer: null,
      distanceInput: 40,
      minDistanceInput: 20,
    };
  },
  computed: {},
  created() {},
  mounted() {
    this.initMap();
    this.addUnderLayer();
    this.addClusterLayer();
    this.map.on("click", (e) => {
      this.clusterLayer.getFeatures(e.pixel).then((clickedFeatures) => {
        if (clickedFeatures.length) {
          // Get clustered Coordinates
          console.log("clickedFeatures[0]", clickedFeatures);
          const features = clickedFeatures[0].get("features");
          //   console.log('features',features);

          if (features.length > 1) {
            console.log(
              "features.map((r) => r.getGeometry().getCoordinates())",
              features.map((r) => r.getGeometry().getCoordinates())
            );
            const extent = boundingExtent(
              features.map((r) => r.getGeometry().getCoordinates())
            );
            const polygon = clickedFeatures[0].getGeometry();
            this.map.getView().fit(extent, { duration: 0, padding: [50, 50, 50, 50] });
          }
        }
      });
    });
  },
  methods: {
    distanceInputFun() {
      this.clusterLayer
        .getSource()
        .setDistance(parseInt(this.distanceInput, 10));
    },
    minDistanceInputFun() {
      this.clusterLayer
        .getSource()
        .setDistance(parseInt(this.minDistanceInput, 10));
    },
    addClusterLayer() {
      const count = 20000;
      const features = new Array(count);
      const e = 4500000;
      for (let i = 0; i < count; ++i) {
        const coordinates = [
          2 * e * Math.random() - e,
          2 * e * Math.random() - e,
        ];
        features[i] = new Feature(new Point(coordinates));
      }
      const source = new VectorSource({
        features: features,
      });

      const clusterSource = new Cluster({
        distance: this.distanceInput,
        minDistance: this.minDistanceInput,
        source: source,
      });

      const styleCache = {};
      this.clusterLayer = new VectorLayer({
        source: clusterSource,
        style: function (feature) {
          const size = feature.get("features").length;
          let style = styleCache[size];
          if (!style) {
            style = new Style({
              image: new CircleStyle({
                radius: 10,
                stroke: new Stroke({
                  color: "#fff",
                }),
                fill: new Fill({
                  color: "#3399CC",
                }),
              }),
              text: new Text({
                text: size.toString(),
                fill: new Fill({
                  color: "#fff",
                }),
              }),
            });
            styleCache[size] = style;
          }
          return style;
        },
      });
      this.map.addLayer(this.clusterLayer);
    },
    addUnderLayer() {
      const raster = new TileLayer({
        source: new OSM(),
      });
      this.map.addLayer(raster);
    },
    initMap() {
      this.map = new Map({
        layers: [],
        target: "map",
        view: new View({
          center: [0, 0],
          zoom: 2,
        }),
      });
    },
  },
};
</script>

<style lang="scss" scoped>
#map {
  width: 100%;
  height: 500px;
}
.box {
  height: 100%;
}
</style>


 2364
2364

 被折叠的 条评论
为什么被折叠?
被折叠的 条评论
为什么被折叠?
 到【灌水乐园】发言


