11、fragment生命周期
关于Fragment的生命周期,博主写过Activity与Fragment生命周期详解,基本上把Fragment的生命周期详细介绍过,但是那仅仅是创建一个Fragmnet时的生命周期,而事实上Fragment的出现是为了动态的切换显示不同的界面的,因此我们对于Fragment的生命周期的了解不能仅仅停留在创建一个Fragment的时候,而是应该能够知道调用不同API切换Fragment时的生命周期是怎么的,如调用add(),hide(),show()与replace()时它们的生命周期的不同,博主在昨天360视频面试的时候就被问到过。
一使用静态方式时的生命周期:
正如我们在Activity与Fragment生命周期详解中所介绍的,此时Fragment的生命周期为
onAttach, onCreate, onCreateView, onActivityCreated, onStart, onResume, onPause, onStop, onDestroyView, onDestroy, onDetach.
可以参看Activity与Fragment生命周期详解中相关内容的官方图片理解,
1其中当创建一个Fragment首次展示其布局界面时:
onAttach, onCreate, onCreateView, onActivityCreated, onStart, onResume,Fragment处于运行状态
2当关闭手机屏幕或者手机屏幕变暗或直接按home键返回桌面时,其生命周期方法调用的顺序是
onPause, onStop
3当再次对手机屏幕解锁或者手机屏幕变亮时,其生命周期方法调用的顺序:
onStart, onResume
4当对Fragment按返回键时:
onPause, onStop, onDestroyView, onDestroy, onDetach.
二使用FragmentManager动态的添加Fragment
这块是本博客讲解的重点,因为动态添加涉及到Fragment的切换,所以我们先定义两个Fragment。代码如下:
- public class FragOne extends Fragment {
- private static final String TAG = FragOne.class.getSimpleName();
- @Override
- public void onAttach(Activity activity) {
- super.onAttach(activity);
- Log.i(TAG, "onAttach");
- }
- @Override
- public void onCreate(Bundle savedInstanceState) {
- super.onCreate(savedInstanceState);
- Log.i(TAG, "onCreate");
- }
- @Override
- public View onCreateView(LayoutInflater inflater, ViewGroup container, Bundle savedInstanceState) {
- Log.i(TAG, "onCreateView");
- return inflater.inflate(R.layout.fragment_test_a, null, false);
- }
- @Override
- public void onViewCreated(View view, Bundle savedInstanceState) {
- Log.i(TAG, "onViewCreated");
- super.onViewCreated(view, savedInstanceState);
- }
- @Override
- public void onDestroy() {
- Log.i(TAG, "onDestroy");
- super.onDestroy();
- }
- @Override
- public void onDetach() {
- Log.i(TAG, "onDetach");
- super.onDetach();
- }
- @Override
- public void onDestroyView() {
- Log.i(TAG, "onDestroyView");
- super.onDestroyView();
- }
- @Override
- public void onStart() {
- Log.i(TAG, "onStart");
- super.onStart();
- }
- @Override
- public void onStop() {
- Log.i(TAG, "onStop");
- super.onStop();
- }
- @Override
- public void onResume() {
- Log.i(TAG, "onResume");
- super.onResume();
- }
- @Override
- public void onPause() {
- Log.i(TAG, "onPause");
- super.onPause();
- }
- @Override
- public void onActivityCreated(Bundle savedInstanceState) {
- Log.i(TAG, "onActivityCreated");
- super.onActivityCreated(savedInstanceState);
- }
- }
- public class FragTwo extends Fragment {
- private static final String TAG = FragTwo.class.getSimpleName();
- @Override
- public void onAttach(Activity activity) {
- super.onAttach(activity);
- Log.i(TAG, "onAttach");
- }
- @Override
- public void onCreate(Bundle savedInstanceState) {
- super.onCreate(savedInstanceState);
- Log.i(TAG, "onCreate");
- }
- @Override
- public View onCreateView(LayoutInflater inflater, ViewGroup container, Bundle savedInstanceState) {
- Log.i(TAG, "onCreateView");
- return inflater.inflate(R.layout.fragment_test_b, null, false);
- }
- @Override
- public void onViewCreated(View view, Bundle savedInstanceState) {
- Log.i(TAG, "onViewCreated");
- super.onViewCreated(view, savedInstanceState);
- }
- @Override
- public void onDestroy() {
- Log.i(TAG, "onDestroy");
- super.onDestroy();
- }
- @Override
- public void onDetach() {
- Log.i(TAG, "onDetach");
- super.onDetach();
- }
- @Override
- public void onDestroyView() {
- Log.i(TAG, "onDestroyView");
- super.onDestroyView();
- }
- @Override
- public void onStart() {
- Log.i(TAG, "onStart");
- super.onStart();
- }
- @Override
- public void onStop() {
- Log.i(TAG, "onStop");
- super.onStop();
- }
- @Override
- public void onResume() {
- Log.i(TAG, "onResume");
- super.onResume();
- }
- @Override
- public void onPause() {
- Log.i(TAG, "onPause");
- super.onPause();
- }
- @Override
- public void onActivityCreated(Bundle savedInstanceState) {
- Log.i(TAG, "onActivityCreated");
- super.onActivityCreated(savedInstanceState);
- }
- }
一当没使用addToBackStack函数时。
1使用replace()函数时:
当我们使用replace初次显示一个Fragment时,此时代码如下:
- FragmentTransaction fragmentTransaction = fragmentManager.beginTransaction();
- fragOne = new FragOne();
- fragmentTransaction.replace(R.id.frag_container, fragOne, fragNames[0]);
- fragmentTransaction.commit();
当我们使用replace()来替换一个已经存在的Fragment时(如腾讯QQ中当我们点击不同的底部按钮时会替换之前的Fragment),此时代码如下:
- public void onClick(View v) {
- FragmentTransaction fragmentTransaction = fragmentManager.beginTransaction();
- switch (v.getId()) {
- case R.id.button1:
- if (fragOne == null) {
- fragOne = new FragOne();
- fragmentTransaction.replace(R.id.frag_container, fragOne, fragNames[0]);
- // fragmentTransaction.addToBackStack(fragNames[0]);
- } else {
- Fragment fragment = fragmentManager.findFragmentByTag(fragNames[0]);
- fragmentTransaction.replace(R.id.frag_container, fragment, fragNames[0]);
- }
- break;
- case R.id.button2:
- if (fragTwo == null) {
- fragTwo = new FragTwo();
- fragmentTransaction.replace(R.id.frag_container, fragTwo, fragNames[1]);
- // fragmentTransaction.addToBackStack(fragNames[1]);
- } else {
- Fragment fragment = fragmentManager.findFragmentByTag(fragNames[1]);
- fragmentTransaction.replace(R.id.frag_container, fragment, fragNames[1]);
- }
- break;
- default:
- break;
- }
- fragmentTransaction.commit();
- }
可以看到第一个Fragment的调用顺序为:onPause, onStop, onDestroyView, onDestroy, onDetach,这表明fragOne已经被FragmentManager销毁了,取而代之的是第二个Fragment,这也与replace()函数的名称和不适用addToBackStack相符合(即替换且不添加到Fragment返回栈中,既然是替换当然得去除前一个,添加第二个Fragment)
这说明,在使用replace添加Fragment时如果没有调用addToBackStack方式的话,当FragmentManager替换Fragment时,是不保存Fragment的状态的,此时第二个Fragment将会直接替换前一个Fragment。
二使用addToBackStack函数时。
当我们使用replace函数且设置addToBackStack函数初次显示一个Fragment运行结果为:onAttach, onCreate, onCreateView, onActivityCreated, onStart, onResume,Fragment处于运行状态。即与不使用addToBackStack函数时的运行结果相同。
当我们使用replace函数且设置addToBackStack函数来替换之前显示的Fragmen't时运行结果为:
可以看到与之前的不使用addToBackStack相比,fragTwo的生命周期不受影响,而fragOne的生命周期和不使用addBackToStack函数相比,只存在三种状态的切换:onPause
onStop,onDestroyView。前者很好理解,因为addToBackStack函数顾名思义就是添加到回退栈中的意思,即当一个Fragment被另一个Fragment替换时会将之前的添加到回退栈中,因此也很好理解fragTwo的生命周期不受影响,因为是将被替换的添加到回退栈中,所以替换者不受影响。另外fragOne状态只到达onDestroyView,而无onDestroy,
onDetach。这说明fragOne仅仅只是界面被销毁onDestroyView,而fragOne对象的实例依然被保存在FragmentManager中(因为无onDestroy,onDetach),它的部分状态依然被保存在FragmentManager中。我们可以来验证一下:
我们点击按钮切换,让fragOne来替换当前显示的fragTwo,此时运行结果如下:
可以看到此时运行结果与fragTwo替换fragOne时fragOne的生命周期调用顺序非常相似,而且可以看到fragOne的生命周期是直接从onCreateView开始的,这也刚好对应上面的fragOne被fragTwo替换时生命周期到达onDestroyView,即之前的fragOne仅仅销毁了视图,而fragOne对象的实例依然被保存在FragmentManager中,所以此时只需要创建视图,即直接从onCreateView开始。
三使用show()/hide()函数时:首先要明白使用show()/hide()时一般是会使用addToBackStack,,因为要使用show()/hide()前提是该Fragment实例已经存在,只不过我们是否将其界面显示出来而已,因此我们需要使用addToBackStack函数将一个Fragment的实例对象保存在Fragment的回退栈中。此时代码如下:
- FragmentTransaction fragmentTransaction = fragmentManager.beginTransaction();
- switch (v.getId()) {
- case R.id.button1:
- hideAllFrags(fragmentTransaction);
- if (fragA == null) {
- fragOne = new FragOne();
- fragmentTransaction.add(R.id.frag_container, fragOne, fragNames[0]);
- fragmentTransaction.addToBackStack(fragNames[0]);
- } else {
- fragmentTransaction.show(fragOne);
- }
- break;
- case R.id.button2:
- hideAllFrags(fragmentTransaction);
- if (fragTwo == null) {
- fragTwo = new FragTwo();
- fragmentTransaction.add(R.id.frag_container, fragTwo, fragNames[1]);
- fragmentTransaction.addToBackStack(fragNames[1]);
- } else {
- fragmentTransaction.show(fragTwo);
- }
- break;
- default:
- break;
- }
- fragmentTransaction.commit();
当我们使用add()/show()函数初次显示一个Fragment运行结果为:onAttach, onCreate, onCreateView, onActivityCreated, onStart, onResume,Fragment处于运行状态。这个很好理解,不再赘述。
当我们点击按钮切换显示第二个Fragment时运行结果为:
可以看到此时fragOne无输出,表示fragOne的生命周期不受影响,而fragTwo的输出结果与直接初次显示fragTwo时是一样的。其实这也很好理解因为在add()/show()/hide()顾名思义就是添加显示隐藏的意思,它都不会对另外的Fragment的生命周期起作用。
Android Gems — Fragment本质之生命周期管理
Fragment最早引入是在给平板的Android 3.0系统,用来解决Pad上UI的模块化。随后逐渐推广到Phone UI上,3.0之前的版本则通过Support包引入。Fragment本质上是带生命周期管理的View的Wrapper,解耦了Activity和View,一方面Activity可以不用再处理View的逻辑;另一方面View也可以只专注渲染,不用关心Controller逻辑。Fragment就是他们之间的桥梁,使得UI模块可以方便的被各个Activity复用。
Fragment对开发者已经不再陌生,本文也并不打算介绍Fragment的api使用,而是分析Fragment的源码,从源码的角度来对Fragment的使用有更深刻的理解。
Fragment相关的源码存放在framework/base/core/java/android/app/下,有如下几个重要的类:
一,Fragment
Fragment基本类,生命周期如下:
- void onAttach(Context context)
- void onCreate(Bundle savedInstanceState)
- View onCreateView(LayoutInflater inflater, ViewGroup container, Bundle savedInstanceState)
- void onActivityCreated(Bundle savedInstanceState)
- void onStart()
- void onStop()
- void onResume()
- void onPause()
- void onDestroyView()
- void onDestroy()
- void onDetach()
Fragment的生命周期和Activity是对应的。
二,FragmentManager
FragmentManager是Fragment生命周期管理的核心类,确切的说,他是个抽象类,具体的实现是FragmentManagerImpl,所有的Fragment的管理:添加、删除、显示、隐藏等都由FragmentManagerImpl完成。
三,FragmentController
Activity拥有FragmentController的实例,通过FragmentController来分发Activity的生命周期事件,而FragmentController只是给外部的FragmentManager接口的wrapper,实际的实现还是由FragmentManager来完成。
四,FragmentTransaction
FragmentTransaction是一组Fragment操作集合,由FragmentManager调用beginTransaction来获得一个FragmentTransaction,之后可以执行add/replace/remove等Fragment操作,在调用Transaction的commit之前,这些操作还并未生效。FragmentTransaction之所以被称为事务,是因为它执行的Fragment Op集合是可以回退的,后面我们做源码分析的时候会详细分析。FragmentTransaction是个抽象类,实现类是BackStackRecord。
Fragment本质系列文章将从如下几个角度,有针对性的对Fragment进行源码分析,分析Fragment本质,从而达到深入浅出的目的。
一,Fragment的生命周期管理
二,Fragment的View管理
三,FragmentTransaction的事务和BackStack管理
四,Fragment的状态保存和恢复
本文先分析Fragment的生命周期管理:
Fragment有如下几种状态和其生命周期对应,状态包括:
- static final int INITIALIZING = 0; // Not yet created.
- static final int CREATED = 1; // Created.
- static final int ACTIVITY_CREATED = 2; // The activity has finished its creation.
- static final int STOPPED = 3; // Fully created, not started.
- static final int STARTED = 4; // Created and started, not resumed.
- static final int RESUMED = 5; // Created started and resumed.
- public void dispatchCreate() {
- mStateSaved = false;
- moveToState(Fragment.CREATED, false);
- }
- public void dispatchActivityCreated() {
- mStateSaved = false;
- moveToState(Fragment.ACTIVITY_CREATED, false);
- }
- public void dispatchStart() {
- mStateSaved = false;
- moveToState(Fragment.STARTED, false);
- }
- public void dispatchResume() {
- mStateSaved = false;
- moveToState(Fragment.RESUMED, false);
- }
- public void dispatchPause() {
- moveToState(Fragment.STARTED, false);
- }
- public void dispatchStop() {
- moveToState(Fragment.STOPPED, false);
- }
- public void dispatchDestroy() {
- mDestroyed = true;
- execPendingActions();
- moveToState(Fragment.INITIALIZING, false);
- mHost = null;
- mContainer = null;
- mParent = null;
- }
FragmentManager的状态是静态的还比较简单,接下来就得分析Fragment的状态切换了。Fragment刚new出来时的初始状态mState是INITIALIZING,状态切换是由FragmentManager的moveToState函数完成。Fragment状态切换是和Fragment的几个操作分不开的,我们先对Fragment的基本操作进行分析,再对moveToState方法做分析。
我们总结一下FragmentTransaction的几个基本操作:
1, add
FragmentTransaction的事务实现细节,我们放到后面的章节介绍,只需知道add的操作最后调用FragmentManager的addFragment方法来增加Fragment
- public void addFragment(Fragment fragment, boolean moveToStateNow) {
- if (mAdded == null) {
- mAdded = new ArrayList<Fragment>();
- }
- if (DEBUG) Log.v(TAG, "add: " + fragment);
- makeActive(fragment); // 将Fragment加入mActive
- if (!fragment.mDetached) { // 忽略已经detach的Fragment
- if (mAdded.contains(fragment)) {
- throw new IllegalStateException("Fragment already added: " + fragment);
- }
- mAdded.add(fragment); // 加如mAdded数组
- fragment.mAdded = true;
- fragment.mRemoving = false;
- if (fragment.mHasMenu && fragment.mMenuVisible) {
- mNeedMenuInvalidate = true;
- }
- if (moveToStateNow) {
- moveToState(fragment);
- }
- }
- }
首先makeActive来激活Fragment,而激活Fragment要做的事就是把Fragment插入到mActive数组里,mActive是FragmentManager的一个字段,用来保存active的Fragment列表。makeActive只有addFragment才会调用,所以其本质是add过的Fragment。mActive设计的目的主要是为了保存和恢复状态,保存所有mActive的所有Fragment,当进程被杀后恢复的时候,可以恢复出之前的所有Fragment,再接着对之前的BackStack的所有FragmentTransaction事务做redo,从而恢复进程被杀之前的状态 。由于Fragment的恢复是基于BackStack的,所以一个Fragment是否是Active的依据是其是否在BackStack里,也就是mBackStackNesting大于0,Active的Fragment在removeFragment的时候,只会将其从mAdded列表里删除,而不会从mActive删除,因为在做状态恢复的时候会要用这个Fragment,这也就是mActive和mAdded的区别,两者是不能等价的。如果Fragment不是active了,removeFragment就会调用makeInactive移除Fragment,另外Activity的onDestroy调用FragmentManager的dispatchDestroy时也会makeInactive把Fragment从mActive里删除(后续分析moveToState的时候会看到)。下面我们看看makeActive和makeInactive的定义加深一下印象。
- void makeActive(Fragment f)
- if(f.mIndex >= 0) { // 表示Fragment已经是active的了
- return;
- }
- if (mAvailIndices == null || mAvailIndices.size() <= 0) {
- if (mActive == null) {
- mActive = new ArrayList<Fragment>();
- }
- // 将Fragment加到mActive
- f.setIndex(mActive.size(), mParent);
- mActive.add(f);
- } else {
- // 复用mActive的索引,将Fragment加到mActive
- f.setIndex(mAvailIndices.remove(mAvailIndices.size()-1), mParent);
- mActive.set(f.mIndex, f);
- }
- }
- void makeInactive(Fragment f) {
- if (f.mIndex < 0) { // 已经是inactive的了
- return;
- }
- // 将Fragment从mActive移除
- mActive.set(f.mIndex, null);
- if (mAvailIndices == null) {
- mAvailIndices = new ArrayList<Integer>();
- }
- mAvailIndices.add(f.mIndex); // 回收index
- mHost.inactivateFragment(f.mWho);
- f.initState(); // 重置Fragment的状态
- }
2,replace
replace是FragmentTransaction的接口,FragmentManager没有与其对应的方法,这是FragmentTransaction内部的操作。replace的两参数的方法replace(int containerViewId, Fragment fragment),表示要替换containerViewId下所有的Fragment。所谓的替换操作,就是把containerId等于containerViewId的所有Fragment都removeFragment。然后将第二个参数fragment调用addFragment加入。三参数的方法replace(int containerViewId, Fragment fragment, String tag)和两参数的差不多,设置替换后的Fragment的tag,可用户后续通过tag从FragmentManager里查找到Fragment。
- public FragmentTransaction replace(int containerViewId, Fragment fragment) {
- return replace(containerViewId, fragment, null);
- }
- public FragmentTransaction replace(int containerViewId, Fragment fragment, String tag) {
- if (containerViewId == 0) {
- throw new IllegalArgumentException("Must use non-zero containerViewId");
- }
- doAddOp(containerViewId, fragment, tag, OP_REPLACE);
- return this;
- }
- case OP_REPLACE: {
- Fragment f = op.fragment;
- int containerId = f.mContainerId;
- if (mManager.mAdded != null) {
- for (int i = 0; i < mManager.mAdded.size(); i++) {
- Fragment old = mManager.mAdded.get(i);
- if (old.mContainerId == containerId) {
- if (old == f) {
- op.fragment = f = null;
- } else {
- if (op.removed == null) {
- op.removed = new ArrayList<Fragment>();
- }
- op.removed.add(old);
- old.mNextAnim = op.exitAnim;
- if (mAddToBackStack) {
- old.mBackStackNesting += 1;
- }
- mManager.removeFragment(old, mTransition, mTransitionStyle);
- }
- }
- }
- }
- if (f != null) {
- f.mNextAnim = op.enterAnim;
- mManager.addFragment(f, false);
- }
- }
从以上代码可知,replace的语义是查找mAdded列表,将containerId对应的所有Fragment都加入removed列表,并增加其mBackStackNesting,mBackStackNesting表示Fragment在back stack里的层数,越大就越接近栈顶,接着调用removeFragment将这些Fragment移除,之后将待替换的Fragment加到FragmentManager里。在这里,mBackStackNesting++的目的在于避免removeFragment的时候将其从mActive列表删除,因为后续popFromBackStack的时候还会undo,将这些Fragment加回来,如果mActive里没有了,影响的就是进程被杀死后,状态恢复没法完全还原,这里的mBackStackNesting+1会在这个BackStackRecord被popFromBackStack的时候,调用bumpBackStackNesting(-1)给减掉。这种在mActive列表里,而不在mAdded列表里的Fragment的状态只能是CREATED,这个状态的Fragment不会将其View加到UI的ViewTree里,所以用户是不可见的。
- case OP_REPLACE: {
- Fragment f = op.fragment;
- if (f != null) {
- f.mNextAnim = op.popExitAnim;
- mManager.removeFragment(f,
- FragmentManagerImpl.reverseTransit(mTransition),
- mTransitionStyle);
- }
- if (op.removed != null) {
- for (int i = 0; i < op.removed.size(); i++) {
- Fragment old = op.removed.get(i);
- old.mNextAnim = op.popEnterAnim;
- mManager.addFragment(old, false);
- }
- }
- }
3, remove
removeFragment和addFragment是成对的,我们接着分析一下removeFragment:
- public void removeFragment(Fragment fragment, int transition, int transitionStyle) {
- final boolean inactive = !fragment.isInBackStack();
- if (!fragment.mDetached || inactive) {
- if (mAdded != null) {
- mAdded.remove(fragment);
- }
- if (fragment.mHasMenu && fragment.mMenuVisible) {
- mNeedMenuInvalidate = true;
- }
- fragment.mAdded = false;
- fragment.mRemoving = true;
- moveToState(fragment, inactive ? Fragment.INITIALIZING : Fragment.CREATED,
- transition, transitionStyle, false);
- }
- }
正如之前所说,removeFragment的时候,会看Fragment是否还在BackStack里,如果还在,那么仅仅是从mAdded列表里删除,mActive列表里的还继续保留,并将Fragment的状态置为CREATED。
4,show
showFragment比较简单,如果当前是hidden状态,就把fragment的View设置VISIBLE,并不影响Fragment的生命周期,所以不需要moveToState。
- public void showFragment(Fragment fragment, int transition, int transitionStyle) {
- if (fragment.mHidden) {
- fragment.mHidden = false;
- if (fragment.mView != null) {
- Animator anim = loadAnimator(fragment, transition, true,
- transitionStyle);
- if (anim != null) {
- anim.setTarget(fragment.mView);
- setHWLayerAnimListenerIfAlpha(fragment.mView, anim);
- anim.start();
- }
- fragment.mView.setVisibility(View.VISIBLE);
- }
- if (fragment.mAdded && fragment.mHasMenu && fragment.mMenuVisible) {
- mNeedMenuInvalidate = true;
- }
- fragment.onHiddenChanged(false);
- }
- }
- public void hideFragment(Fragment fragment, int transition, int transitionStyle) {
- if (!fragment.mHidden) {
- fragment.mHidden = true;
- if (fragment.mView != null) {
- Animator anim = loadAnimator(fragment, transition, false,
- transitionStyle);
- if (anim != null) {
- anim.setTarget(fragment.mView);
- final Fragment finalFragment = fragment;
- anim.addListener(new AnimatorListenerAdapter() {
- @Override
- public void onAnimationEnd(Animator animation) {
- if (finalFragment.mView != null && finalFragment.mHidden) {
- finalFragment.mView.setVisibility(View.GONE);
- }
- }
- });
- setHWLayerAnimListenerIfAlpha(finalFragment.mView, anim);
- anim.start();
- } else {
- fragment.mView.setVisibility(View.GONE);
- }
- }
- if (fragment.mAdded && fragment.mHasMenu && fragment.mMenuVisible) {
- mNeedMenuInvalidate = true;
- }
- fragment.onHiddenChanged(true);
- }
- }
- public void attachFragment(Fragment fragment, int transition, int transitionStyle) {
- if (fragment.mDetached) {
- fragment.mDetached = false;
- if (!fragment.mAdded) {
- if (mAdded == null) {
- mAdded = new ArrayList<Fragment>();
- }
- if (mAdded.contains(fragment)) {
- throw new IllegalStateException("Fragment already added: " + fragment);
- }
- mAdded.add(fragment);
- fragment.mAdded = true;
- if (fragment.mHasMenu && fragment.mMenuVisible) {
- mNeedMenuInvalidate = true;
- }
- moveToState(fragment, mCurState, transition, transitionStyle, false);
- }
- }
- }
- public void detachFragment(Fragment fragment, int transition, int transitionStyle) {
- if (!fragment.mDetached) {
- fragment.mDetached = true;
- if (fragment.mAdded) {
- // We are not already in back stack, so need to remove the fragment.
- if (mAdded != null) {
- mAdded.remove(fragment);
- }
- if (fragment.mHasMenu && fragment.mMenuVisible) {
- mNeedMenuInvalidate = true;
- }
- fragment.mAdded = false;
- moveToState(fragment, Fragment.CREATED, transition, transitionStyle, false);
- }
- }
- }
- void moveToState(Fragment f, int newState, int transit, int transitionStyle,
- boolean keepActive) {
- // 如果f被remove或者detach,那么moveToState后,Fragment的新的状态值最多只能到CREATED,因此只能是INITIALIZING或者CREATED
- if ((!f.mAdded || f.mDetached) && newState > Fragment.CREATED) {
- newState = Fragment.CREATED;
- }
- // 如果f被remove了,那么不能再提升state
- if (f.mRemoving && newState > f.mState) {
- // While removing a fragment, we can't change it to a higher state.
- newState = f.mState;
- }
- // 如果当前start被defer,状态需为STOPPED,mDeferStart和LoaderManager机制有关,这里不展开分析,调用setUserVisibleHint可让Fragment的Start 被defer
- // Defer start if requested; don't allow it to move to STARTED or higher
- // if it's not already started.
- if (f.mDeferStart && f.mState < Fragment.STARTED && newState > Fragment.STOPPED) {
- newState = Fragment.STOPPED;
- }
- ......
- ......
- void moveToState(Fragment f, int newState, int transit, int transitionStyle, boolean keepActive) {
- if (f.mState < newState) {
- switch (f.mState) {
- case Fragment.INITIALIZING:
- ......
- case Fragment.CREATED:
- ......
- case Fragment.ACTIVITY_CREATED:
- ......
- case Fragment.STOPPED:
- ......
- case Fragment.STARTED:
- ......
- }
- } else if (f.mState > newState) {
- switch (f.mState) {
- case Fragment.RESUMED:
- ......
- case Fragment.STARTED:
- ......
- case Fragment.STOPPED:
- case Fragment.ACTIVITY_CREATED:
- ......
- case Fragment.CREATED:
- ......
- }
- }
- f.mState = newState;
- }
- case Fragment.INITIALIZING:
- if (f.mSavedFragmentState != null) {
- // 这是Fragment状态恢复相关的,暂时不分析
- }
- f.mHost = mHost;
- f.mParentFragment = mParent;
- f.mFragmentManager = mParent != null
- ? mParent.mChildFragmentManager : mHost.getFragmentManagerImpl();
- f.mCalled = false;
- // 执行Fragment的onAttach生命周期
- f.onAttach(mHost.getContext());
- if (!f.mCalled) {
- throw new SuperNotCalledException("Fragment " + f
- + " did not call through to super.onAttach()");
- }
- if (f.mParentFragment == null) {
- mHost.onAttachFragment(f);
- }
- // 执行Fragment的onCreate生命周期
- if (!f.mRetaining) {
- f.performCreate(f.mSavedFragmentState);
- }
- f.mRetaining = false
- if (f.mFromLayout) {
- // 如果Fragment是在layout文件里定义的,那么就在这时执行Fragment的onCreateView生命周期
- f.mView = f.performCreateView(f.getLayoutInflater(
- f.mSavedFragmentState), null, f.mSavedFragmentState);
- if (f.mView != null) {
- f.mView.setSaveFromParentEnabled(false);
- if (f.mHidden) f.mView.setVisibility(View.GONE);
- f.onViewCreated(f.mView, f.mSavedFragmentState);
- }
- }
- case Fragment.CREATED:
- if (newState > Fragment.CREATED) {
- if (!f.mFromLayout) { // 代码添加的Fragment,而不是layout文件定义的
- ViewGroup container = null;
- if (f.mContainerId != 0) { // 找到Fragment的Container,用于addView
- container = (ViewGroup)mContainer.onFindViewById(f.mContainerId);
- if (container == null && !f.mRestored) {
- throwException(new IllegalArgumentException());
- }
- }
- f.mContainer = container;
- // 执行Fragment的onCreateView的生命周期
- f.mView = f.performCreateView(f.getLayoutInflaterf.mSavedFragmentState), container, f.mSavedFragmentState);
- if (f.mView != null) {
- f.mView.setSaveFromParentEnabled(false);
- if (container != null) {
- container.addView(f.mView);
- }
- if (f.mHidden) f.mView.setVisibility(View.GONE);
- f.onViewCreated(f.mView, f.mSavedFragmentState);
- }
- }
- // 执行Fragment的onActivityCreated生命周期
- f.performActivityCreated(f.mSavedFragmentState);
- if (f.mView != null) {
- f.restoreViewState(f.mSavedFragmentState);
- }
- f.mSavedFragmentState = null;
- }
- case Fragment.ACTIVITY_CREATED:
- case Fragment.STOPPED:
- if (newState > Fragment.STOPPED) {
- if (DEBUG) Log.v(TAG, "moveto STARTED: " + f);
- // 执行Fragment的onStart的生命周期
- f.performStart();
- }
- case Fragment.STARTED:
- if (newState > Fragment.STARTED) {
- if (DEBUG) Log.v(TAG, "moveto RESUMED: " + f);
- f.mResumed = true;
- // 执行Fragment的onResume的生命周期
- f.performResume();
- // Get rid of this in case we saved it and never needed it.
- f.mSavedFragmentState = null;
- f.mSavedViewState = null;
- }
- case Fragment.RESUMED:
- if (newState < Fragment.RESUMED) {
- if (DEBUG) Log.v(TAG, "movefrom RESUMED: " + f);
- // 执行Fragment的onPause生命周期
- f.performPause();
- f.mResumed = false;
- }
- case Fragment.STARTED:
- if (newState < Fragment.STARTED) {
- if (DEBUG) Log.v(TAG, "movefrom STARTED: " + f);
- // 执行onStop生命周期
- f.performStop();
- }
- case Fragment.STOPPED:
- case Fragment.ACTIVITY_CREATED:
- if (newState < Fragment.ACTIVITY_CREATED) {
- if (mHost.onShouldSaveFragmentState(f) && f.mSavedViewState == null) {
- saveFragmentViewState(f);
- }
- // 执行Fragment的onDestroyView生命周期
- f.performDestroyView();
- if (f.mView != null && f.mContainer != null) {
- if (anim != null) {
- final ViewGroup container = f.mContainer;
- final View view = f.mView;
- final Fragment fragment = f;
- container.startViewTransition(view);
- f.mAnimatingAway = anim;
- f.mStateAfterAnimating = newState;
- ...... // 省略的部分是删除动画,这里不展开分析
- }
- f.mContainer.removeView(f.mView);
- }
- f.mContainer = null;
- f.mView = null;
- }
- case Fragment.CREATED:
- if (newState < Fragment.CREATED) {
- if (f.mAnimatingAway != null) { //如果退出动画还未结束,那么等动画结束之后再切换状态
- f.mStateAfterAnimating = newState;
- newState = Fragment.CREATED;
- } else
- if (!f.mRetaining) {
- f.performDestroy(); //执行Fragment的onDestroy生命周期
- }
- f.mCalled = false;
- f.onDetach(); //执行Fragment的onDetach生命周期
- if (!f.mCalled) {
- throw new SuperNotCalledException("Fragment " + " did not call through to super.onDetach()");
- }
- if (!keepActive) {
- if (!f.mRetaining) {
- makeInactive(f); //如果Fragment已经不在active了,就从mActive列表里删除
- } else {
- f.mHost = null;
- f.mParentFragment = null;
- f.mFragmentManager = null;
- f.mChildFragmentManager = null;
- }
- }
- }
- }
12、Glide源码解析
Google推荐——Glide使用详解

零、前言
本文所使用的Glide版本为3.7.0
一、简介
Glide,一个被google所推荐的图片加载库,作者是bumptech。这个库被广泛运用在google的开源项目中,包括2014年的google I/O大会上发布的官方app。(PS:总所周知的简介就到此为止了)
Glide 对于 Android SDK 的最低要求是 API level 10
Glide滑行的意思,可以看出这个库的主旨就在于让图片加载变的流畅。现在被广泛使用,当然还是有很多开发者使用Square公司的picasso,也有两个库的对比
原文链接:http://inthecheesefactory.com/blog/get-to-know-glide-recommended-by-google/en
译文链接:http://jcodecraeer.com/a/anzhuokaifa/androidkaifa/2015/0327/2650.html
二、使用
(一)导入
在AndroidStudio上添加依赖非常简单
dependencies {
    compile 'com.github.bumptech.glide:glide:3.7.0'
    compile 'com.android.support:support-v4:23.2.1'
}
Glide 也支持 Maven 项目形式:
<dependency>
  <groupId>com.github.bumptech.glide</groupId>
  <artifactId>glide</artifactId>
  <version>3.7.0</version>
</dependency>
<dependency>
  <groupId>com.google.android</groupId>
  <artifactId>support-v4</artifactId>
  <version>r7</version>
</dependency>
如果是Eclipse使用去下载Glide的jar在项目中使用就可以了,jar的链接https://github.com/bumptech/glide/releases
(二)基础使用
基本方法
Glide的一个完整的请求至少需要三个参数,代码如下:
String url = "http://img1.dzwww.com:8080/tupian_pl/20150813/16/7858995348613407436.jpg";
ImageView imageView = (ImageView) findViewById(R.id.imageView);
Glide.with(context)
    .load(url)
    .into(imageView);
- with(Context context) - 需要上下文,这里还可以使用 Activity、FragmentActivity、android.support.v4.app.Fragment、android.app.Fragment 的对象。将 Activity/Fragment 对象作为参数的好处是,图片的加载会和 Activity/Fragment 的生命周期保持一致,例如:onPaused 时暂停加载,onResume 时又会自动重新加载。所以在传参的时候建议使用 Activity/Fragment 对象,而不是 Context。
- load(String url) - 这里我们所使用的一个字符串形式的网络图片的 URL,后面会讲解 load() 的更多使用方式
- into(ImageView imageView) - 你需要显示图片的目标 ImageView
占位图设置
偶尔出现图片加载慢或者加载不出来的情况是难以避免的,所以为了 UI 能好看一些,我们会使用占位图。Glide 也为我们提供这种方法 placeHolder() 和 error()
String url = "http://img1.dzwww.com:8080/tupian_pl/20150813/16/7858995348613407436.jpg";
ImageView imageView = (ImageView) findViewById(R.id.imageView);
Glide.with(context)
    .load(url)
    .placeholder(R.drawable.place_image)//图片加载出来前,显示的图片
    .error(R.drawable.error_image)//图片加载失败后,显示的图片
    .into(imageView);
注:这里需要注意一点,placeholder() 和 error() 的参数都是只支持 int 和 Drawable 类型的参数,这种设计应该是考虑到使用本地图片比网络图片更加合适做占位图。
缩略图
Glide 的缩略图功能在这里不得不说,和占位图略有不同,占位图必须使用资源文件才行,而缩略图是动态的占位图可以从网络中加载。缩略图会在世纪请求加载完成或者处理完之后才显示。在原始图片到达之后,缩略图不会取代原始图片,只会被抹除。
Glide 为缩略图提供了2种不同的加载方式,比较简单的方式是调用 thumbnail() 方法,参数是 float 类型,作为其倍数大小。例如,你传入 0.2f 作为参数,Glide 将会显示原始图片的20%的大小,如果原图是 1000x1000 的尺寸,那么缩略图将会是 200x200 的尺寸。为缩略图明显比原图小得多,所以我们需要确保 ImageView 的 ScaleType 设置的正确。
Glide.with( context )
    .load( url )
    .thumbnail( 0.2f )
    .into( imageView );
注:应用于请求的设置也将应用于缩略图。
使用 thumbnail() 方法来设置是简单粗暴的,但是如果缩略图需要通过网络加载相同的全尺寸图片,就不会很快的显示了。所以 Glide 提供了另一种防止去加载缩略图,先看代码
private void loadImageThumbnailRequest(){
    // setup Glide request without the into() method
    DrawableRequestBuilder<String> thumbnailRequest = Glide.with( context ).load( url );
    // pass the request as a a parameter to the thumbnail request
    Glide.with( context )
        .load( url )
        .thumbnail( thumbnailRequest )
        .into( imageView );
}
与第一种方式不同的是,这里的第一个缩略图请求是完全独立于第二个原始请求的。该缩略图可以是不同的资源图片,同时也可以对缩略图做不同的转换,等等...
动画开关
动画效果可以让图片加载变得更加的平滑,crossFade() 方法强制开启 Glide 默认的图片淡出淡入动画,当前版本3.7.0是默认开启的。crossFade() 还有一个重载方法 crossFade(int duration)。可以控制动画的持续时间,单位ms。动画默认的持续时间是300ms。既然可以添加动画,那肯定就可以设置没有任何淡出淡入效果,调用 dontAnimate()
Glide.with(context)
    .load(url)
    .crossFade()//或者使用 dontAnimate() 关闭动画
    .placeholder(R.drawable.place_image)
    .error(R.drawable.error_image)
    .into(imageView);
PS:Glide 是可以自定义动画效果的,这个在后面会讲解
图片大小与裁剪
在项目开发过程中,指定图片显示大小长长可能用到,毕竟从服务器获取的图片不一定都是符合设计图的标准的。我们在这里就可以使用 override(width,height) 方法,在图片显示到 ImageView 之前,重新改变图片大小。
Glide.with(context)
    .load(url)
    .override(width,height)//这里的单位是px
    .into(imageView);
在设置图片到 ImageView 的时候,为了避免图片被挤压失真,ImageView 本身提供了 ScaleType 属性,这个属性可以控制图片显示时的方式,具体的属性使用还是去搜索吧!Glide 也提供了两个类似的方法 CenterCrop() 和 FitCenter(),CenterCrop() 方法是将图片按比例缩放到足矣填充 ImageView 的尺寸,但是图片可能会显示不完整;而 FitCenter() 则是图片缩放到小于等于 ImageView 的尺寸,这样图片是显示完整了,但是 ImageView 就可能不会填满了。
注:其实 Glide 的 CenterCrop() 和 FitCenter() 这两个方法分别对应 ImageView 的 ScaleType 属性中的 CENTER_CROP 和 FIT_CENTER 命名基本一致。
图片的缓存处理
为了更快的加载图片,我们肯定希望可以直接拿到图片,而不是进行网络请求,所以我们需要缓存。Glide 通过使用默认的内存和磁盘缓存来避免不必要的网络请求,之后我们再详细的去看它的实现。
内存缓存
内存缓存是 Glide 默认帮我们做了的,除非你不需要,可以调用 skipMemoryCache(true) 告诉 Glide 跳过内存缓存。这样 Glide 就不会把这张图片放到内存缓存中,该方法只影响内存缓存。(不要问调用skipMemoryCache(false)的问题,Glide 是默认将图片放入内存缓存中的)
磁盘缓存
磁盘缓存也是默认开启的,当然也是可以关闭的,不过关闭的方式略微有点不一样。
Glide.with(context)
    .load(url)
    .skipMemoryCache(true)
    .diskCacheStrategy( DiskCacheStrategy.NONE )
    .into(imageView);
上面这段代码将内存缓存和磁盘缓存都禁用了,这里使用枚举 DiskCacheStrategy.NONE 将磁盘缓存禁用了,这里涉及到了自定义磁盘缓存行为,我们接下来就讲解这个。
自定义磁盘缓存行为
使用 DiskCacheStrategy 可以为 Glide 配置磁盘缓存行为。Glide 的磁盘缓存比较复杂,这也是在图片加载可以比 Picasso 的原因(之一)。Picasso 只缓存了全尺寸的图片,而 Glide 的不同之处在于,Glide 不仅缓存了全尺寸的图,还会根据 ImageView 大小所生成的图也会缓存起来。比如,请求一个 800x600 的图加载到一个 400x300 的 ImageView 中,Glide默认会将这原图还有加载到 ImageView 中的 400x300 的图也会缓存起来。
DiskCacheStrategy 的枚举意义:
- DiskCacheStrategy.NONE 什么都不缓存
- DiskCacheStrategy.SOURCE 只缓存全尺寸图
- DiskCacheStrategy.RESULT 只缓存最终的加载图
- DiskCacheStrategy.ALL 缓存所有版本图(默认行为)
这只是举个例子而已
Glide.with(context)
    .load(url)
    .diskCacheStrategy( DiskCacheStrategy.SOURCE )
    .into(imageView);
图片请求的优先级
同一时间加载多个图片,App 将难以避免这种情况。如果这个时候我们希望用户的体验更好,往往会选择先加载对于用户更加重要的图片。Glide 可以调用 .priority() 方法配合 Priority 枚举来设置图片加载的优先级。
//设置 HIGH 优先级
Glide.with( context )
    .load( highPriorityImageUrl )
    .priority (Priority.HIGH )
    .into( imageView );
//设置 LOW 优先级
Glide.with( context )
    .load( lowPriorityImageUrl )
    .priority( Priority.LOW )
    .into( imageView );
- Priority.LOW
- Priority.NORMAL
- Priority.HIGH
- Priority.IMMEDIAT
这里有一点需要注意,优先级并不是完全严格遵守的。Glide 将会用他们作为一个准则,尽可能的处理这些请求,但是不能保证所有的图片都会按照所有要求的顺序加载。
显示 Gif 和 Video
显示 GIf 对于 Glide 来说一个比较特别的功能(至少 Picasso 暂时还不行)而且使用起来非常简单
String gifUrl = "http://i2.mhimg.com/M00/0E/AE/CgAAilTPWJ2Aa_EIACcMxiZi5xE299.gif";
Glide.with( context )
    .load( gifUrl )
    .placeholder( R.drawable.default )
    .error( R.drawable.error )
    .into( imageView );
这段代码还有点问题,如果加载的不是一张 gif 图的话,是没有办法显示的。
Glide.with( context )
    .load( gifUrl )
    .asGif()
    .error( R.drawable.error )
    .into( imageView );
做以上修改,如果图片类型不是 Gif 图的话就会当作 load 失败来处理,因此 error() 会被回调。即使这个url的图片是好的,也是不会显示的。当然,如果你想显示 Gif 但只是向现实静态的图片你就可以这么做
Glide.with( context )
    .load( gifUrl )
    .asBitmap()
    .error( R.drawable.error )
    .into( imageView );
仅仅是显示 Gif 的第一帧图像,这样就可以保证图片的正常显示了。
还有一个神奇的功能,Glide 还能显示视频!But...只能够显示手机本地的视频,要是向现实网络上的视频的话,还是另寻他法吧!
String filePath = "/storrage/emulated/0/Pictures/video.mp4";
Glide.with( context )
    .load( Uri.fromFile( new File( filePath ) ) )
    .into( imageView );
Glide 的基础使用就讲解到这了。
(三)进阶使用
Target篇
到现在为止,我们所涉及到的代码都是直接加载图片到 ImageView 中。Glide 隐藏做了所有的网络请求和后台的线程处理,图片准备好之后切回到 UI 线程刷新 ImageView。也就是说 ImageView 在我们代码的链式结构中成为了最后一步,但是如果我们需要获取到 Bitmap 本身
的话我们就需要用到 Target 了。Target 其实就是整个图片的加载的生命周期,所以我们就可以通过它在图片加载完成之后获取到 Bitmap。
其实对于 Target 可以简单的理解为回调,本身就是一个 interface,Glide本身也为我们提供了很多 Target

SimpleTarget
直接上代码
private SimpleTarget<Bitmap> mSimpleTarget = new SimpleTarget<Bitmap>() {
    @Override
    public void onResourceReady(Bitmap resource, GlideAnimation<? super Bitmap> animation) {
        mImageView.setImageBitmap(resource);
    }
};

private void loadImageSimpleTarget() {
    Glide.with( thi s)
        .load( mUrl )
        .asBitmap()
        .into( mSimpleTarget );
}
首先创建了一个 SimpleTarget 的对象并且实现了 onResourceReady() 方法,看方法名能知道是图片加载完之后会调用该方法,参数就有我们需要的 Bitmap 。而使用 SimpleTarget 的对象的时候就像使用 ImageView 一样,作为参数传给 into() 方法就行了,Glide 会内部去处理并返回结果给任何一个对象。这里我们为了防止加载 Gif 、 Video 或者一些位置资源时与 mSimpleTarget 冲突,所以我们调用了 asBitmap() 方法,使其只能返回 Bitmap 对象。
这里就有个问题了,如果我需要改变图片的大小怎么办?这点小问题 Glide 还是有考虑到的,加入原尺寸 1000x1000 的图片,我们显示的时候只需要是 500x500 的尺寸来节省时间和内存,你可以在 SimpleTarget 的回调声明中指定图片的大小。
private SimpleTarget<Bitmap> mSimpleTarget = new SimpleTarget<Bitmap>(500,500) {
    @Override
    public void onResourceReady(Bitmap resource, GlideAnimation<? super Bitmap> animation) {
        mImageView.setImageBitmap(resource);
    }
};
从代码中可以看到 SimpleTarget 的对象的声明没有使用匿名对象,而是单独的声明了一个变量,这里是故意这么做的,如果使用匿名内部类的方式创建 SimpleTarget 的对象,这样会增大该对象在 Glide 完成图片请求之前就被回收的可能性。
还记得前面说过 with() 方法传入 Activity 或者 Fragment 时 Glide 的图片加载会与他们的生命周期关联起来,但是如果我们使用 Target 的话,这个 Target 就有可能独立于他们的生命周期以外,这时候我们就需要使用 context.getApplicationContext() 的上下文了,这样只有在应用完全停止时 Glide 才会杀死这个图片请求。代码如下
Glide.with(mContext.getApplicationContext())
        .load(mUrl)
        .asBitmap()
        .into(target);
ViewTarget
当我们使用 Custom View 时,Glide 并不支持加载图片到自定义 view 中的,使用 ViewTarget 更容易实现。
public class CustomView extends FrameLayout {
    private ImageView mImageView;

    public CustomView(Context context) {
        super(context);
    }

    public CustomView(Context context, AttributeSet attrs) {
        super(context, attrs);
    }

    public CustomView(Context context, AttributeSet attrs, int defStyleAttr) {
        super(context, attrs, defStyleAttr);
    }

    @Override
    protected void onFinishInflate() {
        super.onFinishInflate();
        mImageView = new ImageView(getContext());
        addView(mImageView , LayoutParams.MATCH_PARENT , LayoutParams.MATCH_PARENT);
    }

    public void setImage(Drawable drawable){
        mImageView.setImageDrawable(drawable);
    }
}
上面这个例子就没有办法直接使用 .into() ,如果我们使用 ViewTarget 实现呢!
public void loadImageTarget(Context context){
    CustomView mCustomView = (CustomView) findViewById(R.id.custom_view);

    ViewTarget viewTarget = new ViewTarget<CustomView,GlideDrawable>( mCustomView ) {
        @Override
        public void onResourceReady(GlideDrawable resource, GlideAnimation<? super GlideDrawable> glideAnimation) {
            this.view.setImage(resource);
        }
    };

    Glide.with(context)
            .load(mUrl)
            .into(viewTarget);
}
在 target 的 onResourceReady 回调方法中使用自定义 view 自己的方法去设置图片,可以看到在创建 ViewTarget 的时候传入了 CustomView 的对象。
还有其他Target的使用这里就不一一讲述了,例如 AppWidgetTarget 、 NotificationTarget ...
Transformations篇
图片显示之前我们可能还需要对图片进行处理操作,比如:图片切圆角,灰阶处理等等;这些需求我们通过 Transformations 操作 bitmap 来实现,我们可以修改图片的任意属性:尺寸,范围,颜色,像素位置等等。其实我们之前已经提到过两个 Transformation 了,即 fitCenter 和 centerCrop ,这两个是 Glide 已经实现的。
接下来就要讲讲怎么样来实现自己的 Transformation ,我们需要创建一个类去实现 Transformation 接口,但是要实现这个方法还是比较复杂的,接口中 transform 方法提供的参数 Resource<T> resource 不是那么好处理的。如果你只是想要对图片(不是 Gif 和 video)做常规的 bitmap 转换,我们推荐你使用抽象类 BitmapTransformation。它简化了很多的实现,这应该能覆盖 95% 的应用场景啦。
下面的代码实现了对图片切圆角的操作,其中 getId() 方法描述了这个 Transformation 的唯一标识,为避免意外我们需要确保它是唯一的。
public class RoundTransformation extends BitmapTransformation {
    private float radius = 0f;

    public RoundTransformation(Context context) {
        this(context, 4);
    }

    public RoundTransformation(Context context, int px) {
        super(context);
        this.radius = px;
    }

    @Override
    protected Bitmap transform(BitmapPool pool, Bitmap toTransform, int outWidth, int outHeight) {
        return roundCrop(pool, toTransform);
    }

    private Bitmap roundCrop(BitmapPool pool, Bitmap source) {
        if (source == null)
            return null;

        Bitmap result = pool.get(source.getWidth(), source.getHeight(), Bitmap.Config.ARGB_8888);
        if (result == null) {
            result = Bitmap.createBitmap(source.getWidth(), source.getHeight(), Bitmap.Config.ARGB_8888);
        }

        Canvas canvas = new Canvas(result);
        Paint paint = new Paint();
        paint.setShader(new BitmapShader(source, BitmapShader.TileMode.CLAMP, BitmapShader.TileMode.CLAMP));
        paint.setAntiAlias(true);
        RectF rectF = new RectF(0f, 0f, source.getWidth(), source.getHeight());
        canvas.drawRoundRect(rectF, radius, radius, paint);
        return result;
    }

    @Override
    public String getId() {
        return getClass().getName() + Math.round(radius);
    }

}
现在我们有了自己的 Transformation 就可以来看看怎么使用了。
调用 .transform() 方法,将自定义的 Transformation 的对象作为参数传递进去就可以使用你的 Transformation 了,这里也可以使用 .bitmaoTransform() 但是它只能用于 bitmap 的转换。
Glide.with(context)
    .load(mUrl)
    .transform(new RoundTransformation(context , 20))
    //.bitmapTransform( new RoundTransformation(context , 20) )
    .into(mImageView);
如果我们需要同时执行多个 Transformation 的话,我们不能使用链式的形式多次调用 .transform() 或 .bitmapTransform() 方法,即使你调用了,之前的配置就会被覆盖掉!我们可以直接传递多个转换对象给 .transform() 或 .bitmapTransform() 。
Glide.with(context)
    .load(mUrl)
    .transform(new RoundTransformation(context , 20) ,  new RotateTransformation(context , 90f))
    .into(mImageView);
这段代码中我们把一个图片切圆角,然后做了顺时针旋转90度处理。
下面是旋转处理的代码
public class RotateTransformation extends BitmapTransformation {

    private float rotateRotationAngle = 0f;

    public RotateTransformation(Context context, float rotateRotationAngle) {
        super( context );
        this.rotateRotationAngle = rotateRotationAngle;
    }

    @Override
    protected Bitmap transform(BitmapPool pool, Bitmap toTransform, int outWidth, int outHeight) {
        Matrix matrix = new Matrix();

        matrix.postRotate(rotateRotationAngle);

        return Bitmap.createBitmap(toTransform, 0, 0, toTransform.getWidth(), toTransform.getHeight(), matrix, true);
    }

    @Override
    public String getId() {
        return getClass().getName() + Math.round(rotateRotationAngle);
    }
}
注:这里需要注意一点 .centerCrop() 和 .fitCenter() 也都是 Transformation 所以也是遵循同时使用多个 Transformation 的规则的,即:当你使用了自定义转换后你就不能使用 .centerCrop() 或 .fitCenter() 了。
这里有一个 GLide Transformations 的库,它提供了很多 Transformation 的实现,非常值得去看,不必重复造轮子对吧!
glide-transformations
这个库有两个不同的版本,扩展版本包含了更多的 Transformation ,它是通过设备的 GPU 来计算处理的,需要有额外的依赖,所以这两个版本的设置有一点不同。还是根据需要再决定使用那个版本吧!
Animate篇
从图像到图像的平滑过渡是非常重要,Glide 中有一个标准动画去柔软的在你的 UI 中改变,但是我们现在希望设置自己的动画。
<set xmlns:android="http://schemas.android.com/apk/res/android"
    android:fillAfter="true">

    <scale
        android:duration="@android:integer/config_longAnimTime"
        android:fromXScale="0.1"
        android:fromYScale="0.1"
        android:pivotX="50%"
        android:pivotY="50%"
        android:toXScale="1"
        android:toYScale="1"/>
</set>
这是个 XML 动画缩放动画,图片刚开始小的,然后逐渐增大到原尺寸。我们现在要应用到 Glide 加载图片中去,调用 .animate() 方法传入 XML 动画的 id 即可。
Glide.with(context)
    .load(mUrl)
    .transform(new RoundTransformation(this , 20))
    .animate( R.anim.zoom_in )
    .into(mImageView);
这种加载方式用在常规的 ImageView 上是没有问题的,但如果使用的 Target 是一些自定义的时候就没法好好的实现了。这时候我们就可以通过传入实现了 ViewPropertyAnimation.Animator 接口的类对象来实现。
ViewPropertyAnimation.Animator animator = new ViewPropertyAnimation.Animator() {
    @Override
    public void animate(View view) {
        view.setAlpha( 0f );

        ObjectAnimator fadeAnim = ObjectAnimator.ofFloat( view, "alpha", 0f, 1f );
        fadeAnim.setDuration( 2500 );
        fadeAnim.start();
    }
};
然后,我们只需要在 Glide 请求中设置这个动画对象就ok了
Glide.with(context)
    .load(mUrl)
    .animate( animator )
    .into(viewTarget);
在 animate(View view) 中你的动画对象方法中, 你可以做任何你想要对视图做的事情。自由的用你创建的动画吧。
Modules篇
Glide 的 Module 是一个可以全局改变 Glide 的行为的东西,为了定制 Glide 的行为我们要去实现 interface GlideModule 来写我们自己的代码。
public class ExampleModule implements GlideModule{
    @Override
    public void applyOptions(Context context, GlideBuilder builder) {
        // todo
    }

    @Override
    public void registerComponents(Context context, Glide glide) {
        // todo
    }
}
可以看到 GlideModule 为我们提供了两个方法,这里我们主要使用的是 applyOptions(Context context, GlideBuilder builder) , 我们自己的需要重新定义的代码写在该方法里就可以了。然后我们还需要去 AndroidManifest.xml 中使用 meta 声明我们上面实现的 Module
<?xml version="1.0" encoding="utf-8"?>
<manifest xmlns:android="http://schemas.android.com/apk/res/android"
    package="com.mrtrying.demoglide">

    <application>

        <meta-data
            android:name="com.mrtrying.demoglide.module.ExampleModule"
            android:value="GlideModule" />

        ...

    </application>

    ...

</manifest>
到这里我们就完成了 ExampleModule 的声明,Glide 将会在工作是使用我们所定义的 Module
TIPS
我们需要将 android:name 属性改成 包名+类名 的形式,这样的引用才是正确的。如果你想删掉 Glide Module,只需要删除在 AndroidManifest.xml 中的声明就可以了。Java 类可以保存,说不定以后会用呢。如果它没有在 AndroidManifest.xml 中被引用,那它不会被加载或被使用。
定制 module 的话 Glide 会有这样一个优点:你可以同时声明多个 Glide module。Glide 将会(没有特定顺序)得到所有的声明 module。因为你当前不能定义顺序,请确保定制不会引起冲突!
这个过程走通了,接下来我们来看看是怎么自定义的。applyOptions(Context context, GlideBuilder builder) 中有两个参数, 我们通过使用 GlideBuilder 来实现我们的需求。先看看 GlideBuilder 中可用的方法
- .setMemoryCache(MemoryCache memoryCache)
- .setBitmapPool(BitmapPool bitmapPool)
- .setDiskCache(DiskCache.Factory diskCacheFactory)
- .setDiskCacheService(ExecutorService service)
- .setResizeService(ExecutorService service)
- .setDecodeFormat(DecodeFormat decodeFormat)
可以看到,这个 GlideBuilder 对象给你访问了 Glide 重要的核心组件。接下来我们就要试着去使用这些方法
增加 Glide 的图片质量
在 Android 中有两个主要的方法对图片进行解码:ARGB_8888 和 RGB_565 。前者为每个像素使用4个字节,后者每个像素仅使用2个字节。ARGB_8888 的有时就是图像质量更高以及能储存一个 alpha 通道。 Picasso 使用的就是 ARGB_8888 , Glide 默认使用低质量的 RGB_565 ,但是现在你就可以使用 Glide module 来改变图片解码规则。就象这样
public class QualityModule implements GlideModule{
    @Override
    public void applyOptions(Context context , GlideBuilder builder){
        builder.setDecodeFormat(DecodeFormat.PREFER_ARGB_8888);
    }

    @Override
    public void registerComponents(Context context , Glide glide){
        // nothing to do here
    }
}
这样我们就简单的增加了 Glide 的图片质量。
往往我们还会遇到一些情况,希望 Glide 可以使用我们自己的网络框架,我们就需要做一些事情来实现这个需求了。Glide 的开发者不强制设置网络库给你,所以Glide可以说和 HTTPS 无关。理论上,它可以与任何的网络库实现,只要覆盖了基本的网络能力就行。同样是需要实现 Glide 的 ModuleLoader 的接口,为了让我们更加易用,Glide 为 OkHttp 和 Volley 两个网络库提供了实现。
假设我要集成 OkHttp 作为 Glide 的网络库,我可以手动实现一个 GlideModule 也可以在 build.gradle 中添加依赖:
dependencies{
    //...

    // Glide
    compile 'com.github.bumptech.glide:glide:3.7.0'

    // Glide's OkHttp Integration
    compile 'com.github.bumptech.glide:okhttp-integration:1.4.0@aar'
    compile 'com.squareup.okhttp:okhttp:3.2.0'
}
Gradle 会自动合并必要的 GlideModule 到你的 AndroidManifest.xml , Glide 会认可在 manifest 中存在,然后使用 OkHttp 做到的所有网络连接。
13、Handler、Thread和HandlerThread的差别
Android 并发第五篇
本篇会讲解如何利用 HandlerThread 实现异步操作。
HandlerThread 本身其实就是一个 Thread ,但是其内部还利用 Handler 机制。
对于提交的任务(或者说是信息 Message)依次处理。
所以在介绍 HandlerThread 原理以及如果使用之前,会首先说一个 Handler 异步机制。
当然 Handler, Looper, Message 之间的关系相信很多人都已经很熟悉了,这里会只着重介绍和本节相关的内容。
一 、Handler 机制:
1、 我们都知道,在子线程中通知主线程更新UI界面,需要使用Handler。
一般我们就直接在 Activity 中直接 初始化一个Handler 对象,像这样:
        Handler uiHandler = new Handler(){
            @Override
            public void handleMessage(Message msg) {
                super.handleMessage(msg);
            }
};- 1
- 2
- 3
- 4
- 5
- 6
重写 handlerMessage() 方法,然后利用 uiHandler 对象在子线程中发送消息。
2、 或者我们也可以直接在主线程直接 new 一个 Handler 对象:
Handler handler = new Handler();- 1
但在子线程中 new Handler()需要这样:
Handler handler = new Handler(Context.getMainLooper());- 1
然后在子线程中:
        handler.post(new Runnable() {
            @Override
            public void run() {
        //执行在主线程中
                Log.d(TAG, "run on UI  Thread Id : "+Thread.currentThread().getId());
            }
});- 1
- 2
- 3
- 4
- 5
- 6
- 7
Handler 源码:
    public final boolean post(Runnable r)
    {
       return  sendMessageDelayed(getPostMessage(r), 0);
    }

    private static Message getPostMessage(Runnable r) {
        Message m = Message.obtain();
        m.callback = r;
        return m;
}- 1
- 2
- 3
- 4
- 5
- 6
- 7
- 8
- 9
- 10
在handler 中会将Runnable 对象赋值给 message.callback 属性,封装成Message,调用 sendMessageDelaye() 将消息发送出去。
sendMessageDelaye() 方法最后在辗转几次后最终会调用sendMessageAtTime() 将消息放到消息队列中。
    public boolean sendMessageAtTime(Message msg, long uptimeMillis) {
        MessageQueue queue = mQueue;
        if (queue == null) {
            RuntimeException e = new RuntimeException(
                    this + " sendMessageAtTime() called with no mQueue");
            Log.w("Looper", e.getMessage(), e);
            return false;
        }
        return enqueueMessage(queue, msg, uptimeMillis);
}- 1
- 2
- 3
- 4
- 5
- 6
- 7
- 8
- 9
- 10
而 Handler.sendMessage()的源码为:
    public final boolean sendMessage(Message msg)
    {
        return sendMessageDelayed(msg, 0);
}- 1
- 2
- 3
- 4
所以本质上,无论是利用Handler.sendMessage(),还是 Handler.post() 都是将消息添加到消息队列之中。
那么为什么在子线程中需要传入 MainLooper , 而主线程却不需要呢?
首先我们是要在子线程中通知主线程,那么我们便需要代码执行在UI 线程中。
如果在子线程中直接:
Handler handler = new Handler();- 1
会抛出异常:
Can’t create handler inside thread that has not called Looper.prepare()
我们可以看一下源码:
Handler 源码:
    public Handler() {
        this(null, false);
    }

    public Handler(Callback callback, boolean async) {
        if (FIND_POTENTIAL_LEAKS) {
            final Class<? extends Handler> klass = getClass();
            if ((klass.isAnonymousClass() || klass.isMemberClass() || klass.isLocalClass()) &&
                    (klass.getModifiers() & Modifier.STATIC) == 0) {
                Log.w(TAG, "The following Handler class should be static or leaks might occur: " +
                    klass.getCanonicalName());
            }
        }

        mLooper = Looper.myLooper();
        if (mLooper == null) {
            throw new RuntimeException(
                "Can't create handler inside thread that has not called Looper.prepare()");
        }
        mQueue = mLooper.mQueue;
        mCallback = callback;
        mAsynchronous = async;
}- 1
- 2
- 3
- 4
- 5
- 6
- 7
- 8
- 9
- 10
- 11
- 12
- 13
- 14
- 15
- 16
- 17
- 18
- 19
- 20
- 21
- 22
- 23
我们能够看到,无参的构造方法,会调用public Handler(Callback callback, boolean async) 。
在这个方法中,调用 Looper.myLooper(); 获取 Looper 对象,之所以抛出异常,一定是其为null了。
那么为什么没有获取到Looper对象呢?
接下来看Looper源码:
    public static @Nullable Looper myLooper() {
        return sThreadLocal.get();
}- 1
- 2
- 3
从 ThreadLocal 变量中获取当前线程的值,那么这个值是在哪里设置的呢?
    public static void prepare() {
        prepare(true);
    }

    private static void prepare(boolean quitAllowed) {
        if (sThreadLocal.get() != null) {
            throw new RuntimeException("Only one Looper may be created per thread");
        }
        sThreadLocal.set(new Looper(quitAllowed));
    }
- 1
- 2
- 3
- 4
- 5
- 6
- 7
- 8
- 9
- 10
- 11
在Looper.prepare() 中设置的。
也就是说在子线程中直接 new Handler() 对象,需要先调用Looper.prepare() 方法。
而在主线程中是不需要的,因为在应用初始化时,已经调用 Looper.prepare() 了。
而Looper 中还有一个方法:Looper.loop() 方法
Looper.loop() 内包含一个死循环,不断的从队列中获取消息,如果没有消息时,会阻塞。
Looper.loop() 调用了 Handler.dispatchMessage() 方法:
    public void dispatchMessage(Message msg) {
        if (msg.callback != null) {
            handleCallback(msg);
        } else {
            if (mCallback != null) {
                if (mCallback.handleMessage(msg)) {
                    return;
                }
            }
            handleMessage(msg);
        }
    }

    private static void handleCallback(Message message) {
        message.callback.run();
}- 1
- 2
- 3
- 4
- 5
- 6
- 7
- 8
- 9
- 10
- 11
- 12
- 13
- 14
- 15
- 16
在dispatchMessage() 方法中会调用 handleMessage() 方法,或者调用 handleCallback() 方法处理我们利用Handler post Runnable
所封装的消息。
3 、所以通过以上总结
我们知道如果Looper.loop()是在主线程中调用的,那么我们重写的 handlerMessage() 方法
和封装在消息中的 Runnable 都会在主线程中执行。
反过来说,如果Looper.prepare() 以及 Looper.loop() 是在子线程中调用的,那么基于子线程的Looper,所创建的Handler
所发送的消息都将会执行在子线程中,HandlerThread 便是利用了这个原理。
二 、HandlerThread
1 、我们首先看一下 HandlerThread 如何使用:
    private void requestWithHandlerThread() {
    //初始化一个 HandlerThread 对象
        HandlerThread handlerThread = new HandlerThread("HandlerThread");
    //调用start() 方法
        handlerThread.start();
    Log.d(TAG, "Main : "+Thread.currentThread().getId());
        Log.d(TAG, "HandlerThread : "+handlerThread.getId());
    //初始化一个Handler 对象,利用 HandlerThread 中的 Looper 对象
        Handler handler = new Handler(handlerThread.getLooper()){
            @Override
            public void handleMessage(Message msg) {
                super.handleMessage(msg);
                //执行在子线程中
                Log.d(TAG,"Thread : "+Thread.currentThread().getId() +"   "+msg.obj);


            }
        };
        Message message = Message.obtain();
        message.obj = "From Message";
        handler.sendMessage(message);
        handler.post(new Runnable() {
            @Override
            public void run() {
        //执行在子线程中
                Log.d(TAG, "post : "+Thread.currentThread().getId());
            }
        });
}- 1
- 2
- 3
- 4
- 5
- 6
- 7
- 8
- 9
- 10
- 11
- 12
- 13
- 14
- 15
- 16
- 17
- 18
- 19
- 20
- 21
- 22
- 23
- 24
- 25
- 26
- 27
- 28
- 29
2 、结果:
11-15 17:20:15.634 12297-12297/com.loader.demo D/Demo: Main : 1
11-15 17:20:15.634 12297-12297/com.loader.demo D/Demo: HandlerThread : 26599
11-15 17:20:15.640 12297-12416/com.loader.demo D/Demo: Thread : 26599   From Message
11-15 17:20:15.640 12297-12416/com.loader.demo D/Demo: post : 26599- 1
- 2
- 3
- 4
在这里 HandlerThread 需要和 Handler 一起配合使用,HandlerThread 提供一个在子线程中创建的 Looper 。
按照之前的推论,Looper.prepare(), 以及 Looper.loop() 都是执行在子线程中,那么在处理消息时也必然执行在子线程中。
所以其实现了异步的效果。
3 、接下来看一下 HandlerThread 的源码:
public class HandlerThread extends Thread {
    int mPriority;
    int mTid = -1;
    Looper mLooper;

    public HandlerThread(String name) {
        super(name);
        mPriority = Process.THREAD_PRIORITY_DEFAULT;
    }

    public HandlerThread(String name, int priority) {
        super(name);
        mPriority = priority;
    }


    protected void onLooperPrepared() {
    }

    @Override
    public void run() {
        mTid = Process.myTid();
        Looper.prepare();
        synchronized (this) {
            mLooper = Looper.myLooper();
            notifyAll();
        }
        Process.setThreadPriority(mPriority);
        onLooperPrepared();
        Looper.loop();
        mTid = -1;
    }

    public Looper getLooper() {
        if (!isAlive()) {
            return null;
        }

        // If the thread has been started, wait until the looper has been created.
        synchronized (this) {
            while (isAlive() && mLooper == null) {
                try {
                    wait();
                } catch (InterruptedException e) {
                }
            }
        }
        return mLooper;
    }

    public boolean quit() {
        Looper looper = getLooper();
        if (looper != null) {
            looper.quit();
            return true;
        }
        return false;
    }

    public boolean quitSafely() {
        Looper looper = getLooper();
        if (looper != null) {
            looper.quitSafely();
            return true;
        }
        return false;
    }

    public int getThreadId() {
        return mTid;
    }
}
- 1
- 2
- 3
- 4
- 5
- 6
- 7
- 8
- 9
- 10
- 11
- 12
- 13
- 14
- 15
- 16
- 17
- 18
- 19
- 20
- 21
- 22
- 23
- 24
- 25
- 26
- 27
- 28
- 29
- 30
- 31
- 32
- 33
- 34
- 35
- 36
- 37
- 38
- 39
- 40
- 41
- 42
- 43
- 44
- 45
- 46
- 47
- 48
- 49
- 50
- 51
- 52
- 53
- 54
- 55
- 56
- 57
- 58
- 59
- 60
- 61
- 62
- 63
- 64
- 65
- 66
- 67
- 68
- 69
- 70
- 71
- 72
- 73
4 、总结
可以看到 HandlerThread 本身是一个 Thread 所以其 run() 方法会执行在子线程中。在 run() 方法中首先调用了Looper.prepare(),
用于初始化消息队列以及Looper对象,紧接着调用 Looper.loop() 开始从消息队列中轮询,一旦有消息便将消息取出处理。
因为整个过程都执行在子线程中,所以当我们用在子线程中创建的Looper作为参数传给Handler时,其处理消息的代码就会执行在子线程中了。
以上便是 HandlerThread 的原理,主要还是利用 Handler,Message, Looper 之间的关系。
三 、自定义 HandlerThread:
当我们了解了其原理之后,其实我们也可以自定义自己 HandlerThread , 在线程之中处理消息。
现在我们自定义一个MyHandlerThread 同样继承 Thread。
1 、代码如下:
public class MyHandlerThread extends Thread {

    private Handler asyncHandler;
    private Looper mLooper;
    public MyHandlerThread() {

    }

    @Override
    public void run() {

        Looper.prepare();
        mLooper = Looper.myLooper();
        synchronized (this) {
            mLooper = Looper.myLooper();
            notifyAll();
        }
        asyncHandler = new Handler(){
            @Override
            public void handleMessage(Message msg) {
                handlerThreadMessage(msg);
            }
        };
        Looper.loop();

    }

    public Looper getLooper() {
        if (!isAlive()) {
            return null;
        }

        // If the thread has been started, wait until the looper has been created.
        synchronized (this) {
            while (isAlive() && mLooper == null) {
                try {
                    wait();
                } catch (InterruptedException e) {
                }
            }
        }
        return mLooper;
    }

    //退出
    public void quit() {
        Looper looper = getLooper();
        if(looper != null) {
            looper.quit();
        }
    }


    /**
     * 发送消息
     * @param message
     */
    public void sendMessage(Message message) {
        if(asyncHandler != null) {
            Log.d("test","sendMessage");
            asyncHandler.sendMessage(message);
        }
    }

    /**
     * 处理消息
     * @param message
     */
    private void handlerThreadMessage(Message message) {
        Log.d("test","Message : "+message.obj+" Thread " +Thread.currentThread().getId());
    }
}- 1
- 2
- 3
- 4
- 5
- 6
- 7
- 8
- 9
- 10
- 11
- 12
- 13
- 14
- 15
- 16
- 17
- 18
- 19
- 20
- 21
- 22
- 23
- 24
- 25
- 26
- 27
- 28
- 29
- 30
- 31
- 32
- 33
- 34
- 35
- 36
- 37
- 38
- 39
- 40
- 41
- 42
- 43
- 44
- 45
- 46
- 47
- 48
- 49
- 50
- 51
- 52
- 53
- 54
- 55
- 56
- 57
- 58
- 59
- 60
- 61
- 62
- 63
- 64
- 65
- 66
- 67
- 68
- 69
- 70
- 71
- 72
- 73
2、用法也很简单:
定义变量:
private MyHandlerThread handlerThread;- 1
在onCreate() 中初始化:
handlerThread = new MyHandlerThread();
handlerThread.start();- 1
- 2
在需要异步时调用:
    private void updateData() {
        Message message = Message.obtain();
        message.obj = "更新数据";
        handlerThread.sendMessage(message);
}- 1
- 2
- 3
- 4
- 5
这样我们便实现自定义 HandlerThread ,其中我们还可以根据需求封装不同发送消息的方法。
并且我们还将提交任务的代码和在子线程中处理任务的代码分开了,两块代码利用 MessageQueue 相连接,
那么这是不是也算是一种生产者消费者模式呢? 因为Handler 机制本身也算是一种生产者消费者模式啊。
四、
下一篇会讲解 Android 中另外一个可以实现异步的类: IntentService 。
IntentService 本身当然是一个 Service , 但是它可以做到完成任务后自动退出,下一篇一起看看其是怎么做到的。
14、IntentService作用是什么,AIDL解决了什么问题
IntentService
IntentService,可以看做是Service和HandlerThread的结合体,在完成了使命之后会自动停止,适合需要在工作线程处理UI无关任务的场景。
- IntentService 是继承自 Service 并处理异步请求的一个类,在 IntentService 内有一个工作线程来处理耗时操作。
- 当任务执行完后,IntentService 会自动停止,不需要我们去手动结束。
- 如果启动 IntentService 多次,那么每一个耗时操作会以工作队列的方式在 IntentService 的 onHandleIntent 回调方法中执行,依次去执行,使用串行的方式,执行完自动结束。
例子
下面是一个例子,点击开始启动一个IntentService去更新进度条,更新完毕IntentService会自动结束。如果多次点击开始,就会执行多遍,多遍执行完之后IntentService才会执行onDestroy方法。
IntentService:
package com.bourne.android_common.ServiceDemo;

import android.app.IntentService;
import android.content.Intent;
import android.support.v4.content.LocalBroadcastManager;

import com.bourne.common_library.utils.Logout;

public class MyIntentService extends IntentService {

    /**
     * 是否正在运行
     */
    private boolean isRunning;

    /**
     *进度
     */
    private int count;

    /**
     * 广播
     */
    private LocalBroadcastManager mLocalBroadcastManager;

    public MyIntentService() {
        super("MyIntentService");
        Logout.e("MyIntentService");
    }

    @Override
    public void onCreate() {
        super.onCreate();
        Logout.e("onCreate");
        mLocalBroadcastManager = LocalBroadcastManager.getInstance(this);
    }

    @Override
    protected void onHandleIntent(Intent intent) {
        Logout.e("onHandleIntent");
        try {
            Thread.sleep(1000);
            isRunning = true;
            count = 0;
            while (isRunning) {
                count++;
                if (count >= 100) {
                    isRunning = false;
                }
                Thread.sleep(50);
                sendThreadStatus("线程运行中...", count);
            }

        } catch (InterruptedException e) {
            e.printStackTrace();
        }
    }

    /**
     * 发送进度消息
     */
    private void sendThreadStatus(String status, int progress) {
        Intent intent = new Intent(IntentServiceActivity.ACTION_TYPE_THREAD);
        intent.putExtra("status", status);
        intent.putExtra("progress", progress);
        mLocalBroadcastManager.sendBroadcast(intent);
    }

    @Override
    public void onDestroy() {
        super.onDestroy();
        Logout.e("线程结束运行..." + count);
    }
}
- 1
- 2
- 3
- 4
- 5
- 6
- 7
- 8
- 9
- 10
- 11
- 12
- 13
- 14
- 15
- 16
- 17
- 18
- 19
- 20
- 21
- 22
- 23
- 24
- 25
- 26
- 27
- 28
- 29
- 30
- 31
- 32
- 33
- 34
- 35
- 36
- 37
- 38
- 39
- 40
- 41
- 42
- 43
- 44
- 45
- 46
- 47
- 48
- 49
- 50
- 51
- 52
- 53
- 54
- 55
- 56
- 57
- 58
- 59
- 60
- 61
- 62
- 63
- 64
- 65
- 66
- 67
- 68
- 69
- 70
- 71
- 72
- 73
- 74
- 75
启动之后会先执行构造方法,然后执行onCreate方法,再到onHandleIntent方法。在onHandleIntent让进度自增,每次自增睡眠50ms并向Activity发送广播并传递进度的数据。
IntentServiceActivity:
package com.bourne.android_common.ServiceDemo;

import android.content.BroadcastReceiver;
import android.content.Context;
import android.content.Intent;
import android.content.IntentFilter;
import android.support.v4.content.LocalBroadcastManager;
import android.support.v7.app.AppCompatActivity;
import android.os.Bundle;
import android.view.View;
import android.widget.ProgressBar;
import android.widget.TextView;

import com.bourne.android_common.R;

import butterknife.BindView;
import butterknife.ButterKnife;
import butterknife.OnClick;

public class IntentServiceActivity extends AppCompatActivity {
    /**
     * 状态文字
     */
    @BindView(R.id.tv_status)
    TextView tv_status;

    /**
     * 进度文字
     */
    @BindView(R.id.tv_progress)
    TextView tv_progress;

    /**
     * 进度条
     */
    @BindView(R.id.progressbar)
    ProgressBar progressbar;

    private LocalBroadcastManager mLocalBroadcastManager;
    private MyBroadcastReceiver mBroadcastReceiver;
    public final static String ACTION_TYPE_THREAD = "action.type.thread";

    @Override
    protected void onCreate(Bundle savedInstanceState) {
        super.onCreate(savedInstanceState);
        setContentView(R.layout.activity_intent_service);
        ButterKnife.bind(this);

        //注册广播
        mLocalBroadcastManager = LocalBroadcastManager.getInstance(this);
        mBroadcastReceiver = new MyBroadcastReceiver();
        IntentFilter intentFilter = new IntentFilter();
        intentFilter.addAction(ACTION_TYPE_THREAD);
        mLocalBroadcastManager.registerReceiver(mBroadcastReceiver, intentFilter);

        initView();
    }

    public void initView() {
        tv_status.setText("线程状态:未运行");
        progressbar.setMax(100);
        progressbar.setProgress(0);
        tv_progress.setText("0%");
    }

    @Override
    protected void onDestroy() {
        super.onDestroy();
        //注销广播
        mLocalBroadcastManager.unregisterReceiver(mBroadcastReceiver);
    }

    public class MyBroadcastReceiver extends BroadcastReceiver {
        @Override
        public void onReceive(Context context, Intent intent) {
            switch (intent.getAction()) {

                case ACTION_TYPE_THREAD:
                    //更改UI
                    int progress = intent.getIntExtra("progress", 0);
                    tv_status.setText("线程状态:" + intent.getStringExtra("status"));
                    progressbar.setProgress(progress);
                    tv_progress.setText(progress + "%");
                    if (progress >= 100) {
                        tv_status.setText("线程结束");
                    }
                    break;
            }
        }
    }

    @OnClick({R.id.btn_start})
    public void onClick(View view) {
        switch (view.getId()) {
            case R.id.btn_start:
                Intent intent = new Intent(IntentServiceActivity.this, MyIntentService.class);
                startService(intent);
                break;
        }
    }
}
- 1
- 2
- 3
- 4
- 5
- 6
- 7
- 8
- 9
- 10
- 11
- 12
- 13
- 14
- 15
- 16
- 17
- 18
- 19
- 20
- 21
- 22
- 23
- 24
- 25
- 26
- 27
- 28
- 29
- 30
- 31
- 32
- 33
- 34
- 35
- 36
- 37
- 38
- 39
- 40
- 41
- 42
- 43
- 44
- 45
- 46
- 47
- 48
- 49
- 50
- 51
- 52
- 53
- 54
- 55
- 56
- 57
- 58
- 59
- 60
- 61
- 62
- 63
- 64
- 65
- 66
- 67
- 68
- 69
- 70
- 71
- 72
- 73
- 74
- 75
- 76
- 77
- 78
- 79
- 80
- 81
- 82
- 83
- 84
- 85
- 86
- 87
- 88
- 89
- 90
- 91
- 92
- 93
- 94
- 95
- 96
- 97
- 98
- 99
- 100
- 101
- 102
- 103
点击开始按钮,会启动MyIntentService。mLocalBroadcastManager.registerReceiver(mBroadcastReceiver, intentFilter)注册广播,接收广播消息和数据,并时刻更改进度条进度。
注册MyIntentService
        <service
            android:name=".ServiceDemo.MyIntentService">
</service>- 1
- 2
- 3
IntentService源码分析
源码
package android.app;

import android.annotation.WorkerThread;
import android.annotation.Nullable;
import android.content.Intent;
import android.os.Handler;
import android.os.HandlerThread;
import android.os.IBinder;
import android.os.Looper;
import android.os.Message;

public abstract class IntentService extends Service {
    private volatile Looper mServiceLooper;
    private volatile ServiceHandler mServiceHandler;
    private String mName;
    private boolean mRedelivery;

    private final class ServiceHandler extends Handler {
        public ServiceHandler(Looper looper) {
            super(looper);
        }

        @Override
        public void handleMessage(Message msg) {
            onHandleIntent((Intent)msg.obj);
            stopSelf(msg.arg1);
        }
    }

    /**
     * Creates an IntentService.  Invoked by your subclass's constructor.
     */
    public IntentService(String name) {
        super();
        mName = name;
    }

    /**
     * Sets intent redelivery preferences.  Usually called from the constructor
     */
    public void setIntentRedelivery(boolean enabled) {
        mRedelivery = enabled;
    }

    @Override
    public void onCreate() {
        // TODO: It would be nice to have an option to hold a partial wakelock
        // during processing, and to have a static startService(Context, Intent)
        // method that would launch the service & hand off a wakelock.

        super.onCreate();
        HandlerThread thread = new HandlerThread("IntentService[" + mName + "]");
        thread.start();

        mServiceLooper = thread.getLooper();
        mServiceHandler = new ServiceHandler(mServiceLooper);
    }

    @Override
    public void onStart(@Nullable Intent intent, int startId) {
        Message msg = mServiceHandler.obtainMessage();
        msg.arg1 = startId;
        msg.obj = intent;
        mServiceHandler.sendMessage(msg);
    }

    /**
     * You should not override this method for your IntentService. Instead,
     */
    @Override
    public int onStartCommand(@Nullable Intent intent, int flags, int startId) {
        onStart(intent, startId);
        return mRedelivery ? START_REDELIVER_INTENT : START_NOT_STICKY;
    }

    @Override
    public void onDestroy() {
        mServiceLooper.quit();
    }

    /**
     * Unless you provide binding for your service, you don't need to implement this
     */
    @Override
    @Nullable
    public IBinder onBind(Intent intent) {
        return null;
    }

    /**
     */
    @WorkerThread
    protected abstract void onHandleIntent(@Nullable Intent intent);
}
- 1
- 2
- 3
- 4
- 5
- 6
- 7
- 8
- 9
- 10
- 11
- 12
- 13
- 14
- 15
- 16
- 17
- 18
- 19
- 20
- 21
- 22
- 23
- 24
- 25
- 26
- 27
- 28
- 29
- 30
- 31
- 32
- 33
- 34
- 35
- 36
- 37
- 38
- 39
- 40
- 41
- 42
- 43
- 44
- 45
- 46
- 47
- 48
- 49
- 50
- 51
- 52
- 53
- 54
- 55
- 56
- 57
- 58
- 59
- 60
- 61
- 62
- 63
- 64
- 65
- 66
- 67
- 68
- 69
- 70
- 71
- 72
- 73
- 74
- 75
- 76
- 77
- 78
- 79
- 80
- 81
- 82
- 83
- 84
- 85
- 86
- 87
- 88
- 89
- 90
- 91
- 92
- 93
- 94
- 95
IntentService继承自Service,内部有一个HandlerThread对象。
在onCreate的时候会创建一个HandlerThread对象,并启动线程。紧接着创建ServiceHandler对象,ServiceHandler继承自Handler,用来处理消息。ServiceHandler将获取HandlerThread的Looper就可以开始正常工作了。
每启动一次onStart方法,就会把数消息和数据发给mServiceHandler,相当于发送了一次Message消息给HandlerThread的消息队列。mServiceHandler会把数据传个onHandleIntent方法,onHandleIntent是个抽象方法,需要在IntentService实现,所以每次onStart方法之后都会调用我们自己写的onHandleIntent方法去处理。处理完毕使用stopSelf通知HandlerThread已经处理完毕,HandlerThread继续观察消息队列,如果还有未执行玩的message则继续执行,否则结束。
启动 IntentService 为什么不需要新建线程?
IntentService内部的HandlerThread 继承自 Thread,内部封装了 Looper,在这里新建线程并启动,所以启动 IntentService 不需要新建线程。
为什么不建议通过 bindService() 启动 IntentService?
@Override
public IBinder onBind(Intent intent) {
    return null;
}- 1
- 2
- 3
- 4
IntentService 源码中的 onBind() 默认返回 null;不适合 bindService() 启动服务,如果你执意要 bindService() 来启动 IntentService,可能因为你想通过 Binder 或 Messenger 使得 IntentService 和 Activity 可以通信,这样那么 onHandleIntent() 不会被回调,相当于在你使用 Service 而不是 IntentService。
为什么多次启动 IntentService 会顺序执行事件,停止服务后,后续的事件得不到执行?
@Override
public void onStart(Intent intent, int startId) {
    Message msg = mServiceHandler.obtainMessage();
    msg.arg1 = startId;
    msg.obj = intent;
    mServiceHandler.sendMessage(msg);
}

@Override
public void onDestroy() {
    mServiceLooper.quit();
}- 1
- 2
- 3
- 4
- 5
- 6
- 7
- 8
- 9
- 10
- 11
- 12
IntentService 中使用的 Handler、Looper、MessageQueue 机制把消息发送到线程中去执行的,所以多次启动 IntentService 不会重新创建新的服务和新的线程,只是把消息加入消息队列中等待执行,而如果服务停止,会清除消息队列中的消息,后续的事件得不到执行。
前言
在决定用这个标题之前甚是忐忑,主要是担心自己对AIDL的理解不够深入,到时候大家看了之后说——你这是什么玩意儿,就这么点东西就敢说够了?简直是坐井观天不知所谓——那样就很尴尬了。不过又转念一想,我辈年轻人自当有一种一往无前的锐气,标题大气一点岂不更好?并且大家都是文明人,总归更多的是理解与补充而不是侮辱与谩骂?所以最终还是厚颜用了这么一个不怎么有耻的标题。
好了,接下来进入正题,谈谈我对AIDL的理解和认识。
正文
1,概述
AIDL是一个缩写,全称是Android Interface Definition Language,也就是Android接口定义语言。是的,首先我们知道的第一点就是:AIDL是一种语言。既然是一种语言,那么相应的就很自然的衍生出了一些问题:
- 为什么要设计出这么一门语言?
- 它有哪些语法?
- 我们应该如何使用它?
- 再深入一点,我们可以思考,我们是如何通过它来达到我们的目的的?
- 更深入一点,为什么要这么设计这门语言?会不会有更好的方式来实现我们的目的?
接下来,我们就一步步的来解答上面的这些问题。
ps:1,在研究AIDL相关的东西之前,一些必要的知识储备是要有的。一方面是关于Android中service相关的知识,要了解的比较通透才行,关于这方面的东西可以参考 Android中的Service:默默的奉献者 (1),Android中的Service:Binder,Messenger,AIDL(2) 这两篇博文。另一方面是关于Android中序列化的相关知识,这方面的东西文中会简单提及,但是如果想要深入的研究一下的话最好还是去找一些这方面的资料看一下。 2,我的编译环境为Android Studio2.1.2,SDK Version 23,JDK 1.7。
2,为什么要设计这门语言?
设计这门语言的目的是为了实现进程间通信,尤其是在涉及多进程并发情况下的进程间通信。
每一个进程都有自己的Dalvik VM实例,都有自己的一块独立的内存,都在自己的内存上存储自己的数据,执行着自己的操作,都在自己的那片狭小的空间里过完自己的一生。每个进程之间都你不知我,我不知你,就像是隔江相望的两座小岛一样,都在同一个世界里,但又各自有着自己的世界。而AIDL,就是两座小岛之间沟通的桥梁。相对于它们而言,我们就好像造物主一样,我们可以通过AIDL来制定一些规则,规定它们能进行哪些交流——比如,它们可以在我们制定的规则下传输一些特定规格的数据。
总之,通过这门语言,我们可以愉快的在一个进程访问另一个进程的数据,甚至调用它的一些方法,当然,只能是特定的方法。
但是,如果仅仅是要进行跨进程通信的话,其实我们还有其他的一些选择,比如 BroadcastReceiver , Messenger 等,但是 BroadcastReceiver 占用的系统资源比较多,如果是频繁的跨进程通信的话显然是不可取的;Messenger 进行跨进程通信时请求队列是同步进行的,无法并发执行,在有些要求多进程的情况下不适用——这种时候就需要使用 AIDL 了。如果想要了解它们更详细的区别的话,可以去我的另一篇博文看看:Android中的Service:Binder,Messenger,AIDL(2)
3,它有哪些语法?
其实AIDL这门语言非常的简单,基本上它的语法和 Java 是一样的,只是在一些细微处有些许差别——毕竟它只是被创造出来简化Android程序员工作的,太复杂不好——所以在这里我就着重的说一下它和 Java 不一样的地方。主要有下面这些点:
- 文件类型:用AIDL书写的文件的后缀是 .aidl,而不是 .java。
- 数据类型:AIDL默认支持一些数据类型,在使用这些数据类型的时候是不需要导包的,但是除了这些类型之外的数据类型,在使用之前必须导包,就算目标文件与当前正在编写的 .aidl 文件在同一个包下——在 Java 中,这种情况是不需要导包的。比如,现在我们编写了两个文件,一个叫做 Book.java ,另一个叫做 BookManager.aidl,它们都在 com.lypeer.aidldemo 包下 ,现在我们需要在 .aidl 文件里使用 Book 对象,那么我们就必须在 .aidl 文件里面写上
import com.lypeer.aidldemo.Book;哪怕 .java 文件和 .aidl 文件就在一个包下。
默认支持的数据类型包括:
- Java中的八种基本数据类型,包括 byte,short,int,long,float,double,boolean,char。
- String 类型。
- CharSequence类型。
- List类型:List中的所有元素必须是AIDL支持的类型之一,或者是一个其他AIDL生成的接口,或者是定义的parcelable(下文关于这个会有详解)。List可以使用泛型。
- Map类型:Map中的所有元素必须是AIDL支持的类型之一,或者是一个其他AIDL生成的接口,或者是定义的parcelable。Map是不支持泛型的。
- 定向tag:这是一个极易被忽略的点——这里的“被忽略”指的不是大家都不知道,而是很少人会正确的使用它。在我的理解里,定向 tag 是这样的:AIDL中的定向 tag 表示了在跨进程通信中数据的流向,其中 in 表示数据只能由客户端流向服务端, out 表示数据只能由服务端流向客户端,而 inout 则表示数据可在服务端与客户端之间双向流通。其中,数据流向是针对在客户端中的那个传入方法的对象而言的。in 为定向 tag 的话表现为服务端将会接收到一个那个对象的完整数据,但是客户端的那个对象不会因为服务端对传参的修改而发生变动;out 的话表现为服务端将会接收到那个对象的的空对象,但是在服务端对接收到的空对象有任何修改之后客户端将会同步变动;inout 为定向 tag 的情况下,服务端将会接收到客户端传来对象的完整信息,并且客户端将会同步服务端对该对象的任何变动。具体的分析大家可以移步我的另一篇博文:你真的理解AIDL中的in,out,inout么?
另外,Java 中的基本类型和 String ,CharSequence 的定向 tag 默认且只能是 in 。还有,请注意,请不要滥用定向 tag ,而是要根据需要选取合适的——要是不管三七二十一,全都一上来就用 inout ,等工程大了系统的开销就会大很多——因为排列整理参数的开销是很昂贵的。 - 两种AIDL文件:在我的理解里,所有的AIDL文件大致可以分为两类。一类是用来定义parcelable对象,以供其他AIDL文件使用AIDL中非默认支持的数据类型的。一类是用来定义方法接口,以供系统使用来完成跨进程通信的。可以看到,两类文件都是在“定义”些什么,而不涉及具体的实现,这就是为什么它叫做“Android接口定义语言”。
注:所有的非默认支持数据类型必须通过第一类AIDL文件定义才能被使用。
下面是两个例子,对于常见的AIDL文件都有所涉及:
// Book.aidl
//第一类AIDL文件的例子
//这个文件的作用是引入了一个序列化对象 Book 供其他的AIDL文件使用
//注意:Book.aidl与Book.java的包名应当是一样的
package com.lypeer.ipcclient;

//注意parcelable是小写
parcelable Book;- 1
- 2
- 3
- 4
- 5
- 6
- 7
- 8
// BookManager.aidl
//第二类AIDL文件的例子
package com.lypeer.ipcclient;
//导入所需要使用的非默认支持数据类型的包
import com.lypeer.ipcclient.Book;

interface BookManager {

    //所有的返回值前都不需要加任何东西,不管是什么数据类型
    List<Book> getBooks();
    Book getBook();
    int getBookCount();

    //传参时除了Java基本类型以及String,CharSequence之外的类型
    //都需要在前面加上定向tag,具体加什么量需而定
    void setBookPrice(in Book book , int price)
    void setBookName(in Book book , String name)
    void addBookIn(in Book book);
    void addBookOut(out Book book);
    void addBookInout(inout Book book);
}- 1
- 2
- 3
- 4
- 5
- 6
- 7
- 8
- 9
- 10
- 11
- 12
- 13
- 14
- 15
- 16
- 17
- 18
- 19
- 20
- 21
4,如何使用AIDL文件来完成跨进程通信?
在进行跨进程通信的时候,在AIDL中定义的方法里包含非默认支持的数据类型与否,我们要进行的操作是不一样的。如果不包含,那么我们只需要编写一个AIDL文件,如果包含,那么我们通常需要写 n+1 个AIDL文件( n 为非默认支持的数据类型的种类数)——显然,包含的情况要复杂一些。所以我接下来将只介绍AIDL文件中包含非默认支持的数据类型的情况,至于另一种简单些的情况相信大家是很容易从中触类旁通的。
4.1,使数据类实现 Parcelable 接口
由于不同的进程有着不同的内存区域,并且它们只能访问自己的那一块内存区域,所以我们不能像平时那样,传一个句柄过去就完事了——句柄指向的是一个内存区域,现在目标进程根本不能访问源进程的内存,那把它传过去又有什么用呢?所以我们必须将要传输的数据转化为能够在内存之间流通的形式。这个转化的过程就叫做序列化与反序列化。简单来说是这样的:比如现在我们要将一个对象的数据从客户端传到服务端去,我们就可以在客户端对这个对象进行序列化的操作,将其中包含的数据转化为序列化流,然后将这个序列化流传输到服务端的内存中去,再在服务端对这个数据流进行反序列化的操作,从而还原其中包含的数据——通过这种方式,我们就达到了在一个进程中访问另一个进程的数据的目的。
而通常,在我们通过AIDL进行跨进程通信的时候,选择的序列化方式是实现 Parcelable 接口。关于实现 Parcelable 接口之后里面具体有那些方法啦,每个方法是干嘛的啦,这些我就不展开来讲了,那並非这篇文章的重点,我下面主要讲一下如何快速的生成一个合格的可序列化的类(以Book.java为例)。
注:若AIDL文件中涉及到的所有数据类型均为默认支持的数据类型,则无此步骤。因为默认支持的那些数据类型都是可序列化的。
4.1.1,编译器自动生成
我当前用的编译器是Android Studio 2.1.2,它是自带了 Parcelable 接口的模板的,只需要我们敲几下键盘就可以轻松的生成一个可序列化的 Parcelable 实现类。
首先,创建一个类,正常的书写其成员变量,建立getter和setter并添加一个无参构造,比如:
public class Book{
    public String getName() {
        return name;
    }

    public void setName(String name) {
        this.name = name;
    }

    public int getPrice() {
        return price;
    }

    public void setPrice(int price) {
        this.price = price;
    }

    private String name;

    private int price;

    public Book() {}

}- 1
- 2
- 3
- 4
- 5
- 6
- 7
- 8
- 9
- 10
- 11
- 12
- 13
- 14
- 15
- 16
- 17
- 18
- 19
- 20
- 21
- 22
- 23
- 24
然后 implements Parcelable ,接着 as 就会报错,将鼠标移到那里,按下 alt+enter(as默认的自动解决错误的快捷键,如果你们的as有修改过快捷键的话以修改后的为准) 让它自动解决错误,这个时候它会帮你完成一部分的工作:

在弹出来的框里选择所有的成员变量,然后确定。你会发现类里多了一些代码,但是现在还是会报错,Book下面仍然有一条小横线,再次将鼠标移到那里,按下 alt+enter 让它自动解决错误:

这次解决完错误之后就不会报错了,这个 Book 类也基本上实现了 Parcelable 接口,可以执行序列化操作了。
但是请注意,这里有一个坑:默认生成的模板类的对象只支持为 in 的定向 tag 。为什么呢?因为默认生成的类里面只有 writeToParcel() 方法,而如果要支持为 out 或者 inout 的定向 tag 的话,还需要实现 readFromParcel() 方法——而这个方法其实并没有在 Parcelable 接口里面,所以需要我们从头写。具体为什么大家可以去看看:你真的理解AIDL中的in,out,inout么?
那么这个 readFromParcel() 方法应当怎么写呢?这样写:
@Override
public void writeToParcel(Parcel dest, int flags) {
    dest.writeString(name);
    dest.writeInt(price);
}

/**
 * 参数是一个Parcel,用它来存储与传输数据
 * @param dest
 */
public void readFromParcel(Parcel dest) {
    //注意,此处的读值顺序应当是和writeToParcel()方法中一致的
    name = dest.readString();
    price = dest.readInt();
}- 1
- 2
- 3
- 4
- 5
- 6
- 7
- 8
- 9
- 10
- 11
- 12
- 13
- 14
- 15
像上面这样添加了 readFromParcel() 方法之后,我们的 Book 类的对象在AIDL文件里就可以用 out 或者 inout 来作为它的定向 tag 了。
此时,完整的 Book 类的代码是这样的:
package com.lypeer.ipcclient;

import android.os.Parcel;
import android.os.Parcelable;

/**
 * Book.java
 *
 * Created by lypeer on 2016/7/16.
 */
public class Book implements Parcelable{
    public String getName() {
        return name;
    }

    public void setName(String name) {
        this.name = name;
    }

    public int getPrice() {
        return price;
    }

    public void setPrice(int price) {
        this.price = price;
    }

    private String name;
    private int price;
    public Book(){}

    public Book(Parcel in) {
        name = in.readString();
        price = in.readInt();
    }

    public static final Creator<Book> CREATOR = new Creator<Book>() {
        @Override
        public Book createFromParcel(Parcel in) {
            return new Book(in);
        }

        @Override
        public Book[] newArray(int size) {
            return new Book[size];
        }
    };

    @Override
    public int describeContents() {
        return 0;
    }

    @Override
    public void writeToParcel(Parcel dest, int flags) {
        dest.writeString(name);
        dest.writeInt(price);
    }

    /**
     * 参数是一个Parcel,用它来存储与传输数据
     * @param dest
     */
    public void readFromParcel(Parcel dest) {
        //注意,此处的读值顺序应当是和writeToParcel()方法中一致的
        name = dest.readString();
        price = dest.readInt();
    }

    //方便打印数据
    @Override
    public String toString() {
        return "name : " + name + " , price : " + price;
    }
}- 1
- 2
- 3
- 4
- 5
- 6
- 7
- 8
- 9
- 10
- 11
- 12
- 13
- 14
- 15
- 16
- 17
- 18
- 19
- 20
- 21
- 22
- 23
- 24
- 25
- 26
- 27
- 28
- 29
- 30
- 31
- 32
- 33
- 34
- 35
- 36
- 37
- 38
- 39
- 40
- 41
- 42
- 43
- 44
- 45
- 46
- 47
- 48
- 49
- 50
- 51
- 52
- 53
- 54
- 55
- 56
- 57
- 58
- 59
- 60
- 61
- 62
- 63
- 64
- 65
- 66
- 67
- 68
- 69
- 70
- 71
- 72
- 73
- 74
- 75
至此,关于AIDL中非默认支持数据类型的序列化操作就完成了。
4.1.2,插件生成
我不是很清楚 Eclipse 或者较低版本的 as 上会不会像 as 2.1.2 这样帮我们在实现 Parcelable 接口的过程中做如此多的操作,但是就算不会,我们还有其他的招数——通过插件来帮我们实现 Parcelable 接口。
具体的实现方式和实现过程大家可以参见这篇文章:告别手写parcelable
4.2,书写AIDL文件
首先我们需要一个 Book.aidl 文件来将 Book 类引入使得其他的 AIDL 文件其中可以使用 Book 对象。那么第一步,如何新建一个 AIDL 文件呢?Android Studio已经帮我们把这个集成进去了:

鼠标移到app上面去,点击右键,然后 new->AIDL->AIDL File,按下鼠标左键就会弹出一个框提示生成AIDL文件了。生成AIDL文件之后,项目的目录会变成这样的:

比起以前多了一个叫做 aidl 的包,而且他的层级是和 java 包相同的,并且 aidl 包里默认有着和 java 包里默认的包结构。那么如果你用的是 Eclipse 或者较低版本的 as ,编译器没有这个选项怎么办呢?没关系,我们也可以自己写。打开项目文件夹,依次进入 app->src->main,在 main 包下新建一个和 java 文件夹平级的 aidl 文件夹,然后我们手动在这个文件夹里面新建和 java 文件夹里面的默认结构一样的文件夹结构,再在最里层新建 .aidl 文件就可以了:

注意看图中的文件目录。
Ok,如何新建AIDL文件说的差不多了,接下来就该写AIDL文件的内容了。内容的话如果上一节有认真看的话基本上是没什么问题的。在这里,我们需要两个AIDL文件,我是这样写的:
// Book.aidl
//第一类AIDL文件
//这个文件的作用是引入了一个序列化对象 Book 供其他的AIDL文件使用
//注意:Book.aidl与Book.java的包名应当是一样的
package com.lypeer.ipcclient;

//注意parcelable是小写
parcelable Book;- 1
- 2
- 3
- 4
- 5
- 6
- 7
- 8
// BookManager.aidl
//第二类AIDL文件
//作用是定义方法接口
package com.lypeer.ipcclient;
//导入所需要使用的非默认支持数据类型的包
import com.lypeer.ipcclient.Book;

interface BookManager {

    //所有的返回值前都不需要加任何东西,不管是什么数据类型
    List<Book> getBooks();

    //传参时除了Java基本类型以及String,CharSequence之外的类型
    //都需要在前面加上定向tag,具体加什么量需而定
    void addBook(in Book book);
}- 1
- 2
- 3
- 4
- 5
- 6
- 7
- 8
- 9
- 10
- 11
- 12
- 13
- 14
- 15
- 16
注意:这里又有一个坑!大家可能注意到了,在 Book.aidl 文件中,我一直在强调:Book.aidl与Book.java的包名应当是一样的。这似乎理所当然的意味着这两个文件应当是在同一个包里面的——事实上,很多比较老的文章里就是这样说的,他们说最好都在 aidl 包里同一个包下,方便移植——然而在 Android Studio 里并不是这样。如果这样做的话,系统根本就找不到 Book.java 文件,从而在其他的AIDL文件里面使用 Book 对象的时候会报 Symbol not found 的错误。为什么会这样呢?因为 Gradle 。大家都知道,Android Studio 是默认使用 Gradle 来构建 Android 项目的,而 Gradle 在构建项目的时候会通过 sourceSets 来配置不同文件的访问路径,从而加快查找速度——问题就出在这里。Gradle 默认是将 java 代码的访问路径设置在 java 包下的,这样一来,如果 java 文件是放在 aidl 包下的话那么理所当然系统是找不到这个 java 文件的。那应该怎么办呢?
又要 java文件和 aidl 文件的包名是一样的,又要能找到这个 java 文件——那么仔细想一下的话,其实解决方法是很显而易见的。首先我们可以把问题转化成:如何在保证两个文件包名一样的情况下,让系统能够找到我们的 java 文件?这样一来思路就很明确了:要么让系统来 aidl 包里面来找 java 文件,要么把 java 文件放到系统能找到的地方去,也即放到 java 包里面去。接下来我详细的讲一下这两种方式具体应该怎么做:
- 修改 build.gradle 文件:在 android{} 中间加上下面的内容:
sourceSets {
    main {
        java.srcDirs = ['src/main/java', 'src/main/aidl']
    }
}- 1
- 2
- 3
- 4
- 5
也就是把 java 代码的访问路径设置成了 java 包和 aidl 包,这样一来系统就会到 aidl 包里面去查找 java 文件,也就达到了我们的目的。只是有一点,这样设置后 Android Studio 中的项目目录会有一些改变,我感觉改得挺难看的。
- 把 java 文件放到 java 包下去:把 Book.java 放到 java 包里任意一个包下,保持其包名不变,与 Book.aidl 一致。只要它的包名不变,Book.aidl 就能找到 Book.java ,而只要 Book.java 在 java 包下,那么系统也是能找到它的。但是这样做的话也有一个问题,就是在移植相关 .aidl 文件和 .java 文件的时候没那么方便,不能直接把整个 aidl 文件夹拿过去完事儿了,还要单独将 .java 文件放到 java 文件夹里去。
我们可以用上面两个方法之一来解决找不到 .java 文件的坑,具体用哪个就看大家怎么选了,反正都挺简单的。
到这里我们就已经将AIDL文件新建并且书写完毕了,clean 一下项目,如果没有报错,这一块就算是大功告成了。
4.3,移植相关文件
我们需要保证,在客户端和服务端中都有我们需要用到的 .aidl 文件和其中涉及到的 .java 文件,因此不管在哪一端写的这些东西,写完之后我们都要把这些文件复制到另一端去。如果是用的上面两个方法中的第一个解决的找不到 .java 文件的问题,那么直接将 aidl 包复制到另一端的 main 目录下就可以了;如果是使用第二个方法的话,就除了把把整个 aidl 文件夹拿过去,还要单独将 .java 文件放到 java 文件夹里去。
4.4,编写服务端代码
通过上面几步,我们已经完成了AIDL及其相关文件的全部内容,那么我们究竟应该如何利用这些东西来进行跨进程通信呢?其实,在我们写完AIDL文件并 clean 或者 rebuild 项目之后,编译器会根据AIDL文件为我们生成一个与AIDL文件同名的 .java 文件,这个 .java 文件才是与我们的跨进程通信密切相关的东西。事实上,基本的操作流程就是:在服务端实现AIDL中定义的方法接口的具体逻辑,然后在客户端调用这些方法接口,从而达到跨进程通信的目的。
接下来我直接贴上我写的服务端代码:
/**
 * 服务端的AIDLService.java
 * <p/>
 * Created by lypeer on 2016/7/17.
 */
public class AIDLService extends Service {

    public final String TAG = this.getClass().getSimpleName();

    //包含Book对象的list
    private List<Book> mBooks = new ArrayList<>();

    //由AIDL文件生成的BookManager
    private final BookManager.Stub mBookManager = new BookManager.Stub() {
        @Override
        public List<Book> getBooks() throws RemoteException {
            synchronized (this) {
                Log.e(TAG, "invoking getBooks() method , now the list is : " + mBooks.toString());
                if (mBooks != null) {
                    return mBooks;
                }
                return new ArrayList<>();
            }
        }


        @Override
        public void addBook(Book book) throws RemoteException {
            synchronized (this) {
                if (mBooks == null) {
                    mBooks = new ArrayList<>();
                }
                if (book == null) {
                    Log.e(TAG, "Book is null in In");
                    book = new Book();
                }
                //尝试修改book的参数,主要是为了观察其到客户端的反馈
                book.setPrice(2333);
                if (!mBooks.contains(book)) {
                    mBooks.add(book);
                }
                //打印mBooks列表,观察客户端传过来的值
                Log.e(TAG, "invoking addBooks() method , now the list is : " + mBooks.toString());
            }
        }
    };

    @Override
    public void onCreate() {
        super.onCreate();
        Book book = new Book();
        book.setName("Android开发艺术探索");
        book.setPrice(28);
        mBooks.add(book);
    }

    @Nullable
    @Override
    public IBinder onBind(Intent intent) {
        Log.e(getClass().getSimpleName(), String.format("on bind,intent = %s", intent.toString()));
        return mBookManager;
    }
}- 1
- 2
- 3
- 4
- 5
- 6
- 7
- 8
- 9
- 10
- 11
- 12
- 13
- 14
- 15
- 16
- 17
- 18
- 19
- 20
- 21
- 22
- 23
- 24
- 25
- 26
- 27
- 28
- 29
- 30
- 31
- 32
- 33
- 34
- 35
- 36
- 37
- 38
- 39
- 40
- 41
- 42
- 43
- 44
- 45
- 46
- 47
- 48
- 49
- 50
- 51
- 52
- 53
- 54
- 55
- 56
- 57
- 58
- 59
- 60
- 61
- 62
- 63
整体的代码结构很清晰,大致可以分为三块:第一块是初始化。在 onCreate() 方法里面我进行了一些数据的初始化操作。第二块是重写 BookManager.Stub 中的方法。在这里面提供AIDL里面定义的方法接口的具体实现逻辑。第三块是重写 onBind() 方法。在里面返回写好的 BookManager.Stub 。
接下来在 Manefest 文件里面注册这个我们写好的 Service ,这个不写的话我们前面做的工作都是无用功:
<service
    android:name=".service.AIDLService"
    android:exported="true">
        <intent-filter>
            <action android:name="com.lypeer.aidl"/>
            <category android:name="android.intent.category.DEFAULT"/>
        </intent-filter>
</service>- 1
- 2
- 3
- 4
- 5
- 6
- 7
- 8
到这里我们的服务端代码就编写完毕了,如果你对里面的一些地方感觉有些陌生或者根本不知所云的话,说明你对 Service 相关的知识已经有些遗忘了,建议再去看看这两篇博文:Android中的Service:默默的奉献者 (1),Android中的Service:Binder,Messenger,AIDL(2) 。
4.5,编写客户端代码
前面说过,在客户端我们要完成的工作主要是调用服务端的方法,但是在那之前,我们首先要连接上服务端,完整的客户端代码是这样的:
/**
 * 客户端的AIDLActivity.java
 * 由于测试机的无用debug信息太多,故log都是用的e
 * <p/>
 * Created by lypeer on 2016/7/17.
 */
public class AIDLActivity extends AppCompatActivity {

    //由AIDL文件生成的Java类
    private BookManager mBookManager = null;

    //标志当前与服务端连接状况的布尔值,false为未连接,true为连接中
    private boolean mBound = false;

    //包含Book对象的list
    private List<Book> mBooks;

    @Override
    protected void onCreate(Bundle savedInstanceState) {
        super.onCreate(savedInstanceState);
        setContentView(R.layout.activity_aidl);
    }

    /**
     * 按钮的点击事件,点击之后调用服务端的addBookIn方法
     *
     * @param view
     */
    public void addBook(View view) {
        //如果与服务端的连接处于未连接状态,则尝试连接
        if (!mBound) {
            attemptToBindService();
            Toast.makeText(this, "当前与服务端处于未连接状态,正在尝试重连,请稍后再试", Toast.LENGTH_SHORT).show();
            return;
        }
        if (mBookManager == null) return;

        Book book = new Book();
        book.setName("APP研发录In");
        book.setPrice(30);
        try {
            mBookManager.addBook(book);
            Log.e(getLocalClassName(), book.toString());
        } catch (RemoteException e) {
            e.printStackTrace();
        }
    }

    /**
     * 尝试与服务端建立连接
     */
    private void attemptToBindService() {
        Intent intent = new Intent();
        intent.setAction("com.lypeer.aidl");
        intent.setPackage("com.lypeer.ipcserver");
        bindService(intent, mServiceConnection, Context.BIND_AUTO_CREATE);
    }

    @Override
    protected void onStart() {
        super.onStart();
        if (!mBound) {
            attemptToBindService();
        }
    }

    @Override
    protected void onStop() {
        super.onStop();
        if (mBound) {
            unbindService(mServiceConnection);
            mBound = false;
        }
    }

    private ServiceConnection mServiceConnection = new ServiceConnection() {
        @Override
        public void onServiceConnected(ComponentName name, IBinder service) {
            Log.e(getLocalClassName(), "service connected");
            mBookManager = BookManager.Stub.asInterface(service);
            mBound = true;

            if (mBookManager != null) {
                try {
                    mBooks = mBookManager.getBooks();
                    Log.e(getLocalClassName(), mBooks.toString());
                } catch (RemoteException e) {
                    e.printStackTrace();
                }
            }
        }

        @Override
        public void onServiceDisconnected(ComponentName name) {
            Log.e(getLocalClassName(), "service disconnected");
            mBound = false;
        }
    };
}- 1
- 2
- 3
- 4
- 5
- 6
- 7
- 8
- 9
- 10
- 11
- 12
- 13
- 14
- 15
- 16
- 17
- 18
- 19
- 20
- 21
- 22
- 23
- 24
- 25
- 26
- 27
- 28
- 29
- 30
- 31
- 32
- 33
- 34
- 35
- 36
- 37
- 38
- 39
- 40
- 41
- 42
- 43
- 44
- 45
- 46
- 47
- 48
- 49
- 50
- 51
- 52
- 53
- 54
- 55
- 56
- 57
- 58
- 59
- 60
- 61
- 62
- 63
- 64
- 65
- 66
- 67
- 68
- 69
- 70
- 71
- 72
- 73
- 74
- 75
- 76
- 77
- 78
- 79
- 80
- 81
- 82
- 83
- 84
- 85
- 86
- 87
- 88
- 89
- 90
- 91
- 92
- 93
- 94
- 95
- 96
- 97
- 98
- 99
同样很清晰,首先建立连接,然后在 ServiceConnection 里面获取 BookManager 对象,接着通过它来调用服务端的方法。
4.6,开始通信吧!
通过上面的步骤,我们已经完成了所有的前期工作,接下来就可以通过AIDL来进行跨进程通信了!将两个app同时运行在同一台手机上,然后调用客户端的 addBook() 方法,我们会看到服务端的 logcat 信息是这样的:
//服务端的 log 信息,我把无用的信息头去掉了,然后给它编了个号
1,on bind,intent = Intent { act=com.lypeer.aidl pkg=com.lypeer.ipcserver }
2,invoking getBooks() method , now the list is : [name : Android开发艺术探索 , price : 28]
3,invoking addBooks() method , now the list is : [name : Android开发艺术探索 , price : 28, name : APP研发录In , price : 2333]- 1
- 2
- 3
- 4
客户端的信息是这样的:
//客户端的 log 信息
1,service connected
2,[name : Android开发艺术探索 , price : 28]
3,name : APP研发录In , price : 30- 1
- 2
- 3
- 4
所有的 log 信息都很正常并且符合预期——这说明我们到这里为止的步骤都是正确的,按照上面说的来做是能够正确的使用AIDL来进行跨进程通信的。
结语
这一篇文章主要介绍了我们在概述里提到的前三个问题,即:
- 为什么要设计AIDL语言?
- AIDL的语法是什么?
- 如何使用AIDL语言完成跨进程通信?
本来我是准备在这篇文章里把我那五个问题都讲完的,结果写到这里发现篇幅已经有些长了,再写的话可能就少有人有这个耐性读下去了——那么写在后面的这些又有什么意义呢?于是就干脆从这里截断,将AIDL的工作原理和它的设计思想以及我对于它的这种设计的一些看法放在下一篇博文里来讲述——刚好,有那么点基础篇和提高篇的意思,哈哈。
文中相关代码可点击 传送门 下载。
谢谢大家。
前言
上一篇博文介绍了关于AIDL是什么,为什么我们需要AIDL,AIDL的语法以及如何使用AIDL等方面的知识,这一篇博文将顺着上一篇的思路往下走,接着介绍关于AIDL的一些更加深入的知识。强烈建议大家在看这篇博文之前先看一下上一篇博文:Android:学习AIDL,这一篇文章就够了(上)
注:文中所有代码均源自上一篇博文中的例子。
另:在看这篇博文之前,建议先将上一篇博文中的代码下载下来或者敲一遍,然后确定可以正常运行后再接着看。因为文中有大量对于具体代码的分析以及相关代码片段之间的跳转,如果你手头没有一份完整代码的话很容易看得一头雾水,最后浪费了你的时间也浪费了这篇博文。
正文
1,源码分析:AIDL文件是怎么工作的?
进行到上一篇文章的最后一步,我们已经学会了AIDL的全部用法,接下来让我们透过现象看本质,研究一下究竟AIDL是如何帮助我们进行跨进程通信的。
我们在上一篇提到过,在写完AIDL文件后,编译器会帮我们自动生成一个同名的 .java 文件——也许大家已经发现了,在我们实际编写客户端和服务端代码的过程中,真正协助我们工作的其实是这个文件,而 .aidl 文件从头到尾都没有出现过。这样一来我们就很容易产生一个疑问:难道我们写AIDL文件的目的其实就是为了生成这个文件么?答案是肯定的。事实上,就算我们不写AIDL文件,直接按照它生成的 .java 文件那样写一个 .java 文件出来,在服务端和客户端中也可以照常使用这个 .java 类来进行跨进程通信。所以说AIDL语言只是在简化我们写这个 .java 文件的工作而已,而要研究AIDL是如何帮助我们进行跨进程通信的,其实就是研究这个生成的 .java 文件是如何工作的。
1.1,这个文件在哪儿?
要研究它,首先我们就需要找到它,那么它在哪儿呢?在这里:

它的完整路径是:app->build->generated->source->aidl->debug->com->lypeer->ipcclient->BookManager.java(其中 com.lypeer.ipcclient 是包名,相对应的AIDL文件为 BookManager.aidl )。在Android Studio里面目录组织方式由默认的 Android 改为 Project 就可以直接按照文件夹结构访问到它。
1.2,从应用看原理
和我一贯的分析方式一样,我们先不去看那些冗杂的源码,先从它在实际中的应用着手,辅以思考分析,试图寻找突破点。首先从服务端开始,刨去其他与此无关的东西,从宏观上我们看看它干了些啥:
private final BookManager.Stub mBookManager = new BookManager.Stub() {
    @Override
    public List<Book> getBooks() throws RemoteException {
        // getBooks()方法的具体实现
    }

    @Override
    public void addBook(Book book) throws RemoteException {
         // addBook()方法的具体实现
    }
};

public IBinder onBind(Intent intent) {
    return mBookManager;
}- 1
- 2
- 3
- 4
- 5
- 6
- 7
- 8
- 9
- 10
- 11
- 12
- 13
- 14
- 15
可以看到首先我们是对 BookManager.Stub 里面的抽象方法进行了重写——实际上,这些抽象方法正是我们在 AIDL 文件里面定义的那些。也就是说,我们在这里为我们之前定义的方法提供了具体实现。接着,在 onBind() 方法里我们将这个 BookManager.Stub 作为返回值传了过去。
接着看看客户端:
private BookManager mBookManager = null;

private ServiceConnection mServiceConnection = new ServiceConnection() {
    @Override
    public void onServiceConnected(ComponentName name, IBinder service)
        mBookManager = BookManager.Stub.asInterface(service);
        //省略
    }
    @Override
    public void onServiceDisconnected(ComponentName name) {
       //省略
    }
};

public void addBook(View view) {
   //省略
   mBookManager.addBook(book);
}- 1
- 2
- 3
- 4
- 5
- 6
- 7
- 8
- 9
- 10
- 11
- 12
- 13
- 14
- 15
- 16
- 17
- 18
简单的来说,客户端就做了这些事:获取 BookManager 对象,然后调用它里面的方法。
现在结合服务端与客户端做的事情,好好思考一下,我们会发现这样一个怪事情:它们配合的如此紧密,以至于它们之间的交互竟像是同一个进程中的两个类那么自然!大家可以回想下平时项目里的接口回调,基本流程与此一般无二。明明是在两个线程里面,数据不能直接互通,何以他们能交流的如此愉快呢?答案在 BookManager.java 里。
1.3,从客户端开始
一点开 BookManager.java ,我发现的第一件事是:BookManager 是一个接口类!一看到它是个接口,我就知道,突破口有了。为什么呢?接口意味着什么?方法都没有具体实现。但是明明在客户端里面我们调用了 mBookManager.addBook() !那么就说明我们在客户端里面用到的 BookManager 绝不仅仅是 BookManager,而是它的一个实现类!那么我们就可以从这个实现类入手,看看在我们的客户端调用 addBook() 方法的时候,究竟 BookManager 在背后帮我们完成了哪些操作。首先看下客户端的 BookManager 对象是怎么来的:
public void onServiceConnected(ComponentName name, IBinder service)
    mBookManager = BookManager.Stub.asInterface(service);
}- 1
- 2
- 3
在这里我首先注意到的是方法的传参:IBinder service 。这是个什么东西呢?通过调试,我们可以发现,这是个 BinderProxy 对象。但随后我们会惊讶的发现:Java中并没有这个类!似乎研究就此陷入了僵局——其实不然。在这里我们没办法进一步的探究下去,那我们就先把这个问题存疑,从后面它的一些应用来推测关于它的更多的东西。
接下来顺藤摸瓜去看下这个 BookManager.Stub.asInterface() 是怎么回事:
public static com.lypeer.ipcclient.BookManager asInterface(android.os.IBinder obj) {
    //验空
    if ((obj == null)) {
        return null;
    }
    //DESCRIPTOR = "com.lypeer.ipcclient.BookManager",搜索本地是否已經
    //有可用的对象了,如果有就将其返回
    android.os.IInterface iin = obj.queryLocalInterface(DESCRIPTOR);
    if (((iin != null) && (iin instanceof com.lypeer.ipcclient.BookManager))) {
        return ((com.lypeer.ipcclient.BookManager) iin);
    }
    //如果本地没有的话就新建一个返回
    return new com.lypeer.ipcclient.BookManager.Stub.Proxy(obj);
}- 1
- 2
- 3
- 4
- 5
- 6
- 7
- 8
- 9
- 10
- 11
- 12
- 13
- 14
方法里首先进行了验空,这个很正常。第二步操作是调用了 queryLocalInterface() 方法,这个方法是 IBinder 接口里面的一个方法,而这里传进来的 IBinder 对象就是上文我们提到过的那个 service 对象。由于对 service 对象我们还没有一个很清晰的认识,这里也没法深究这个 queryLocalInterface() 方法:它是 IBinder 接口里面的一个方法,那么显然,具体实现是在 service 的里面的,我们无从窥探。但是望文生义我们也能体会到它的作用,这里就姑且这么理解吧。第三步是创建了一个对象返回——很显然,这就是我们的目标,那个实现了 BookManager 接口的实现类。果断去看这个 BookManager.Stub.Proxy 类:
private static class Proxy implements com.lypeer.ipcclient.BookManager {
    private android.os.IBinder mRemote;

    Proxy(android.os.IBinder remote) {
        //此处的 remote 正是前面我们提到的 IBinder service
        mRemote = remote;
    }

    @Override
    public java.util.List<com.lypeer.ipcclient.Book> getBooks() throws android.os.RemoteException {
        //省略
    }

    @Override
    public void addBook(com.lypeer.ipcclient.Book book) throws android.os.RemoteException {
        //省略
    }
    //省略部分方法
}- 1
- 2
- 3
- 4
- 5
- 6
- 7
- 8
- 9
- 10
- 11
- 12
- 13
- 14
- 15
- 16
- 17
- 18
- 19
看到这里,我们几乎可以确定:Proxy 类确实是我们的目标,客户端最终通过这个类与服务端进行通信。
那么接下来看看 getBooks() 方法里面具体做了什么:
@Override
public java.util.List<com.lypeer.ipcclient.Book> getBooks() throws android.os.RemoteException {
    //很容易可以分析出来,_data用来存储流向服务端的数据流,
    //_reply用来存储服务端流回客户端的数据流
    android.os.Parcel _data = android.os.Parcel.obtain();
    android.os.Parcel _reply = android.os.Parcel.obtain();
    java.util.List<com.lypeer.ipcclient.Book> _result;
    try {
        _data.writeInterfaceToken(DESCRIPTOR);
        //调用 transact() 方法将方法id和两个 Parcel 容器传过去
        mRemote.transact(Stub.TRANSACTION_getBooks, _data, _reply, 0);
        _reply.readException();
        //从_reply中取出服务端执行方法的结果
        _result = _reply.createTypedArrayList(com.lypeer.ipcclient.Book.CREATOR);
    } finally {
        _reply.recycle();
        _data.recycle();
    }
    //将结果返回
    return _result;
}- 1
- 2
- 3
- 4
- 5
- 6
- 7
- 8
- 9
- 10
- 11
- 12
- 13
- 14
- 15
- 16
- 17
- 18
- 19
- 20
- 21
在这段代码里有几个需要说明的地方,不然容易看得云里雾里的:
- 关于 _data 与 _reply 对象:一般来说,我们会将方法的传参的数据存入_data 中,而将方法的返回值的数据存入 _reply 中——在没涉及定向 tag 的情况下。如果涉及了定向 tag ,情况将会变得稍微复杂些,具体是怎么回事请参见这篇博文:你真的理解AIDL中的in,out,inout么?
- 关于 Parcel :简单的来说,Parcel 是一个用来存放和读取数据的容器。我们可以用它来进行客户端和服务端之间的数据传输,当然,它能传输的只能是可序列化的数据。具体 Parcel 的使用方法和相关原理可以参见这篇文章:Android中Parcel的分析以及使用
- 关于 transact() 方法:这是客户端和服务端通信的核心方法。调用这个方法之后,客户端将会挂起当前线程,等候服务端执行完相关任务后通知并接收返回的 _reply 数据流。关于这个方法的传参,这里有两点需要说明的地方:
- 方法 ID :transact() 方法的第一个参数是一个方法 ID ,这个是客户端与服务端约定好的给方法的编码,彼此一一对应。在AIDL文件转化为 .java 文件的时候,系统将会自动给AIDL文件里面的每一个方法自动分配一个方法 ID。
- 第四个参数:transact() 方法的第四个参数是一个 int 值,它的作用是设置进行 IPC 的模式,为 0 表示数据可以双向流通,即 _reply 流可以正常的携带数据回来,如果为 1 的话那么数据将只能单向流通,从服务端回来的 _reply 流将不携带任何数据。
注:AIDL生成的 .java 文件的这个参数均为 0。
上面的这些如果要去一步步探究出结果的话也不是不可以,但是那将会涉及到 Binder 机制里比较底层的东西,一点点说完势必会将文章的重心带偏,那样就不好了——所以我就直接以上帝视角把结论给出来了。
另外的那个 addBook() 方法我就不去分析了,殊途同归,只是由于它涉及到了定向 tag ,所以有那么一点点的不一样,有兴趣的读者可以自己去试着阅读一下。接下来我总结一下在 Proxy 类的方法里面一般的工作流程:
- 1,生成 _data 和 _reply 数据流,并向 _data 中存入客户端的数据。
- 2,通过 transact() 方法将它们传递给服务端,并请求服务端调用指定方法。
- 3,接收 _reply 数据流,并从中取出服务端传回来的数据。
纵观客户端的所有行为,我们不难发现,其实一开始我们不能理解的那个 IBinder service 恰恰是客户端与服务端通信的灵魂人物——正是通过用它调用的 transact() 方法,我们得以将客户端的数据和请求发送到服务端去。从这个角度来看,这个 service 就像是服务端在客户端的代理一样——你想要找服务端?要传数据过去?行啊!你来找我,我给你把数据送过去——而 BookManager.java 中的那个 Proxy 类,就只能沦为二级代理了,我们在外部通过它来调动 service 对象。
至此,客户端在 IPC 中进行的工作已经分析完了,接下来我们看一下服务端。
1.4,接着看服务端
前面说了客户端通过调用 transact() 方法将数据和请求发送过去,那么理所当然的,服务端应当有一个方法来接收这些传过来的东西:在 BookManager.java 里面我们可以很轻易的找到一个叫做 onTransact() 的方法——看这名字就知道,多半和它脱不了关系,再一看它的传参 (int code, android.os.Parcel data, android.os.Parcel reply, int flags) ——和 transact() 方法的传参是一样的!如果说他们没有什么 py 交易把我眼珠子挖出来当泡踩!下面来看看它是怎么做的:
@Override
public boolean onTransact(int code, android.os.Parcel data, android.os.Parcel reply, int flags) throws android.os.RemoteException {
    switch (code) {
        case INTERFACE_TRANSACTION: {
            reply.writeString(DESCRIPTOR);
            return true;
        }
        case TRANSACTION_getBooks: {
            //省略
            return true;
        }
        case TRANSACTION_addBook: {
            //省略
            return true;
        }
    }
    return super.onTransact(code, data, reply, flags);
}- 1
- 2
- 3
- 4
- 5
- 6
- 7
- 8
- 9
- 10
- 11
- 12
- 13
- 14
- 15
- 16
- 17
- 18
可以看到,它在接收了客户端的 transact() 方法传过来的参数后,什么废话都没说就直接进入了一个 switch 选择:根据传进来的方法 ID 不同执行不同的操作。接下来看一下每个方法里面它具体做了些什么,以 getBooks() 方法为例:
case TRANSACTION_getBooks: {
    data.enforceInterface(DESCRIPTOR);
    //调用 this.getBooks() 方法,在这里开始执行具体的事务逻辑
    //result 列表为调用 getBooks() 方法的返回值
    java.util.List<com.lypeer.ipcclient.Book> _result = this.getBooks();
    reply.writeNoException();
    //将方法执行的结果写入 reply ,
    reply.writeTypedList(_result);
    return true;
}- 1
- 2
- 3
- 4
- 5
- 6
- 7
- 8
- 9
- 10
非常的简单直了,直接调用服务端这边的具体方法实现,然后获取返回值并将其写入 reply 流——当然,这是由于这个方法没有传入参数并且不涉及定向 tag 的关系,不然还会涉及到将传入参数从 data 中读取出来,以及针对定向 tag 的操作,具体的可以参考这篇博文:你真的理解AIDL中的in,out,inout么?。
另外,还有一个问题,有些读者可能会疑惑,为什么这里没有看到关于将 reply 回传到客户端的相关代码?事实上,在客户端我们也没有看到它将相关参数传向服务端的相关代码——它只是把这些参数都传入了一个方法,其中过程同样是对我们隐藏的——服务端也同样,在执行完 return true 之后系统将会把 reply 流传回客户端,具体是怎么做的就不足为外人道也了。不知道大家发现了没有,通过隐藏了这些细节,我们在 transact() 与 onTransact() 之间的调用以及数据传送看起来就像是发生在同一个进程甚至同一个类里面一样。我们的操作就像是在一条直线上面走,根本感受不出来其中原来有过曲折——也许这套机制在设计之初,就是为了达到这样的目的。
分析到这里,服务端的工作我们也分析的差不多了,下面我们总结一下服务端的一般工作流程:
- 1,获取客户端传过来的数据,根据方法 ID 执行相应操作。
- 2,将传过来的数据取出来,调用本地写好的对应方法。
- 3,将需要回传的数据写入 reply 流,传回客户端。
1.5,总结
现在我们已经完成了 BookManager.java 几乎所有的分析工作,接下来我想用两张图片来做一个总结。第一张是它的 UML 结构图:

第二张是客户端与服务端使用其进行 IPC 的工作流程:

剩下的就大家自己体味一下吧——如果前面的东西你看懂了,这里有没有我说的几句总结都差不多;如果前面你看的似懂非懂,看看这两张图片也就懂了;如果前面你几乎没有看懂,那么我写几句总结你还是看不懂。。。
2,为什么要这样设计?
这个问题可以拆分成两个子问题:
- 为什么AIDL的语法要这样设计?
- 为什么它生成的 .java 文件的结构要这样设计?
首先我有一个总的观点:在程序设计领域,任何的解决方案,无非是基于需求和性能两方面的考虑。首先是保证把需求完成,在这个大前提下保证性能最佳——这里的性能,就包括了代码的健壮性,可维护性等等林林总总的东西。
关于AIDL的语法为什么要这么设计,其实没有太大的研究的必要——因为他的语法实际上和 Java 没有多大区别,区别的地方也很容易想通,多是因为一些很显然的原因而不得不那样做。接下来我主要分析一下 BookManager.java 的设计之道。首先我们要明确需求:
- 基本需求当然是实现 IPC 。
- 在此基础上要尽可能的对开发者友好,即使用方便,且最好让开发者有那种在同一个进程中调用方法传输数据的爽感。
既然要实现 IPC ,一些核心的要素就不能少,比如客户端接收到的 IBinder service ,比如 transact() 方法,比如 onTransact() 方法——但是能让开发者察觉到这些这些东西的存在甚至自己写这些东西么?不能。为什么?因为这些东西做的事情其实非常的单调,无非就是那么几步,但是偏偏又涉及到很多对数据的写入读出的操作——涉及到数据流的东西一般都很繁琐。把这些东西暴露出去显然是不合适的,还是建立一套模板把它封装起来比较的好。但是归根结底,我们实现 IPC 是需要用到它们的,所以我们需要有一种途径去访问它们——在这个时候,代理-桩的设计理念就初步成型了。为了达到我们的目的,我们可以在客户端建立一个服务端的代理,在服务端建立一个客户端的桩,这样一来,客户端有什么需求可以直接跟代理说,代理跟它说你等等,我马上给你处理,然后它就告诉桩,客户端有这个需求了,桩就马上让服务端开始执行相应的事件,在执行结束后再通过桩把结果告诉代理,代理最后把结果给客户端。这样一来,客户端以为代理就是服务端,并且事实上它也只与代理进行了交互,而客户端与代理是在同一个进程中的,在服务端那边亦然——通过这种方式,我们就可以让客户端与服务端的通信看上去简单无比,像是从头到尾我们都在一个进程中工作一样。
在上面的设计思想指导之下,BookManager.java 为什么是我们看到的这个样子就很清楚明白了。
3,有没有更好的方式来完成 IPC ?
首先我要阐述的观点是:如果你对这篇文章中上面叙述的那些内容有一定的掌握与理解了的话,完全脱离AIDL来手动书写客户端与服务端的相关文件来进行 IPC 是绝对没有问题的。并且在了解了 IPC 得以进行的根本之后,你甚至完全没有必要照着 BookManager.java 来写,只要那几个点在,你想怎么写就怎么写。
但是要说明的是,相较于使用AIDL来进行IPC,手动实现基本上是没有什么优势的。毕竟AIDL是一门用来简化我们的工作的语言,用它确实可以省很多事。
那么现在除了AIDL与自己手动写,有没有其他的方式来进行 IPC 呢?答案是:有的。前段时间饿了么(这不算打广告吧。。。毕竟没有利益相关,只是纯粹的讨论技术)的一个工程师开源了一套 IPC 的框架,地址在这里:Hermes。这套框架的核心还是 IBinder service , transact() ,onTransact() 那些东西(事实上,任何和IPC有关的操作最终都还是要落在这些东西上面),但是他采取了一种巧妙的方式来实现:在服务端开启了一条默认进程,让这条进程来负责所有针对服务端的请求,同时采用注解的方式来注册类和方法,使得客户端能用这种形式和服务端建立约定,并且,这个框架对绑定service的那些细节隐藏的比较好,我们甚至都不需要在服务端写service,在客户端调用 bindService了——三管齐下,使得我们可以远离以前那些烦人的有关service的操作了。但是也并不是说这套框架就完全超越了AIDL,在某些方面它也有一些不足。比如,不知道是他的那个 Readme 写的太晦涩了还是怎么回事,我觉得使用它需要付出的学习成本还是比较大的;另外,在这套框架里面是将所有传向服务端的数据都放在一个 Mail 类里面的,而这个类的传输方式相当于AIDL里面定向 tag 为 in 的情况——也就是说,不要再想像AIDL里面那样客户端数据还能在服务端完成操作之后同步变化了。更多的东西我也还没看出来,还没用过这个框架,只是简单的看了下它的源码,不过总的来说能过看出来的是作者写的很用心,作者本身的Android功底也很强大,至少不知道比我强大到哪里去了……另外,想微微的吐槽一下,为什么这个框架用来进行IPC的核心类 IHermesService 里面长得和AIDL生成的 .java 一模一样啊一模一样……
总之,我想说的就是,虽然已经有AIDL了,但是并不意味着就不会出现比它更好的实现了——不止在这里是这样,这个观点可以推广到所有领域。
结语
这篇文章说是学习AIDL的,其实大部分的内容都是在通过AIDL生成的那个.java 文件讲 IPC 相关的知识——其实也就是 Binder 机制的利用的一部分——这也是为什么文中其实有很多地方没有深入下去讲,而是匆匆忙忙的给出了结论,因为再往下就不是应用层的东西了,讲起来比较麻烦,而且容易把人看烦。
讲到这里,基本上关于Android里面 IPC 相关的东西都已经讲得差不多了,如果你是从我写的 Android中的Service:默默的奉献者 (1) –> Android中的Service:Binder,Messenger,AIDL(2) –> Android:学习AIDL,这一篇文章就够了(上) –> 现在这篇,这样一路看下来,并且是认真的看下来的话,基本上这一块的问题都难不倒你了。
另外,除了知识,我更希望通过我的博文传递的是一些解决问题分析问题的思路或者说是方法,所以我的很多博文都重在叙述思考过程而不是阐述结果——这样有好处也有坏处,好处是如果看懂了,能够收获更多,坏处是,大部分人都没有那个耐性慢慢的来看懂它,毕竟这需要思考,而当前很多的人都已经没有思考的时间,甚至丧失思考的能力了。
谢谢大家。
另:关于脱离AIDL自己写IPC的代码,我自己写了一份,大家可以聊作参考,传送门。
15、invalidate和postInvalidate的区别及使用
onDraw是在View初化完成之后开始调用
postInvalidate()是重绘的,也就是调用postInvalidate()后系统会重新调用onDraw方法画一次,
android中Invalidate和postInvalidate的区别
Android中实现view的更新有两组方法,一组是invalidate,另一组是postInvalidate,其中前者是在UI线程自身中使用,而后者在非UI线程中使用。
Android提供了Invalidate方法实现界面刷新,但是Invalidate不能直接在线程中调用,因为他是违背了单线程模型:Android
UI操作并不是线程安全的,并且这些操作必须在UI线程中调用。
Android程序中可以使用的界面刷新方法有两种,分别是利用Handler和利用postInvalidate()来实现在线程中刷新界面。
1,利用invalidate()刷新界面
实例化一个Handler对象,并重写handleMessage方法调用invalidate()实现界面刷新;而在线程中通过sendMessage发送界面更新消息。
//
在onCreate()中开启线程
new Thread(new GameThread()).start();、
//
实例化一个handler
Handler myHandler = new Handler() {
// 接收到消息后处理
public
void handleMessage(Message msg) {
switch (msg.what) {
case
Activity01.REFRESH:
mGameView.invalidate(); //
刷新界面
break;
}
super.handleMessage(msg);
}
};
class
GameThread implements Runnable {
public void run() {
while
(!Thread.currentThread().isInterrupted()) {
Message message = new
Message();
message.what = Activity01.REFRESH;
//
发送消息
Activity01.this.myHandler.sendMessage(message);
try
{
Thread.sleep(100);
} catch (InterruptedException e)
{
Thread.currentThread().interrupt();
}
}
}
}
2,使用postInvalidate()刷新界面
使用postInvalidate则比较简单,不需要handler,直接在线程中调用postInvalidate即可。
class
GameThread implements Runnable {
public void run() {
while
(!Thread.currentThread().isInterrupted()) {
try {
Thread.sleep(100);
}
catch (InterruptedException e)
{
Thread.currentThread().interrupt();
}
//
使用postInvalidate可以直接在线程中更新界面
mGameView.postInvalidate();
}
}
}
View
类中postInvalidate()方法源码如下,可见它也是用到了handler的:
public void
postInvalidate() {
postInvalidateDelayed(0);
}
public void postInvalidateDelayed(long delayMilliseconds) {
// We
try only with the AttachInfo because there's no point in
invalidating
// if we are not attached to our
window
if (mAttachInfo != null) {
Message msg
= Message.obtain();
msg.what =
AttachInfo.INVALIDATE_MSG;
msg.obj = this;
mAttachInfo.mHandler.sendMessageDelayed(msg, delayMilliseconds);
}
}
16、launch Mode应用场景
在我们写应用的时候,常常涉及多个activity组件之间的跳转。比如说某个资讯的页面中,点击下一篇资讯跳转相同的页面,只有页面的数据不一样。一般情况下我不会注意launchMode 这个属性,只会使用默认的,这样会产生大量重复的activity。那是因为之前不了解,所以特此研究学习。
1.如何指定launchMode
基本上我们可以直接指定一个launchMode属性在AndroidManifest.xml 文件中
<activity
    android:name=".views.MainActivity"
    android:screenOrientation="portrait"
android:launchMode="singleTop"/>- 1
- 2
- 3
- 4
存在4中类型的launchMode
2.standard 模式介绍
这是默认模式,每次激活Activity时都会创建Activity实例,并放入任务栈中。
activity设置为这个模式的行为是一个新的活动,每一个意图发送,将总是被创建的工作分开。想象一下,如果有10的意图去写邮件,应该有10个活动的开展为每一个单独的意图。因此,有可能是一个无限数量的这种活动在一个设备启动。
2.1 5.0 版本之前
这种activity将被创建,并放置在堆栈的顶部,在同一个task,发送一个Intent。
下面的一个图片显示当我们将一个图像分享到一个标准的activity时会发生什么。它将被堆叠在同一个任务中,虽然他们是从不同的应用程序。
这是你将在任务管理器中看到的。(可能有点奇怪)
如果我们换到另一个应用程序,然后再切换回Gallery,我们仍将看到顶上画廊的任务launchMode标准的地方。因此,如果我们需要做任何与Gallery相关的操作,我们必须完成当前activity的事情或者关闭当前的activity,才可以回到原来的地方。
2.2 5.0版本之后
如果这些活动都来自同一个应用程序,它能够像5.0之前一样,堆叠的任务
但是在某些情况下,我们发送的Intent 来自不同的intent,新的task将被创建,新创建的activity将被放置在下面的根activity中。
下面是我们重任务管理器中看到的和5.0之前是有区别的
这是因为任务管理系统的改进Lollipop使它更有意义。Lollipop,你可以切换回画廊,因为它们是不同的任务。你可以发射另一个意图,一个新的任务将被创建,以服务一个与前一个相同的意图。
2.3 应用场景举例
这种activity的一个例子是一个组成电子邮件activity或社交网络的状态张贴activity。如果你考虑一个可以单独工作的活动,为一个单独的意图服务。
举例引用:
AlarmClock uses standard. The user can launch multiple instances of this activity and these instances can be part of any task and anywhere in the activity stack. As a fairly simple application it doesn’t really demand tight control of its activity
闹钟的使用 standard。用户可以启动此activity的多个实例,这些实例可以是任何任务的一部分,也可以是活动堆栈中的任何地方的一部分。作为一个相当简单的应用,它并不真的需要它的activity的严格控制
3.singleTop 模式介绍
singleTop模式。它的作用几乎和standard一样。唯一不同的是,如果已经存在在栈顶在对方的任务一个同类型的活动实例,不会有任何新的activity创造,而是被发送到一个存在的activity实例通过onNewIntent() 方法的意图,即会重用该实例调用当前activity的onNewIntent() 方法。
在singleTop模式,对于新的Intent,你要负责onCreate() 和 onNewIntent() 来控制使它适用于所有的情况。
3.1 应用场景举例
这个模式的一个示例用例是一个搜索功能。我们想创造一个搜索框,它会带你到一个SearchActivity看到搜索结果。为了更好的用户体验,我们通常总是把一个搜索框,在搜索结果页面以及让用户做另一个搜索无压回。
现在想象一下,如果我们总是推出服务新的搜索结果的新searchactivity,10次搜索将产生10个新activity。这将是非常奇怪的,当你按下回来,因为你必须要10次,通过这些搜索结果activity,以获得回你的根activity。相反,如果在栈顶 searchactivity,我们最好送一个Intent的一个存在的activity实例,让它更新搜索结果。现在只会有一个searchactivity放在栈顶,你可以简单地按下按钮就回一次回到以前的活动。现在有更多的意义。
反正singleTop 作用相同的任务栈。如果你期望一个Intent被发送到一个存在的活动放置在任何其他任务的顶部,我必须让你失望,说它不工作。如果Intent是从另一个应用程序发送到singleTop activity,新的activity将推出在同一方面作为standard launchMode。
注意:5.0之前:放在对方的任务,5.0以及之后(Lollipop):一个新的任务被创建。
举例引用:
BrowserBookmarksPage uses singleTop. While there can be multiple instances of this activity, if there is already one at the top of the task’s activity stack it will be reused and onNewIntent() will be called. This way you only have to hit back once to return to the browser if the bookmarks activity is started multiple times.
浏览书签页面使用singleTop。虽然有可能是这一活动的多个实例,如果已经有一个在任务栈顶的活动将被重用和onnewintent()将被调用。这样,你只需要返回一次返回到浏览器,如果书签activity是开始多次。
4.singleTask 模式介绍
这种模式和 standard singleTop完全不同。采用singleTask launchMode 的activity是允许在系统中只有一个实例(又名Singleton)。如果系统中有一个存在的活动实例,整个任务将实例将被移动到顶部,Intent将通过onnewintent()方法交付。否则,新的activity将被创建并放置在适当的任务中。
4.1 在同一个应用中
如果没有在系统中还存在singleTask活动实例,新一将要建立简单的放在栈顶在同一个任务。
但如果有一个存在的singleTask activity实例放在上面,会自动地破坏(以恰当的方式 生命周期触发)其他的activity,让该实例出现在栈顶。同时,一个Intent是通过的onnewintent()方法送到singleTask activity。
在用户体验上没有一个很好的感觉,但它是这样设计的…
The system creates a new task and instantiates the activity at the root of the new task.
注意:系统创建一个新任务并实例化活动新任务的根。
但从实验中,它似乎不工作。单一任务活动仍栈顶上的任务的活动堆栈。从中我们可以看到什么dumpsys活动命令显示。
如果你想让一个活动就像描述singleTask文档:创建一个新的任务,把活动作为一根活动。你需要指定的taskAffinity属性为singleTask这样的活动。
下面是启动SingleTaskActivity 的结果示例
考虑是否使用taskAffinity的行为,这是你的工作。
4.2 与另一个应用合作
一旦一个 Intent 是从另一个应用程序发送,并且没有在系统中创建的任何活动实例,新的任务将创建一个新创建的活动作为一个根活动。
除非有一个应用程序,是一个拥有调用singleTask activity存在的任务,创造了新的活动会放在上面。
如果有任何任务存在的活动实例,整个任务将被移动到顶部和每个单独的activity在singleTask activity上的将会被销毁按照正常的生命周期。如果按下后退按钮,用户必须在返回到调用方任务之前通过堆栈中的活动进行。即先关闭图中task#1 中的activity,再回到task#2.
4.3 应用场景示例
这种模式的一个示例用例是任何一个入口点活动例如电子邮件客户端的收件箱页面或社交网络的时间轴。无论如何,你必须明智地使用这个模式,在这种模式下活动可能会被破坏。
BrowserActivity uses singleTask. There is only one browser activity at a time and it doesn’t become part tasks that send it intents to open web pages. While it might return to whatever most recently launched it when you hit back it is actually fixed at the bottom of its own task activity stack. It will share its task with activities that it launches like bookmarks
browseractivity使用singleTask。只有一个浏览器的活动的时间,它不成为一部分的任务,把它试图打开网页。虽然它可能会返回到任何最近推出的它,当你回击它实际上是固定在其自己的任务活动栈的底部。它将分享它的任务与活动,它推出像书签.
5.singleInstance 模式介绍
这种模式是相当接近singleTask,单个activity实例可以存在于系统中。不同的是任务举行这次活动,只能有一个活动。如果这种活动调用另一个活动,一个新的任务将被自动创建,以放置新的活动。同样,如果singleInstance活动被被调用,新的任务将会被创建放置这个activity。
无论如何,结果是相当奇怪的。从dumpsys提供的信息,它在系统中有两个任务,但只有一个出现在任务管理器中最新的一个决定,移动到顶部。因此,虽然有一个任务,仍然在后台工作,但我们不能切换到前台。根本没有任何意义。
这是singleInstance活动被调用同时一个activity已经存在在task 中。
但是在任务管理器中看不到新的task
由于这项任务可能只有一个活动,我们无法切换回任务# 1了。这样做的唯一方法是重新启动的应用程序,但看来singleInstance任务将被隐藏在后台。
简单地分配taskAffinity属性到singleInstance活动使任务管理多个任务。
<activity
    android:name=".SingleInstanceActivity"
    android:label="singleInstance launchMode"
    android:launchMode="singleInstance"
android:taskAffinity="">- 1
- 2
- 3
- 4
- 5
这样将看到被隐藏的task
5.1 应用场景示例
AlarmAlert uses singleInstance. Only one alert activity at a time and it is always its own task. Anything it launches (if anything) becomes part of its own new task
alarmalert使用singleInstance。只有一个警报活动在一个时间,它总是自己的任务。它启动的任何东西(如果有的话)成为它自己的新任务的一部分
这种模式很少被使用。一些真正的用例是一个用于启动或应用程序的活动,你是100%肯定只有一个活动。总之,我建议你不要使用这种模式,除非它是真的有必要。
6.Intent Flags
launchMode是规定你自己的Activity启动的行为模式,而Intent.Flag是你期望由你启动的其他的Activity是什么样的行为模式
除了分配启动模式直接在AndroidManifest.xml,我们也能够通过所谓的意图标志更多的行为分配,例如:
Intent intent = new Intent(StandardActivity.this, StandardActivity.class);
intent.addFlags(Intent.FLAG_ACTIVITY_SINGLE_TOP);
startActivity(intent);- 1
- 2
- 3
7.总结以及参考资料
7.1 总结
[1] standard 模式
这是默认模式,每次激活Activity时都会创建Activity实例,并放入任务栈中。
[2] singleTop 模式
如果在任务的栈顶正好存在该Activity的实例,就重用该实例( 会调用实例的 onNewIntent() ),否则就会创建新的实例并放入栈顶,即使栈中已经存在该Activity的实例,只要不在栈顶,都会创建新的实例。
[3] singleTask 模式
如果在栈中已经有该Activity的实例,就重用该实例(会调用实例的 onNewIntent() )。重用时,会让该实例回到栈顶,因此在它上面的实例将会被移出栈。如果栈中不存在该实例,将会创建新的实例放入栈中。
[4] singleInstance 模式
在一个新栈中创建该Activity的实例,并让多个应用共享该栈中的该Activity实例。一旦该模式的Activity实例已经存在于某个栈中,任何应用再激活该Activity时都会重用该栈中的实例( 会调用实例的 onNewIntent() )。其效果相当于多个应用共享一个应用,不管谁激活该 Activity 都会进入同一个应用中。
最后,资料什么的都看完了,学习到了很多。最近在写项目会用到launchMode,将以前模糊不明白的地方,搞懂一些。磨刀不误砍柴工说的很对,所以先看资料学习,再通过项目练手加深印象。
使用场景
不同的启动模式,适用与应用中的不同应用场景。
standard
标准模式适用于大多数场景,因为在应用中,我们基本上可以允许用户同时进行多个任务,每个任务操作不同的数据,这样允许创建一个Activty的多个实例,例如新建邮件Activity,如果当前正在新建一个给张三的邮件,此时同时需要创建一个给李四的邮件,此时Activty就要使用标准模式,这样允许创建多个不同的实例,允许创建多封邮件。
singleTop
singleTop模式,由于其特点是检查栈顶实例,可以用这个特性,防止短时间创建多个实例,例如有个按钮,点击之后打开一个播放视频的Activty,如果用户短时间重复点击,不是singleTop模式的话,就会短时间在Back Stack中出现多个实例,而且每个实例的播放进度不一致,如果是singleTop模式的话,不论打开多少次都没有影响。
singleTask
这个模式,常用于那些有一定任务,且任务已经进行了一部分,但是忽然又去做别的事情了,等会儿回来还要继续任务的场景,还是播放那个视频的例子,如果正在播放的时候需要去打开新Activty搜索相关视频,搜索完毕又要回到播放页面,那这个页面就比较适合使用singleTask模式
singleInstance
这种模式较少使用,如果一定要在你的应用中使用这种启动模式,请提前考虑好是否有这个必要,另外,在做一些特殊场景下的应用,比如Launcher的主屏时,可能会使用得到。
17、LinearLayout对比RelativeLayout
看到几篇关于RelativeLayout和LinearLayout性能分析的博客,写的相当不错,这里在大神的基础上,增加了部分内容
     RelativeLayout和LinearLayout是Android中常用的布局,两者的使用会极大的影响程序生成每一帧的性能,因此,正确的使用它们是提升程序性能的重要工作。记得以前,较低的SDK版本新建Android项目时,默认的布局文件是采用线性布局LinearLayout,但现在自动生成的布局文件都是RelativeLayout,或许你会认为这是IDE的默认设置问题,其实不然,这由 android-sdk\tools\templates\activities\BlankActivity\root\res\layout\activity_simple.xml.ftl 这个文件事先就定好了的,也就是说这是Google的选择,而非IDE的选择。那SDK为什么会默认给开发者新建一个默认的RelativeLayout布局呢?<-----原因见最后小结
     当然是因为RelativeLayout的性能更优,性能至上嘛。但是我们再看看默认新建的这个RelativeLayout的父容器,也就是当前窗口的顶级View——DecorView,它却是个垂直方向的LinearLayout,上面是标题栏,下面是内容栏。那么问题来了,Google为什么给开发者默认新建了个RelativeLayout,而自己却偷偷用了个LinearLayout,到底谁的性能更高,开发者该怎么选择呢?
       下面将通过分析它们的源码来探讨其View绘制性能,并得出其正确的使用方法。
一、View的一些基本工作原理
      先通过几个问题,简单的了解写android中View的工作原理吧。
(1)View是什么?
    简单来说,View是Android系统在屏幕上的视觉呈现,也就是说你在手机屏幕上看到的东西都是View。
(2)View是怎么绘制出来的?
    View的绘制流程是从ViewRoot的performTraversals()方法开始,依次经过measure(),layout()和draw()三个过程才最终将一个View绘制出来。
(3)View是怎么呈现在界面上的?
    Android中的视图都是通过Window来呈现的,不管Activity、Dialog还是Toast它们都有一个Window,然后通过WindowManager来管理View。Window和顶级View——DecorView的通信是依赖ViewRoot完成的。
(4)View和ViewGroup什么区别?
    不管简单的Button和TextView还是复杂的RelativeLayout和ListView,他们的共同基类都是View。所以说,View是一种界面层控件的抽象,他代表了一个控件。那ViewGroup是什么东西,它可以被翻译成控件组,即一组View。ViewGroup也是继承View,这就意味着View本身可以是单个控件,也可以是多个控件组成的控件组。根据这个理论,Button显然是个View,而RelativeLayout不但是一个View还可以是一个ViewGroup,而ViewGroup内部是可以有子View的,这个子View同样也可能是ViewGroup,以此类推。
二、RelativeLayout和LinearLayout性能PK
基于以上原理和大背景,我们要探讨的性能问题,说的简单明了一点就是:当RelativeLayout和LinearLayout分别作为ViewGroup,表达相同布局时绘制在屏幕上时谁更快一点。上面已经简单说了View的绘制,从ViewRoot的performTraversals()方法开始依次调用perfromMeasure、performLayout和performDraw这三个方法。这三个方法分别完成顶级View的measure、layout和draw三大流程,其中perfromMeasure会调用measure,measure又会调用onMeasure,在onMeasure方法中则会对所有子元素进行measure,这个时候measure流程就从父容器传递到子元素中了,这样就完成了一次measure过程,接着子元素会重复父容器的measure,如此反复就完成了整个View树的遍历。同理,performLayout和performDraw也分别完成perfromMeasure类似的流程。通过这三大流程,分别遍历整棵View树,就实现了Measure,Layout,Draw这一过程,View就绘制出来了。那么我们就分别来追踪下RelativeLayout和LinearLayout这三大流程的执行耗时。
如下图,我们分别用两用种方式简单的实现布局测试下
LinearLayout
Measure:0.738ms
Layout:0.176ms
draw:7.655ms
RelativeLayout
Measure:2.280ms
Layout:0.153ms
draw:7.696ms
    从这个数据来看无论使用RelativeLayout还是LinearLayout,layout和draw的过程两者相差无几,考虑到误差的问题,几乎可以认为两者不分伯仲,关键是Measure的过程RelativeLayout却比LinearLayout慢了一大截。
(1)RelativeLayout的onMeasure()方法
- protected void onMeasure(int widthMeasureSpec, int heightMeasureSpec) {
- if (mDirtyHierarchy) {
- mDirtyHierarchy = false;
- sortChildren();
- }
- int myWidth = -1;
- int myHeight = -1;
- int width = 0;
- int height = 0;
- final int widthMode = MeasureSpec.getMode(widthMeasureSpec);
- final int heightMode = MeasureSpec.getMode(heightMeasureSpec);
- final int widthSize = MeasureSpec.getSize(widthMeasureSpec);
- final int heightSize = MeasureSpec.getSize(heightMeasureSpec);
- // Record our dimensions if they are known;
- if (widthMode != MeasureSpec.UNSPECIFIED) {
- myWidth = widthSize;
- }
- if (heightMode != MeasureSpec.UNSPECIFIED) {
- myHeight = heightSize;
- }
- if (widthMode == MeasureSpec.EXACTLY) {
- width = myWidth;
- }
- if (heightMode == MeasureSpec.EXACTLY) {
- height = myHeight;
- }
- mHasBaselineAlignedChild = false;
- View ignore = null;
- int gravity = mGravity & Gravity.RELATIVE_HORIZONTAL_GRAVITY_MASK;
- final boolean horizontalGravity = gravity != Gravity.START && gravity != 0;
- gravity = mGravity & Gravity.VERTICAL_GRAVITY_MASK;
- final boolean verticalGravity = gravity != Gravity.TOP && gravity != 0;
- int left = Integer.MAX_VALUE;
- int top = Integer.MAX_VALUE;
- int right = Integer.MIN_VALUE;
- int bottom = Integer.MIN_VALUE;
- boolean offsetHorizontalAxis = false;
- boolean offsetVerticalAxis = false;
- if ((horizontalGravity || verticalGravity) && mIgnoreGravity != View.NO_ID) {
- ignore = findViewById(mIgnoreGravity);
- }
- final boolean isWrapContentWidth = widthMode != MeasureSpec.EXACTLY;
- final boolean isWrapContentHeight = heightMode != MeasureSpec.EXACTLY;
- // We need to know our size for doing the correct computation of children positioning in RTL
- // mode but there is no practical way to get it instead of running the code below.
- // So, instead of running the code twice, we just set the width to a "default display width"
- // before the computation and then, as a last pass, we will update their real position with
- // an offset equals to "DEFAULT_WIDTH - width".
- final int layoutDirection = getLayoutDirection();
- if (isLayoutRtl() && myWidth == -1) {
- myWidth = DEFAULT_WIDTH;
- }
- View[] views = mSortedHorizontalChildren;
- int count = views.length;
- for (int i = 0; i < count; i++) {
- View child = views[i];
- if (child.getVisibility() != GONE) {
- LayoutParams params = (LayoutParams) child.getLayoutParams();
- int[] rules = params.getRules(layoutDirection);
- applyHorizontalSizeRules(params, myWidth, rules);
- measureChildHorizontal(child, params, myWidth, myHeight);
- if (positionChildHorizontal(child, params, myWidth, isWrapContentWidth)) {
- offsetHorizontalAxis = true;
- }
- }
- }
- views = mSortedVerticalChildren;
- count = views.length;
- final int targetSdkVersion = getContext().getApplicationInfo().targetSdkVersion;
- for (int i = 0; i < count; i++) {
- View child = views[i];
- if (child.getVisibility() != GONE) {
- LayoutParams params = (LayoutParams) child.getLayoutParams();
- applyVerticalSizeRules(params, myHeight);
- measureChild(child, params, myWidth, myHeight);
- if (positionChildVertical(child, params, myHeight, isWrapContentHeight)) {
- offsetVerticalAxis = true;
- }
- if (isWrapContentWidth) {
- if (isLayoutRtl()) {
- if (targetSdkVersion < Build.VERSION_CODES.KITKAT) {
- width = Math.max(width, myWidth - params.mLeft);
- } else {
- width = Math.max(width, myWidth - params.mLeft - params.leftMargin);
- }
- } else {
- if (targetSdkVersion < Build.VERSION_CODES.KITKAT) {
- width = Math.max(width, params.mRight);
- } else {
- width = Math.max(width, params.mRight + params.rightMargin);
- }
- }
- }
- if (isWrapContentHeight) {
- if (targetSdkVersion < Build.VERSION_CODES.KITKAT) {
- height = Math.max(height, params.mBottom);
- } else {
- height = Math.max(height, params.mBottom + params.bottomMargin);
- }
- }
- if (child != ignore || verticalGravity) {
- left = Math.min(left, params.mLeft - params.leftMargin);
- top = Math.min(top, params.mTop - params.topMargin);
- }
- if (child != ignore || horizontalGravity) {
- right = Math.max(right, params.mRight + params.rightMargin);
- bottom = Math.max(bottom, params.mBottom + params.bottomMargin);
- }
- }
- }
- if (mHasBaselineAlignedChild) {
- for (int i = 0; i < count; i++) {
- View child = getChildAt(i);
- if (child.getVisibility() != GONE) {
- LayoutParams params = (LayoutParams) child.getLayoutParams();
- alignBaseline(child, params);
- if (child != ignore || verticalGravity) {
- left = Math.min(left, params.mLeft - params.leftMargin);
- top = Math.min(top, params.mTop - params.topMargin);
- }
- if (child != ignore || horizontalGravity) {
- right = Math.max(right, params.mRight + params.rightMargin);
- bottom = Math.max(bottom, params.mBottom + params.bottomMargin);
- }
- }
- }
- }
- if (isWrapContentWidth) {
- // Width already has left padding in it since it was calculated by looking at
- // the right of each child view
- width += mPaddingRight;
- if (mLayoutParams != null && mLayoutParams.width >= 0) {
- width = Math.max(width, mLayoutParams.width);
- }
- width = Math.max(width, getSuggestedMinimumWidth());
- width = resolveSize(width, widthMeasureSpec);
- if (offsetHorizontalAxis) {
- for (int i = 0; i < count; i++) {
- View child = getChildAt(i);
- if (child.getVisibility() != GONE) {
- LayoutParams params = (LayoutParams) child.getLayoutParams();
- final int[] rules = params.getRules(layoutDirection);
- if (rules[CENTER_IN_PARENT] != 0 || rules[CENTER_HORIZONTAL] != 0) {
- centerHorizontal(child, params, width);
- } else if (rules[ALIGN_PARENT_RIGHT] != 0) {
- final int childWidth = child.getMeasuredWidth();
- params.mLeft = width - mPaddingRight - childWidth;
- params.mRight = params.mLeft + childWidth;
- }
- }
- }
- }
- }
- if (isWrapContentHeight) {
- // Height already has top padding in it since it was calculated by looking at
- // the bottom of each child view
- height += mPaddingBottom;
- if (mLayoutParams != null && mLayoutParams.height >= 0) {
- height = Math.max(height, mLayoutParams.height);
- }
- height = Math.max(height, getSuggestedMinimumHeight());
- height = resolveSize(height, heightMeasureSpec);
- if (offsetVerticalAxis) {
- for (int i = 0; i < count; i++) {
- View child = getChildAt(i);
- if (child.getVisibility() != GONE) {
- LayoutParams params = (LayoutParams) child.getLayoutParams();
- final int[] rules = params.getRules(layoutDirection);
- if (rules[CENTER_IN_PARENT] != 0 || rules[CENTER_VERTICAL] != 0) {
- centerVertical(child, params, height);
- } else if (rules[ALIGN_PARENT_BOTTOM] != 0) {
- final int childHeight = child.getMeasuredHeight();
- params.mTop = height - mPaddingBottom - childHeight;
- params.mBottom = params.mTop + childHeight;
- }
- }
- }
- }
- }
- if (horizontalGravity || verticalGravity) {
- final Rect selfBounds = mSelfBounds;
- selfBounds.set(mPaddingLeft, mPaddingTop, width - mPaddingRight,
- height - mPaddingBottom);
- final Rect contentBounds = mContentBounds;
- Gravity.apply(mGravity, right - left, bottom - top, selfBounds, contentBounds,
- layoutDirection);
- final int horizontalOffset = contentBounds.left - left;
- final int verticalOffset = contentBounds.top - top;
- if (horizontalOffset != 0 || verticalOffset != 0) {
- for (int i = 0; i < count; i++) {
- View child = getChildAt(i);
- if (child.getVisibility() != GONE && child != ignore) {
- LayoutParams params = (LayoutParams) child.getLayoutParams();
- if (horizontalGravity) {
- params.mLeft += horizontalOffset;
- params.mRight += horizontalOffset;
- }
- if (verticalGravity) {
- params.mTop += verticalOffset;
- params.mBottom += verticalOffset;
- }
- }
- }
- }
- }
- if (isLayoutRtl()) {
- final int offsetWidth = myWidth - width;
- for (int i = 0; i < count; i++) {
- View child = getChildAt(i);
- if (child.getVisibility() != GONE) {
- LayoutParams params = (LayoutParams) child.getLayoutParams();
- params.mLeft -= offsetWidth;
- params.mRight -= offsetWidth;
- }
- }
- }
- setMeasuredDimension(width, height);
- }
根据上述关键代码,RelativeLayout分别对所有子View进行两次measure,横向纵向分别进行一次,这是为什么呢?首先RelativeLayout中子View的排列方式是基于彼此的依赖关系,而这个依赖关系可能和布局中View的顺序并不相同,在确定每个子View的位置的时候,需要先给所有的子View排序一下。又因为RelativeLayout允许A,B 2个子View,横向上B依赖A,纵向上A依赖B。所以需要横向纵向分别进行一次排序测量。 mSortedHorizontalChildren和mSortedVerticalChildren是分别对水平方向的子控件和垂直方向的子控件进行排序后的View数组。
(2)LinearLayout的onMeasure()方法
- @Override
- protected void onMeasure(int widthMeasureSpec, int heightMeasureSpec) {
- if (mOrientation == VERTICAL) {
- measureVertical(widthMeasureSpec, heightMeasureSpec);
- } else {
- measureHorizontal(widthMeasureSpec, heightMeasureSpec);
- }
- }
与RelativeLayout相比LinearLayout的measure就简单的多,只需判断线性布局是水平布局还是垂直布局即可,然后才进行测量:
- /**
- * Measures the children when the orientation of this LinearLayout is set
- * to {@link #VERTICAL}.
- *
- * @param widthMeasureSpec Horizontal space requirements as imposed by the parent.
- * @param heightMeasureSpec Vertical space requirements as imposed by the parent.
- *
- * @see #getOrientation()
- * @see #setOrientation(int)
- * @see #onMeasure(int, int)
- */
- void measureVertical(int widthMeasureSpec, int heightMeasureSpec) {
- mTotalLength = 0;
- int maxWidth = 0;
- int childState = 0;
- int alternativeMaxWidth = 0;
- int weightedMaxWidth = 0;
- boolean allFillParent = true;
- float totalWeight = 0;
- final int count = getVirtualChildCount();
- final int widthMode = MeasureSpec.getMode(widthMeasureSpec);
- final int heightMode = MeasureSpec.getMode(heightMeasureSpec);
- boolean matchWidth = false;
- boolean skippedMeasure = false;
- final int baselineChildIndex = mBaselineAlignedChildIndex;
- final boolean useLargestChild = mUseLargestChild;
- int largestChildHeight = Integer.MIN_VALUE;
- // See how tall everyone is. Also remember max width.
- for (int i = 0; i < count; ++i) {
- final View child = getVirtualChildAt(i);
- if (child == null) {
- mTotalLength += measureNullChild(i);
- continue;
- }
- if (child.getVisibility() == View.GONE) {
- i += getChildrenSkipCount(child, i);
- continue;
- }
- if (hasDividerBeforeChildAt(i)) {
- mTotalLength += mDividerHeight;
- }
- LinearLayout.LayoutParams lp = (LinearLayout.LayoutParams) child.getLayoutParams();
- totalWeight += lp.weight;
- if (heightMode == MeasureSpec.EXACTLY && lp.height == 0 && lp.weight > 0) {
- // Optimization: don't bother measuring children who are going to use
- // leftover space. These views will get measured again down below if
- // there is any leftover space.
- final int totalLength = mTotalLength;
- mTotalLength = Math.max(totalLength, totalLength + lp.topMargin + lp.bottomMargin);
- skippedMeasure = true;
- } else {
- int oldHeight = Integer.MIN_VALUE;
- if (lp.height == 0 && lp.weight > 0) {
- // heightMode is either UNSPECIFIED or AT_MOST, and this
- // child wanted to stretch to fill available space.
- // Translate that to WRAP_CONTENT so that it does not end up
- // with a height of 0
- oldHeight = 0;
- lp.height = LayoutParams.WRAP_CONTENT;
- }
- // Determine how big this child would like to be. If this or
- // previous children have given a weight, then we allow it to
- // use all available space (and we will shrink things later
- // if needed).
- measureChildBeforeLayout(
- child, i, widthMeasureSpec, 0, heightMeasureSpec,
- totalWeight == 0 ? mTotalLength : 0);
- if (oldHeight != Integer.MIN_VALUE) {
- lp.height = oldHeight;
- }
- final int childHeight = child.getMeasuredHeight();
- final int totalLength = mTotalLength;
- mTotalLength = Math.max(totalLength, totalLength + childHeight + lp.topMargin +
- lp.bottomMargin + getNextLocationOffset(child));
- if (useLargestChild) {
- largestChildHeight = Math.max(childHeight, largestChildHeight);
- }
- }
- /**
- * If applicable, compute the additional offset to the child's baseline
- * we'll need later when asked {@link #getBaseline}.
- */
- if ((baselineChildIndex >= 0) && (baselineChildIndex == i + 1)) {
- mBaselineChildTop = mTotalLength;
- }
- // if we are trying to use a child index for our baseline, the above
- // book keeping only works if there are no children above it with
- // weight. fail fast to aid the developer.
- if (i < baselineChildIndex && lp.weight > 0) {
- throw new RuntimeException("A child of LinearLayout with index "
- + "less than mBaselineAlignedChildIndex has weight > 0, which "
- + "won't work. Either remove the weight, or don't set "
- + "mBaselineAlignedChildIndex.");
- }
- boolean matchWidthLocally = false;
- if (widthMode != MeasureSpec.EXACTLY && lp.width == LayoutParams.MATCH_PARENT) {
- // The width of the linear layout will scale, and at least one
- // child said it wanted to match our width. Set a flag
- // indicating that we need to remeasure at least that view when
- // we know our width.
- matchWidth = true;
- matchWidthLocally = true;
- }
- final int margin = lp.leftMargin + lp.rightMargin;
- final int measuredWidth = child.getMeasuredWidth() + margin;
- maxWidth = Math.max(maxWidth, measuredWidth);
- childState = combineMeasuredStates(childState, child.getMeasuredState());
- allFillParent = allFillParent && lp.width == LayoutParams.MATCH_PARENT;
- if (lp.weight > 0) {
- /*
- * Widths of weighted Views are bogus if we end up
- * remeasuring, so keep them separate.
- */
- weightedMaxWidth = Math.max(weightedMaxWidth,
- matchWidthLocally ? margin : measuredWidth);
- } else {
- alternativeMaxWidth = Math.max(alternativeMaxWidth,
- matchWidthLocally ? margin : measuredWidth);
- }
- i += getChildrenSkipCount(child, i);
- }
- if (mTotalLength > 0 && hasDividerBeforeChildAt(count)) {
- mTotalLength += mDividerHeight;
- }
- if (useLargestChild &&
- (heightMode == MeasureSpec.AT_MOST || heightMode == MeasureSpec.UNSPECIFIED)) {
- mTotalLength = 0;
- for (int i = 0; i < count; ++i) {
- final View child = getVirtualChildAt(i);
- if (child == null) {
- mTotalLength += measureNullChild(i);
- continue;
- }
- if (child.getVisibility() == GONE) {
- i += getChildrenSkipCount(child, i);
- continue;
- }
- final LinearLayout.LayoutParams lp = (LinearLayout.LayoutParams)
- child.getLayoutParams();
- // Account for negative margins
- final int totalLength = mTotalLength;
- mTotalLength = Math.max(totalLength, totalLength + largestChildHeight +
- lp.topMargin + lp.bottomMargin + getNextLocationOffset(child));
- }
- }
- // Add in our padding
- mTotalLength += mPaddingTop + mPaddingBottom;
- int heightSize = mTotalLength;
- // Check against our minimum height
- heightSize = Math.max(heightSize, getSuggestedMinimumHeight());
- // Reconcile our calculated size with the heightMeasureSpec
- int heightSizeAndState = resolveSizeAndState(heightSize, heightMeasureSpec, 0);
- heightSize = heightSizeAndState & MEASURED_SIZE_MASK;
- // Either expand children with weight to take up available space or
- // shrink them if they extend beyond our current bounds. If we skipped
- // measurement on any children, we need to measure them now.
- int delta = heightSize - mTotalLength;
- if (skippedMeasure || delta != 0 && totalWeight > 0.0f) {
- float weightSum = mWeightSum > 0.0f ? mWeightSum : totalWeight;
- mTotalLength = 0;
- for (int i = 0; i < count; ++i) {
- final View child = getVirtualChildAt(i);
- if (child.getVisibility() == View.GONE) {
- continue;
- }
- LinearLayout.LayoutParams lp = (LinearLayout.LayoutParams) child.getLayoutParams();
- float childExtra = lp.weight;
- if (childExtra > 0) {
- // Child said it could absorb extra space -- give him his share
- int share = (int) (childExtra * delta / weightSum);
- weightSum -= childExtra;
- delta -= share;
- final int childWidthMeasureSpec = getChildMeasureSpec(widthMeasureSpec,
- mPaddingLeft + mPaddingRight +
- lp.leftMargin + lp.rightMargin, lp.width);
- // TODO: Use a field like lp.isMeasured to figure out if this
- // child has been previously measured
- if ((lp.height != 0) || (heightMode != MeasureSpec.EXACTLY)) {
- // child was measured once already above...
- // base new measurement on stored values
- int childHeight = child.getMeasuredHeight() + share;
- if (childHeight < 0) {
- childHeight = 0;
- }
- child.measure(childWidthMeasureSpec,
- MeasureSpec.makeMeasureSpec(childHeight, MeasureSpec.EXACTLY));
- } else {
- // child was skipped in the loop above.
- // Measure for this first time here
- child.measure(childWidthMeasureSpec,
- MeasureSpec.makeMeasureSpec(share > 0 ? share : 0,
- MeasureSpec.EXACTLY));
- }
- // Child may now not fit in vertical dimension.
- childState = combineMeasuredStates(childState, child.getMeasuredState()
- & (MEASURED_STATE_MASK>>MEASURED_HEIGHT_STATE_SHIFT));
- }
- final int margin = lp.leftMargin + lp.rightMargin;
- final int measuredWidth = child.getMeasuredWidth() + margin;
- maxWidth = Math.max(maxWidth, measuredWidth);
- boolean matchWidthLocally = widthMode != MeasureSpec.EXACTLY &&
- lp.width == LayoutParams.MATCH_PARENT;
- alternativeMaxWidth = Math.max(alternativeMaxWidth,
- matchWidthLocally ? margin : measuredWidth);
- allFillParent = allFillParent && lp.width == LayoutParams.MATCH_PARENT;
- final int totalLength = mTotalLength;
- mTotalLength = Math.max(totalLength, totalLength + child.getMeasuredHeight() +
- lp.topMargin + lp.bottomMargin + getNextLocationOffset(child));
- }
- // Add in our padding
- mTotalLength += mPaddingTop + mPaddingBottom;
- // TODO: Should we recompute the heightSpec based on the new total length?
- } else {
- alternativeMaxWidth = Math.max(alternativeMaxWidth,
- weightedMaxWidth);
- // We have no limit, so make all weighted views as tall as the largest child.
- // Children will have already been measured once.
- if (useLargestChild && heightMode != MeasureSpec.EXACTLY) {
- for (int i = 0; i < count; i++) {
- final View child = getVirtualChildAt(i);
- if (child == null || child.getVisibility() == View.GONE) {
- continue;
- }
- final LinearLayout.LayoutParams lp =
- (LinearLayout.LayoutParams) child.getLayoutParams();
- float childExtra = lp.weight;
- if (childExtra > 0) {
- child.measure(
- MeasureSpec.makeMeasureSpec(child.getMeasuredWidth(),
- MeasureSpec.EXACTLY),
- MeasureSpec.makeMeasureSpec(largestChildHeight,
- MeasureSpec.EXACTLY));
- }
- }
- }
- }
- if (!allFillParent && widthMode != MeasureSpec.EXACTLY) {
- maxWidth = alternativeMaxWidth;
- }
- maxWidth += mPaddingLeft + mPaddingRight;
- // Check against our minimum width
- maxWidth = Math.max(maxWidth, getSuggestedMinimumWidth());
- setMeasuredDimension(resolveSizeAndState(maxWidth, widthMeasureSpec, childState),
- heightSizeAndState);
- if (matchWidth) {
- forceUniformWidth(count, heightMeasureSpec);
- }
- }
LinearLayout首先会对所有的子View进行measure,并计算totalWeight(所有子View的weight属性之和),然后判断子View的weight属性是否为最大,如为最大则将剩余的空间分配给它。如果不使用weight属性进行布局,则不进行第二次measure。
父视图在对子视图进行measure操作的过程中,使用变量mTotalLength保存已经measure过的child所占用的高度,该变量刚开始时是0。在for循环中调用measureChildBeforeLayout()对每一个child进行测量,该函数实际上仅仅是调用了measureChildWithMargins(),在调用该方法时,使用了两个参数。其中一个是heightMeasureSpec,该参数为LinearLayout本身的measureSpec;另一个参数就是mTotalLength,代表该LinearLayout已经被其子视图所占用的高度。 每次for循环对child测量完毕后,调用child.getMeasuredHeight()获取该子视图最终的高度,并将这个高度添加到mTotalLength中。在本步骤中,暂时避开了lp.weight>0的子视图,即暂时先不测量这些子视图,因为后面将把父视图剩余的高度按照weight值的大小平均分配给相应的子视图。源码中使用了一个局部变量totalWeight累计所有子视图的weight值。处理lp.weight>0的情况需要注意,如果变量heightMode是EXACTLY,那么,当其他子视图占满父视图的高度后,weight>0的子视图可能分配不到布局空间,从而不被显示,只有当heightMode是AT_MOST或者UNSPECIFIED时,weight>0的视图才能优先获得布局高度。
最后我们的结论是:如果不使用weight属性,LinearLayout会在当前方向上进行一次measure的过程,如果使用weight属性,LinearLayout会避开设置过weight属性的view做第一次measure,完了再对设置过weight属性的view做第二次measure。由此可见,weight属性对性能是有影响的,而且本身有大坑,请注意避让。
三、小结
从源码中我们似乎能看出,我们先前的测试结果中RelativeLayout不如LinearLayout快的根本原因是RelativeLayout需要对其子View进行两次measure过程。而LinearLayout则只需一次measure过程,所以显然会快于RelativeLayout,但是如果LinearLayout中有weight属性,则也需要进行两次measure,但即便如此,应该仍然会比RelativeLayout的情况好一点。RelativeLayout另一个性能问题对比到这里就结束了嘛?显然没有!我们再看看View的Measure()方法都干了些什么?public final void measure(int widthMeasureSpec, int heightMeasureSpec) {if ((mPrivateFlags & PFLAG_FORCE_LAYOUT) == PFLAG_FORCE_LAYOUT ||widthMeasureSpec != mOldWidthMeasureSpec ||heightMeasureSpec != mOldHeightMeasureSpec) {......}mOldWidthMeasureSpec = widthMeasureSpec;mOldHeightMeasureSpec = heightMeasureSpec;mMeasureCache.put(key, ((long) mMeasuredWidth) << 32 |(long) mMeasuredHeight & 0xffffffffL); // suppress sign extension}
View的measure方法里对绘制过程做了一个优化,如果我们或者我们的子View没有要求强制刷新,而父View给子View的传入值也没有变化(也就是说子View的位置没变化),就不会做无谓的measure。但是上面已经说了RelativeLayout要做两次measure,而在做横向的测量时,纵向的测量结果尚未完成,只好暂时使用myHeight传入子View系统,假如子View的Height不等于(设置了margin)myHeight的高度,那么measure中上面代码所做得优化将不起作用,这一过程将进一步影响RelativeLayout的绘制性能。而LinearLayout则无这方面的担忧。解决这个问题也很好办,如果可以,尽量使用padding代替margin。结论
(1)RelativeLayout会让子View调用2次onMeasure,LinearLayout 在有weight时,也会调用子View 2次onMeasure
(2)RelativeLayout的子View如果高度和RelativeLayout不同,则会引发效率问题,当子View很复杂时,这个问题会更加严重。如果可以,尽量使用padding代替margin。
(3)在不影响层级深度的情况下,使用LinearLayout和FrameLayout而不是RelativeLayout。
(4)提高绘制性能的使用方式
    根据上面源码的分析,RelativeLayout将对所有的子View进行两次measure,而LinearLayout在使用weight属性进行布局时也会对子View进行两次measure,如果他们位于整个View树的顶端时并可能进行多层的嵌套时,位于底层的View将会进行大量的measure操作,大大降低程序性能。因此,应尽量将RelativeLayout和LinearLayout置于View树的底层,并减少嵌套。
最后思考一下文章开头的疑问:较低的SDK版本新建Android项目时,默认的布局文件是采用线性布局LinearLayout,但现在自动生成的布局文件都是RelativeLayout,为什么呢?
这是Google关于RelativeLayout的说明:
- A RelativeLayout is a very powerful utility for designing a user interface because it can eliminate nested view groups and keep your layout hierarchy flat, which improves performance. If you find yourself using several nested LinearLayout groups, you may be able to replace them with a single RelativeLayout.
Google的意思是“性能至上”, RelativeLayout 在性能上更好,因为在诸如 ListView 等控件中,使用 LinearLayout 容易产生多层嵌套的布局结构,这在性能上是不好的。而 RelativeLayout 因其原理上的灵活性,通常层级结构都比较扁平,很多使用LinearLayout 的情况都可以用一个 RelativeLayout 来替代,以降低布局的嵌套层级,优化性能。所以从这一点来看,Google比较推荐开发者使用RelativeLayout,因此就将其作为Blank Activity的默认布局了。
18、RequestLayout, onlayout, onDraw ,DrawChild的区别和联系
19、Touch事件传递流程
20、Unbuntu编译安卓系统
21、View绘制流程
22、Volley解析


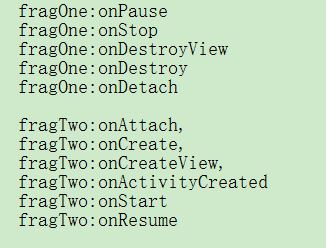
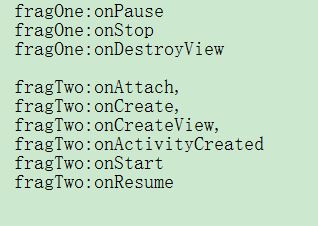
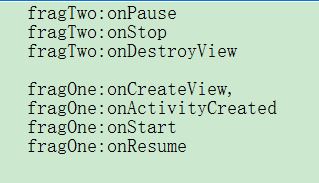
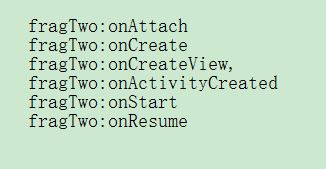


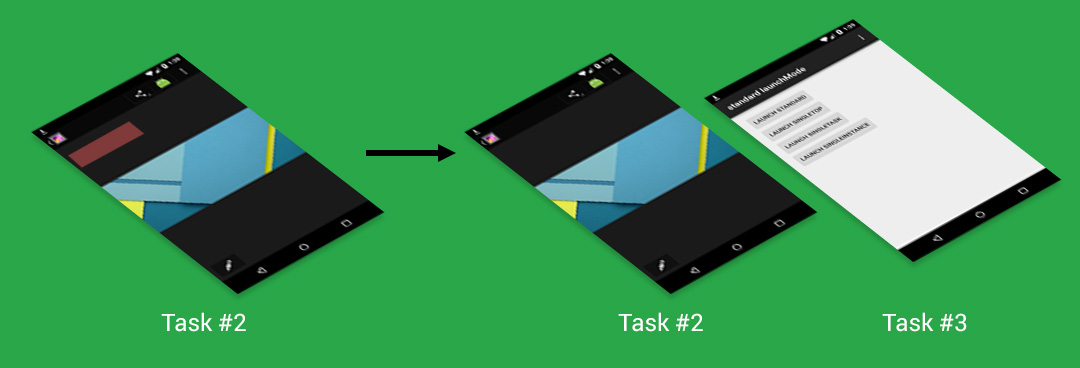
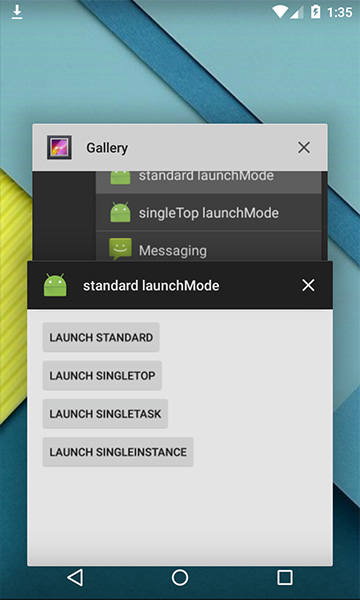
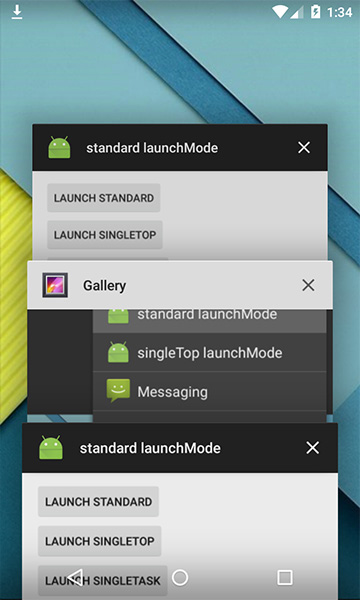
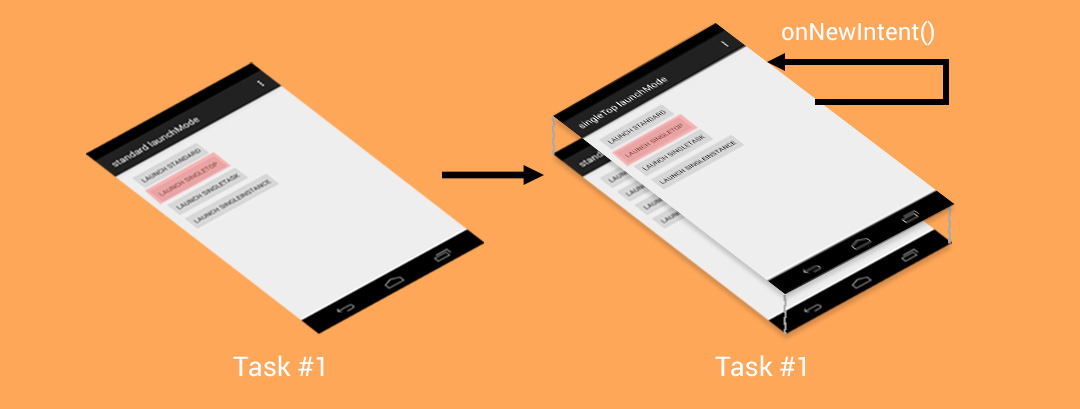
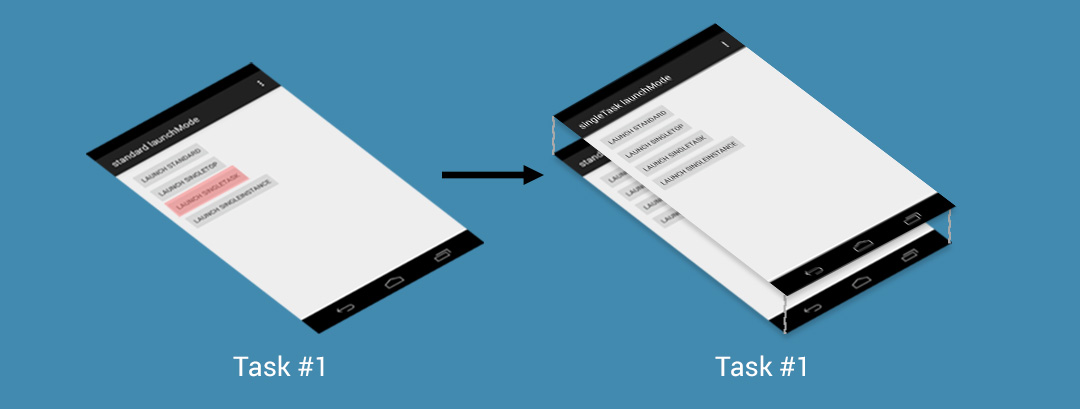
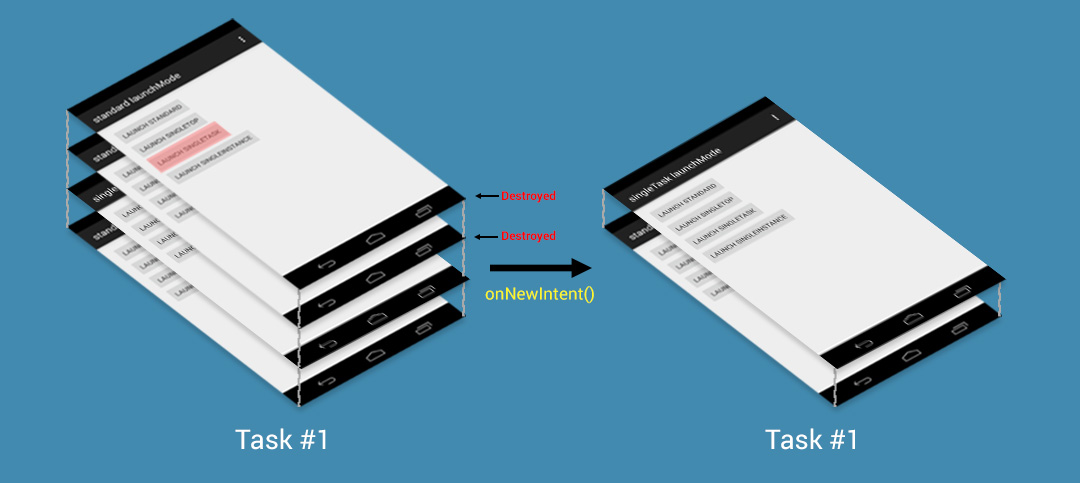

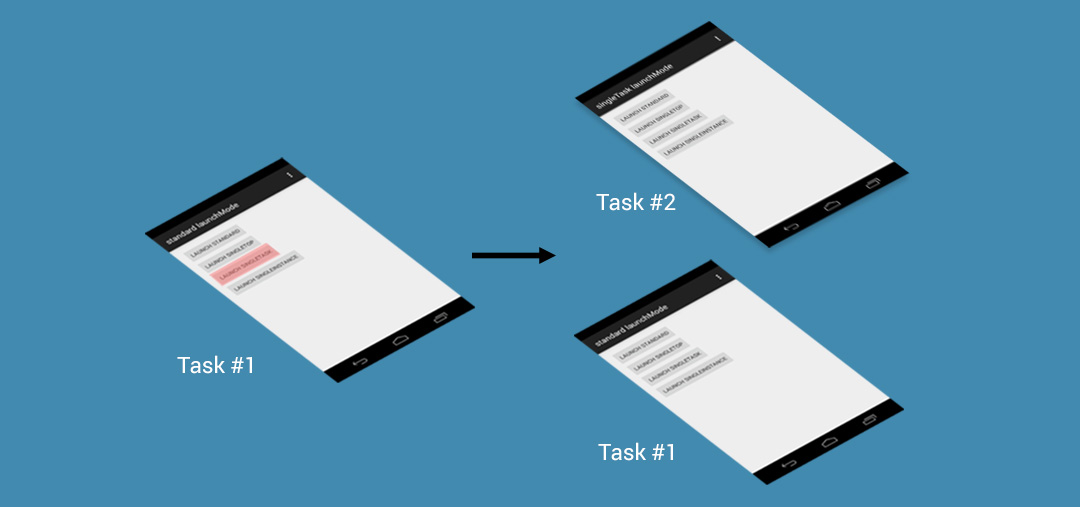
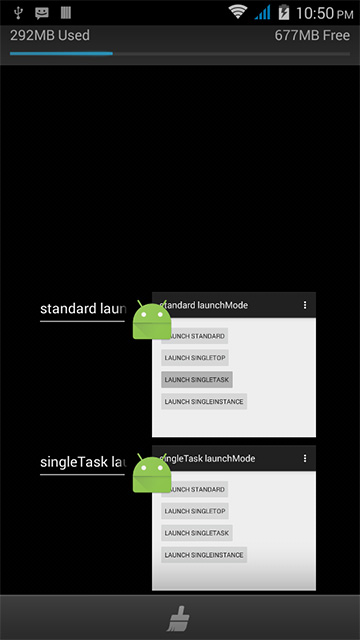

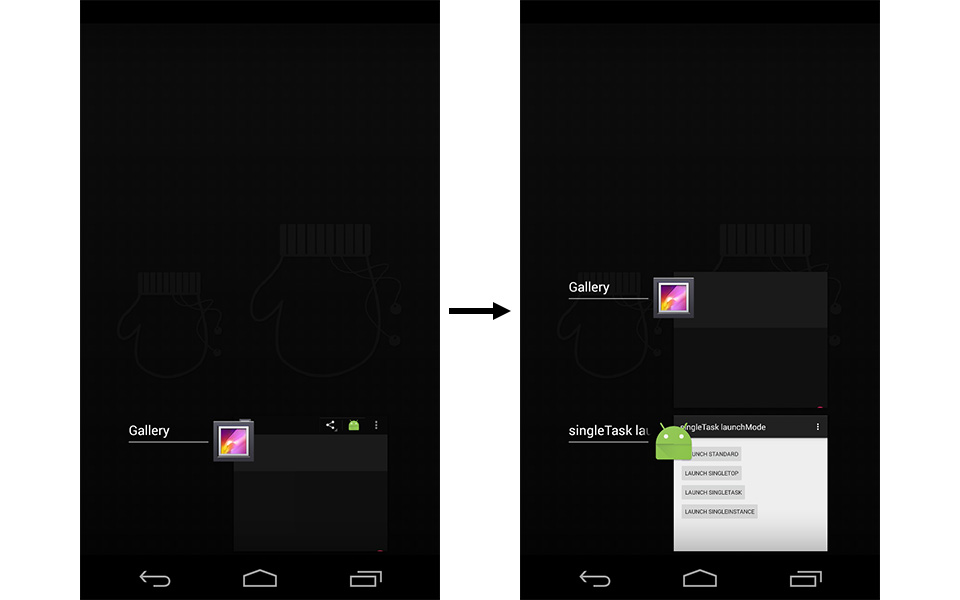

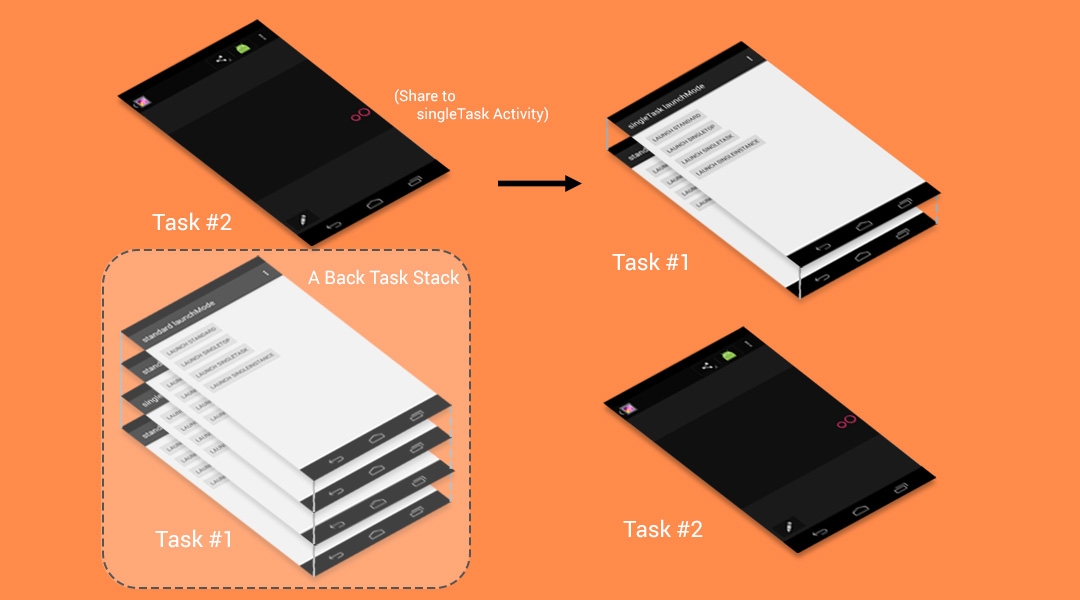
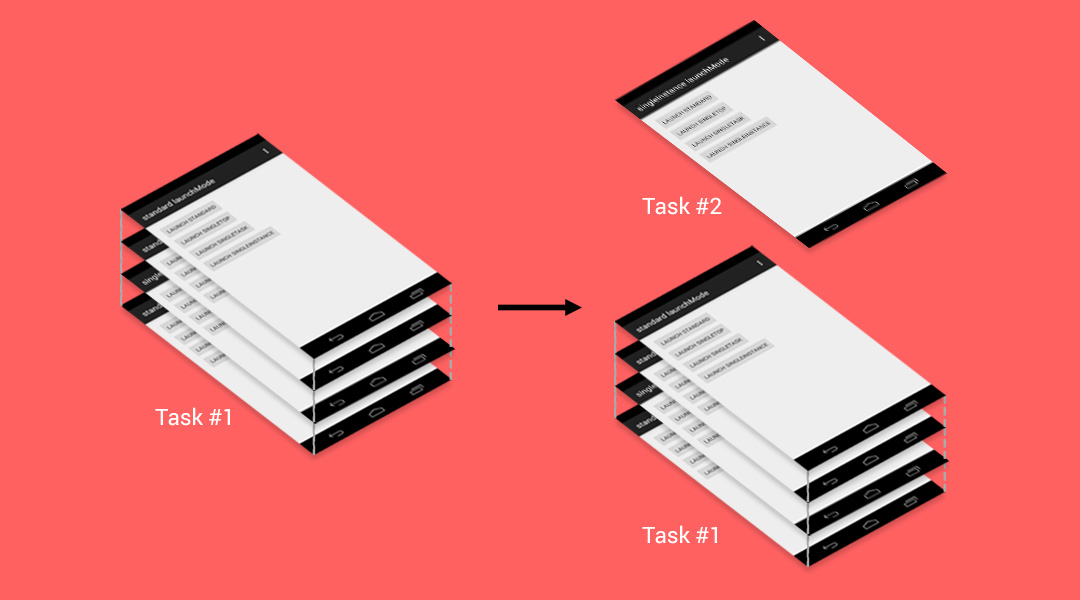


 2万+
2万+

 被折叠的 条评论
为什么被折叠?


