


Spring入门实例
安装JDK,配置好Java路径,在IDEA新建一个web项目,并配置好tomcat服务器,这里新建的项目名为JavaEE。注意本项目需要导入日志jar包:commons-logging-1.2.jar和标签库jar包:jstl.jar。否则会无法启动。
1. 持久层:建立领域对象User
持久层还包括DAO层的数据库操作等。
package com.baobaotao.domain;

/**
 * Created by gzx on 16-11-19.
 */
//持久层,领域对象
public class User {
    private String userName;
    private String password;
    private String realName;

    public String getUserName() {
        return userName;
    }

    public void setUserName(String userName) {
        this.userName = userName;
    }

    public String getPassword() {
        return password;
    }

    public void setPassword(String password) {
        this.password = password;
    }

    public String getRealName() {
        return realName;
    }

    public void setRealName(String realName) {
        this.realName = realName;
    }

    @Override
    public String toString() {
        return "User{" +
                "userName='" + userName + '\'' +
                ", password='" + password + '\'' +
                ", realName='" + realName + '\'' +
                '}';
    }
}
2. 实现业务层的逻辑
定义一个UserService类,可以调用DAO。
package com.baobaotao.service;

import com.baobaotao.domain.User;
import org.springframework.stereotype.Service;

/**
 * Created by gzx on 16-11-19.
 */
//将UserService标志为一个服务层的bean
@Service
public class UserService {
    public void createUser(User user){
        System.out.println("service create user : " + user);
    }
}
3. 配置持久层和业务层的applicationContext.xml文件
这个文件主要是用于业务层容器初始化时自动生成一些bean,可以定义Spring JDBC数据源,也可以定义AOP增强等。这里的bean可以供web层使用。文件名为applicationContext.xml,位于类路径的根目录下。
<?xml version="1.0" encoding="UTF-8" ?>
<beans xmlns="http://www.springframework.org/schema/beans"
       xmlns:xsi="http://www.w3.org/2001/XMLSchema-instance" xmlns:p="http://www.springframework.org/schema/p"
       xmlns:context="http://www.springframework.org/schema/context"
       xmlns:aop="http://www.springframework.org/schema/aop" xmlns:tx="http://www.springframework.org/schema/tx"
       xsi:schemaLocation="http://www.springframework.org/schema/beans
       http://www.springframework.org/schema/beans/spring-beans-3.0.xsd
       http://www.springframework.org/schema/context
       http://www.springframework.org/schema/context/spring-context-3.0.xsd
       http://www.springframework.org/schema/tx
       http://www.springframework.org/schema/tx/spring-tx-3.0.xsd
       http://www.springframework.org/schema/aop
       http://www.springframework.org/schema/aop/spring-aop-3.0.xsd">
    <!-- 扫描类包,将标注Spring注解的类自动转化Bean,同时完成Bean的注入 -->
    <context:component-scan base-package="com.baobaotao.service"/>
</beans>
4. 展现层,配置web.xml
web.xml位于WEB-INF/下,是tomcat容器依赖的配置文件。applicationContext.xml和Spring MVC的web层配置文件都必须在web.xml定义。在下面文件中第一个applicationContext.xml将初始化业务层的Spring容器,作为父容器。而后面DispatcherServlet将对应一个Spring MVC容器。根据servlet-name,配置文件必须命名为baobaotao-servlet.xml,且位于WEB-INF/下,可以对URL进行拦截,不合法的URL将不被处理。
<?xml version="1.0" encoding="UTF-8"?>
<web-app xmlns="http://xmlns.jcp.org/xml/ns/javaee"
         xmlns:xsi="http://www.w3.org/2001/XMLSchema-instance"
         xsi:schemaLocation="http://xmlns.jcp.org/xml/ns/javaee http://xmlns.jcp.org/xml/ns/javaee/web-app_3_1.xsd"
         version="3.1">
    <!-- 指定持久层和业务层的配置文件:在类路径下,初始化业务层Spring容器,也是父容器 -->
    <context-param>
        <param-name>contextConfigLocation</param-name>
        <param-value>classpath:applicationContext.xml</param-value>
    </context-param>
    <listener>
        <listener-class>
            org.springframework.web.context.ContextLoaderListener
        </listener-class>
    </listener>
    <!-- 初始化web层容器,同时指定过滤的URL,对应的web层配置文件必须为WEB-INF/baobaotao-servlet.xml -->
    <servlet>
        <servlet-name>baobaotao</servlet-name>
        <servlet-class>
            org.springframework.web.servlet.DispatcherServlet
        </servlet-class>
        <load-on-startup>1</load-on-startup>
    </servlet>
    <!-- 过滤所有以html结尾的请求-->
    <servlet-mapping>
        <servlet-name>baobaotao</servlet-name>
        <url-pattern>*.html</url-pattern>
    </servlet-mapping>
</web-app>
5. 控制器(处理器)
这里使用UserController来完成对具体的URL和POST请求进行处理。
package com.baobaotao.web;

import com.baobaotao.domain.User;
import com.baobaotao.service.UserService;
import org.springframework.beans.factory.annotation.Autowired;
import org.springframework.stereotype.Controller;
import org.springframework.web.bind.annotation.RequestMapping;
import org.springframework.web.bind.annotation.RequestMethod;
import org.springframework.web.servlet.ModelAndView;

/**
 * Created by gzx on 16-11-19.
 */
//处理器或者控制器,在过滤.html的基础上,完成要处理的URL,只处理/user
@Controller
@RequestMapping("/user")
public class UserController {
    //自动注入父容器(业务层)中的bean
    @Autowired
    private UserService userService;
    //处理/user/register.html请求,返回视图逻辑名,会被进一步处理
    //被解析器映射为WEB-INF/views/user/register.jsp
    //并将该页面的内容返回给客户端
    @RequestMapping("/register")
    public String register(){
        return "user/register";
    }
    //处理/user.html请求,且是表单,POST请求
    //参数user的成员将与表单的返回参数字段匹配,自动注入
    @RequestMapping(method = RequestMethod.POST)
    public ModelAndView createUser(User user){
        userService.createUser(user);
        ModelAndView mav = new ModelAndView();
        //视图逻辑名,被解析器映射为WEB-INF/views/user/createSuccess.jsp
        //并将该页面的内容返回给客户端
        mav.setViewName("user/createSuccess");
        //model,将user的值一并传递给上述jsp视图页面
        mav.addObject("user", user);
        return mav;
    }
}
6. Spring MVC配置文件WEB-INF/baobaotao-servlet.xml
这里主要是对展现层的bean进行生成,同时配置视图解析器,将逻辑视图名解析为具体存在的JSP页面。
<?xml version="1.0" encoding="UTF-8" ?>
<beans xmlns="http://www.springframework.org/schema/beans"
       xmlns:xsi="http://www.w3.org/2001/XMLSchema-instance" xmlns:p="http://www.springframework.org/schema/p"
       xmlns:context="http://www.springframework.org/schema/context"
       xsi:schemaLocation="http://www.springframework.org/schema/beans
       http://www.springframework.org/schema/beans/spring-beans-3.0.xsd
       http://www.springframework.org/schema/context
       http://www.springframework.org/schema/context/spring-context-3.0.xsd">
    <!-- 扫描web包,应用Spring的注解 -->
    <context:component-scan base-package="com.baobaotao.web"/>

    <!-- 配置视图解析器,将ModelAndView及字符串解析为具体的页面,即逻辑视图名转化为/WEB-INF/views/逻辑视图名.jsp -->
    <bean class="org.springframework.web.servlet.view.InternalResourceViewResolver"
            p:viewClass="org.springframework.web.servlet.view.JstlView"
            p:prefix="/WEB-INF/views/"
            p:suffix=".jsp"
    />
</beans>
7. JSP页面视图
注册时显示的HTML内容来自WEB-INF/views/user/register.jsp文件:
<%--
  Created by IntelliJ IDEA.
  User: gzx
  Date: 16-11-19
  Time: 下午2:50
  To change this template use File | Settings | File Templates.
--%>
<%@ page contentType="text/html;charset=UTF-8" language="java" %>
<%@taglib uri="http://java.sun.com/jsp/jstl/core" prefix="c"%>
<html>
<head>
    <meta charset="utf-8">
    <title>新增用户</title>
</head>
<body>
    <form method="post" action="<c:url value="/user.html"/>">
        <table>
            <tr>
                <td>用户名:</td>
                <td><input type="text" name="userName"/></td>
            </tr>
            <tr>
                <td>密码:</td>
                <td><input type="text" name="password"/></td>
            </tr>
            <tr>
                <td>姓名:</td>
                <td><input type="text" name="realName"/></td>
            </tr>
            <tr>
                <td colspan="2"><input type="submit" value="提交"/></td>
            </tr>
        </table>
    </form>
</body>
</html>
成功时的HTML内容来自WEB-INF/views/user/createSuccess.jsp文件:
<%--
  Created by IntelliJ IDEA.
  User: gzx
  Date: 16-11-19
  Time: 下午2:55
  To change this template use File | Settings | File Templates.
--%>
<%@ page contentType="text/html;charset=UTF-8" language="java" %>
<html>
<head>
    <title>用户创建成功</title>
</head>
<%-- 此user即为model,整个页面即为view--%>
<body>
    <h1>恭喜,用户${user.userName}创建成功!</h1>
</body>
</html>
8. 测试
启动tomcat,在浏览器下输入http://localhost:8080/JavaEE/user/register.html,将出现如下界面,注意浏览器URL:
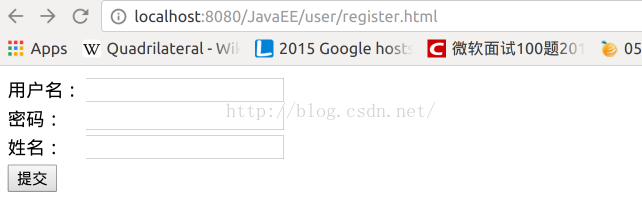
--------------------------------------------------------------------------------------------------------------------------------------------------------------------------------------------
填写如下内容:
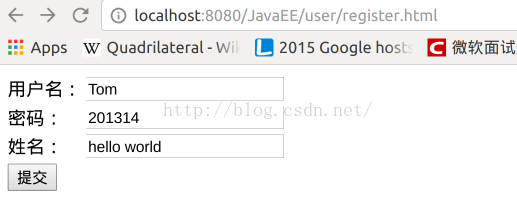
--------------------------------------------------------------------------------------------------------------------------------------------------------------------------------------------
提交后将出现如下界面,注意浏览器URL:

--------------------------------------------------------------------------------------------------------------------------------------------------------------------------------------------
控制台输出:这是由userService输出的,且被UserController调用。

参考文献:
Spring 3.x 企业应用开发实战


 1699
1699

 被折叠的 条评论
为什么被折叠?
被折叠的 条评论
为什么被折叠?
 到【灌水乐园】发言


