


 本文介绍如何使用Arduino控制WS2812B可寻址RGB LED灯带,包括所需硬件组件、接线方法及编程示例。通过实际案例演示如何创建动态灯光效果。
带有Arduino的WS2812B可寻址RGB LED灯条指南
这篇文章是关于WS2812B LED灯带的,这是一个可寻址的RGB LED灯带。这篇文章中的信息也适用于其他类似的LED灯条,例如 WS28XX系列的灯条,Neopixel灯条等。
WS2812B LED灯带介绍
WS2812B可寻址LED灯带有几种型号,尺寸,密封胶或LED密度不同。选择最适合您目的的一种。
去哪买?
您可以访问Maker Advisor并找到WS2812B RGB LED灯条的最优惠价格。
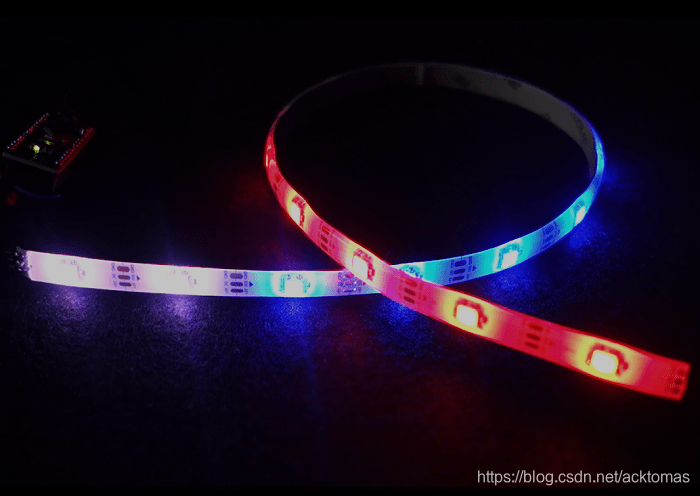
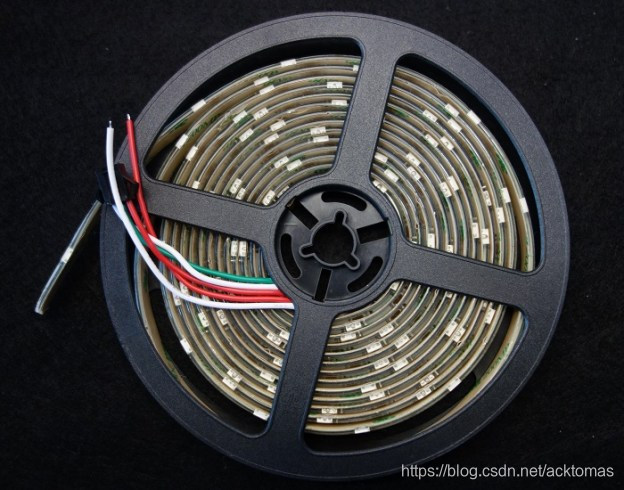
在下图中,您可以看到我的WS2812B LED灯条。它长5米,LED封装在防风雨的硅树脂中。因此,它们可以不受雨淋和灰尘的影响而留在外面。
在我看来,这是最酷的LED灯条类型。您可以控制亮度和颜色的每个LED的独立,它可以让你产生一种简单的方式惊人的,复杂的影响。
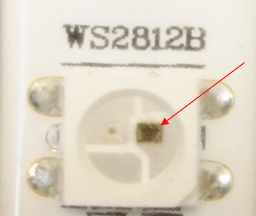
该LED灯条由串联连接的WS2812B LED制成。这些LED的LED内建有一个IC。这允许通过单线接口进行通信。这意味着您仅需使用Arduino的一个数字引脚即可控制许多LED。
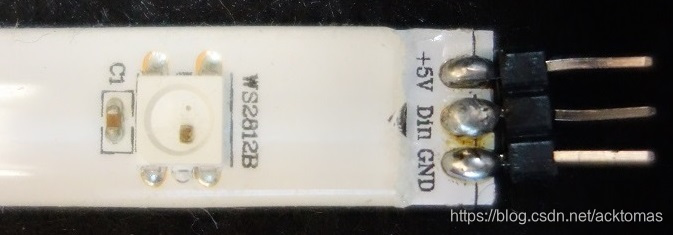
在下图中,您可以看到LED内的芯片。LED是RGB LED,工作原理是这样的。
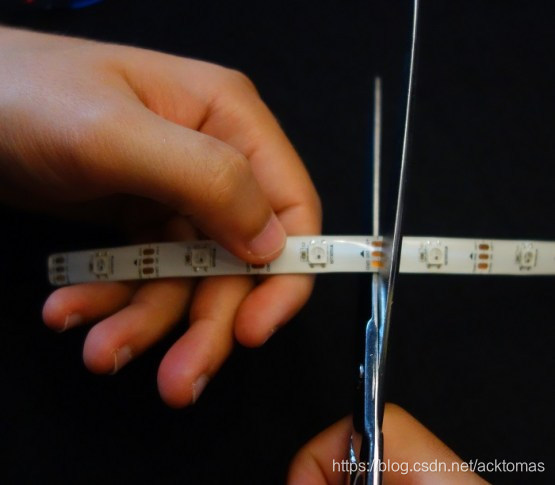
这种条非常灵活,可以切成您想要的任何长度。如您所见,该条带分为多个段,每个段包含一个RGB LED。
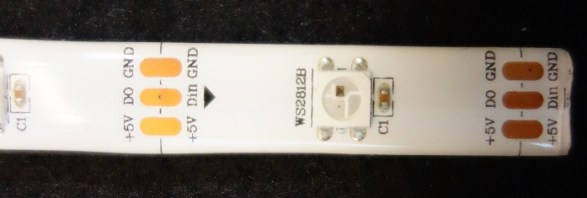
您可以通过在合适的地方用剪刀剪裁条来调整其大小(标出了剪裁条的正确位置)。
这些条带的两端均带有连接器。我决定剪掉连接器和焊头引脚。如果您要将条带连接到Arduino或面包板,则更加方便。
给WS2812B LED灯条供电
LED灯条应使用5V电源供电。设置为全亮度时,在5V电压下,每个LED消耗约50mA电流。这意味着每30个LED灯带可能会消耗1.5 A电流。请确保选择的电源符合灯带的需求。提供5V和2A的AC到DC电源适配器应该可以完成以下工作:
如果您使用外部电源,请不要忘记将电源接地线连接到Arduino接地线。
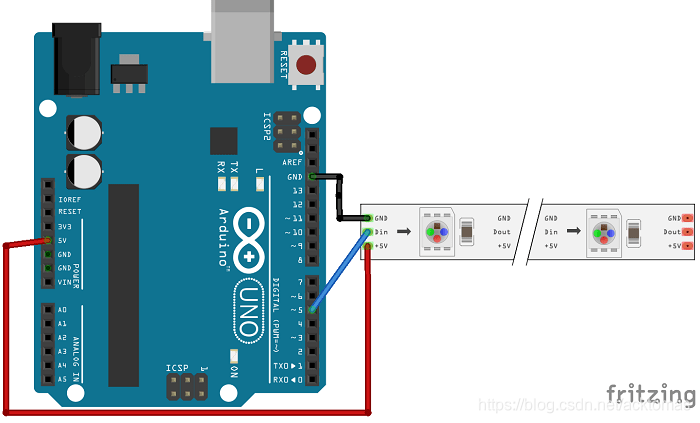
原理图
在此示例中,将使用5V Arduino引脚为WS2812B LED灯条供电。就我而言,我正在控制14个LED。如果要控制许多LED,则需要使用外部电源。
有用的 提示:
- 从电源到地连接一个电容,其电容在100uF和1000uF之间,以平滑电源。
- 在Arduino数字输出引脚和条形数据输入引脚之间添加一个220或470欧姆的电阻,以减少该线上的噪声。
- 使您的arduino,电源和插排之间的电线尽可能短,以最大程度地减少电压损失。
- 如果条带损坏并且无法正常工作,请检查第一个LED是否损坏。如果是这样,则将其切下,然后重新焊接排针,它应该可以再次工作。
代码
要控制WS2812B LED灯条,您需要下载FastLED库。
安装FastLED库
- 单击此处下载FastLED库。您的下载文件夹中应该有一个.zip文件夹
- 解压缩.zip文件夹,您应该得到FastLED-maste r文件夹
- 重命名您的文件夹 ~~FastLED主控~~到FastLED
- 将FastLED文件夹移至Arduino IDE安装库文件夹
- 最后,重新打开您的Arduino IDE
安装所需的库后,将以下代码上传到Arduino板(这是库examples文件夹中提供的示例草图)。转到“文件” >“示例” >“ FastLED” >“ **ColorPalette”,**或复制以下代码。
#include <FastLED.h>

#define LED_PIN     5
#define NUM_LEDS    14
#define BRIGHTNESS  64
#define LED_TYPE    WS2811
#define COLOR_ORDER GRB
CRGB leds[NUM_LEDS];

#define UPDATES_PER_SECOND 100

// This example shows several ways to set up and use 'palettes' of colors
// with FastLED.
//
// These compact palettes provide an easy way to re-colorize your
// animation on the fly, quickly, easily, and with low overhead.
//
// USING palettes is MUCH simpler in practice than in theory, so first just
// run this sketch, and watch the pretty lights as you then read through
// the code.  Although this sketch has eight (or more) different color schemes,
// the entire sketch compiles down to about 6.5K on AVR.
//
// FastLED provides a few pre-configured color palettes, and makes it
// extremely easy to make up your own color schemes with palettes.
//
// Some notes on the more abstract 'theory and practice' of
// FastLED compact palettes are at the bottom of this file.


CRGBPalette16 currentPalette;
TBlendType    currentBlending;

extern CRGBPalette16 myRedWhiteBluePalette;
extern const TProgmemPalette16 myRedWhiteBluePalette_p PROGMEM;


void setup() {
    delay( 3000 ); // power-up safety delay
    FastLED.addLeds<LED_TYPE, LED_PIN, COLOR_ORDER>(leds, NUM_LEDS).setCorrection( TypicalLEDStrip );
    FastLED.setBrightness(  BRIGHTNESS );

    currentPalette = RainbowColors_p;
    currentBlending = LINEARBLEND;
}


void loop()
{
    ChangePalettePeriodically();

    static uint8_t startIndex = 0;
    startIndex = startIndex + 1; /* motion speed */

    FillLEDsFromPaletteColors( startIndex);

    FastLED.show();
    FastLED.delay(1000 / UPDATES_PER_SECOND);
}

void FillLEDsFromPaletteColors( uint8_t colorIndex)
{
    uint8_t brightness = 255;

    for( int i = 0; i < NUM_LEDS; i++) {
        leds[i] = ColorFromPalette( currentPalette, colorIndex, brightness, currentBlending);
        colorIndex += 3;
    }
}


// There are several different palettes of colors demonstrated here.
//
// FastLED provides several 'preset' palettes: RainbowColors_p, RainbowStripeColors_p,
// OceanColors_p, CloudColors_p, LavaColors_p, ForestColors_p, and PartyColors_p.
//
// Additionally, you can manually define your own color palettes, or you can write
// code that creates color palettes on the fly.  All are shown here.

void ChangePalettePeriodically()
{
    uint8_t secondHand = (millis() / 1000) % 60;
    static uint8_t lastSecond = 99;

    if( lastSecond != secondHand) {
        lastSecond = secondHand;
        if( secondHand ==  0)  { currentPalette = RainbowColors_p;         currentBlending = LINEARBLEND; }
        if( secondHand == 10)  { currentPalette = RainbowStripeColors_p;   currentBlending = NOBLEND;  }
        if( secondHand == 15)  { currentPalette = RainbowStripeColors_p;   currentBlending = LINEARBLEND; }
        if( secondHand == 20)  { SetupPurpleAndGreenPalette();             currentBlending = LINEARBLEND; }
        if( secondHand == 25)  { SetupTotallyRandomPalette();              currentBlending = LINEARBLEND; }
        if( secondHand == 30)  { SetupBlackAndWhiteStripedPalette();       currentBlending = NOBLEND; }
        if( secondHand == 35)  { SetupBlackAndWhiteStripedPalette();       currentBlending = LINEARBLEND; }
        if( secondHand == 40)  { currentPalette = CloudColors_p;           currentBlending = LINEARBLEND; }
        if( secondHand == 45)  { currentPalette = PartyColors_p;           currentBlending = LINEARBLEND; }
        if( secondHand == 50)  { currentPalette = myRedWhiteBluePalette_p; currentBlending = NOBLEND;  }
        if( secondHand == 55)  { currentPalette = myRedWhiteBluePalette_p; currentBlending = LINEARBLEND; }
    }
}

// This function fills the palette with totally random colors.
void SetupTotallyRandomPalette()
{
    for( int i = 0; i < 16; i++) {
        currentPalette[i] = CHSV( random8(), 255, random8());
    }
}

// This function sets up a palette of black and white stripes,
// using code.  Since the palette is effectively an array of
// sixteen CRGB colors, the various fill_* functions can be used
// to set them up.
void SetupBlackAndWhiteStripedPalette()
{
    // 'black out' all 16 palette entries...
    fill_solid( currentPalette, 16, CRGB::Black);
    // and set every fourth one to white.
    currentPalette[0] = CRGB::White;
    currentPalette[4] = CRGB::White;
    currentPalette[8] = CRGB::White;
    currentPalette[12] = CRGB::White;

}

// This function sets up a palette of purple and green stripes.
void SetupPurpleAndGreenPalette()
{
    CRGB purple = CHSV( HUE_PURPLE, 255, 255);
    CRGB green  = CHSV( HUE_GREEN, 255, 255);
    CRGB black  = CRGB::Black;

    currentPalette = CRGBPalette16(
                                   green,  green,  black,  black,
                                   purple, purple, black,  black,
                                   green,  green,  black,  black,
                                   purple, purple, black,  black );
}


// This example shows how to set up a static color palette
// which is stored in PROGMEM (flash), which is almost always more
// plentiful than RAM.  A static PROGMEM palette like this
// takes up 64 bytes of flash.
const TProgmemPalette16 myRedWhiteBluePalette_p PROGMEM =
{
    CRGB::Red,
    CRGB::Gray, // 'white' is too bright compared to red and blue
    CRGB::Blue,
    CRGB::Black,

    CRGB::Red,
    CRGB::Gray,
    CRGB::Blue,
    CRGB::Black,

    CRGB::Red,
    CRGB::Red,
    CRGB::Gray,
    CRGB::Gray,
    CRGB::Blue,
    CRGB::Blue,
    CRGB::Black,
    CRGB::Black
};


// Additionl notes on FastLED compact palettes:
//
// Normally, in computer graphics, the palette (or "color lookup table")
// has 256 entries, each containing a specific 24-bit RGB color.  You can then
// index into the color palette using a simple 8-bit (one byte) value.
// A 256-entry color palette takes up 768 bytes of RAM, which on Arduino
// is quite possibly "too many" bytes.
//
// FastLED does offer traditional 256-element palettes, for setups that
// can afford the 768-byte cost in RAM.
//
// However, FastLED also offers a compact alternative.  FastLED offers
// palettes that store 16 distinct entries, but can be accessed AS IF
// they actually have 256 entries; this is accomplished by interpolating
// between the 16 explicit entries to create fifteen intermediate palette
// entries between each pair.
//
// So for example, if you set the first two explicit entries of a compact
// palette to Green (0,255,0) and Blue (0,0,255), and then retrieved
// the first sixteen entries from the virtual palette (of 256), you'd get
// Green, followed by a smooth gradient from green-to-blue, and then Blue.
您必须将NUM_LEDS变量更改为LED灯带中的LED数量。在我们的示例中,LED灯带长14个LED。
#定义NUM_LEDS 14
如果要使用Arduino的另一个引脚来控制LED灯条,则需要更改LED_PIN变量:
#定义LED_PIN 5
示范
最后,这就是您将要拥有的。如此惊人的效果:

还有这个:
还有这个:
等等 (…)
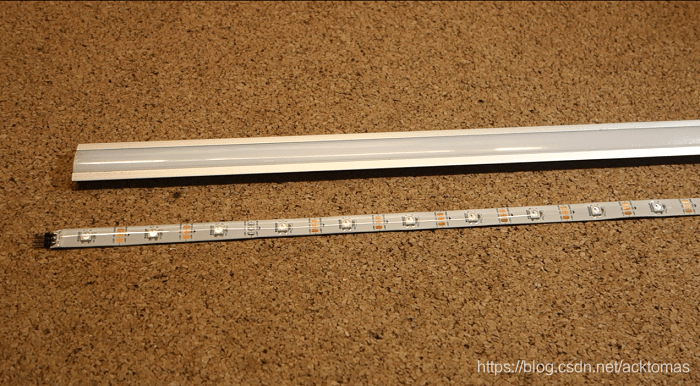
使用LED灯条盒
这些LED灯带通常带有可移动胶带,因此您可以将它们粘贴在任何需要的地方。问题在于它们的粘着性不太好,因此可能是第二天您会在地板上找到条带。
解决方案:我发现这种带状盒子可以很好地散射光线,例如,如果您需要永久性解决方案,可以将其拧在架子上。


 1182
1182

 被折叠的 条评论
为什么被折叠?
被折叠的 条评论
为什么被折叠?
 到【灌水乐园】发言


