


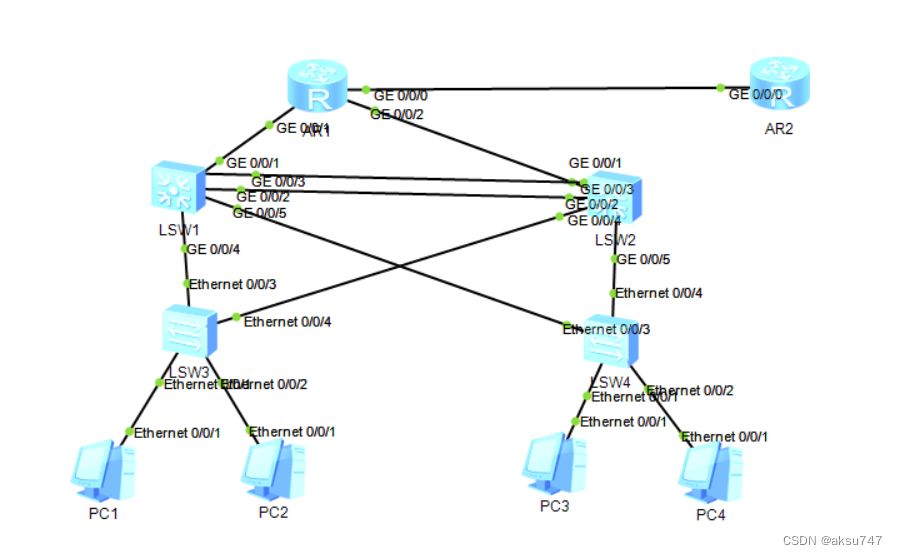
一,先将汇聚层交换机互联的接口调为
[SW1]int Eth-Trunk 0
[SW1-GigabitEthernet0/0/2]Eth-Trunk 0
[SW1-GigabitEthernet0/0/3]Eth-Trunk 0
SW2同理
二,各个交换机上创建vlan2
[sw1]vlan 2
三,创建Turnk干道
[SW2]port-group group-member Eth-Trunk 0 g0/0/4 to g0/0/5
[SW2-port-group]port link-type trunk
[SW2-Eth-Trunk0]port link-type trunk
[SW2-GigabitEthernet0/0/4]port link-type trunk
[SW2-GigabitEthernet0/0/5]port link-type trunk
[SW2-port-group]port trunk allow-pass vlan 2
[SW2-Eth-Trunk0]port trunk allow-pass vlan 2
[SW2-GigabitEthernet0/0/4]port trunk allow-pass vlan 2
[SW2-GigabitEthernet0/0/5]port trunk allow-pass vlan 2SW1,SW3,SW4同理
四,将与PC2.4相连的接口设置为access
[SW3-Ethernet0/0/2]port link-type access
[SW3-Ethernet0/0/2]port default vlan 2[SW3-Ethernet0/0/1]stp edged-port enable -----防止接受根发送的BPDU
SW4同理
五,设置生成树
[SW2]stp mode mstp
[SW2]stp region-configuration[SW2-mst-region]region-name a
[SW2-mst-region]instance 1 vlan 1
[SW2-mst-region]instance 2 vlan 2
[SW2-mst-region]active region-configuration
Info: This operation may take a few seconds. Please wait for a moment...done.
[SW2-mst-region]q
[SW2]stp instance 2 root primary ---------VLAN2在SW2为主根
[SW2]stp instance 1 root secondary -----------VLAN1在SW2位备份根SW1同理,最后两步颠倒
SW3
[SW3]stp mode mstp
[SW3]stp region-configuration
[SW3-mst-region]region-name a
[SW3-mst-region]instance 1 vlan 1
[SW3-mst-region]instance 2 vlan 2
[SW3-mst-region]active region-configurationSW4相同配置
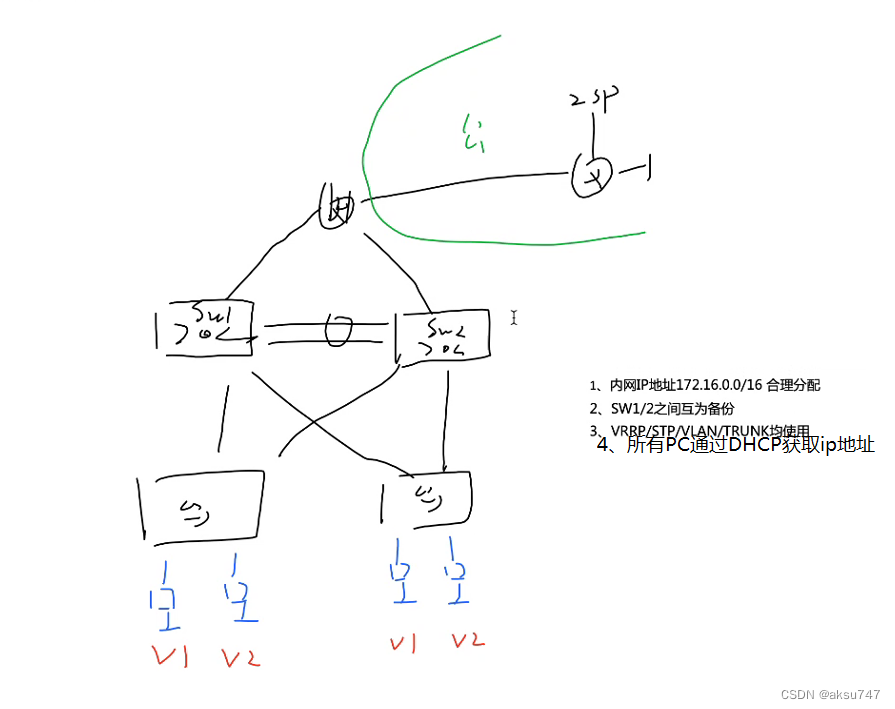
六,网关冗余
[SW2]int vlan 1
[SW2-Vlanif1]vrrp vrid 1 virtual-ip 172.16.1.126-----将此ip设为VLAN1的备份网关
[SW2-Vlanif2]vrrp vrid 1 virtual-ip 172.16.1.254---------VLAN2的主网关
[SW2-Vlanif2]vrrp vrid 1 track interface g0/0/1 reduced 2------如果出现问题 该接口优先级减少2,让出主身份
[SW2-Vlanif2]vrrp vrid 1 priority 101----优先级增大2,确保为VLAN2网关SW1同理,颠倒即可
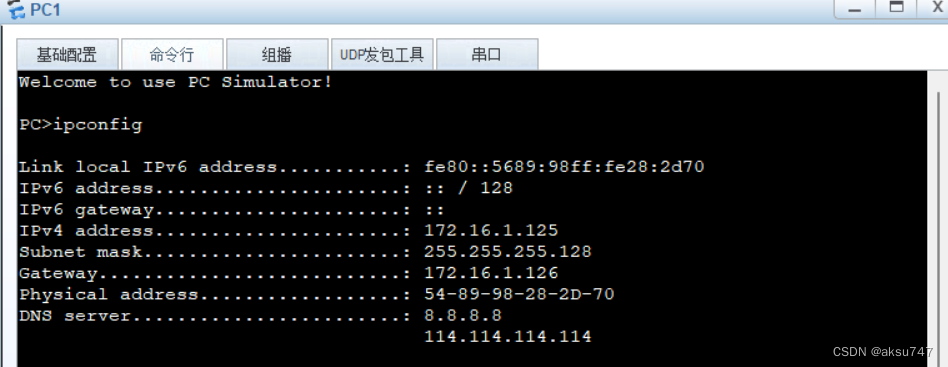
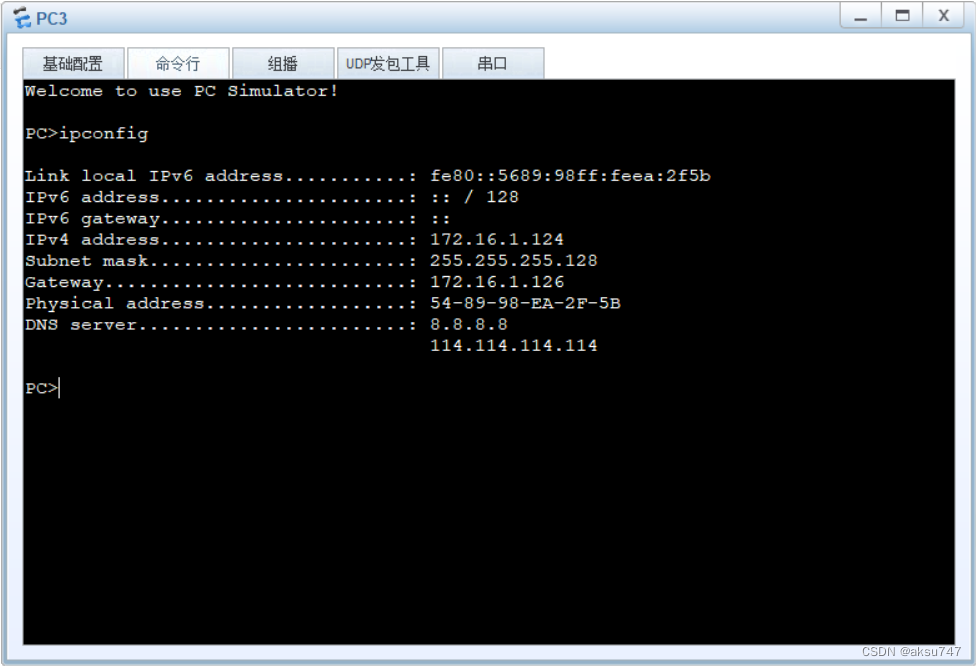
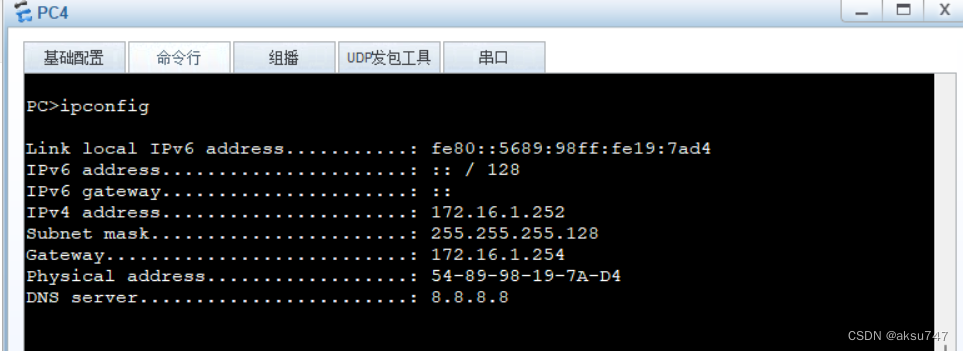
七,配置DHCP池塘
[SW1]dhcp enable
[SW1]ip pool v1
[SW1-ip-pool-v1]network 172.16.1. 0 ma 25
[SW1-ip-pool-v1]gateway-list 172.16.1.126
[SW1-ip-pool-v1]dns-list 8.8.8.8 114.114.114.114
[SW1-ip-pool-v2]network 172.16.1.128 mask 25
[SW1-ip-pool-v2]gateway-list 172.16.1.254
[SW1-ip-pool-v2]dns-list 8.8.8.8
[SW1-Vlanif1]dhcp select global
[SW1-Vlanif2]dhcp select globalSW2同理

八,在汇聚层交换机0/0/1口设置ip接口(华为模拟器不支持,故用SVI接口替代)
[SW1]vlan 3
[SW1-Vlanif3]ip add 172.16.0.2 30
[SW1-Vlanif3]int g0/0/1
[SW1-GigabitEthernet0/0/1]port link-type access
[SW1-GigabitEthernet0/0/1]port default vlan 3
[SW1-GigabitEthernet0/0/1]stp edged-port enable ------防止发送BPDUSW2同理
九,配置R1以及ISP路由
十,启动OSPF
R1
[R1]ospf 1 router-id 1.1.1.1
[R1-ospf-1]area 0
[R1-ospf-1-area-0.0.0.0]net
[R1-ospf-1-area-0.0.0.0]network 172.16.0.0 0.0.0.255SW1
[SW1]ospf 1 router-id 2.2.2.2
[SW1-ospf-1]area 0
[SW1-ospf-1-area-0.0.0.0]net 172.16.0.2 0.0.0.0
[SW1-ospf-1]area 1
[SW1-ospf-1-area-0.0.0.1]net 172.16.1.0 0.0.0.255[SW1-ospf-1-area-0.0.0.1]abr-summary 172.16.1.0 255.255.255.0----路由汇总
SW2
[SW2]ospf 1 router-id 3.3.3.3
[SW2-ospf-1]area 0
[SW1-ospf-1-area-0.0.0.0]net 172.16.0.6 0.0.0.0
[SW2-ospf-1-area-0.0.0.0]q
[SW2-ospf-1]area 1
[SW2-ospf-1-area-0.0.0.1]net 172.16.1.0 0.0.0.255[SW2-ospf-1-area-0.0.0.1]abr-summary 172.16.1.0 255.255.255.0---路由汇总
十一,配置沉默接口(防止bpdu的hello包发送过多)
[SW1-ospf-1]silent-interface all ----沉默所有接口
[SW1]ospf 1
[SW1-ospf-1]undo silent-interface GigabitEthernet 0/0/1---关闭此接口的沉默
[SW1-ospf-1]undo silent-interface vlanif 3 -----同上
[SW1-ospf-1]undo silent-interface vlanif 1 -----同上
[SW1-ospf-1]undo silent-interface Eth-Trunk 0---同上SW2同理
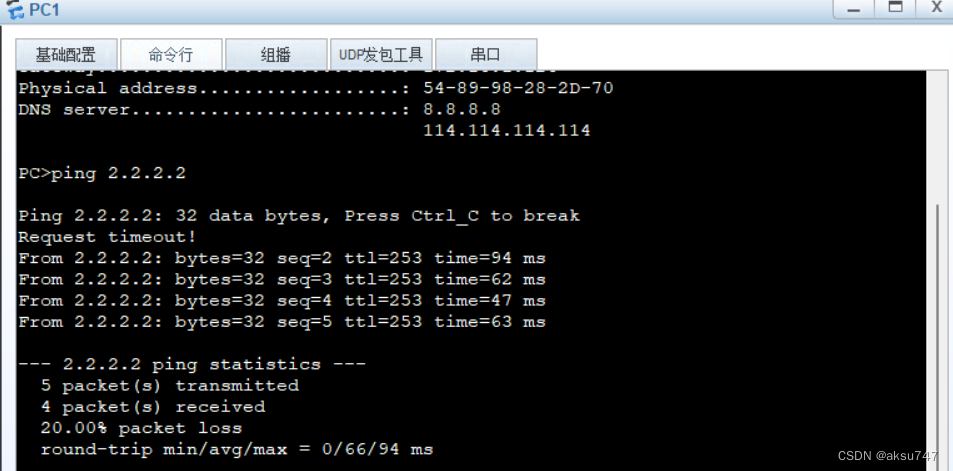
十二,配置nat,pc可访问isp
[R1]ip route-static 0.0.0.0 0 12.1.1.2
[R1]ospf 1
[R1-ospf-1]default-route-advertise ------- 向区域1发放缺省
[R1-ospf-1]q
[R1]acl 2000
[R1-acl-basic-2000]rule 1 permit source 172.16.0.0 0.0.255.255
[R1-acl-basic-2000]q
[R1]int g0/0/0
[R1-GigabitEthernet0/0/0]nat outbound 2000


 1283
1283


 被折叠的 条评论
为什么被折叠?
被折叠的 条评论
为什么被折叠?
 到【灌水乐园】发言


