


系列文章目录
第一章.JuCheap5.0中使用NET6+SignalR来实现站内信消息推送给指定的客户端用户之后台WebApi搭建
前言
本文重点介绍如何使用Net6 WebApi + SignalR来实现站内信消息实时推送给在线的用户。
提示:以下是本篇文章正文内容,下面案例可供参考
一、NET6 WebApi项目搭建
1.新建WebApi项目,如下图:

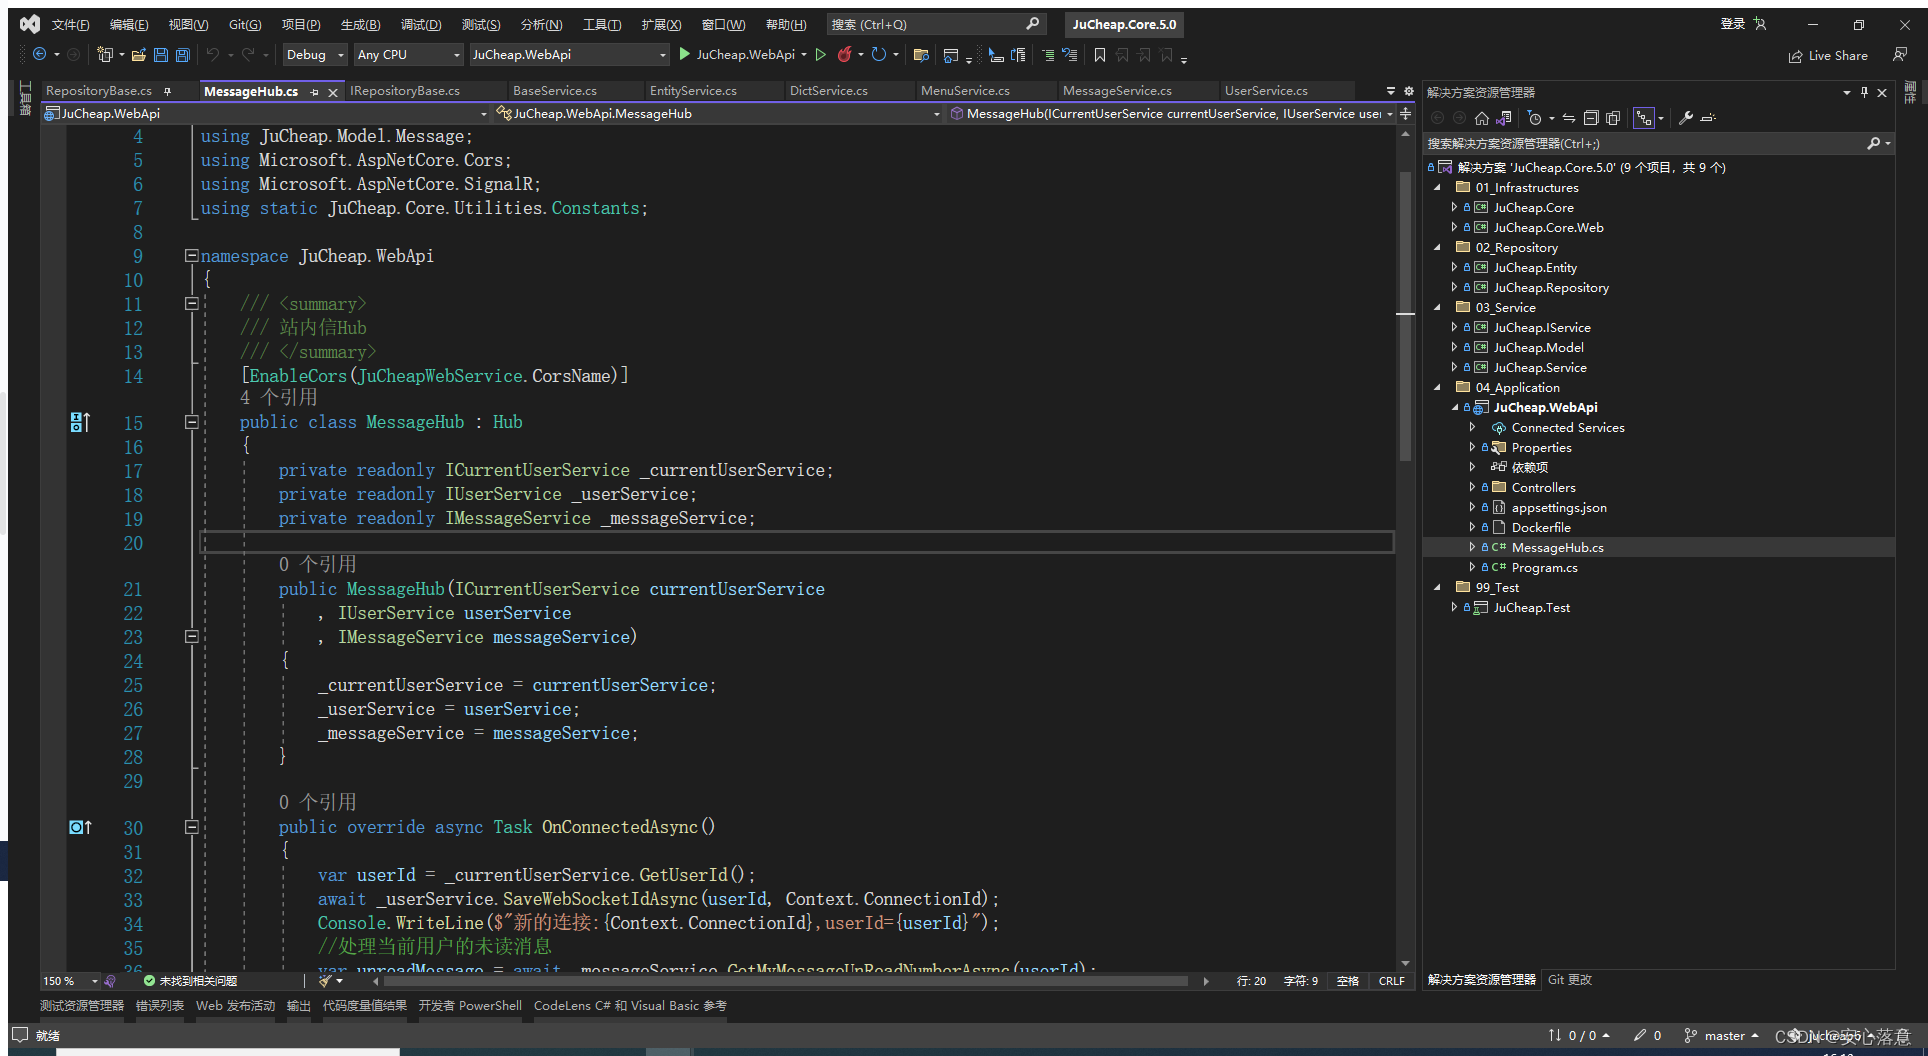
2.新建完成后,添加MessageHub.cs文件,继承Hub类,如下图:
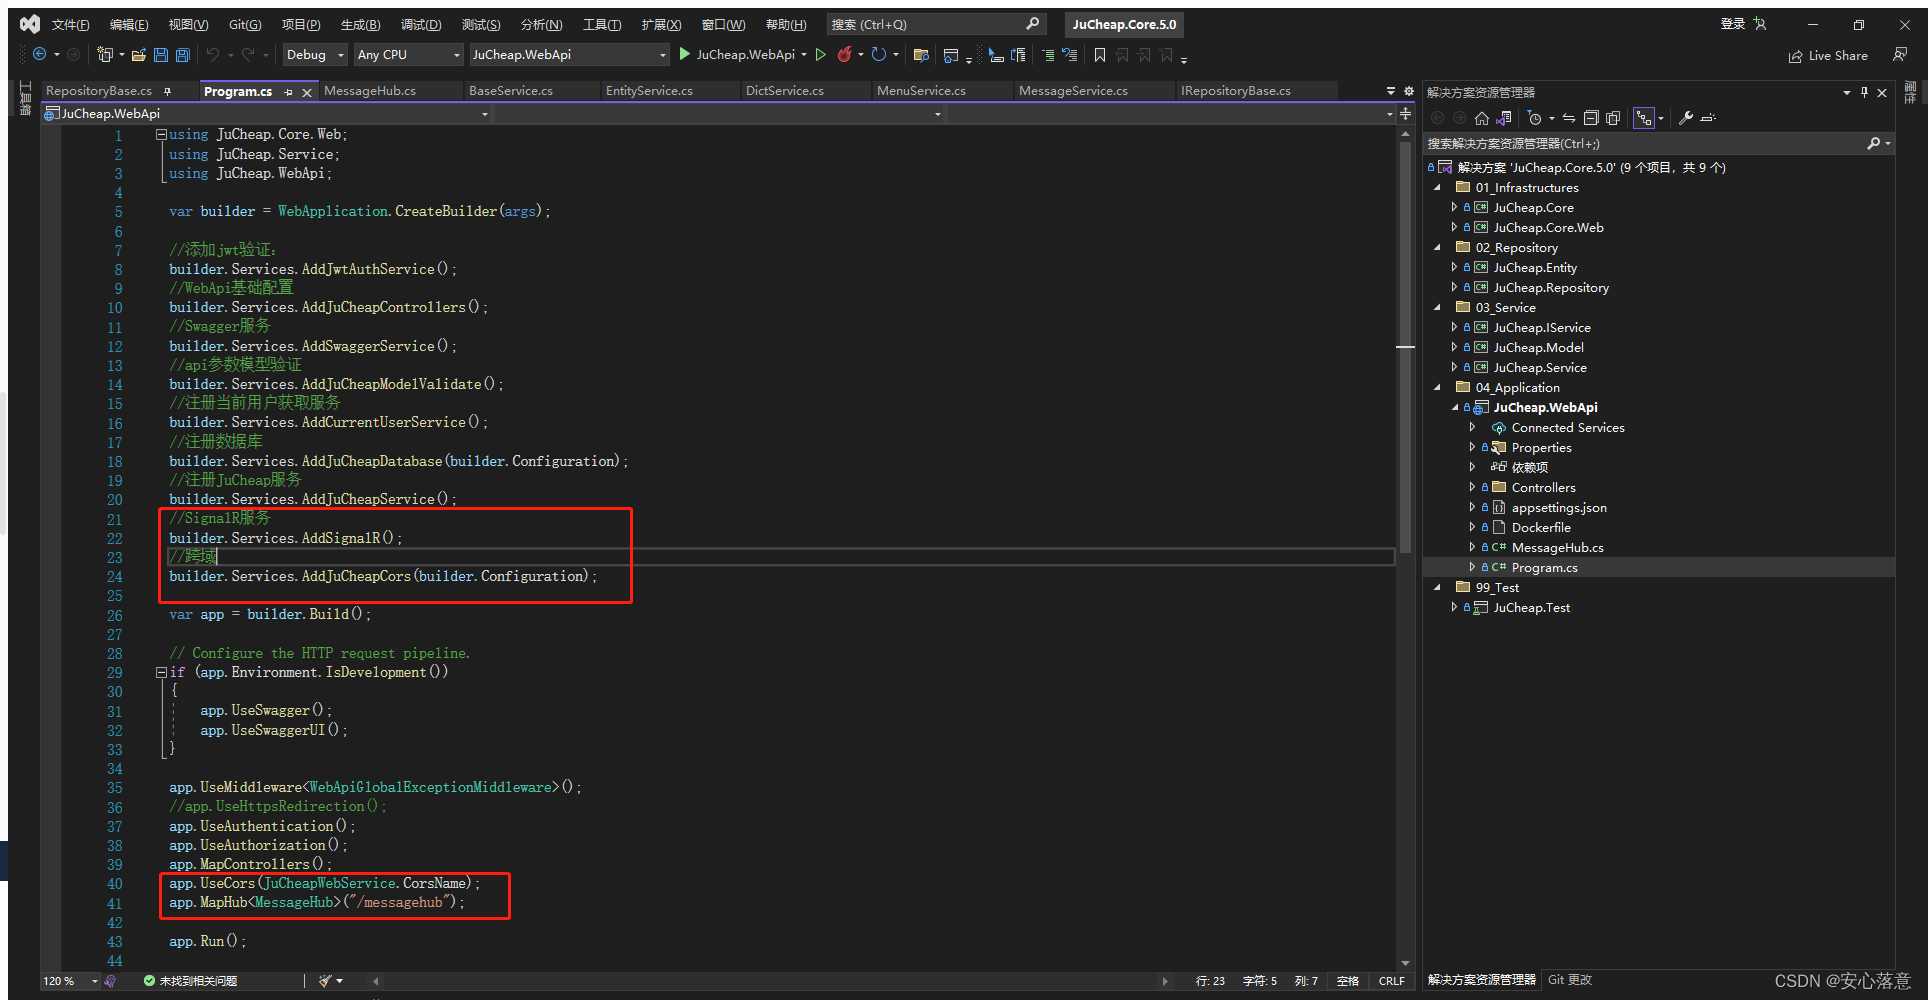
3.在Program.cs文件里面,配置SignalR。
如红色框中的标注,添加SignalR服务,并设置MessageHub的路由地址。
using JuCheap.Core.Web;
using JuCheap.Service;
using JuCheap.WebApi;

var builder = WebApplication.CreateBuilder(args);

//添加jwt验证:
builder.Services.AddJwtAuthService();
//WebApi基础配置
builder.Services.AddJuCheapControllers();
//Swagger服务
builder.Services.AddSwaggerService();
//api参数模型验证
builder.Services.AddJuCheapModelValidate();
//注册当前用户获取服务
builder.Services.AddCurrentUserService();
//注册数据库
builder.Services.AddJuCheapDatabase(builder.Configuration);
//注册JuCheap服务
builder.Services.AddJuCheapService();
//SignalR服务
builder.Services.AddSignalR();
//跨域
builder.Services.AddJuCheapCors(builder.Configuration);

var app = builder.Build();

// Configure the HTTP request pipeline.
if (app.Environment.IsDevelopment())
{
    app.UseSwagger();
    app.UseSwaggerUI();
}

app.UseMiddleware<WebApiGlobalExceptionMiddleware>();
//app.UseHttpsRedirection();
app.UseAuthentication();
app.UseAuthorization();
app.MapControllers();
app.UseCors(JuCheapWebService.CorsName);
app.MapHub<MessageHub>("/messagehub");

app.Run();
二、MessageHub.cs文件配置
1.重写OnConnectedAsync和OnDisconnectedAsync方法
OnConnectedAsync记录当前用户的连接ID,方便后面给客户端用户推送站内信通知消息。
OnDisconnectedAsync主要作用是,当用户的WebSocket断开连接后,清空他的连接ID。
using JuCheap.Core;
using JuCheap.Core.Web;
using JuCheap.IService.AppService;
using JuCheap.Model.Message;
using Microsoft.AspNetCore.Cors;
using Microsoft.AspNetCore.SignalR;
using static JuCheap.Core.Utilities.Constants;

namespace JuCheap.WebApi
{
    /// <summary>
    /// 站内信Hub
    /// </summary>
    [EnableCors(JuCheapWebService.CorsName)]
    public class MessageHub : Hub
    {
        private readonly ICurrentUserService _currentUserService;
        private readonly IUserService _userService;
        private readonly IMessageService _messageService;

        public MessageHub(ICurrentUserService currentUserService
            , IUserService userService
            , IMessageService messageService)
        {
            _currentUserService = currentUserService;
            _userService = userService;
            _messageService = messageService;
        }

        public override async Task OnConnectedAsync()
        {
            var userId = _currentUserService.GetUserId();
            await _userService.SaveWebSocketIdAsync(userId, Context.ConnectionId);
            Console.WriteLine($"新的连接:{Context.ConnectionId},userId={userId}");
            //处理当前用户的未读消息
            var unreadMessage = await _messageService.GetMyMessageUnReadNumberAsync(userId);
            var message = new
            {
                UnReadNumber = unreadMessage,
                MessageList = new List<MessageDTO>()
            };
            await Clients.Client(Context.ConnectionId).SendAsync(MesssageCenter.NewMessageNotify, message);
            await base.OnConnectedAsync();
        }

        public override async Task OnDisconnectedAsync(Exception? exception)
        {
            var userId = _currentUserService.GetUserId();
            Console.WriteLine($"断开连接:{Context.ConnectionId},userId={userId}");
            await _userService.SaveWebSocketIdAsync(userId, string.Empty);
            await base.OnDisconnectedAsync(exception);
        }
    }
}
2.增加跨域配置
[EnableCors(JuCheapWebService.CorsName)]3.设置MessageHub.cs的登录用户信息
        public static void AddJwtAuthService(this IServiceCollection services)
        {
            services.AddAuthorization();

            services.AddAuthentication(JwtBearerDefaults.AuthenticationScheme)
                .AddJwtBearer(options =>
                {
                    options.TokenValidationParameters = new TokenValidationParameters
                    {
                        ValidateIssuer = true,//是否验证Issuer
                        ValidateAudience = true,//是否验证Audience
                        ValidateLifetime = true,//是否验证失效时间
                        ClockSkew = TimeSpan.FromDays(7),
                        ValidateIssuerSigningKey = true,//是否验证SecurityKey
                        ValidAudience = JwtConst.ValidAudience,//Audience
                        ValidIssuer = JwtConst.ValidIssuer,//Issuer,这两项和前面签发jwt的设置一致
                        IssuerSigningKey = new SymmetricSecurityKey(Encoding.UTF8.GetBytes(JwtConst.SecurityKey))//拿到SecurityKey
                    };
                    options.Events = new JwtBearerEvents
                    {
                        OnMessageReceived = context =>
                        {
                            var path = context.HttpContext.Request.Path;
                            if (path.StartsWithSegments("/messagehub"))
                            {
                                context.Token = context.Request.Query["access_token"];
                            }
                            return Task.CompletedTask;
                        },
                        //此处为权限验证失败后触发的事件
                        OnChallenge = context =>
                        {
                            //此处代码为终止.Net Core默认的返回类型和数据结果,这个很重要哦,必须
                            context.HandleResponse();
                            //自定义自己想要返回的数据结果,我这里要返回的是Json对象,通过引用Newtonsoft.Json库进行转换
                            var payload = new ResponseJsonData<string> { Code = 401, Message = "身份认证失败" };
                            //自定义返回的数据类型
                            context.Response.ContentType = "application/json";
                            //自定义返回状态码,默认为401 我这里改成 200
                            context.Response.StatusCode = StatusCodes.Status200OK;

                            //context.Response.StatusCode = StatusCodes.Status401Unauthorized;
                            //输出Json数据结果
                            context.Response.WriteAsync(JsonSerializer.Serialize(payload));
                            return Task.CompletedTask;
                        }
                    };
                });
        }
三、前端代码配置
前端使用vue3来开发的,首先需要安装signalR的js包,具体代码如下:
npm install @aspnet/signalr安装完毕后, 新建messagehub.js文件,如下:
import * as signalR from "@aspnet/signalr"
import config from "@/config"
import tool from '@/utils/tool'
import { ElNotification } from 'element-plus'

export default {
	isLoaded: false,
	SR: {},
	//初始化SignalR连接
	initSR: function (userbar) {
		let that = this
		var token = tool.cookie.get("TOKEN")
		if (token === '' || that.isLoaded) {
			return false
		}
		// 1.获取系统中定义的baseURL
		let url = config.Hub_URL
		// 2.初始化连接
		that.SR = new signalR.HubConnectionBuilder()
			.withUrl(url + "messagehub", {
				accessTokenFactory: () => encodeURI(token),
				// 跳过negotiate握手操作,直接使用WebSocket进行连接
				skipNegotiation: true,
        		transport: signalR.HttpTransportType.WebSockets
			})
			.configureLogging(signalR.LogLevel.Information)
			.build();
		// 3.携带参数
		that.SR.qs = {
			enc_auth_token: encodeURI(token),
		}

		that.SR.on('NewMessageNotify', function (message) {
			// 接收后要做的事
			console.log('NewMessageNotify', message)
			userbar.messageNumber = message.unReadNumber
			// userbar.msgList.push.apply(userbar.msgList, message.messageList)
			// es6
			// userbar.msgList = [...message.messageList, ...userbar.msgList]
			if (message.unReadNumber > 0) {
				ElNotification({
					title: '新消息通知',
					message: `您有${message.unReadNumber}条未读消息,请查阅。`,
					position: 'bottom-right',
					type: 'success'
				})
			}
		})

		// 4.启动连接的方法
		async function start() {
			try {
				await that.SR.start()
				that.isLoaded = true
			} catch (err) {
				console.log("signaR连接异常", err)
				setTimeout(start, 5000)
			}
		}
		// 5.关闭之后重连
		that.SR.onclose(async () => {
			await start()
		})
		// 6.启动连接
		start()
	},
	// 停止连接(这个方法好像没啥用,先放着吧)
	stopSR: function () {
		let that = this
		async function stop() {
			try {
				that.isLoaded = false
				await that.SR.stop()
			} catch (err) {
				console.log("signaR退出异常", err)
			}
		}
		stop()
	},
}
初始化SignalR
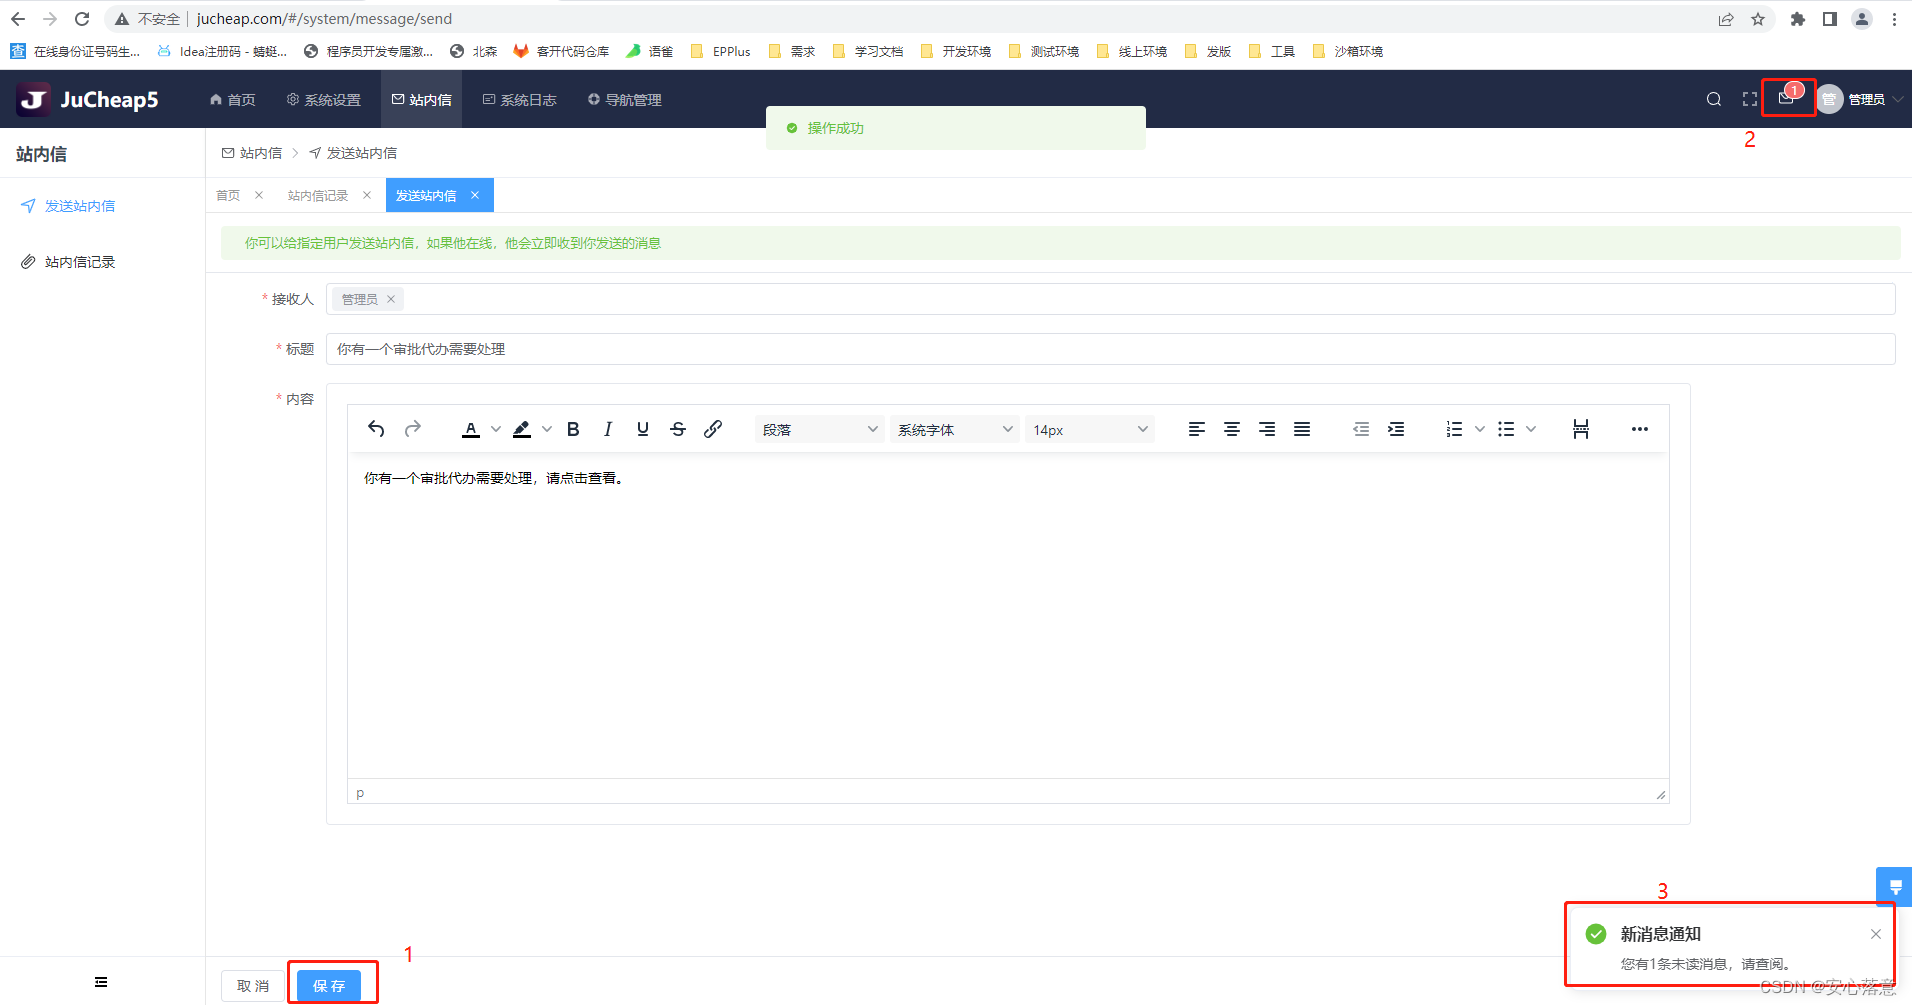
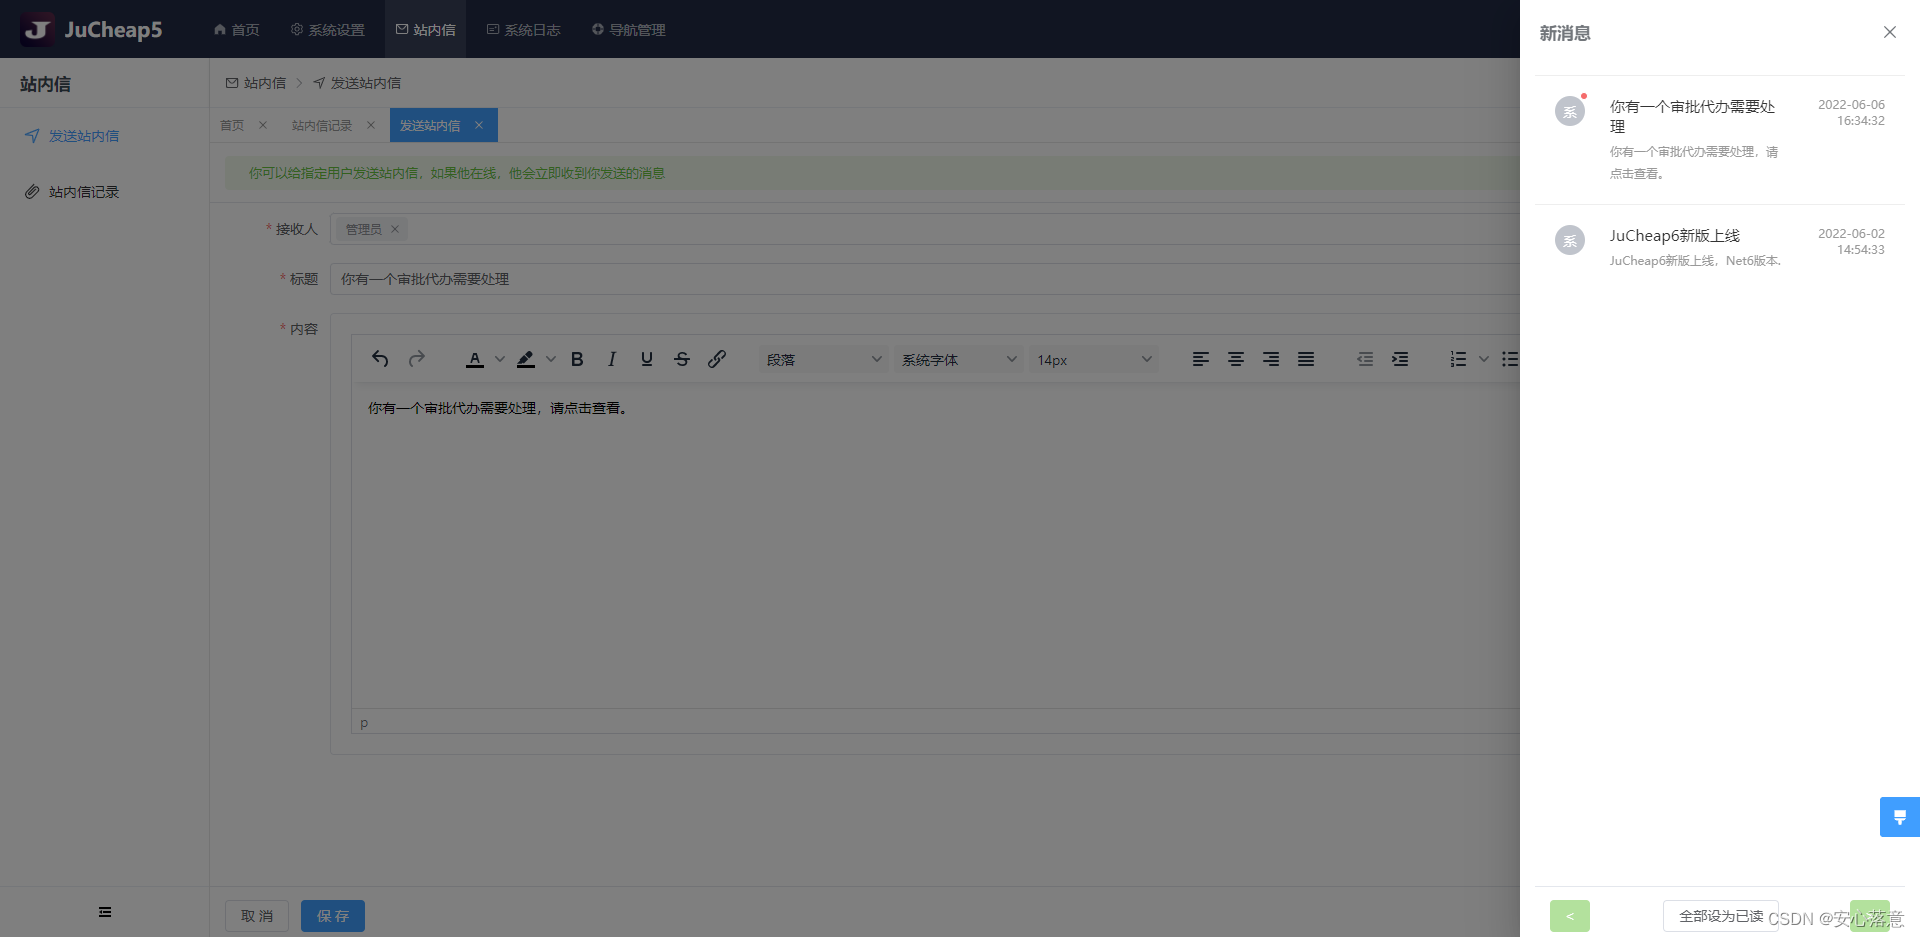
this.$MessageHub.initSR(this.$refs.userbar)到此,我们的站内信推送服务,就搭建完毕。具体效果图如下图:
总结
以上就是今天要讲的内容,使用NET6 WebApi搭建SignalR服务,实现实时的站内信消息推送。在实际开发中,我需要解决的问题如下:
后端需要解决的问题:当前用户的连接Id存储、前端跨域问题、登录用户信息问题等。


 790
790


 被折叠的 条评论
为什么被折叠?
被折叠的 条评论
为什么被折叠?
 到【灌水乐园】发言


