


通常我们构建的应用程序可能需要多个任务在同一个应用程序中同时运行。这就是python中多线程概念发挥作用的地方。这篇文章提供了在 Python 中使用多线程(又名 Python 中的线程)的全面解释。
介绍
Python 中的多线程或 Python 中的 Threading 是一个概念,通过在同一进程中启动多个线程以在同一应用程序中实现并行和多任务处理。执行不同的线程相当于在同一个进程内执行不同的程序或不同的功能。
这篇文章将介绍 Python 中的线程如何与 GIL 或全局解释器锁一起工作。此外,它将说明如何使用 pythonthreadpoolexecutor或 python创建 python 中的线程池threadpool。
目录
- 什么是多线程或线程
- 何时在 Python 中使用多线程
- Python 中的线程示例
- Python 中的全局解释器锁或 GIL
- 线程在 Python 中是如何工作的?
- 什么是线程连接
- Python 多线程 - 线程池
- 在 Python 中使用 ThreadPoolExecutor
- 在 Python 中使用线程池
- 线程间同步——线程锁
- 何时不使用 Python 多线程
- 结论
什么是多线程(Threading)?
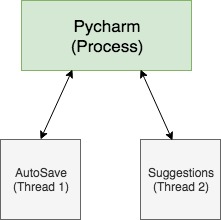
Python 多线程可以简单理解为在同一个进程内同时执行多个线程。这些线程与进程共享相同的内存空间。
例如,像 Pycharm 或 Jupyter Notebook 这样的 GUI 会在您进行更改时自动保存您的代码,这清楚地说明了在同一进程中执行的多个任务。
Python 线程通常是轻量级进程的首选,因为多个任务在同一个进程中运行并使用为该进程分配的内存(即)使用该进程的内存空间。
python 中的多线程不应该与多处理混淆,因为多处理是两个或多个进程在单个应用程序中运行而没有共享状态的地方,因为它们作为不同的独立进程运行。
要阅读有关python 中的多处理的更多信息,请单击此处
何时在 Python 中使用多线程?
python中的多线程可用于多个用例,其中一些在下面提到,
- 线程最适合轻量级任务。
- 当您有多个受 I/O 限制更大的任务时。
- 创建具有后端数据库连接的无延迟应用程序。
- 当您想对 API 进行多次调用时。
- 当您想从/向服务器下载/上传数据时。
- 当您在同一应用程序中共享对象时。
重要说明:由于 CPython 中存在 GIL,因此强烈建议在 Python 中单独使用多线程处理 I/O 绑定任务,这将在下面详细解释。
Python 中的线程示例
要在 python 中创建线程,您只需调用threading.Thread如下所示的方法,
下面的例子说明了如何在python中创建一个线程以及如何在线程内调用一个函数,
import threading

def new_function(a, b, kw2=10, kw1=None)
    print("Hello")

# Create a thread

new_thread = threading.Thread(target=function_name, args=(arg1, arg2), kwargs={'kw1': 1, 'kw2': '2'})
要启动上述线程,请运行以下命令,
new_thread.start()
现在我们已经了解了如何创建和启动一个线程,让我们继续另一个简单的应用程序示例,您可以requests通过在 python 中启动 2 个线程来使用模块连接到不同的 URL 。
注意:这只是一个简单的例子,用于演示 python 中的线程。
import threading
import requests

def connect_to_urls(urls):
    for url in urls:
        r = requests.get(url)
        print(f"{url} - Status: {r.status_code}")

if __name__ == '__main__':

    url_list = ['https://google.com', 'https://youtube.com', 'https://wikipedia.com', 'https://medium.com']
    print(f"URL List: {url_list}")

    t1 = threading.Thread(target=connect_to_urls, args=(url_list[:2],)) # Create Thread 1
    t2 = threading.Thread(target=connect_to_urls, args=(url_list[2:],)) # Create Thread 2

    t1.start()  # Thread 1 starts here
    t2.start()  # Thread 2 starts here
URL List: ['https://google.com', 'https://youtube.com', 'https://wikipedia.com', 'https://medium.com']
https://wikipedia.com - Status: 200
https://google.com - Status: 200
https://medium.com - Status: 200
https://youtube.com - Status: 200
Python 中的全局解释器锁或 GIL
在我们开始实际使用 Python 中的线程模块之前,让我们先了解一下 Python 中的 GIL 是什么以及它在 Python 多线程中是如何发挥作用的。
全局解释器锁,在 Python 中也称为 GIL,是一种互斥锁(或锁),可确保在任何时刻只有一个线程执行 Python 的字节码。它确保 python 对象的线程安全,并启用对 python 解释器的单线程访问。
GIL 是 CPython 的一种实现,因此在 Python 中无法实现真正的多线程。因此,如果 CPU 边界任务是多线程的,它会导致执行时间增加,这就是为什么建议在 python 中单独使用多线程来处理 I/O 边界任务。
当线程正在运行时,它会在执行其任务时获取 GIL。该 GIL 在 I/O 操作期间释放,这些操作涉及一些等待时间,例如读取、写入、发送、下载等。
线程在 Python 中是如何工作的
CPython 有全局解释器锁 (GIL),它阻碍了 Python 中的多线程,因为在任何时候只有一个线程可以获取 GIL 来处理 Python 的字节码。所以现在的问题是如何通过线程在 Python 中实现并发。
线程之间发生上下文切换以启用某种并发性。例如,假设您必须在一个数据库中独立运行 10 个不同的查询。每个 SQL 查询都需要一些时间来完成它的执行,因此此等待时间 (I/O) 是发生线程切换以启用并发的时间。
要更详细地了解 Python 中的线程是如何工作的,我们必须考虑正在运行的任务类型,即 I/O 绑定任务和 CPU 绑定任务
- I/O 绑定任务
I/O 绑定任务是指需要等待或延迟操作才能完成的任务。此类任务的一些示例包括将数据读取或写入数据库/磁盘、下载/上传数据等。
对于此类任务,只要涉及等待时间,当前线程就会释放 GIL,队列中的下一个线程将获取 GIL 并开始执行。让我们通过一个例子更好地理解这一点。
下面是python中线程如何工作的图示。
对于我们的示例,让我们考虑 2 个线程和一个包含 1 秒睡眠的函数。
import threading
import time
import sys

def display_time(thread):
    """  Display the time after a 1 second delay  """
    print(f"Thread {thread} - Beginning to sleep at {time.time()}")
    time.sleep(1)
    print(f"Thread {thread} - Sleep Complete at {time.time()}")


if __name__ == '__main__':

    t1 = threading.Thread(target=display_time, args=[1])
    t2 = threading.Thread(target=display_time, args=[2])
    start = time.time()
    t1.start()
    t2.start()

    t1.join()
    t2.join()

    print(f"We are at the end of the program. Time Taken: {time.time() - start}")
Thread 1 - Beginning to sleep at 1590616707.353773
Thread 2 - Beginning to sleep at 1590616707.3544252
Thread 1 - Sleep Complete at 1590616708.354223
Thread 2 - Sleep Complete at 1590616708.359642
We are at the end of the program. Time Taken: 1.006382942199707
- CPU 绑定任务
如果任务完成所需的时间取决于 CPU 的速度,则该任务受 CPU 限制。CPU 绑定任务的一些示例包括数字运算任务、数学运算、计算等。
对于此类任务,由于此处不涉及等待时间,线程切换每 0.005 秒发生一次,由sys.getswitchinterval. 这也可以使用手动修改sys.setswitchinterval。您可以在此处阅读更多相关信息。
注意:这种在特定时间间隔后的线程切换是从 Python 3.2 开始定义的。
让我们通过一个例子更好地理解这一点。在这里,我们将运行一个函数,该函数将递减 counter 的值,直到它达到零。我们将在增加线程切换间隔后再次运行相同的函数并查看结果。
重要提示:不建议在 python 中对 CPU 密集型应用程序使用多线程,因为它可能会导致性能下降。
import threading
import time
import sys


def decrement(t):
    """  Increment val 100000 times  """
    start = time.time()
    print(f"Thread {t} in decrement at {start}")
    counter = 100000000
    while counter > 0:
        counter -= 1
    end = time.time()
    print(f"Thread {t} ended at {end}, Time Taken: {end - start}")


def run_threads():
    t1 = threading.Thread(target=decrement, args=(1,))
    t2 = threading.Thread(target=decrement, args=(2,))

    start = time.time()
    t1.start()
    t2.start()

    t1.join()
    t2.join()

    print(f"We are at the end of the program. Total Time Taken: {time.time() - start}")


if __name__ == '__main__':
    print(f"Switch Interval is {sys.getswitchinterval()} seconds")
    run_threads()

    sys.setswitchinterval(10)
    print(f"\nSwitch Interval set to {sys.getswitchinterval()} seconds")

    run_threads()
    sys.setswitchinterval(0.005) # Setting it back to it's original value
Switch Interval is 0.005 seconds
Thread 1 in decrement at 1590616384.611721
Thread 2 in decrement at 1590616384.617289
Thread 2 ended at 1590616396.703609, Time Taken: 12.086319923400879
Thread 1 ended at 1590616396.8213172, Time Taken: 12.209596157073975
We are at the end of the program. Total Time Taken: 12.210150241851807
Switch Interval set to 10.0 seconds
Thread 1 in decrement at 1590616396.822057
Thread 1 ended at 1590616402.9130921, Time Taken: 6.0910351276397705
Thread 2 in decrement at 1590616402.913912
Thread 2 ended at 1590616408.976337, Time Taken: 6.062424898147583
We are at the end of the program. Total Time Taken: 12.155883073806763
什么是线程连接?
在我们定义线程中的连接是什么之前,让我们分析一下我们的问题陈述。
有一个应用程序并行运行 2 个线程。线程 1 比线程 2 快 30 秒完成。
那么,在第一个线程完成后,程序会退出还是等待第二个线程完成?
好吧,如果你猜到程序会终止,那么你是对的。这就是join线程方法的魔力发挥作用的地方。
加入基本上使程序等待线程完成。因此,启动线程后的附加连接将使应用程序等待成功完成其中的所有线程。
让我们join通过下面的两个例子来更有意义,
示例 1:python 中没有 Join 的线程
让我们创建一个程序,以 0.5 秒的延迟显示三次时间,并在线程之后添加一些代码。
import threading
import time
import sys


def display_time(val):
    """  Display the time 3 times  with a 0.5 second delay  """
    for i in range(3):
        time.sleep(0.5)
        print("Process:{0} Time is {1}".format(val, time.time()))


if __name__ == '__main__':

    t1 = threading.Thread(target=display_time, args=(1,))
    t2 = threading.Thread(target=display_time, args=(2,))

    t1.start()
    t2.start()

    print("Threading Complete. We are at the end of the program.")
Threading Complete. We are at the end of the program.
Process:1 Time is 1543436647.7216341
Process:2 Time is 1543436647.722194
Process:1 Time is 1543436648.2265742
Process:2 Time is 1543436648.227299
Process:1 Time is 1543436648.729373
Process:2 Time is 1543436648.731555
从上面的示例中可以明显看出,即使在 2 个线程完成执行之前,启动 2 个线程后出现的代码行也正在执行。
那么,在继续执行程序的其余部分之前,您如何等待线程完成?
这就是join完美的解决方案。现在让我们用join.
在这里,程序在到达结束之前等待线程完成。
示例 2:在 Python 中使用 Join 进行线程处理
import threading
import time
import sys


def display_time(val):
    """  Display the time 3 times  with a 0.5 second dh elay  """
    for i in range(3):
        time.sleep(0.5)
        print("Process:{0} Time is {1}".format(val, time.time()))


if __name__ == '__main__':

    t1 = threading.Thread(target=display_time, args=(1,))
    t2 = threading.Thread(target=display_time, args=(2,))

    t1.start()
    t2.start()

    t1.join()
    t2.join()

    print("Threading Complete. We are at the end of the program.")
Process:1 Time is 1543436975.869845
Process:2 Time is 1543436975.8704278
Process:2 Time is 1543436976.37433
Process:1 Time is 1543436976.37479
Process:2 Time is 1543436976.87863
Process:1 Time is 1543436976.878934
Threading Complete. We are at the end of the program.
Python 多线程 - 线程池
您还可以在 python 中启动一个线程池来并发运行您的任务。
这可以通过使用作为模块ThreadPoolExecutor一部分的in pythonconcurrent.futures或通过使用ThreadPool作为multiprocessing模块的一部分的in python来实现。
下面是 2 个示例,它们说明了两者的用法。
示例 1 -ThreadPoolExecutor在 Python 中使用
我们可以ThreadPoolExecutor从concurrent.futures模块中导入类来启动一个工作线程池。
对于我们的示例,我们将使用requestsPython 中的模块下载随机图像列表。
接下来我们将初始化 aThreadPoolExecutor以启动线程池。可以使用max_workers参数指定线程数。如果未指定,它将根据版本采用默认值。在 Python 3.8 版本中, max_workers 的默认值为min(32, os.cpu_count() + 4)。对于我们的示例,我们将使用 5 个线程。
除此之外,我们还将比较执行相同的顺序执行所花费的时间。
import time
from concurrent.futures import ThreadPoolExecutor
import requests


def save_image(url):
    """  Method to download an image and save it as a local image file  """
    r = requests.get(url)
    file_name = url.split("/")[-1]
    with open(file_name, 'wb') as f:
        f.write(r.content)
    print(f"{file_name} - Downloaded")
    return file_name

image_url_list = ['https://cdn.pixabay.com/photo/2020/05/20/06/47/rome-5195046__480.jpg',
                  'https://cdn.pixabay.com/photo/2020/05/15/18/10/forth-bridge-5174535__480.jpg',
                  'https://cdn.pixabay.com/photo/2020/05/18/22/17/travel-5188598__480.jpg',
                  'https://cdn.pixabay.com/photo/2020/05/11/13/40/masonry-5158303__480.jpg',
                  'https://cdn.pixabay.com/photo/2020/05/17/12/56/mykonos-5181484__480.jpg',
                  'https://cdn.pixabay.com/photo/2020/02/11/07/55/robots-4838671__480.png',
                  'https://cdn.pixabay.com/photo/2020/05/12/16/43/mallard-5163882__480.jpg',
                  'https://cdn.pixabay.com/photo/2020/04/27/12/02/strawberries-5099527__480.jpg',
                  'https://cdn.pixabay.com/photo/2020/05/04/11/19/smile-5128742__480.jpg',
                  'https://cdn.pixabay.com/photo/2020/05/17/07/00/butterfly-5180349__480.jpg'
                 ]

start = time.time()

for img_url in image_url_list:
    save_image(img_url)
# _ = list(map(save_image, image_url_list)) # Alternative to above 2 statements

print(f"\nSequential Execution, Time Taken: {time.time() - start}\n")

start = time.time()

with ThreadPoolExecutor(max_workers=5) as executors:
    executors.map(save_image, image_url_list)  # Each item from the list is passed as arg to the function

print(f"\nParallel Execution, Time Taken: {time.time() - start}")
rome-5195046__480.jpg - Downloaded
forth-bridge-5174535__480.jpg - Downloaded
travel-5188598__480.jpg - Downloaded
masonry-5158303__480.jpg - Downloaded
mykonos-5181484__480.jpg - Downloaded
robots-4838671__480.png - Downloaded
mallard-5163882__480.jpg - Downloaded
strawberries-5099527__480.jpg - Downloaded
smile-5128742__480.jpg - Downloaded
butterfly-5180349__480.jpg - Downloaded
Sequential Execution, Time Taken: 1.1698040962219238
forth-bridge-5174535__480.jpg - Downloaded
mykonos-5181484__480.jpg - Downloaded
masonry-5158303__480.jpg - Downloaded
travel-5188598__480.jpg - Downloaded
rome-5195046__480.jpg - Downloaded
robots-4838671__480.png - Downloaded
mallard-5163882__480.jpg - Downloaded
strawberries-5099527__480.jpg - Downloaded
butterfly-5180349__480.jpg - Downloaded
smile-5128742__480.jpg - Downloaded
Parallel Execution, Time Taken: 0.2731809616088867
从上面的结果可以明显看出,通过在python中使用线程,整体执行时间减少了相当多。
示例 2 -ThreadPool在 Python 中使用
下面的例子演示了如何ThreadPool在 Python 中使用来启动一个线程池。
一旦我们从multiprocessing模块导入它,我们将使用它的map方法将每个图像 url 映射到函数并并行下载它们。
这与Pool类非常相似,其方法或多或少相同。要阅读有关它的更多信息,请单击此处。
import time
from multiprocessing.pool import ThreadPool

start = time.time()

threads = ThreadPool(5) # Initialize the desired number of threads
threads.map(save_image, image_url_list)

print(f"\nParallel Execution 2, Time Taken: {time.time() - start}")
travel-5188598__480.jpg - Downloaded
mykonos-5181484__480.jpg - Downloaded
rome-5195046__480.jpg - Downloaded
masonry-5158303__480.jpg - Downloaded
forth-bridge-5174535__480.jpg - Downloaded
robots-4838671__480.png - Downloaded
butterfly-5180349__480.jpg - Downloaded
strawberries-5099527__480.jpg - Downloaded
smile-5128742__480.jpg - Downloaded
mallard-5163882__480.jpg - Downloaded
Parallel Execution 2, Time Taken: 0.28809595108032227
线程间同步——线程锁
Python 中的线程锁有助于在线程之间建立同步并避免竞争条件。例如,如果您希望在正在运行的线程之间共享数据怎么办。这是线程模块中最有用的部分,展示了如何以同步方式在 2 个或更多线程之间共享数据。
如果两个或多个线程同时尝试更改共享对象,会发生什么情况?
这将导致意外和异步的结果。线程锁有助于解决这个问题。
python 中的线程锁是这样设计的,即在任何时刻只有一个线程可以对共享对象进行更改。
这种锁定机制确保在线程之间建立干净的同步,从而避免由于这种同时执行而导致的意外结果。
实际用例:例如,如果有一个前端 UI 来显示表的数据,并且该表的数据是从每 5 分钟定期刷新的 2 个数据源中操作的,那么共享对象将非常有用。因此,如果这 2 个数据刷新中的任何一个出现延迟,并且如果两个线程尝试同时操作同一个对象,则可能会导致不一致的结果。
示例 1:无锁线程
让我们创建一个场景,其中创建了竞争条件,产生了不一致的结果。
我们的程序将包含 2 个函数,
refresh_val()- 将 val 增加 100000 次main()- 创建 2 个同时调用 refresh_val 的线程
我们将main在我们的代码中调用这个函数 10 次
import threading

val = 0 # global variable val

def refresh_val():
    """  Increment val 100000 times  """
    global lock, val
    counter = 100000
    while counter > 0:
        val += 1
        counter -= 1


def main():
    global val
    val = 0

    # creating threads
    t1 = threading.Thread(target=refresh_val)
    t2 = threading.Thread(target=refresh_val)

    # start threads
    t1.start()
    t2.start()

    # wait until threads complete
    t1.join()
    t2.join()


if __name__ == "__main__":
    for i in range(1,11):
        main()
        print("Step {0}: val = {1}".format(i, val))
Step 1: val = 200000
Step 2: val = 191360
Step 3: val = 200000
Step 4: val = 200000
Step 5: val = 200000
Step 6: val = 199331
Step 7: val = 200000
Step 8: val = 200000
Step 9: val = 157380
Step 10: val = 200000
让我们使用线程中存在的锁定机制来执行上述相同的操作。
这里是 threading 模块引入 2 种方法的地方,
Acquire- 阻塞直到锁被释放Release- 释放
当线程为共享对象获取锁时,其他线程不能同时更改此对象。获得锁后,如果另一个线程试图访问一个对象,它必须等到锁被释放。
创建锁的方法
方法一:
import threading

lock = threading.Lock() # create a lock
try:
    lock.acquire() # Block the lock
    # code goes here
finally:
    lock.release() # Release the lock
方法二:
我们还可以lock使用上下文管理器创建一个 python 线程。
建议使用此方法以确保lock在 python 中创建a 时同时应用获取和释放方法。
import threading

lock = threading.Lock() # create a lock
with lock:
    # code goes here
示例 2:在 Python 中使用锁进行线程处理
让我们执行上面相同的操作,在python中使用lock来实现线程之间的同步。
正如您在下面看到的,全局变量按预期同时递增,没有任何不一致。
import threading

val = 0 # global variable val

lock = threading.Lock() # create a lock

def refresh_val():
    """  Increment val 10000 times  """
    global lock, val
    counter = 100000
    while counter > 0:
        lock.acquire() # Block the lock
        val += 1
        lock.release() # Release the lock
        counter -= 1


def main():
    global val
    val = 0

    # creating threads
    t1 = threading.Thread(target=refresh_val)
    t2 = threading.Thread(target=refresh_val)

    # start threads
    t1.start()
    t2.start()

    # wait until threads complete
    t1.join()
    t2.join()


if __name__ == "__main__":
    for i in range(1,11):
        main()
        print("Step {0}: val = {1}".format(i, val))
Step 1: val = 200000
Step 2: val = 200000
Step 3: val = 200000
Step 4: val = 200000
Step 5: val = 200000
Step 6: val = 200000
Step 7: val = 200000
Step 8: val = 200000
Step 9: val = 200000
Step 10: val = 200000
什么时候不使用 Python 中的多线程?
对于以下提到的场景,不建议使用 Python 多线程,
- 不适合 CPU 密集型任务。下面举例说明。
- 拥有多个重量级线程会减慢主进程的速度。
- 单个线程是不可杀死的。
- 为单个应用程序创建过多线程可能会使您的代码更长且处理速度更慢。
下面的例子清楚地说明了为什么 python 中的线程甚至不适合简单的 CPU 绑定任务。下面是一个数字运算任务,它使用 2 个线程运行,并与相同的顺序执行进行比较。
import time
from concurrent.futures import ThreadPoolExecutor


def decrement():
    counter = 10000000
    while counter > 0:
        counter -= 1

def execute_parallel():
    start_time = time.time()

    with ThreadPoolExecutor(max_workers=2) as executors:
        for _ in range(2):
            executors.submit(decrement)

    print(f"Threaded Execution - Time Taken: {time.time() - start_time}")

def execute_serially():
    start_time = time.time()

    for _ in range(2):
        decrement()

    print(f"Serial Execution - Time Taken: {time.time() - start_time}")

if __name__ == "__main__":
    execute_parallel()
    execute_serially()
Threaded Execution - Time Taken: 1.3582673072814941
Serial Execution - Time Taken: 1.2527658939361572
结论
通过我们的学习,我们可以总结出 Python 中的多线程可用于您希望在访问某些共享对象的同一应用程序中执行多个 I/O 绑定任务的情况。
由于全局解释器锁(GIL)的实现,更推荐使用 python 中的多线程用于 I/O 绑定任务。
我们还学习了如何使用ThreadPoolExecutor或ThreadPool类启动线程池。
为了消除竞争条件期间的不一致,可以使用线程锁。
到目前为止,您应该能够根据您的要求在 Python 中利用多线程。


 866
866


 被折叠的 条评论
为什么被折叠?
被折叠的 条评论
为什么被折叠?
 到【灌水乐园】发言


