


 本文介绍了certutil工具在Linux环境中的安装,详细讲解了如何使用certutil进行证书查询、添加、删除、导出等操作,以及解决浏览器证书不安全问题的方法。还探讨了certutil的参数详解和相关补充知识,包括生成证书请求、导入导出证书、设置证书信任等。
文章目录
一、安装环境
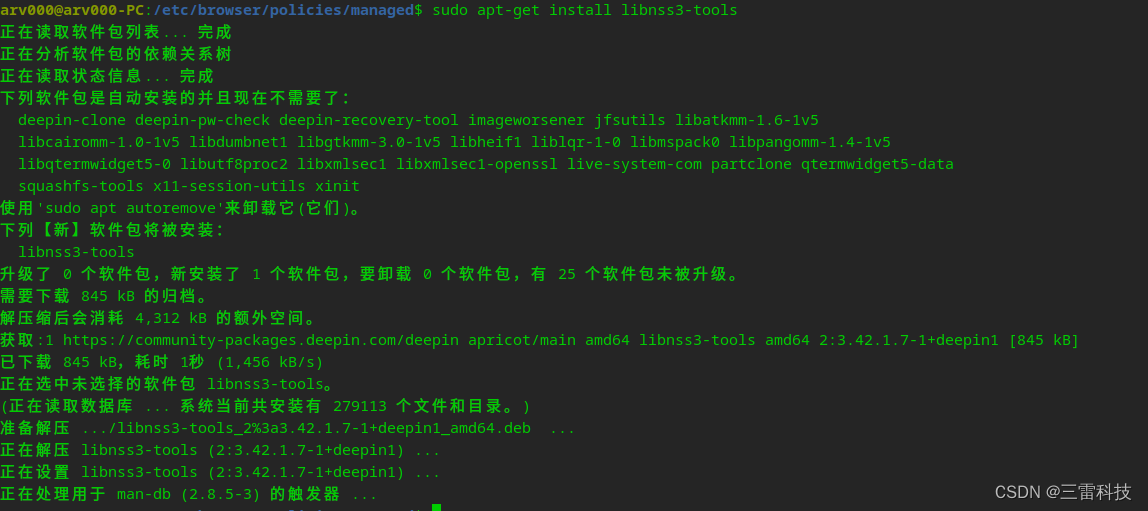
在linux系统中安装certutil工具可以使用以下语句。
sudo apt-get install libnss3-tools
chrome内核浏览器通过读取证书数据库中的证书文件作为信任文件。我们可以通过手动导入方式证书进行信任。
二、certutil命令使用
certutil证书管理常用的命令如下:
2.1 certutil查询数据库中证书列表
certutil -L -d .  # 数据库文件在当前目录
certutil -L -d ~/.pki/nssdb/  # 数据库文件在~/.pki/nssdb/ 目录
certutil -L -d sql:/etc/ipsec.d

2.2 certutil添加证书到数据库中
# 添加一个根证书到数据库中,作为信任证书
certutil -A -n 存入数据库中的名字 -t "C,," -i mycert.crt -d 数据库目录
# 添加一个中间证书到数据库中,作为信任证书
certutil -A -n 存入数据库中的名字 -t ",," -i mycert.crt -d 数据库目录
# 添加一个私有证书到数据库中,作为信任证书
certutil -A -n 存入数据库中的名字 -t "P,," -i mycert.crt -d 数据库目录
2.3 certutil查询某个证书
certutil -L -n 存入数据库中的名字 -d 数据库目录
2.4 certutil删除数据库中某个证书
certutil -D -n 存入数据库中的名字 -d 数据库目录
2.5 certutil导出某个证书文件
certutil -L -a -n 证书名 -d . > 证书名
2.5 为SSL客户端身份验证添加个人证书和私钥
pk12util -d sql:$HOME/.pki/nssdb -i PKCS12_file.p12
最近接到一个需求,统计所有证书相同加密算法的证书种类。
#!/bin/bash
list=`certutil -L  -d . | awk -F "CT,C,c" '{print $1}' `
IFS=$'\n\n'
for item in $list
do
        name=`echo "$item"| awk '$1=$1'`
        i=`certutil -L -n "$name" -d .| grep "Signature Algorithm"`
        echo $name"\t"$i
done
三、浏览器显示证书不安全问题
问题描述:
- 浏览器导入证书能正常访问目标网站,显示目标网站安全。
- 使用脚本命令导入证书,访问目标网站显示不安全网站。
问题原因:
- 浏览器导入证书后会自动下载信任机构的CA证书,然后再导入目标网站的证书。
- 脚本命令导入证书,是强行将目标网站证书导入,因此对于机构证书未信任,导致网站证书也未被信任。
解决办法:
将机构提供的CA证书以及,网站证书同时导入到浏览器中即可解决问题。
四、certutil参数详解
#certutile -H
-A              Add a certificate to the database        (create if needed)
   All options under -E apply
-B              Run a series of certutil commands from a batch file
   -i batch-file     Specify the batch file
-E              Add an Email certificate to the database (create if needed)
   -n cert-name      Specify the nickname of the certificate to add
   -t trustargs      Set the certificate trust attributes:
                          trustargs is of the form x,y,z where x is for SSL, y is for S/MIME,
                          and z is for code signing. Use ,, for no explicit trust.
                          p      prohibited (explicitly distrusted)
                          P      trusted peer
                          c      valid CA
                          T      trusted CA to issue client certs (implies c)
                          C      trusted CA to issue server certs (implies c)
                          u      user cert
                          w      send warning
                          g      make step-up cert
   -f pwfile         Specify the password file
   -d certdir        Cert database directory (default is ~/.netscape)
   -P dbprefix       Cert & Key database prefix
   -a                The input certificate is encoded in ASCII (RFC1113)
   -i input          Specify the certificate file (default is stdin)

-C              Create a new binary certificate from a BINARY cert request
   -c issuer-name    The nickname of the issuer cert
   -i cert-request   The BINARY certificate request file
   -o output-cert    Output binary cert to this file (default is stdout)
   -x                Self sign
   --pss-sign        Sign the certificate with RSA-PSS (the issuer key must be rsa)
   -m serial-number  Cert serial number
   -w warp-months    Time Warp
   -v months-valid   Months valid (default is 3)
   -f pwfile         Specify the password file
   -d certdir        Cert database directory (default is ~/.netscape)
   -P dbprefix       Cert & Key database prefix
   -Z hashAlg
                     Specify the hash algorithm to use. Possible keywords:
                     "MD2", "MD4", "MD5", "SHA1", "SHA224",
                     "SHA256", "SHA384", "SHA512"
   -1 | --keyUsage keyword,keyword,...
                     Create key usage extension. Possible keywords:
                     "digitalSignature", "nonRepudiation", "keyEncipherment",
                     "dataEncipherment", "keyAgreement", "certSigning",
                     "crlSigning", "critical"
   -2                Create basic constraint extension
   -3                Create authority key ID extension
   -4                Create crl distribution point extension
   -5 | --nsCertType keyword,keyword,...
                     Create netscape cert type extension. Possible keywords:
                     "sslClient", "sslServer", "smime", "objectSigning",
                     "sslCA", "smimeCA", "objectSigningCA", "critical".
   -6 | --extKeyUsage keyword,keyword,...
                     Create extended key usage extension. Possible keywords:
                     "serverAuth", "clientAuth","codeSigning",
                     "emailProtection", "timeStamp","ocspResponder",
                     "stepUp", "msTrustListSign", "critical"
   -7 emailAddrs     Create an email subject alt name extension
   -8 dnsNames       Create an dns subject alt name extension
   -a                The input certificate request is encoded in ASCII (RFC1113)

-G              Generate a new key pair
   -h token-name     Name of token in which to generate key (default is internal)
   -k key-type       Type of key pair to generate ("dsa", "ec", "rsa" (default))
   -g key-size       Key size in bits, (min 512, max 8192, default 2048) (not for ec)
   -y exp            Set the public exponent value (3, 17, 65537) (rsa only)
   -f password-file  Specify the password file
   -z noisefile      Specify the noise file to be used
   -q pqgfile        read PQG value from pqgfile (dsa only)
   -q curve-name     Elliptic curve name (ec only)
                     One of nistp256, nistp384, nistp521, curve25519.
                     If a custom token is present, the following curves are also supported:
                     sect163k1, nistk163, sect163r1, sect163r2,
                     nistb163, sect193r1, sect193r2, sect233k1, nistk233,
                     sect233r1, nistb233, sect239k1, sect283k1, nistk283,
                     sect283r1, nistb283, sect409k1, nistk409, sect409r1,
                     nistb409, sect571k1, nistk571, sect571r1, nistb571,
                     secp160k1, secp160r1, secp160r2, secp192k1, secp192r1,
                     nistp192, secp224k1, secp224r1, nistp224, secp256k1,
                     secp256r1, secp384r1, secp521r1,
                     prime192v1, prime192v2, prime192v3,
                     prime239v1, prime239v2, prime239v3, c2pnb163v1,
                     c2pnb163v2, c2pnb163v3, c2pnb176v1, c2tnb191v1,
                     c2tnb191v2, c2tnb191v3,
                     c2pnb208w1, c2tnb239v1, c2tnb239v2, c2tnb239v3,
                     c2pnb272w1, c2pnb304w1,
                     c2tnb359w1, c2pnb368w1, c2tnb431r1, secp112r1,
                     secp112r2, secp128r1, secp128r2, sect113r1, sect113r2
                     sect131r1, sect131r2
   -d keydir         Key database directory (default is ~/.netscape)
   -P dbprefix       Cert & Key database prefix
   --keyAttrFlags attrflags
                     PKCS #11 key Attributes.
                     Comma separated list of key attribute attribute flags,
                     selected from the following list of choices:
                     {token | session} {public | private} {sensitive | insensitive}
                     {modifiable | unmodifiable} {extractable | unextractable}
   --keyOpFlagsOn opflags
   --keyOpFlagsOff opflags
                     PKCS #11 key Operation Flags.
                     Comma separated list of one or more of the following:
                     encrypt, decrypt, sign, sign_recover, verify,
                     verify_recover, wrap, unwrap, derive

-D              Delete a certificate from the database
   -n cert-name      The nickname of the cert to delete
   -d certdir        Cert database directory (default is ~/.netscape)
   -P dbprefix       Cert & Key database prefix

--rename        Change the database nickname of a certificate
   -n cert-name      The old nickname of the cert to rename
   --new-n new-name  The new nickname of the cert to rename
   -d certdir        Cert database directory (default is ~/.netscape)
   -P dbprefix       Cert & Key database prefix

-F              Delete a key and associated certificate from the database
   -n cert-name      The nickname of the key to delete
   -k key-id         The key id of the key to delete, obtained using -K
   -d certdir        Cert database directory (default is ~/.netscape)
   -P dbprefix       Cert & Key database prefix

-U              List all modules
   -d moddir         Module database directory (default is '~/.netscape')
   -P dbprefix       Cert & Key database prefix
   -X                force the database to open R/W

-K              List all private keys
   -h token-name     Name of token to search ("all" for all tokens)
   -k key-type       Key type ("all" (default), "dsa", "ec", "rsa")
   -n name           The nickname of the key or associated certificate
   -f password-file  Specify the password file
   -d keydir         Key database directory (default is ~/.netscape)
   -P dbprefix       Cert & Key database prefix
   -X                force the database to open R/W

-L              List all certs, or print out a single named cert (or a subset)
   -h token-name     Name of token to search ("all" for all tokens)
   -n cert-name      Pretty print named cert (list all if unspecified)
   --email email-address
                     Pretty print cert with email address (list all if unspecified)
   -d certdir        Cert database directory (default is ~/.netscape)
   -P dbprefix       Cert & Key database prefix
   -X                force the database to open R/W
   -r                For single cert, print binary DER encoding
   -a                For single cert, print ASCII encoding (RFC1113)
   --dump-ext-val OID
                     For single cert, print binary DER encoding of extension OID

--build-flags   Print enabled build flags relevant for NSS test execution

-M              Modify trust attributes of certificate
   -n cert-name      The nickname of the cert to modify
   -t trustargs      Set the certificate trust attributes (see -A above)
   -d certdir        Cert database directory (default is ~/.netscape)
   -P dbprefix       Cert & Key database prefix

-N              Create a new certificate database
   -d certdir        Cert database directory (default is ~/.netscape)
   -P dbprefix       Cert & Key database prefix
   -f password-file  Specify the password file
   --empty-password  use empty password when creating a new database

-T              Reset the Key database or token
   -d certdir        Cert database directory (default is ~/.netscape)
   -P dbprefix       Cert & Key database prefix
   -h token-name     Token to reset (default is internal)
   -0 SSO-password   Set token's Site Security Officer password

-O              Print the chain of a certificate
   -n cert-name      The nickname of the cert to modify
   -d certdir        Cert database directory (default is ~/.netscape)
   -a                Input the certificate in ASCII (RFC1113); default is binary
   -P dbprefix       Cert & Key database prefix
   -X                force the database to open R/W
   --simple-self-signed don't search for a chain if issuer name equals subject name

-R              Generate a certificate request (stdout)
   -s subject        Specify the subject name (using RFC1485)
   -o output-req     Output the cert request to this file
   -k key-type-or-id Type of key pair to generate ("dsa", "ec", "rsa" (default))
                     or nickname of the cert key to use, or key id obtained using -K
   -h token-name     Name of token in which to generate key (default is internal)
   -g key-size       Key size in bits, RSA keys only (min 512, max 8192, default 2048)
   --pss             Create a certificate request restricted to RSA-PSS (rsa only)
   -q pqgfile        Name of file containing PQG parameters (dsa only)
   -q curve-name     Elliptic curve name (ec only)
                     See the "-G" option for a full list of supported names.
   -f pwfile         Specify the password file
   -d keydir         Key database directory (default is ~/.netscape)
   -P dbprefix       Cert & Key database prefix
   -p phone          Specify the contact phone number ("123-456-7890")
   -Z hashAlg
                     Specify the hash algorithm to use. Possible keywords:
                     "MD2", "MD4", "MD5", "SHA1", "SHA224",
                     "SHA256", "SHA384", "SHA512"
   -a                Output the cert request in ASCII (RFC1113); default is binary
   See -S for available extension options
   See -G for available key flag options

-V              Validate a certificate
   -n cert-name      The nickname of the cert to Validate
   -b time           validity time ("YYMMDDHHMMSS[+HHMM|-HHMM|Z]")
   -e                Check certificate signature
   -u certusage      Specify certificate usage:
                          C      SSL Client
                          V      SSL Server
                          I      IPsec
                          L      SSL CA
                          A      Any CA
                          Y      Verify CA
                          S      Email signer
                          R      Email Recipient
                          O      OCSP status responder
                          J      Object signer
   -d certdir        Cert database directory (default is ~/.netscape)
   -a                Input the certificate in ASCII (RFC1113); default is binary
   -P dbprefix       Cert & Key database prefix
   -X                force the database to open R/W

-W              Change the key database password
   -d certdir        cert and key database directory
   -f pwfile         Specify a file with the current password
   -@ newpwfile      Specify a file with the new password in two lines

--upgrade-merge Upgrade an old database and merge it into a new one
   -d certdir        Cert database directory to merge into (default is ~/.netscape)
   -P dbprefix       Cert & Key database prefix of the target database
   -f pwfile         Specify the password file for the target database
   --source-dir certdir
                     Cert database directory to upgrade from
   --source-prefix dbprefix
                     Cert & Key database prefix of the upgrade database
   --upgrade-id uniqueID
                     Unique identifier for the upgrade database
   --upgrade-token-name name
                     Name of the token while it is in upgrade state
   -@ pwfile         Specify the password file for the upgrade database

--merge         Merge source database into the target database
   -d certdir        Cert database directory of target (default is ~/.netscape)
   -P dbprefix       Cert & Key database prefix of the target database
   -f pwfile         Specify the password file for the target database
   --source-dir certdir
                     Cert database directory of the source database
   --source-prefix dbprefix
                     Cert & Key database prefix of the source database
   -@ pwfile         Specify the password file for the source database

-S              Make a certificate and add to database
   -n key-name       Specify the nickname of the cert
   -s subject        Specify the subject name (using RFC1485)
   -c issuer-name    The nickname of the issuer cert
   -t trustargs      Set the certificate trust attributes (see -A above)
   -k key-type-or-id Type of key pair to generate ("dsa", "ec", "rsa" (default))
   -h token-name     Name of token in which to generate key (default is internal)
   -g key-size       Key size in bits, RSA keys only (min 512, max 8192, default 2048)
   --pss             Create a certificate restricted to RSA-PSS (rsa only)
   -q pqgfile        Name of file containing PQG parameters (dsa only)
   -q curve-name     Elliptic curve name (ec only)
                     See the "-G" option for a full list of supported names.
   -x                Self sign
   --pss-sign        Sign the certificate with RSA-PSS (the issuer key must be rsa)
   -m serial-number  Cert serial number
   -w warp-months    Time Warp
   -v months-valid   Months valid (default is 3)
   -f pwfile         Specify the password file
   -d certdir        Cert database directory (default is ~/.netscape)
   -P dbprefix       Cert & Key database prefix
   -p phone          Specify the contact phone number ("123-456-7890")
   -Z hashAlg
                     Specify the hash algorithm to use. Possible keywords:
                     "MD2", "MD4", "MD5", "SHA1", "SHA224",
                     "SHA256", "SHA384", "SHA512"
   -1                Create key usage extension
   -2                Create basic constraint extension
   -3                Create authority key ID extension
   -4                Create crl distribution point extension
   -5                Create netscape cert type extension
   -6                Create extended key usage extension
   -7 emailAddrs     Create an email subject alt name extension
   -8 DNS-names      Create a DNS subject alt name extension
   --extAIA          Create an Authority Information Access extension
   --extSIA          Create a Subject Information Access extension
   --extCP           Create a Certificate Policies extension
   --extPM           Create a Policy Mappings extension
   --extPC           Create a Policy Constraints extension
   --extIA           Create an Inhibit Any Policy extension
   --extSKID         Create a subject key ID extension
   See -G for available key flag options
   --extNC           Create a name constraints extension
   --extSAN type:name[,type:name]...
                     Create a Subject Alt Name extension with one or multiple names
                     - type: directory, dn, dns, edi, ediparty, email, ip, ipaddr,
                             other, registerid, rfc822, uri, x400, x400addr
   --extGeneric OID:critical-flag:filename[,OID:critical-flag:filename]...
                     Add one or multiple extensions that certutil cannot encode yet,
                     by loading their encodings from external files.
                     - OID (example): 1.2.3.4
                     - critical-flag: critical or not-critical
                     - filename: full path to a file containing an encoded extension
五、补充知识
certutil 是一个命令行工具,通常用于在Windows系统上处理证书和密钥。它提供了多种功能,包括生成证书请求、导入和导出证书、查看证书信息、设置证书信任等。以下是 certutil 工具的一些常用功能和用法:
1. certutil生成证书请求
certutil -generateRequest -keysize 2048 -type "RSA" -saveRequest certreq.txt
这个命令将生成一个包含证书请求信息的文件 certreq.txt。
2. certutil导入证书
certutil -importpfx MyCert.pfx
这个命令将导入一个PFX格式的证书文件到Windows证书存储中。
3. certutil导出证书
certutil -exportpfx -p Password -f -privatekey MyCert MyCertExport.pfx
这个命令将导出名为 MyCert 的证书(包括私钥)为PFX格式,保存为 MyCertExport.pfx。
4. certutil查看证书信息
certutil -store My
这个命令将列出当前用户的“个人”证书存储区中的证书信息。
5. certutil设置证书信任
certutil -addstore -enterprise -f "Root" MyCert.cer
这个命令将名为 MyCert.cer 的证书添加到“受信任的根证书颁发机构”存储区。
6. certutil删除证书
certutil -delstore My "CertificateThumbprint"
这个命令将在“个人”存储区中删除具有指定指纹(Thumbprint)的证书。
以上是 certutil 命令的一些基本用法。请注意,命令的具体参数和用法可能会因为操作系统版本和具体情境而有所不同。您可以在命令提示符中输入 certutil -h 或 certutil /? 来查看帮助信息,了解更多用法和参数。


 1321
1321

 被折叠的 条评论
为什么被折叠?
被折叠的 条评论
为什么被折叠?
 到【灌水乐园】发言


