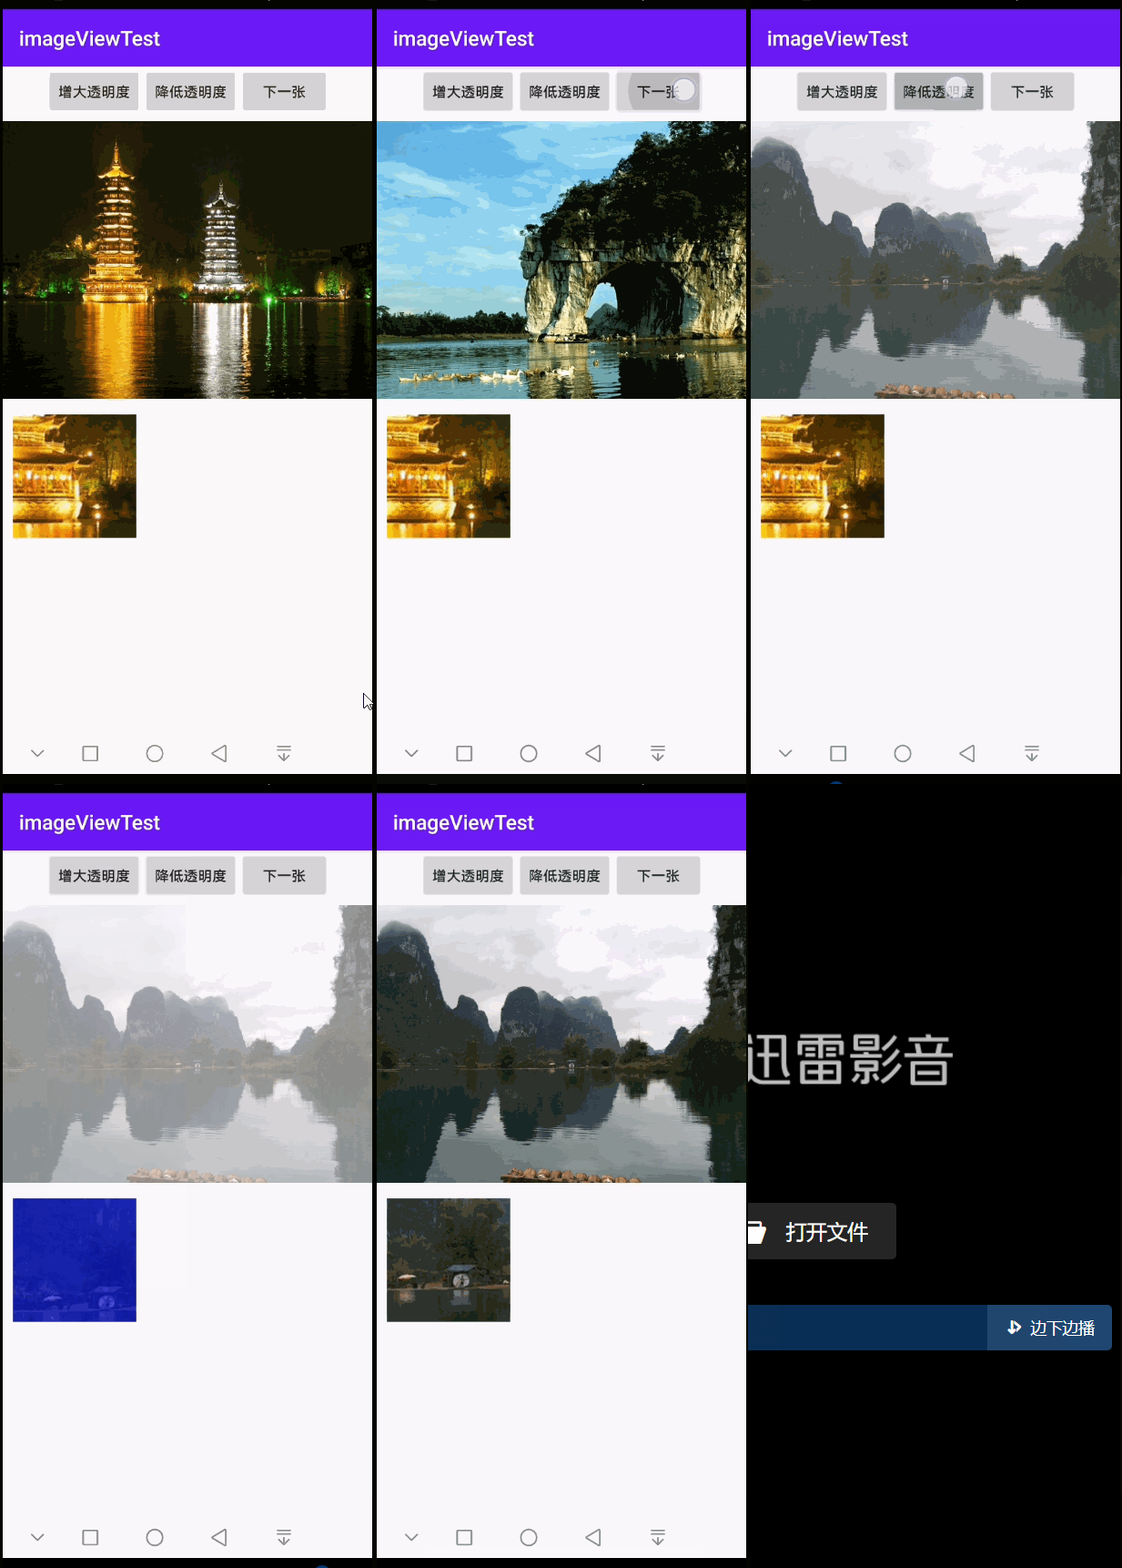
支持查看图片的透明度,支持小区域查看图片
MainActivity.kt
package com.example.imageviewtest

import android.graphics.Bitmap
import android.graphics.drawable.BitmapDrawable
import android.media.Image
import androidx.appcompat.app.AppCompatActivity
import android.os.Bundle
import android.view.View
import android.widget.Button
import android.widget.ImageView

class MainActivity : AppCompatActivity() {

    // 定义一个访问图片的数组
    private var images = intArrayOf(R.drawable.lijiang, R.drawable.qiao,
            R.drawable.shuangta, R.drawable.shui, R.drawable.xiangbi)
    // 定义默认显示的图片
    private var currentImg = 2
    // 定义图片的初始透明度
    private var alpha = 255

    override fun onCreate(savedInstanceState: Bundle?) {
        super.onCreate(savedInstanceState)
        setContentView(R.layout.activity_main)
        val plus = findViewById<Button>(R.id.plus)
        val minus = findViewById<Button>(R.id.minus)
        val image1 = findViewById<ImageView>(R.id.image1)
        val image2 = findViewById<ImageView>(R.id.image2)
        val next = findViewById<Button>(R.id.next)
        next.setOnClickListener {
            image1.setImageResource(images[++currentImg % images.size])
        }
        // 定义改变图片透明度的方法
        val listener = View.OnClickListener {v ->
            if (v == plus) {
                alpha += 20
            }
            if (v == minus){
                alpha -= 20
            }
            if (alpha >= 255){
                alpha = 255
            }
            if (alpha <= 0){
                alpha = 0
            }
            image1.imageAlpha = alpha
        }
        plus.setOnClickListener(listener)
        minus.setOnClickListener(listener)
        image1.setOnTouchListener { v, event ->
            val bitmapDrawable = image1.drawable as BitmapDrawable
            val bitmap = bitmapDrawable.bitmap
            val scale = 1.0 * bitmap.height / image1.getHeight()
            var x = (event.x * scale).toInt()
            var y = (event.y * scale).toInt()
            if (x + 120 > bitmap.width){
                x = bitmap.width - 120
            }
            if (y + 120 > bitmap.height){
                y = bitmap.height - 120
            }
            // 显示图片的指定区域
            image2.setImageBitmap(Bitmap.createBitmap(bitmap, x, y, 120, 120))
            image2.imageAlpha = alpha
            false
        }
    }
}
activity_main.xml
<?xml version="1.0" encoding="utf-8"?>
<LinearLayout xmlns:android="http://schemas.android.com/apk/res/android"
    android:orientation="vertical"
    android:layout_width="match_parent"
    android:layout_height="match_parent">
    <LinearLayout
        android:orientation="horizontal"
        android:layout_width="match_parent"
        android:layout_height="wrap_content"
        android:gravity="center">
        <!-- 此处省略三个按钮定义 -->
        <Button android:id="@+id/plus"
            android:layout_width="wrap_content"
            android:layout_height="wrap_content"
            android:text="增大透明度"/>
        <Button android:id="@+id/minus"
            android:layout_width="wrap_content"
            android:layout_height="wrap_content"
            android:text="降低透明度"/>
        <Button android:id="@+id/next"
            android:layout_width="wrap_content"
            android:layout_height="wrap_content"
            android:text="下一张"/>
    </LinearLayout>
    <!-- 定义显示图片整体的ImageView -->
    <ImageView android:id="@+id/image1"
        android:layout_width="wrap_content"
        android:layout_height="280dp"
        android:src="@drawable/shuangta"
        android:scaleType="fitCenter"/>
    <!-- 定义显示图片局部细节的ImageView -->
    <ImageView android:id="@+id/image2"
        android:layout_width="120dp"
        android:layout_height="120dp"
        android:background="#00f"
        android:layout_margin="10dp"/>
</LinearLayout>
效果


 323
323


 被折叠的 条评论
为什么被折叠?


